Table of Contents
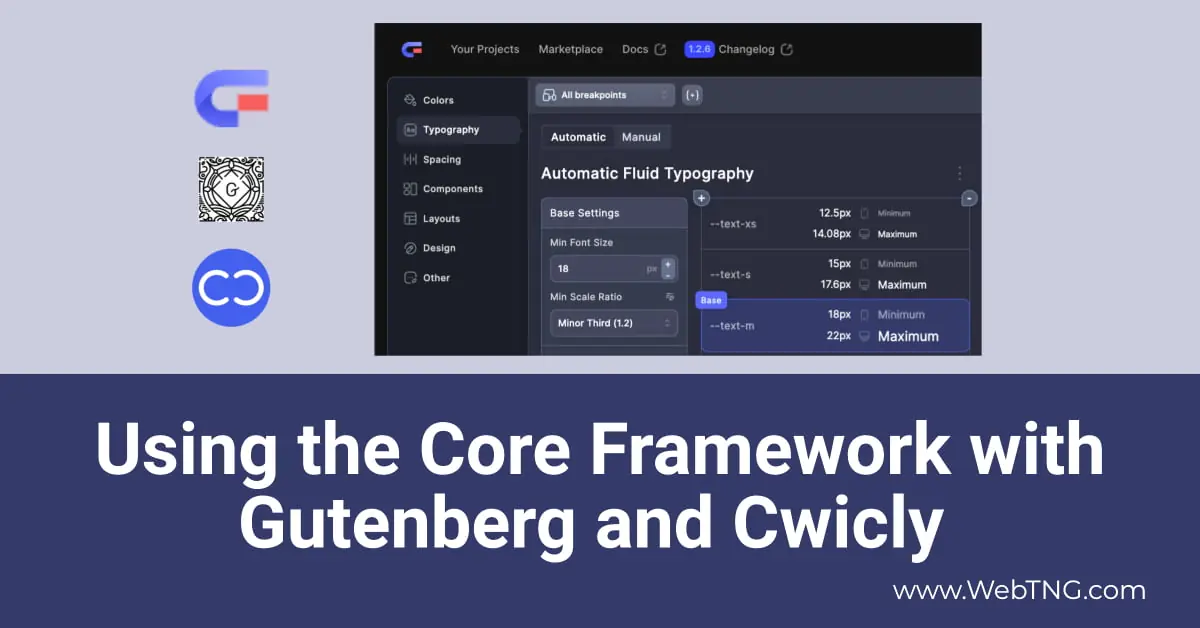
In this tutorial I’m taking a look at the Core Framework. This is my second look at the Core Framework. A couple of months ago I did an overview of the Core Framework when it was first released. In this tutorial I’m actually going to walk through the steps of using the Core Framework to generate my own CSS framework. As we’ll see there are many, many features and options in the Core Framework and it can be a little bit intimidating. However, after we go through the walkthrough, I think you’ll start to have a good feel for how to use it.
Core Framework Introduction and Website Tour
I’m here on the Core Framework website. You can see it’s on version 1.2.6. So in the past several months since it launched, it’s gone through a few versions. There’s a documentation, which is okay, but kind of a little thin. There’s a marketplace here. They have some premium add-ons, one for oxygen, one for bricks, but they also have a free Gutenberg add-on. They’re also going to start selling UI kits and templates. Even though it has a free version, you still need to sign up for the website to use it.

In case you don’t know what the Core Framework is, what the Core Framework is, is it’s a CSS framework, which is really some CSS variable and CSS class presets for utility classes for things like colors and topography and spacing. But in addition to just being a framework like in a style sheet, it also has another component and that is that it’s a user interface for tweaking and modifying and adding to the variables and classes that are there. You can use this with WordPress, but you can also use this UI to generate your own framework for use with any web application. You know, it’s just going to be a style sheet.
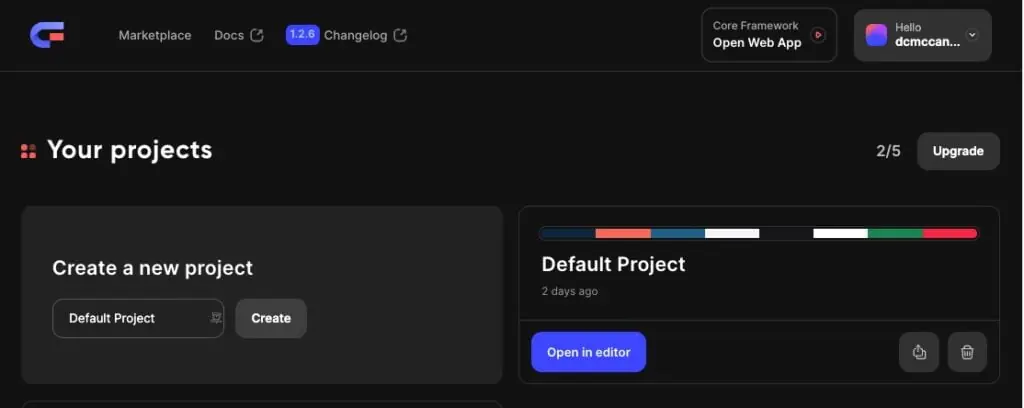
So I’ve already signed up here. If we go to the dashboard, see we open the web editor, that’s the same thing here, but we can also download the plugin and we can download our add-ons. I’m going to go into the user interface here, the UI. You can see I’ve been working on my own framework here for a project. This is something I’m doing in Cwickly. And so I’ve been walking through the steps, figuring out how to use the Core Framework with Cwickly. And so in this walk-through, we’re going to be looking at using it with core Gutenberg, but also with Cwickly, kind of what’s involved and what are the great things and the gotchas. I’m gonna come back to this web interface ’cause we’re gonna use it when we build our own framework for Cwickly.
Testing the Plugin Version with Gutenberg
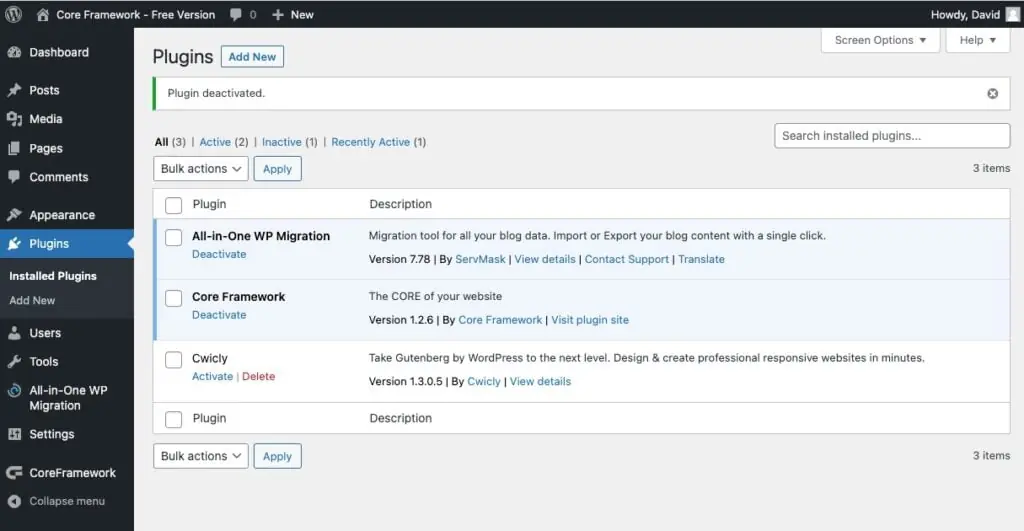
But to start out and give you an idea how to use it with vanilla Gutenberg and to kind of take a quick look at the WordPress plugin, I’m gonna go to a test site that I’ve set up here. If we go look at the themes, you can see I’ve got the core 2023 theme. I’ve got the Cwickly theme installed, it’s not activated yet. If we look at plugins, I’ve got Cwickly installed but not activated, but I do have the Core Framework plugin activated.
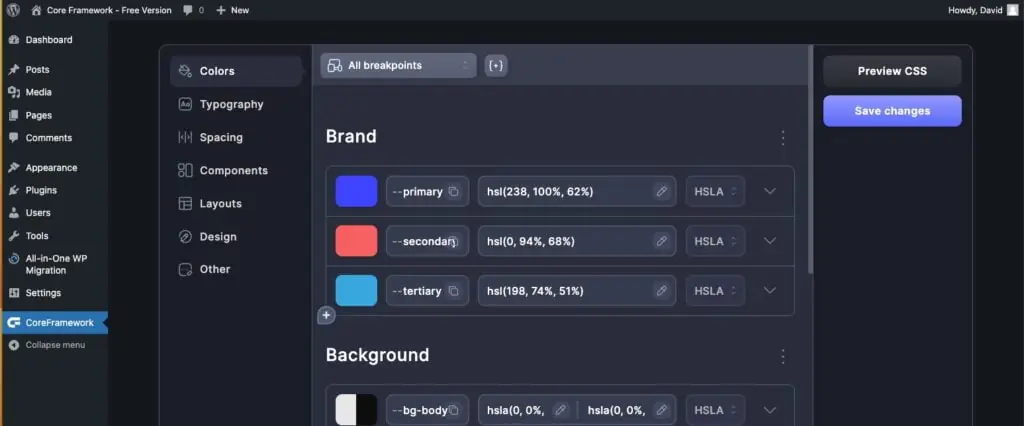
When you do that, you get this user interface here, okay? And this is the same type of UI, very similar to what you get online. So it gives you this inside of WordPress if you wanna use it this way. And it gives you one other thing also which we’ll see in a minute. But before we jump into Gutenberg, I just wanted to show you, you have things like colors, topography, spacing, components, layout, design, and other. You can use as much of this or all of it as you want. Add-ons, here’s where you would activate your bricks or oxygen add-on. You can see I’ve turned the Gutenberg add-on on already.
You can manage the project, their preferences. You can preview what’s being generated. You can save changes. And here it tells you how many classes and how many variables you’ve generated that you’ve gonna have in your style sheet. If we just go here and look, we can see the default out of the jump is gonna be 54K uncompressed and 11K when you minify it. This is a little much for me. So when we go and do our own, I’m gonna try to get like a third of this or something, because I’m not goning to use quite so many of the variables and classes in my project. And so when we do that, this size is going to go way down. Generally, you have a style sheet with these variables and then these classes or whatever subset you create. Okay, and so what the Gutenberg add-on does is it loads the style sheet into the Gutenberg editor and it also loads it on the front end. So it takes care of that for you. And whenever you save changes, it regenerates the variables here in this list. So if you make changes here and then save, then that’ll regenerate this and you can export it or copy it out again. If you’re using the plugin, you don’t have to export or copy it out because it’s taking care of that for us.
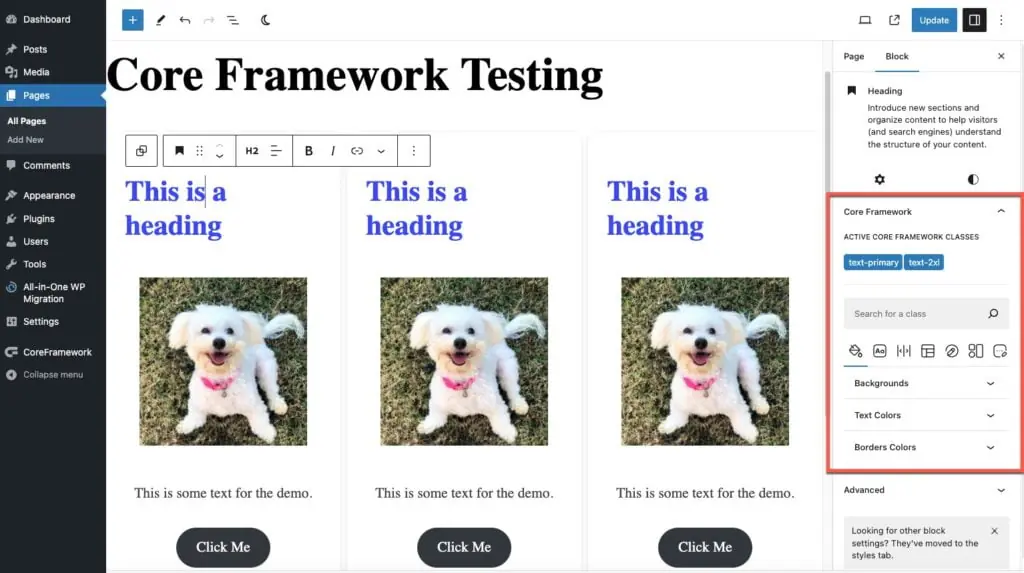
I go and add a page, I’m just gonna publish it and let’s add a heading. All right, so this is an H2, a core block. Over here, you see that we have this Core Framework addition to the Gutenberg UI. So this is very convenient. We can search for a class. Here are the colors, the topography, the spacing, the layout, the design component and other categories, just as we saw in the plugin. Regular Gutenberg options are still there. It adds to it, doesn’t replace them. All right, so we’re on the heading. let’s say we wanted to make the text color be our primary color. So I just click on it and you can see it adds here to tell us what class is being used. If you look at advanced down here, this is the regular Gutenberg place where you can add your own classes. It’s adding those for us down here. Okay. And if we click on it, we can remove the class. So that’s how that works and it’s very convenient. Let’s play around for a couple of minutes. Let’s add an image. Take this cute dog and under that we’ll add some text. And under that, let’s add a button. Okay, and in Gutenberg, you can select multiple blocks and then use this feature to group them. So I’m going to group them together. you know, basically what it’s doing, we’ve created kind of a flex container, the Gutenberg version of one, which is quirky, but they’ve been improving it as they go along.
Now, I noticed that when I was looking at the options in the Core Framework, that they’ve got some components and one of the components is called “Card.” And whoa, look what happens when I select that. All of a sudden we’ve got kind of a card layout there. Some of the items from the components come in and you can use them like that. Let’s say we want to tweak the size of the heading. We can go in and change the size there. Let’s say we wanna tweak the size of the image. This is the Gutenberg option here. Let’s just say that we want the medium thumbnail. Now I’m going to add a Gutenberg row, and I’m going to drag this card. Let’s make sure we’re getting the right thing here. Gonna drag this card up into our row. Let’s go to the image, and let’s go to our Core Framework spacing. Let’s see if we can add a little padding. That adds it on four sides, I think. Let’s say we want some horizontal padding on that. Let’s go to this card and let’s duplicate it a couple of times. I think you get the idea here, kind of what I’m doing. This is cool. You know, it’s not perfect, but you definitely have a number of the options that come with the Core fFramework available here in the Gutenberg editor.
One thing I wanted to point out is I made that comment about the Gutenberg rows. You know, the Core Famework has these layout options, like a grid layout and some simple flex ones. I think that because it’s not using its own container, it’s using a Gutenberg container and Gutenberg is adding classes here as you make changes to whether it’s a group or a row or a column. You could get some kind of wonky behavior here. So some of the simple things work if you put it on group and then you go and you say you want a simple flex layout and you want it as a row, that kind of works. You can see you get some things here. I’m not sure why we get the extra spacing on the first item. go look on the front end. There’s something a little bit odd there. Let’s go in on our group and remove that. For the most part the Core Framework, these features, work pretty well in vanilla Gutenberg. And so in addition to putting the style sheet in the editor and on the front end, it also gives you this picker here. So that’s pretty convenient, it’s pretty nice, and it’s free. All good.
Testing the Plugin Version with Cwicly
Now what I want to do is I want to switch over to try this out and Cwickly. So I’m going to activate Cwickly here and I’m going to then go into a page. We’ll call this Cwickly Testing and I’ll save that. Okay I’m going to add a section here and it gives us a container and inside the container. Let’s add a Cwickly heading. All right, I’m going to collapse that down. So where is our Core Framework user interface here? Well, there’s kind of a little glitch. It’s down here. If we go, for example, with colors, and we go say we want to change the color of the heading. See it adds a class there. Okay. And I save. Okay and I refresh. We lose the class. Okay the Core Framework isn’t integrated into Cwickly the way that it is with Bricks or Oxygen. Okay so using this UI doesn’t really work for us here unless they at some point do some fixes and integration. Also the Core Framework, all these classes that it’s providing they aren’t integrated into the editor when using Cwickly. For example, the class is “text-medium” we don’t see any of those classes there at all. For the sake of using it with Cwickly the Gutenberg add-on doesn’t really help us. So I’m going to go to plugins and I’m going to deactivate that.
Using the Core Framework UI to Create Our Own CSS Framework
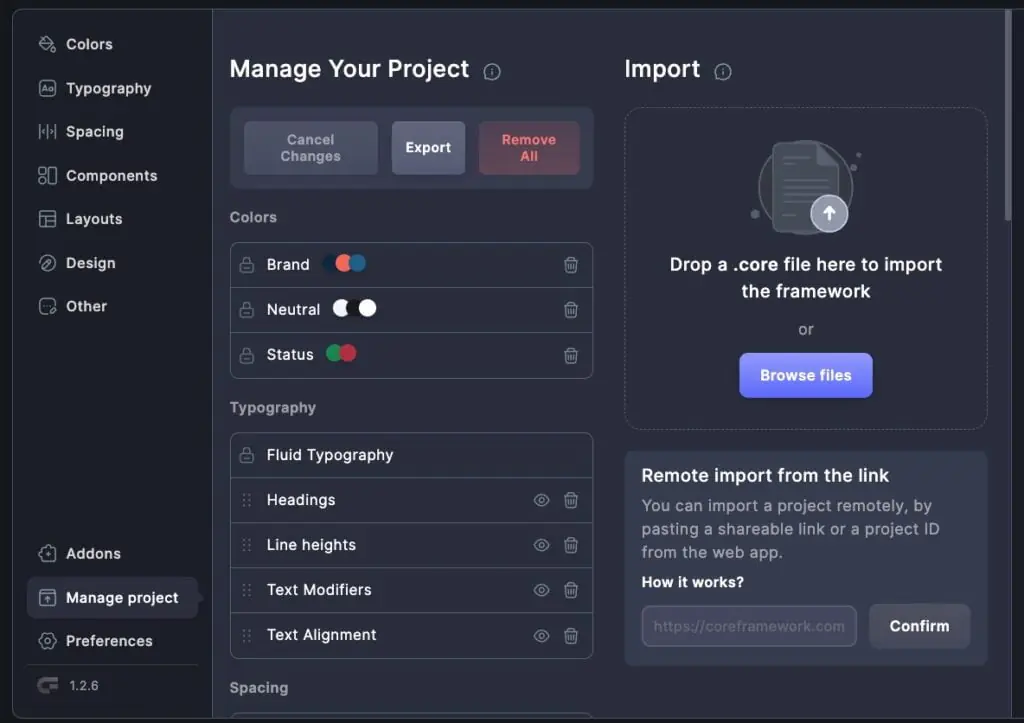
And now what we’re going to do is go back to the web version and we’re going to create a project and export a style sheet and use that with Cwickly. Here create a project. I’m just going to leave it at that name. And one of the first things I do is set the preferences. I just want to show you here Manage Project has a place where you can export. You can export when you’re up here also. And that exports a .core file. “.core” is the file extension. And you can import that over here. Okay, but if you go to preferences, then you can change the title here. I found that if you do it inside the editor, then you need to refresh the screen to have it show up up here. But anyway, I like to have a hundred percent so use the regular 16 pixels for a REM. My project the width is 1280.
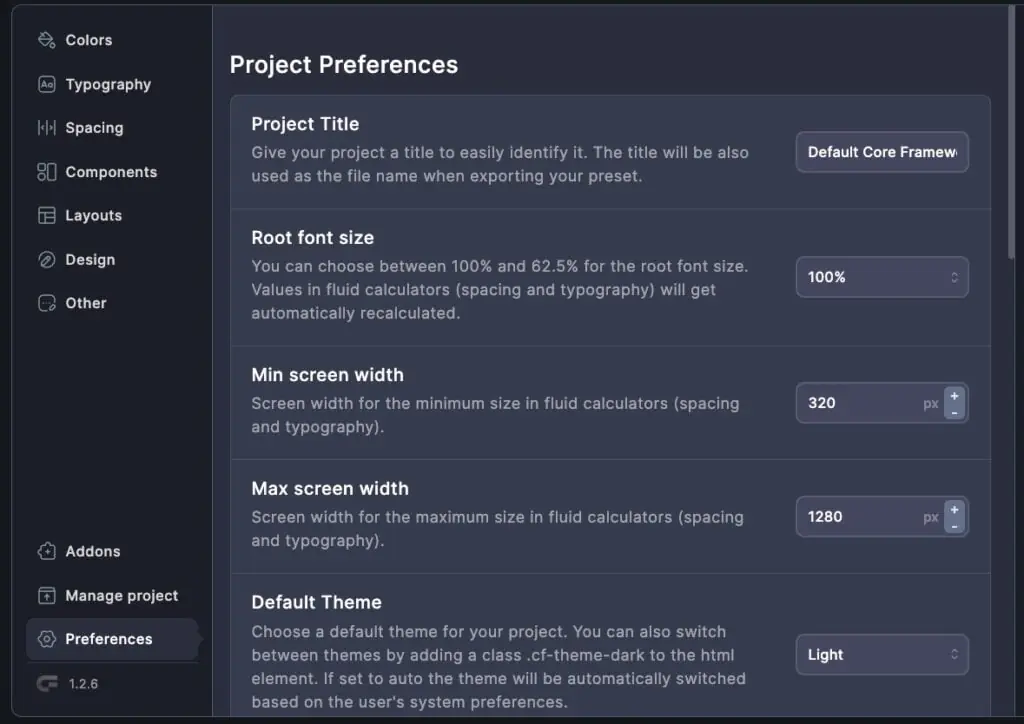
The Core Framework allows you to create both a light and dark mode for your website at the same time. You know while we’re going through the process you create it for both at the same time. So that’s very cool, but I’m not going to use that on my project. There’s an option to give all the classes or variables a prefix. This will add some vendor prefixes to some of the classes. I want to output in rim. This feature turns off animations for people who have that set in their browser, and I don’t know of any reason why you wouldn’t turn that on. This is the theme for the actual Core Famework UI for this UI. Okay and here you can reset to default if you get lost and kind of want to start over again. So I’m going to save the changes.
As you can see we’ve got 902 selectors and 137 variables so I’m going to try to get that down to a more manageable number for me. We go to colors and we see there are several categories. There’s brand, background, text, base, neutral status. What I did is I went to a online color palette generator and I picked three colors and some shades of those. This gives you the option of using hex or RGB or HSL. Some people like this because if you know your color theory I think you can see some ideas of what color you’re gonna to get here. Doesn’t help me. I’m kind of used to using hex code, so I’m switching to hex. Okay, and I’m going to add my first color, which is this very dark blue. And now over here, you can see that it’s going to generate utility classes for text, background, and border. So it’s giving us a color when you have it with text. I can see the advantage of having color border classes because then if you want to change the color of your border, but I’m not going to use it. I’m just going to go down to using one CSS class to generate one CSS class for this. I don’t need transparent. I don’t need shades. When I use the color palette generator, it actually gave me the same color variations as these, and I only need three of them. So I’m going to just go down to three. I think it’ll actually generate maybe 12 or 16. Not sure, but I just need three. Okay, so I’m glad that those match. I guess they’re using the same color theory item there, whatever. Close that up.
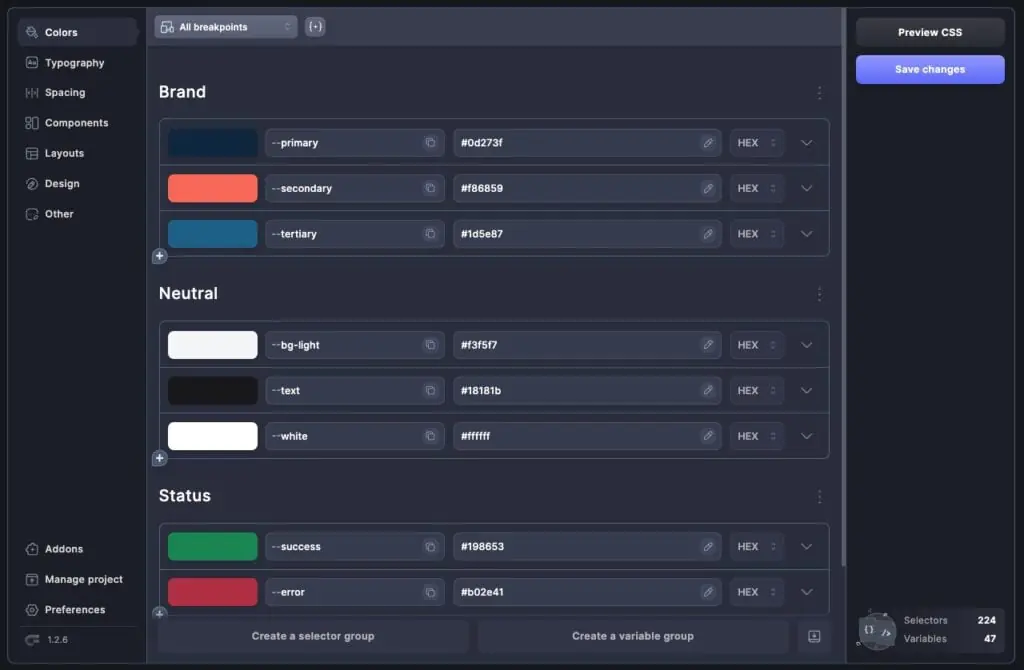
Point out up here, you can duplicate, move up, move down, copy group, paste group, or delete. If you delete one of these groups, there’s no way to get it back unless you go and reset the project. So anyway, there’s that. And if you’re on an individual item, You have the option here to duplicate, move up, down, copy, paste, or delete. So there’s my first color. I’m going to go to the secondary color and do that one now. Same thing. Okay, and we’ll go here, get rid of the extra items that I’m not using, and just have three of those. And now for the third color, I’ve only got, I think, maybe eight colors or something in my group. So this isn’t going to take too long. Okay. Then here, you know, remember I said that you can generate the light mode and dark mode at the same time. I’m not using that. So I’m just going to delete this. And I’m going to delete this. And I’m going to delete this. And I’m going to delete this. OK, I’m going to add a new color group. I’ll call it Other. OK, and here I’ll have background light. And I’ll get my light background color. Okay and look and it’s not it doesn’t have any of these turned on so that’s great. I’ll add another color and I’m just going to use for text the same color for body text and headings. Okay and check that. And then I think I’ll add another one for white and change that and just set this for white. Okay and I’ll move this group up. Okay so there’s my brand there are my other colors and here’s status colors that green is a little bright for me so let’s change this to hex and this to hex and let’s make that a little darker okay so I’m gonna save changes and you see that we’re already down to 671 and 67 variables so we’re kind of simplifying here we go ahead and look at the preview, we see the variables and the classes that are being generated. I just want to find the colors here. Here they are. And you can see here it’s like text success. It’s generating all those variations of the color there for that. So let’s go back to colors and here, oh yeah, so I didn’t turn those off. Turn these off. So I’m not going to use them. Alright so there are colors. Oh I need to name this. Let’s see, call it “text.” Okay, save.
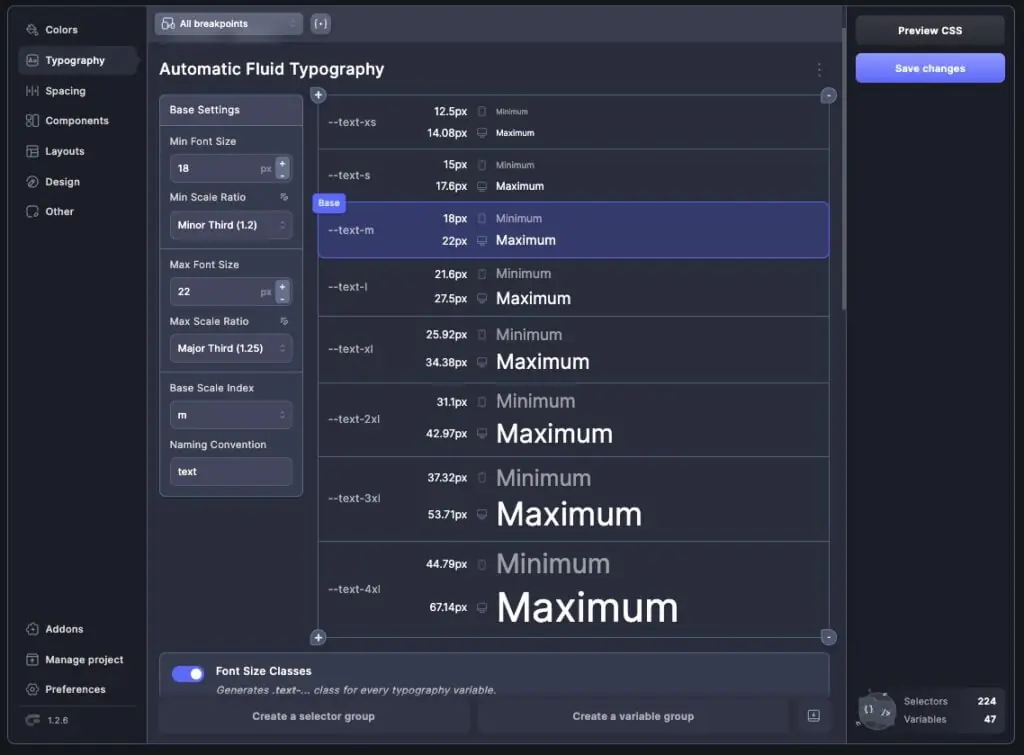
There are a lot of fluid topography calculators online. This one seems to have everything that I need, so let’s do this. I like my minimum font to be 18 and my largest font, large screen size to be 22. Then the steps here, I’ll go with minor third for the small size. I’ll go for the major third for the large size. So you can see I’ve got a progression there in size but it’s not quite as dramatic. And the medium that’s going to be your body text. And then this is the variable here. Okay and so it’s going to generate the classes for that along with the variables.
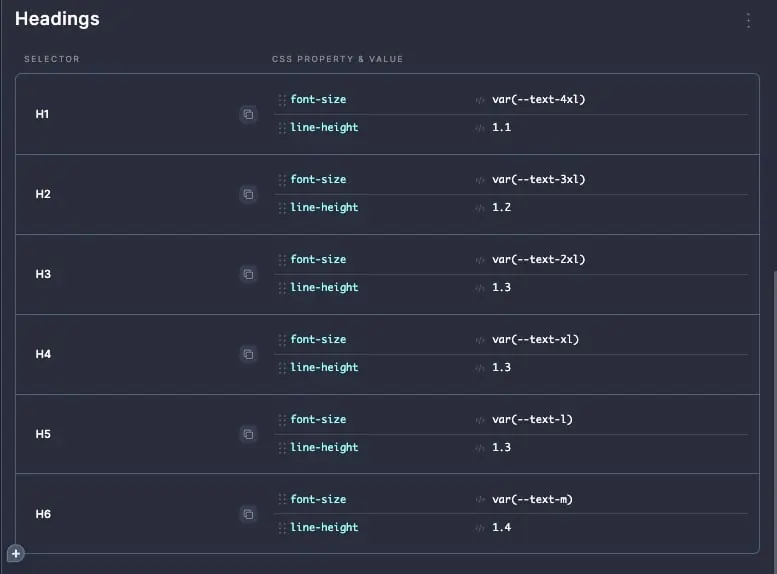
Now here for headings what it’s doing which is interesting is it’s using the variable that we created up top which is clever. And then it’s adding some line heights because you don’t need as big a line height for big titles as you do for little ones. So I’m going to go with that. Here I’m going to disable this. You see text modifiers. Things like where the CSS property value is the same as the class. I don’t see much use for it for me. So I’m disabling these as well. Okay and so that’s our tyopography done and the numbers have gone down a little bit more.

Now for spacing we have kind of a similar type thing. I think I’m going to go leave it at 16 here for the small size and go to 24 for the large size. Okay then this will be your default. This is your name here. We go down it’s going to generate gap classes, margin classes, and padding classes. We’ll stick with that.
Go to components. You see they have buttons and badges and here’s the card kind of thing. Cwickly just added the ability to create components inside of Cwickly. So I’m going to use that and not this so I’m going to turn this off.
Then we go to layouts and I’m going to use the Cwickly UI for my grids and my flexbox options So I’m going to turn these off as well. Then under Design, we have Variables and Classes for Border Radius and Box Shadows and Shadows. I’m not going to need the Opacity, Aspect Ratios, Image Fit. I’m not going to use Backdrop Blur. ISo I’m down to 245 classes and 47 variables. So down quite a bit from the 900 and something. I’m going to save. And now if we go into the preview CSS, we see we’re at 19k and 4.2k. export here to save a copy to our hard drive that can we can re-import. So let’s just do that. Then I’m going to copy this to the clipboard. So I’m done with the online editor.
Steps for Using the Core Framework with Cwicly
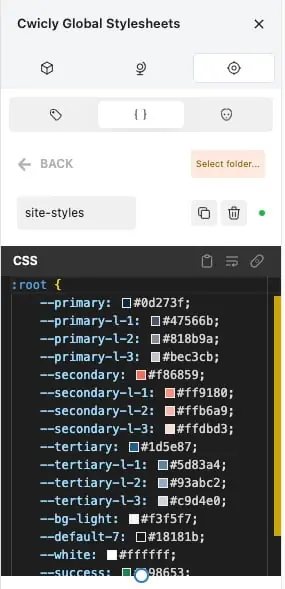
Let’s go back into the website. We have Cwickly turned on. Let’s go to our Cwickly page because you can Add global classes and styles and things in Cwickly, you know, editing any page or template. So it doesn’t matter which one we’re in. We want to be able to use these classes in Cwickly. And we go here, Cwickly has a place for a global style sheet. So I’m going to add one. We’ll call it “site styles.” With Cwickly you have the option to activate it or have it turned off. So I’m going to activate it, click here and paste in our style sheet. So there, there that is.
All right. And you can see that the heading is already being picked up now because we do have, you know our H1 through H6 in this style sheet but at this point if we wanted to say add the primary color and we go in and type our class primary you see we’re not getting any joy anything out of that yet and so what we need to do is we need to go in and add our external classes. Im going to save and I’m going to go add our external classes.
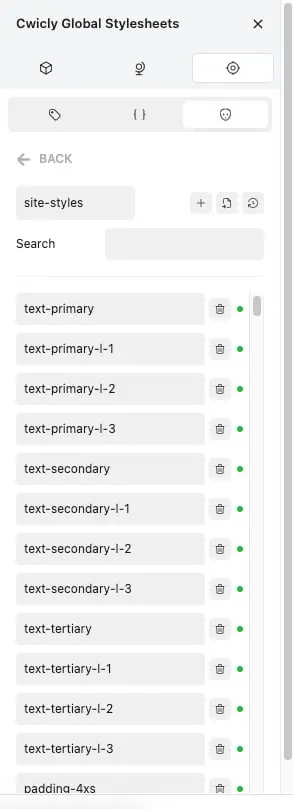
Let’s add a folder we’ll call this “site styles “also. Okay again we can turn them on or off so I’m going to activate it. Oh and one kind of cool thing is you can give a color for this group of classes. We’ll do something like that. Okay and then if we click on it we can add one by one our classes but there’s also the option to import. When we do this, we can add them manually kind of with as a list with a comma in between them, or we can paste the style sheet. And so what this is doing when we do this, it’s going to pick up the classes from our style sheet. And you can see it’s added all of our external classes now. And we need both the style sheet and the external classes. We need the style sheet because it has all the variables in it. So I’m gonna update now again.
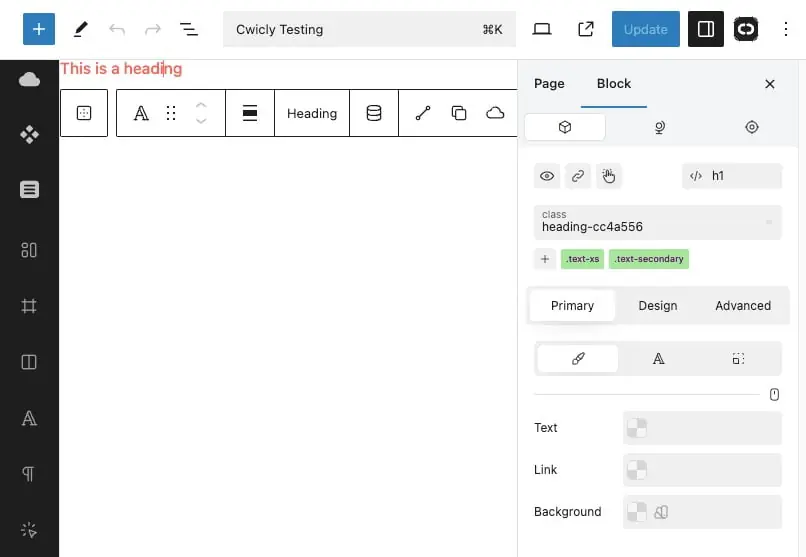
And now if I go to our heading and let’s go to the class UI and you can see it’s got my external classes. So let’s say I wanted to make this small. I can go “text-extra-small”. Okay, and you can see it’s added that class there and it’s using that color I picked, which is kind of cool. We can add another class here and let’s say secondary. All right, I’m gonna click and add that. And now we have our kind of salmon color heading and it’s small. I’ll save this. We’ll go onto the front end. we see our Core Famework styles applied. And if you hover over one of these classes, you can see a very small little X here in the corner and this is how you would clear that. So that’s my walkthrough and look at using the Core Framework with vanilla Gutenberg and with Cwickly.
Conclusions
Now just a few conclusions. First, the Core Framework plugin with the Gutenberg add-in works well with vanilla Gutenberg for many basic styling tasks. However, it doesn’t have its own container, so features like CSS Grid might not work as expected. Second, the Core Framework plug-in with the Gutenberg add-in isn’t integrated for Cwickly, and as a consequence it doesn’t work. So if we’re going to use the Core Framework with Cwickly, then what we need to do is add the Core Framework generated CSS as an external style sheet and the classes as external classes. Then they’re integrated with the Cwickly class management system and this works well. Overall I’d say that the free version of the Core Framework is a great resource for WordPress site builders. I hope you got something out of this walk-through.