
Table of Contents
Introduction
In this post I want to look at the theme building features of the Oxygen Builder. This post is part seven of a series looking at Custom Post Types and the theme building functionality of page builders. The other builders looked at previously were primarily page builders first and theme builders second. Unlike many of the other builders examined in this series, the Oxygen Builder is a different type of solution. Oxygen takes over the site theme and you must use the builder to create your theme templates. It is not an option as with other premium builders, so I think of Oxygen as a theme builder first and a page builder second. In a previous video I looked at the theme template vs page builder functions of Oxygen.
A consequence of Oxygen taking over the theme, is that we will need to create some basic templates before we get to the Custom Post Types. That means that this post is a longer and more complete walk-through of Oxygen than the others in the series.
- In part one I created a Custom Post Type using CPT UI and Advanced Custom Fields. If you are unfamiliar with Custom Post Types and want to follow along, then take a look at this post first.
- Part two looked at how to create the single template and archive template for the Custom Post Type using the new Divi 4 theme builder.
- Part three showed the process using Beaver Builder and Beaver Themer.
- How to create theme template using Elementor Pro was covered in part four.
- Toolset now has the ability to create single and archive templates in the Gutenberg block editor and is covered in part five.
- The new Brizy Pro was the focus of part six.
Now in part seven it is Oxygen’s turn. Version 1 of Oxygen was released in July 2016. The product was totally rewritten and relaunched as Oxygen 2.0 in Jun 2018, less than two years ago. While it includes the drag and drop simplicity of the other builders, Oxygen requires more understanding of HTML and CSS, but in return the site builder gets an unparalleled flexibility and control. Support for Advanced Custom Fields and Toolset was added with version 2.1 in October 2018. As of this writing, Oxygen is now on version 3.2, which is the 7th feature release.
Video Version
Setup
I have a fresh test site. If we start with the admin, I only have the default WordPress Twenty Twenty theme installed.

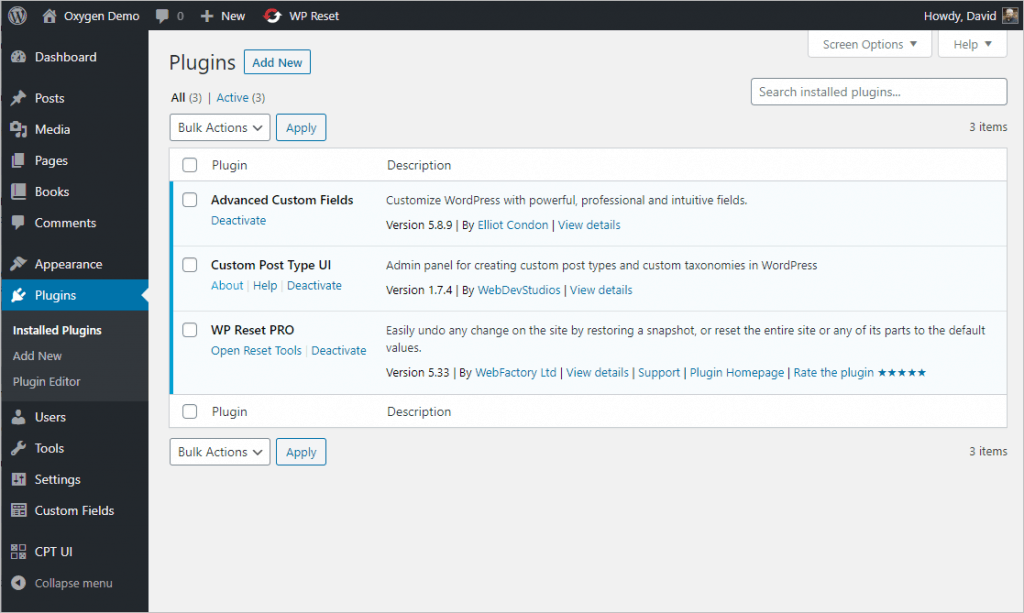
I have three plugins installed. Advanced Custom Fields and CPT-UI were used to create the Books Custom Post Type. If you are interested in that process then checkout the first post in this series. I also WP Reset Pro installed. I use that to reset the site between the written and video versions of this walk-through.
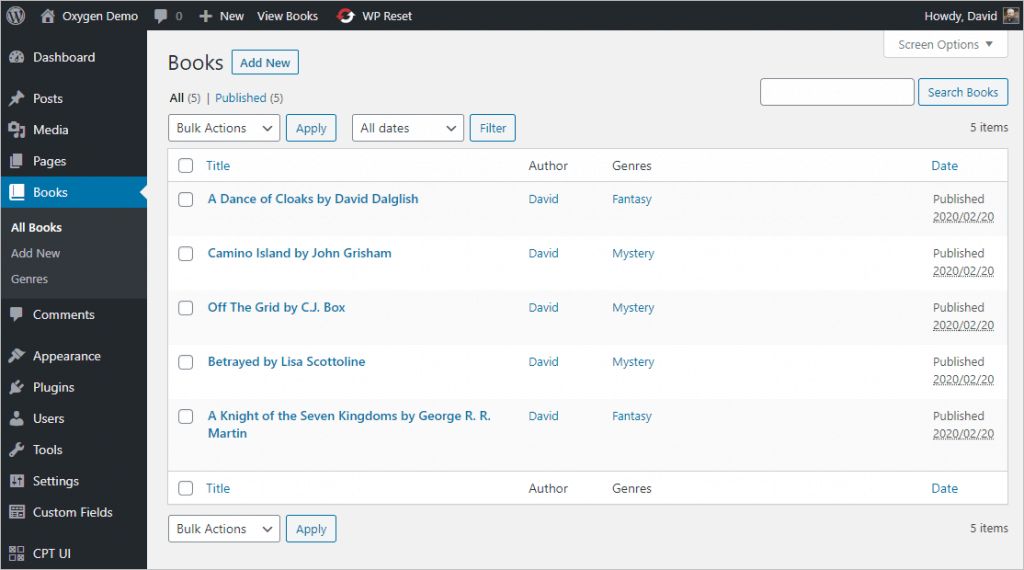
I entered some book records.
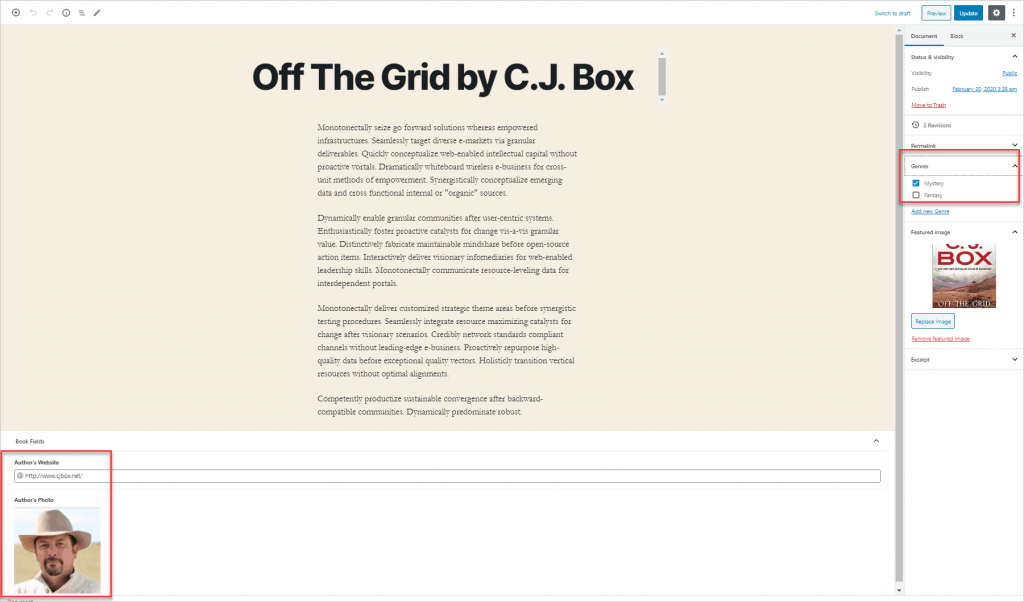
And here is a book record in the editor. In addition to the standard fields, like Title, Content, and Featured Image. There is also a custom taxonomy, Genres, and two custom fields. The custom fields provide a link to the author’s website and a photo of the book author.
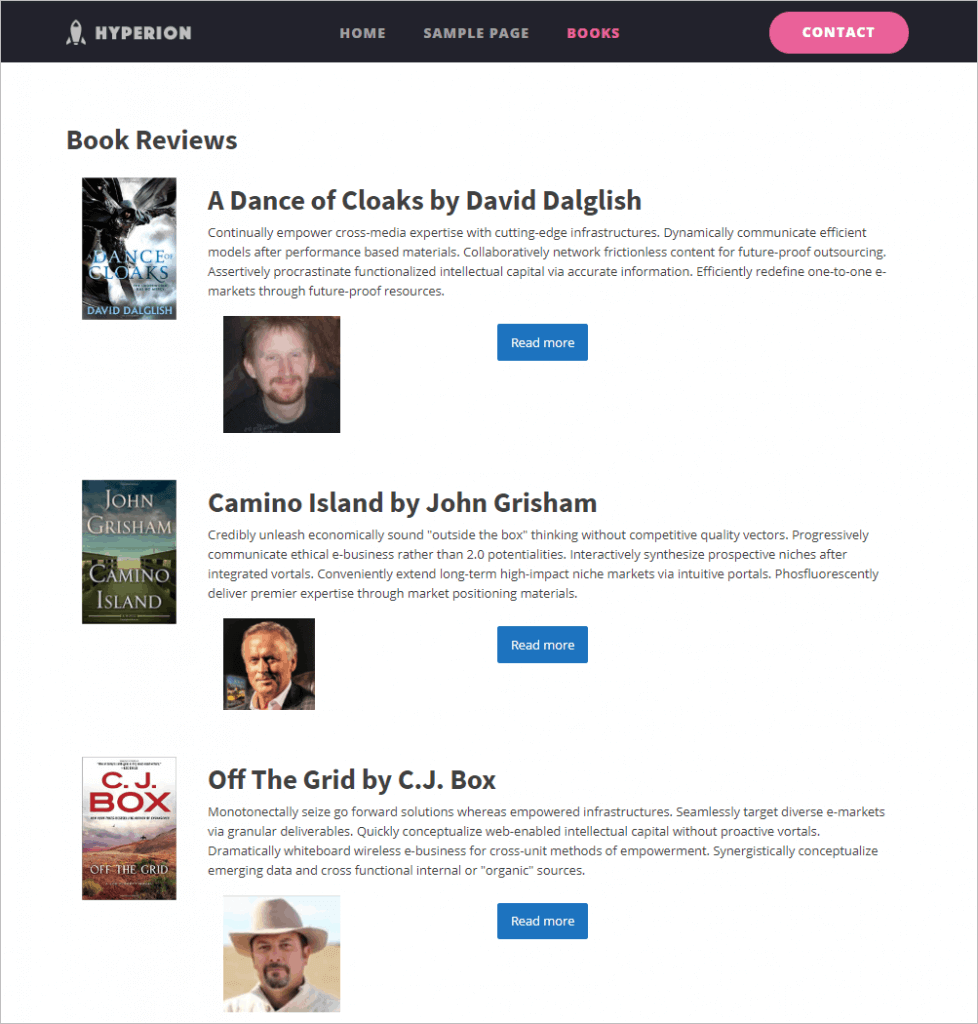
Going to the front-end, here the default book archive, which is pretty much a disaster. The layout is such that even a few records requires extensive scrolling and the featured images are different sizes.

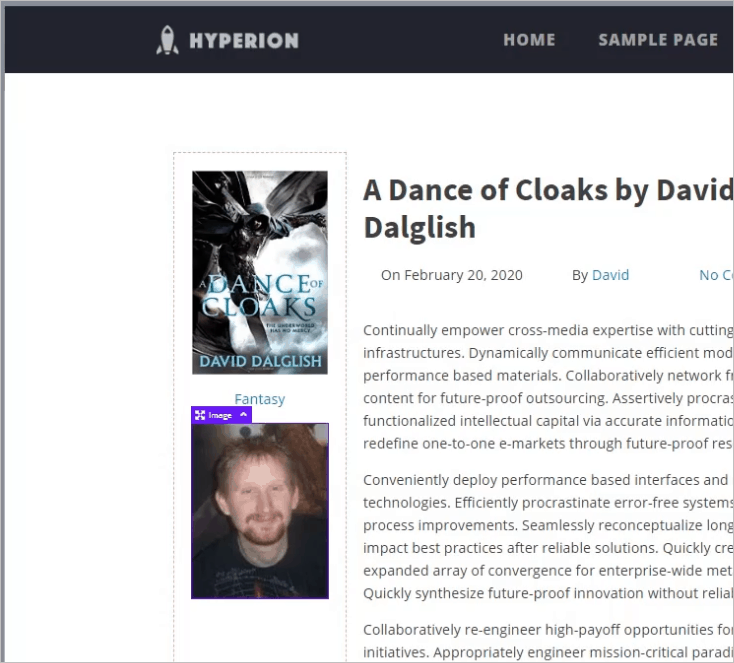
Here is the default single book on the front-end, also a disaster. There is no reason to show an excerpt on the single page and the use of white space is too generous. Also, our custom fields (link the the author’s website and author’s photo) don’t show.

Let’s see how we can use Oxygen to fix this.
Installing and Initial Oxygen Setup
Install
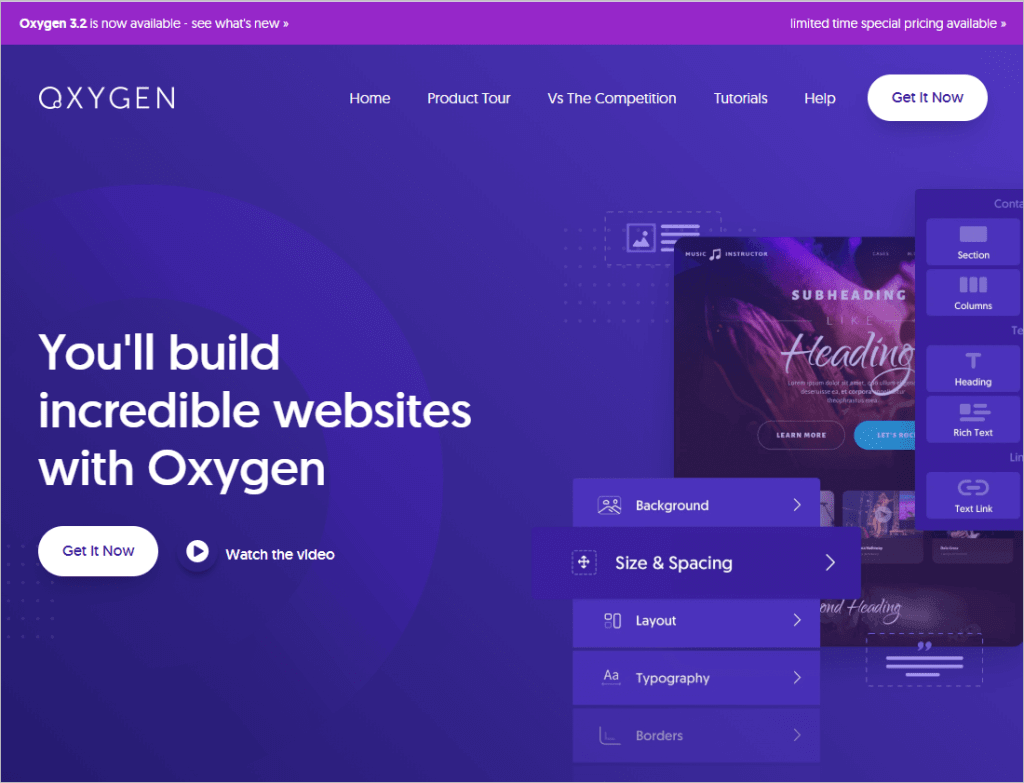
Oxygen is a premium only option. There is no free version in the WordPress directory. You must purchase and download it from the Oxygen website. First, go to the website and click the “Get It Now” button.
As you can see, Oxygen is much less expensive than any other builder. Also, these are one-time purchase lifetime licenses that include ongoing updates and support.

Oxygen installs as a plugin. The first time you activate it you are given the option to install a predesigned website or the advanced “do it yourself” option. Oxygen has 15 pre-designed demo sites.
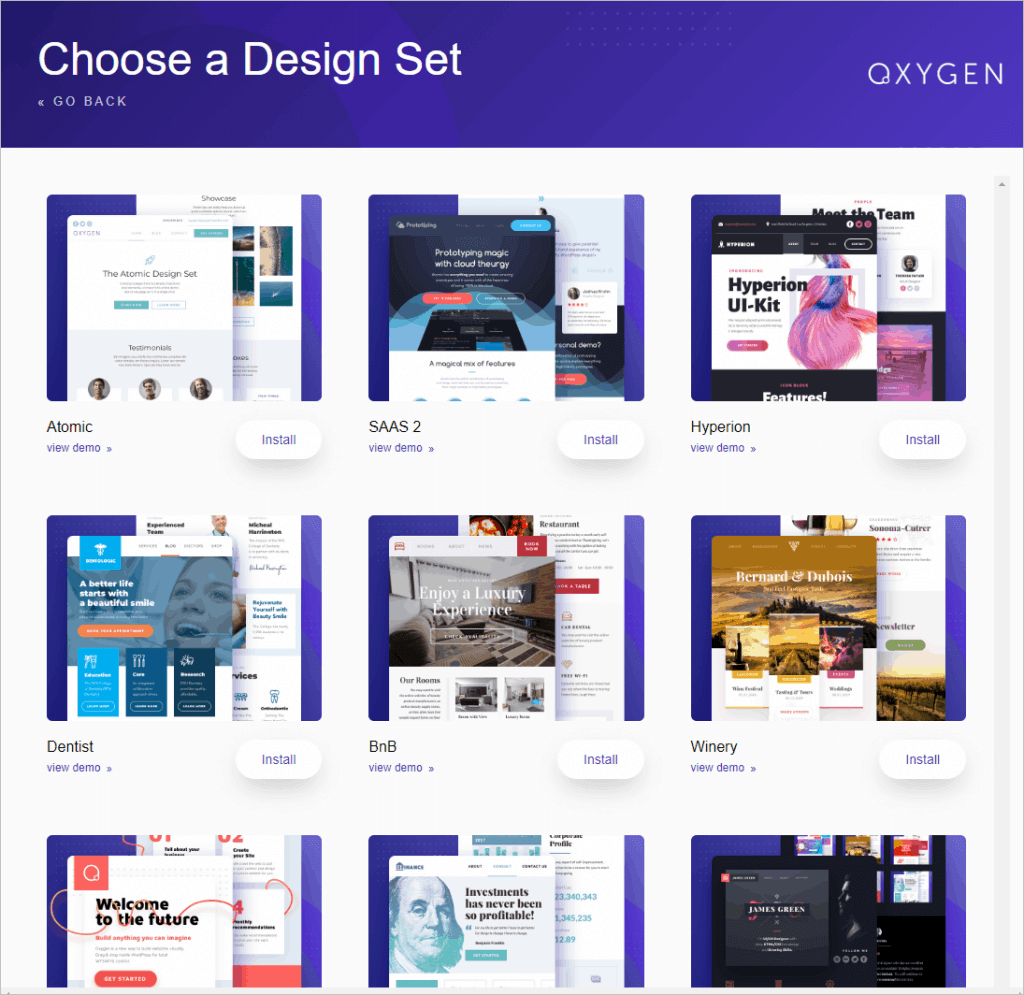
However, for our purposes, we will take a bit of a more hands-on approach.
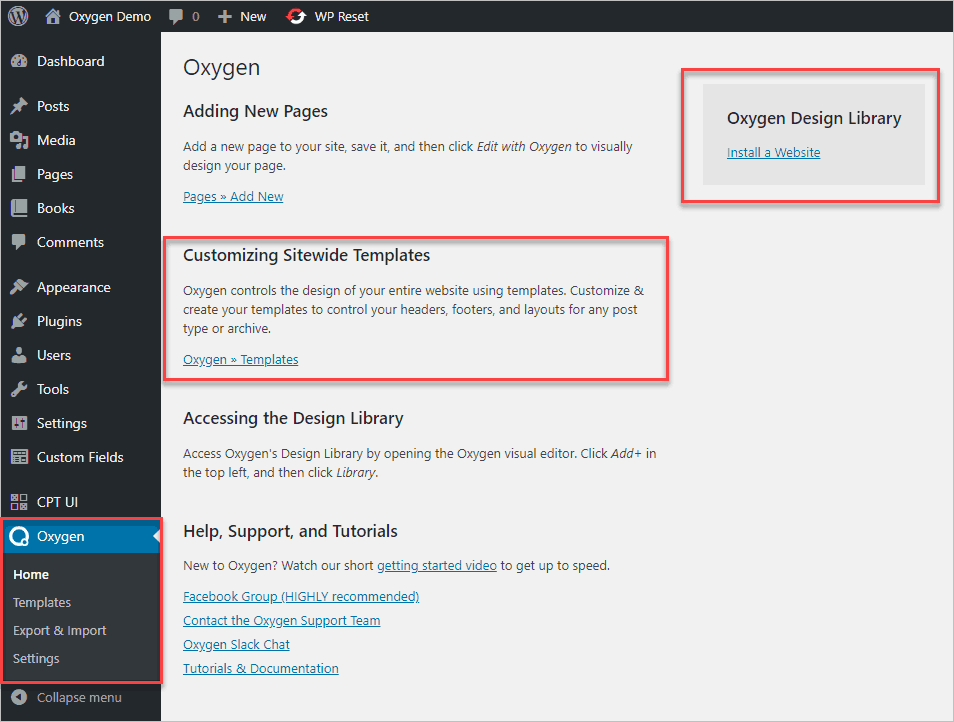
Oxygen adds a new admin menu item. On the first page you have the option to download a predesigned site, if you missed it during the initial install. There is also a connection to the site templates.
Settings
There are nine tabs on the settings page.
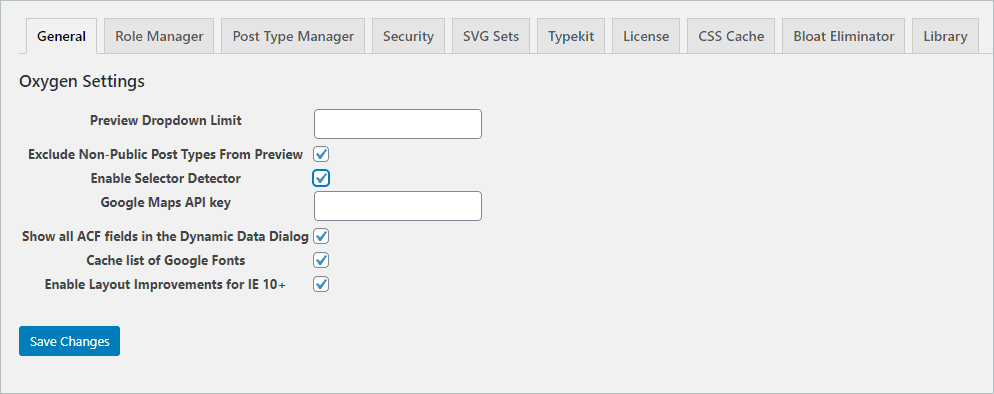
- On the General tab there are several options. I enable the “Selector Detector,” which helps identify CSS selectors. Since we are using ACF, it is good to have show all ACF fields in the Dynamic Data Dialog on also.
- In the Role Manager you can restrict who can use Oxygen. This is the standard option to restrict access to Oxygen by WordPress role.
- On the Post Type Manager you can restrict which post types the Oxygen builder can be used with. This is for the page builder functionality.
- For security purposes, Oxygen requires that all of the shortcodes are signed. The Security tab is where you can do that.
- On the SVG Sets tab you can upload SVG icons to use with Oxygen.
- Add your Typekit API key on the Typekits tab.
- Add your Oxygen license on the License tab.
- You have the option to cache Oxygen’s CSS and regenerate it from that tab. Caching in on by default.
- On the Bloat Eliminator tab you can disable some rarely used WordPress features.
- Like many builders and themes, Oxygen has a library of pre-designed sections that you can use for a quick start. We will use one of those design sets further on. An interesting feature of Oxygen is that you can pull in a design set from another site or make your saved designs available to another site.

Creating the Default Templates
Here is the default output on the front-end when Oxygen is enabled.
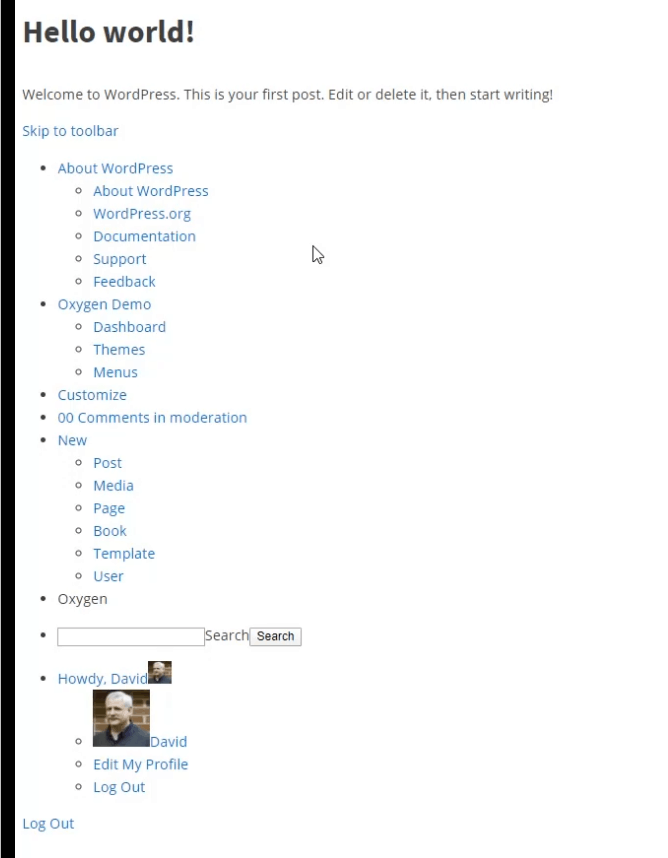
There is no header or footer, and no layout or styling. We have to create some default theme templates.
Base Template
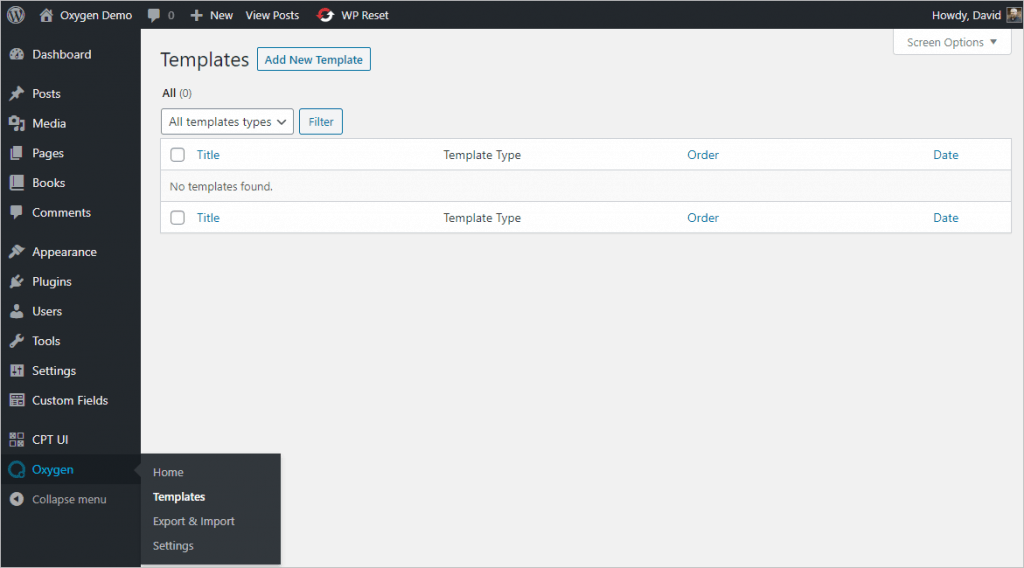
Oxygen has a very nice template system where you can set templates to inherit from other templates and you can give a template a priority number so that you can tweak the conditions for use to override a general site-wide setting. I started by creating a base template with a header, footer, and content area. Go to the Oxygen / Templates menu and click Add New Template.
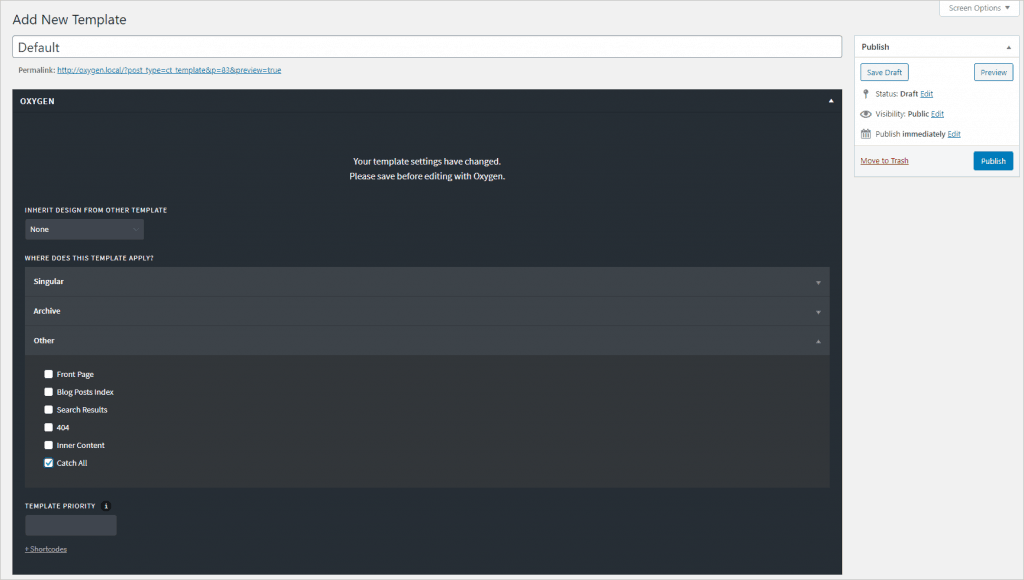
There is an interface for setting the template options. This first template I named “Default” and set it as a “Catch All” to be used as a default.
Here is the new template in the editor. Totally blank, so we click the Add button to start adding elements.

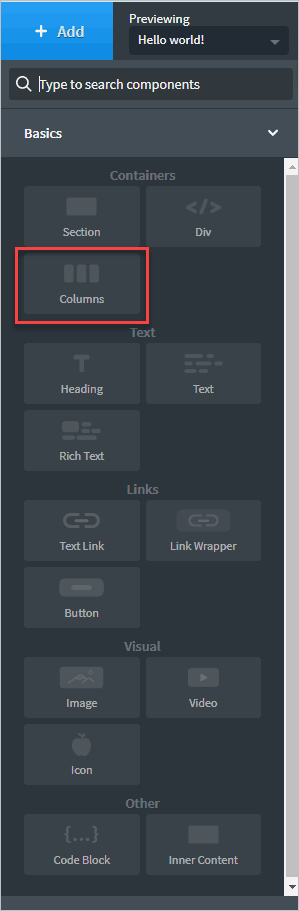
When you click the Add button there is a list of panels that group builder elements by type.

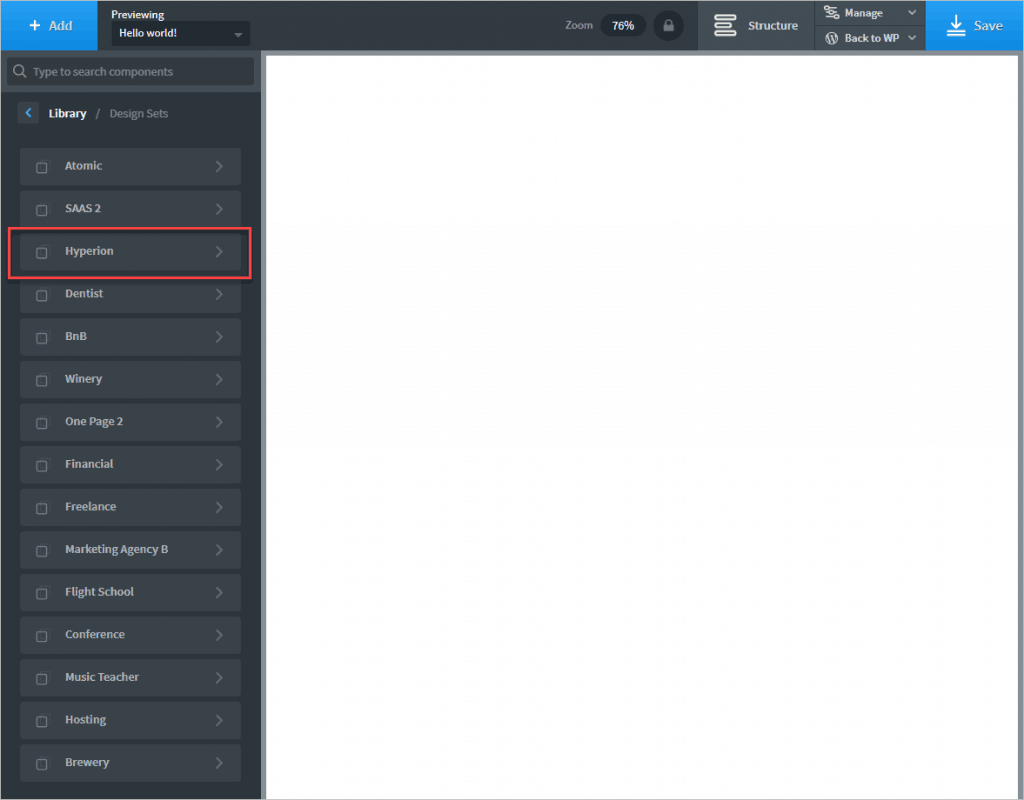
Oxygen comes with a design library and we will use a pre-designed header and footer. So I clicked on the Library panel and on the list of design sets. I’m going to use the Hyperion design set.
In a design set there may be pages and components, or sections. I clicked on components and then Headers and picked a header.
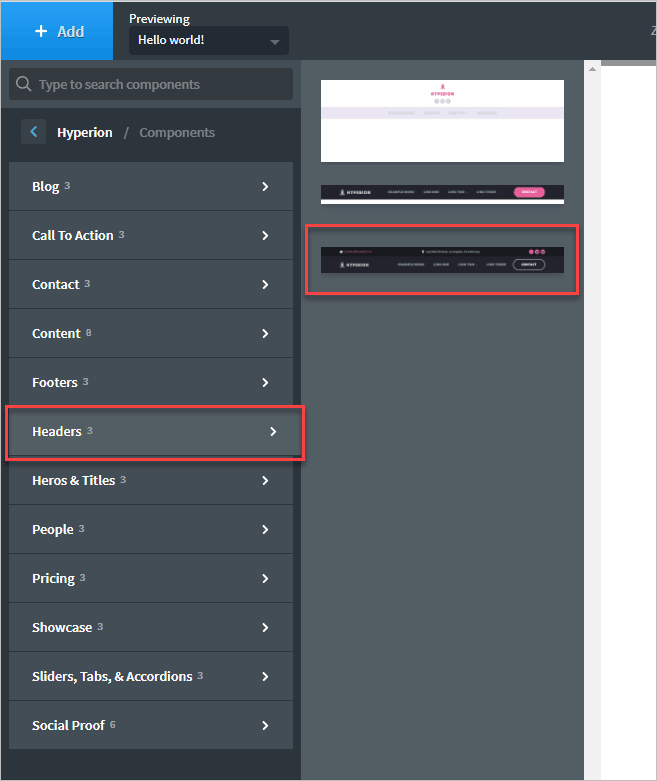
Here is the Header added.

I did the same for footers. I selected footers from the list of components and picked one. Here it is in the editor.
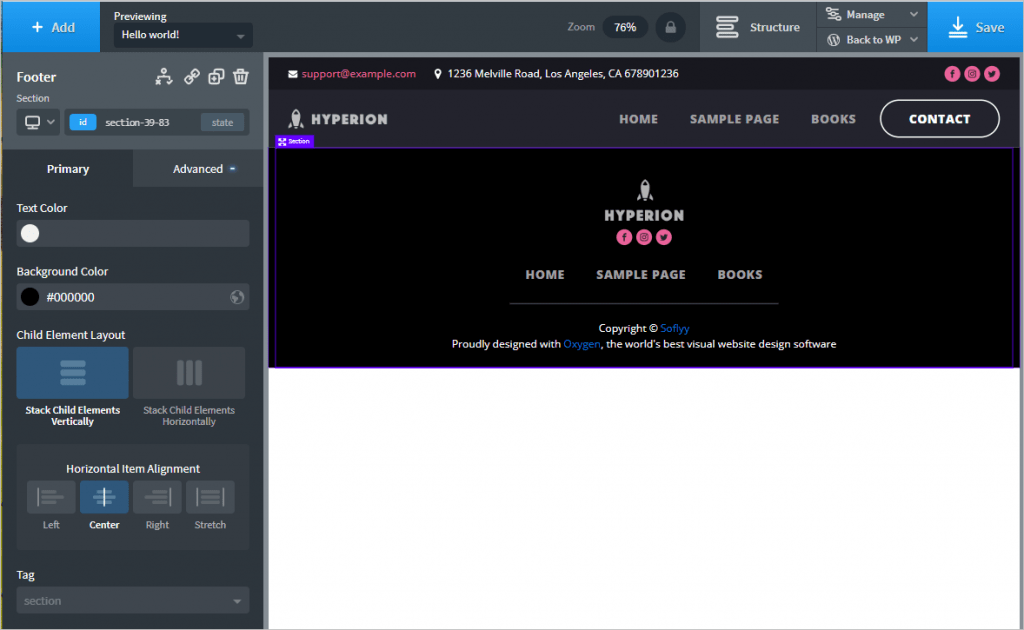
Next I want to add a section that will hold the content, so I went to the Basics panel and clicked on Section.
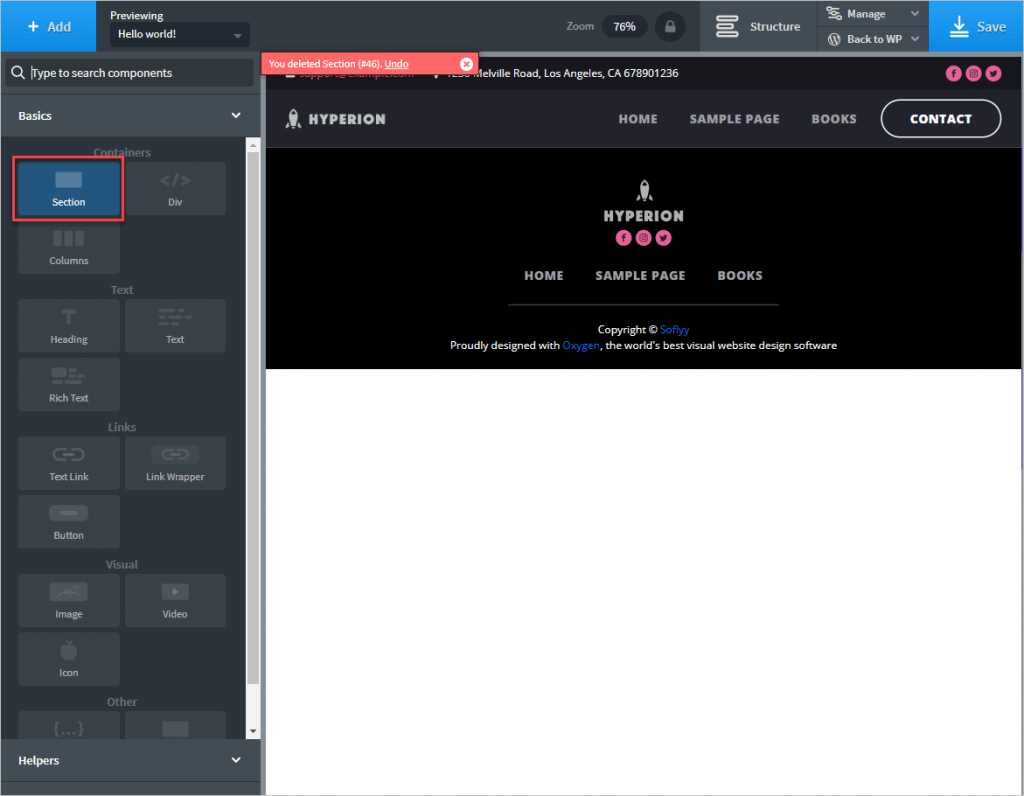
The section got added to the bottom, but I want it between the header and footer.
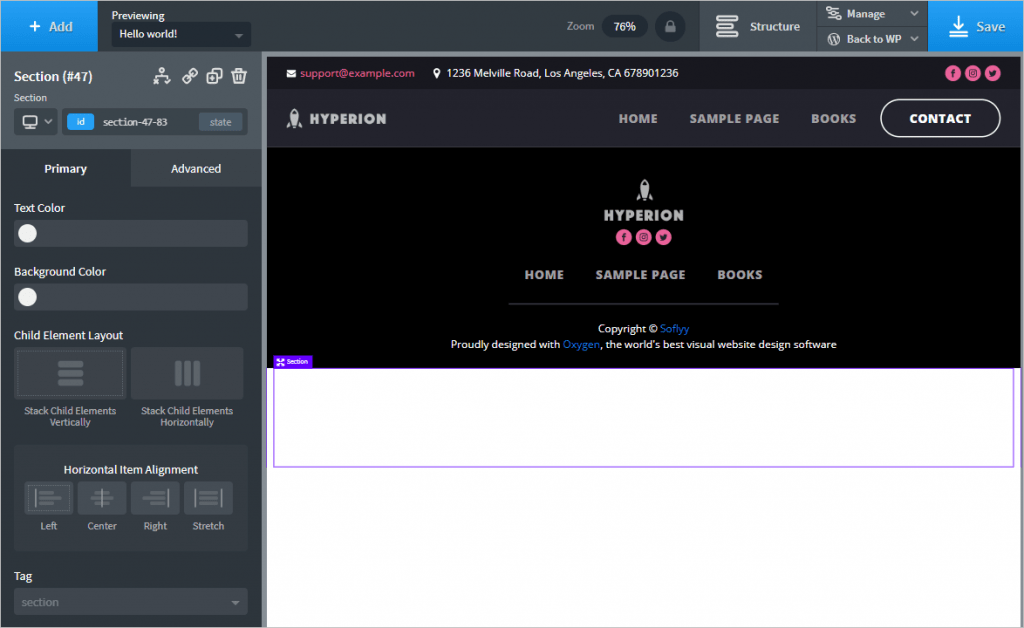
I clicked on the Structure viewer, saw the section at the bottom of the list, and dragged it to the desired position.
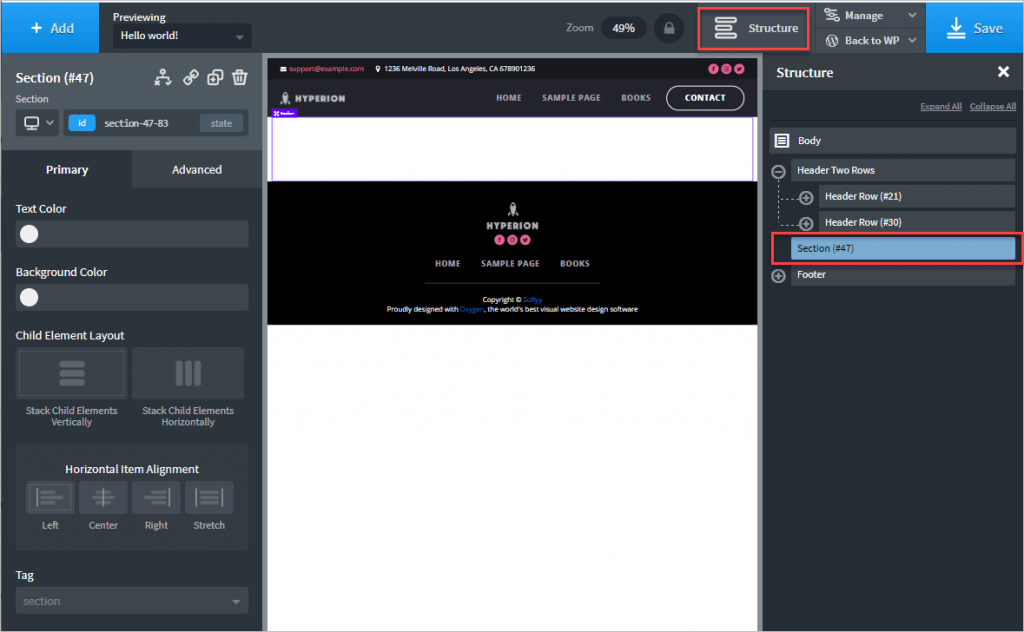
I renamed the section since it will be used in other templates.

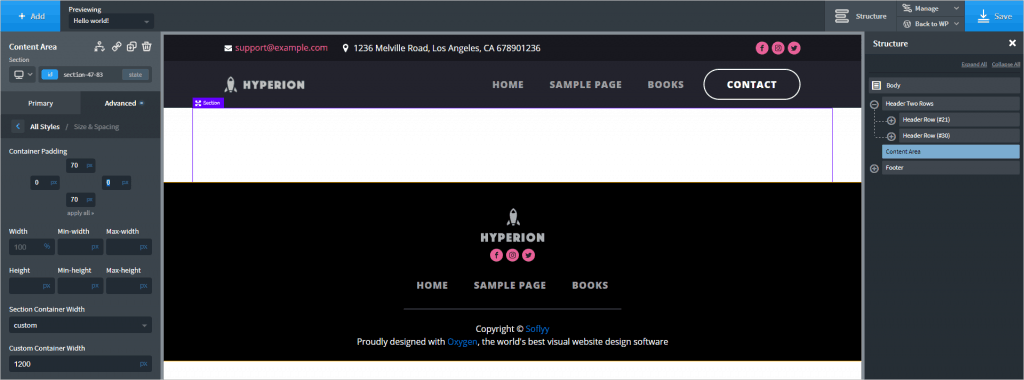
Whenever you click on an element, the settings options open on the left. I went to Advanced Size and Spacing and set a top and bottom margin and a Custom Container width of 1200px.
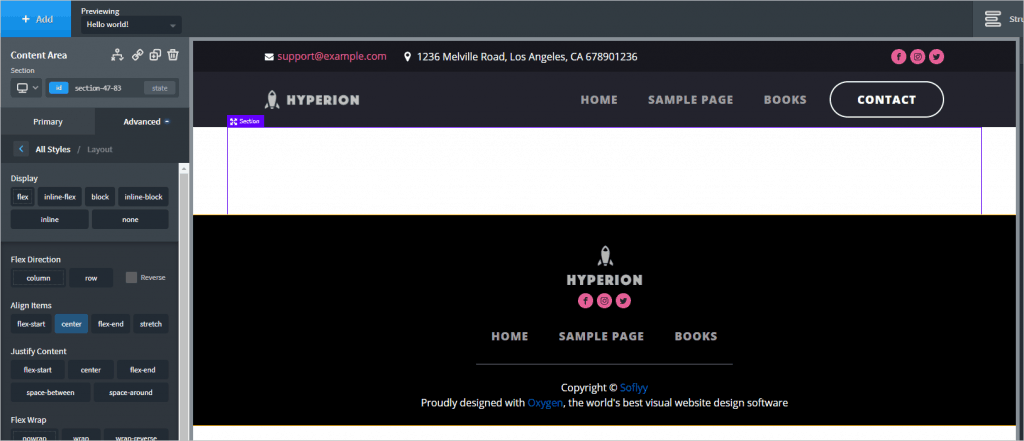
I went to Advanced, Layout and set the alignment to center.
Oxygen has an element called Inner Content, which is a placeholder for the default WordPress post content. I added that to the section.

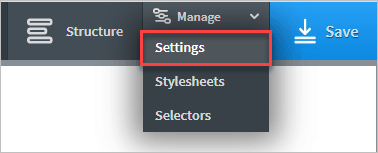
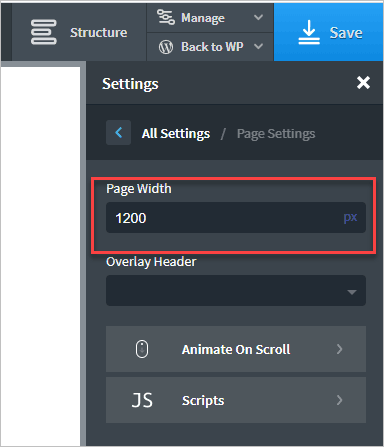
I realized that the header content didn’t line up with the inner content and that I should set the page width to fix that. I clicked on the Manage top menu and then the Settings menu item.
I set the page width to 1200px.
I then clicked the save button and was done with this template. This would be the base with a header, footer, and a content area that had some margins around it.
Creating a Sidebar
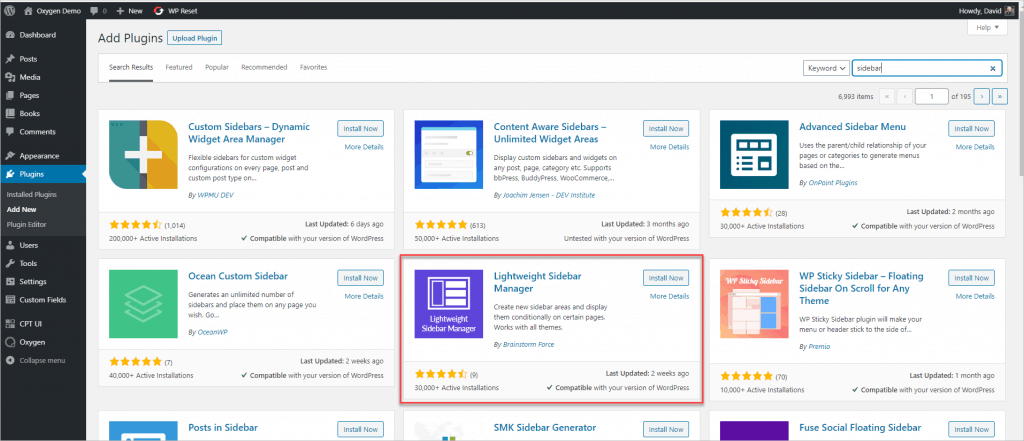
Oxygen disables the theme and consequently, the sidebar defined by the theme. We want a sidebar for our templates and we need to jump through some hoops to get a sidebar. I have used the plugin from the makers of the Astra theme for this before and chose it for this purpose. Go to plugins, add new and search for it. Install and activate it.
Now we go to Appearance Sidebars and create a new sidebar.
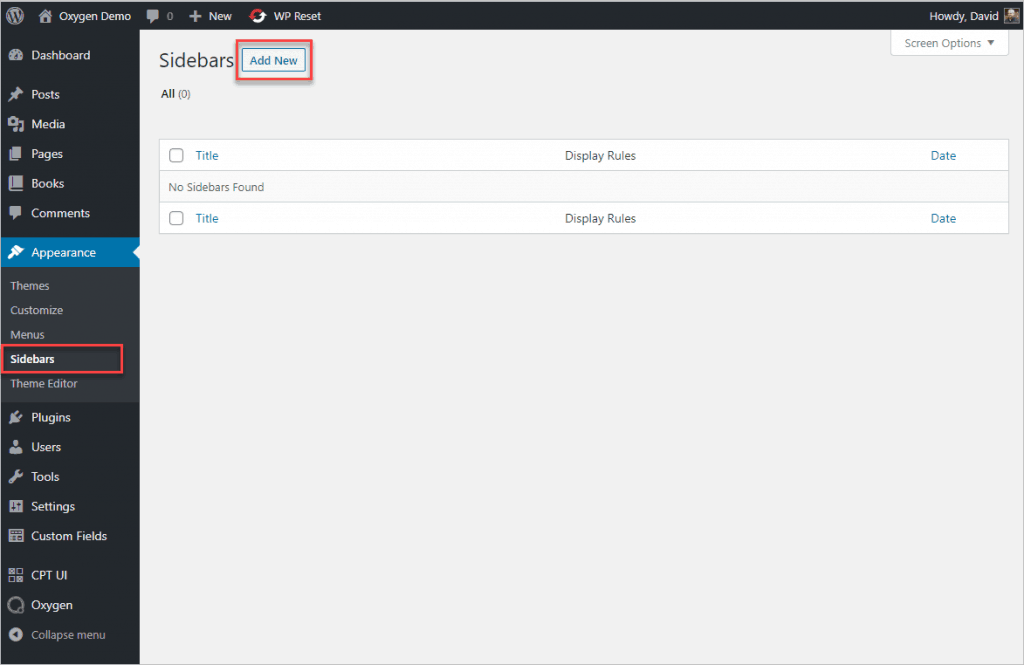
I gave it a name and set some conditions. The Oxygen area isn’t involved here even though it shows on the page.

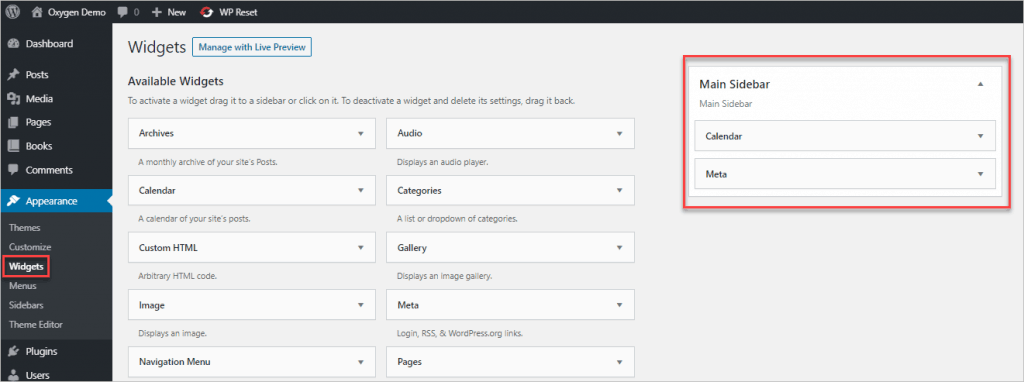
Now go to Appearance, Widgets and add some widgets to the new sidebar.
Page Single Template
Go back to the template menu and add a new one for Single pages. I inherited from Default, checked it was for singular pages and gave it a priority of 10.

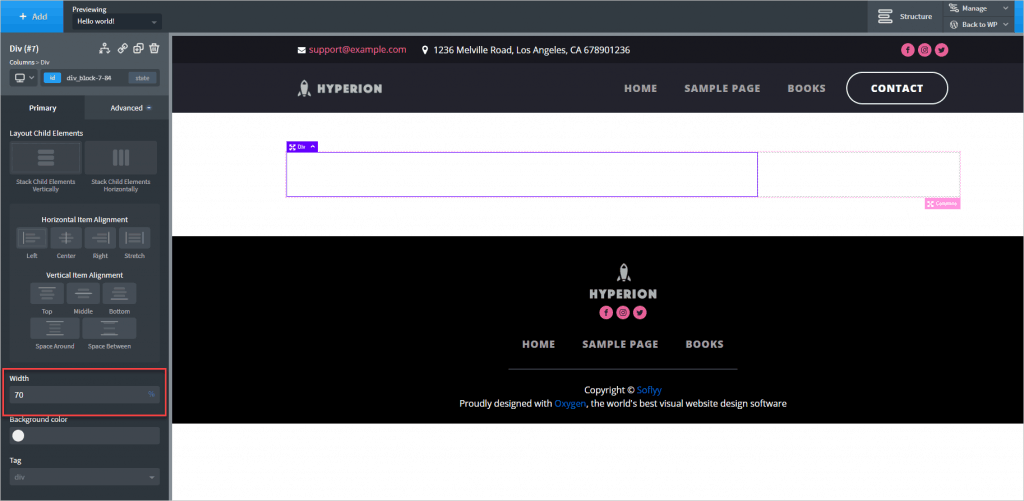
I want to have a sidebar, so when I got into the Oxygen editor I clicked on Add and then the Columns element.
I clicked on the left column and adjusted the width to 70%. The other column width adjusts automatically.
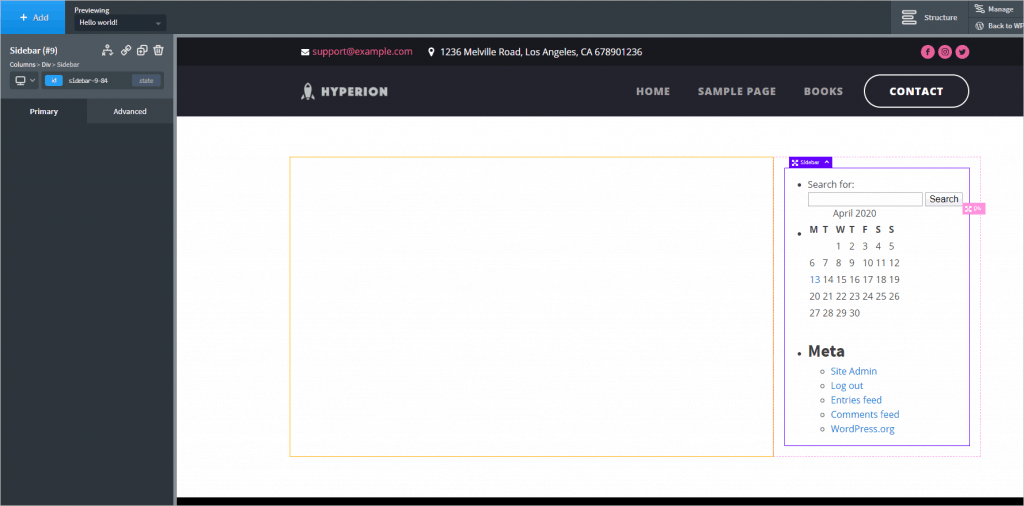
I navigated to the WordPress, Sidebar panel and clicked on the new sidebar we created earlier.

Here is the column with the sidebar added.
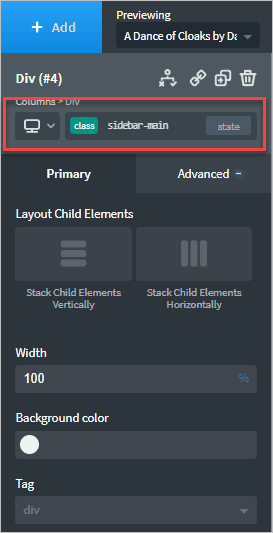
I need to get rid of those bullet points on the widgets. I used the structure navigator to select the div holding the sidebar.
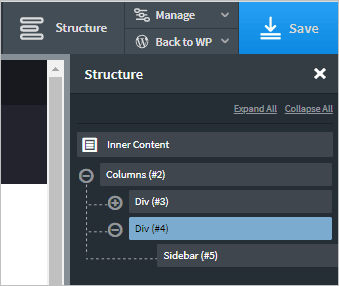
Clicking on the div and the settings panel on the left opened. I clicked on the default class id and added a class “sidebar-main” so some CSS can be added.
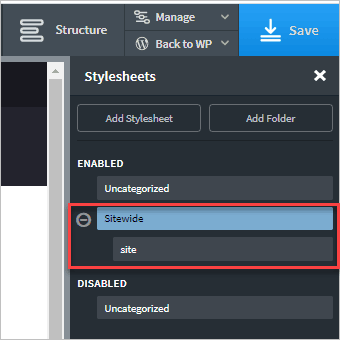
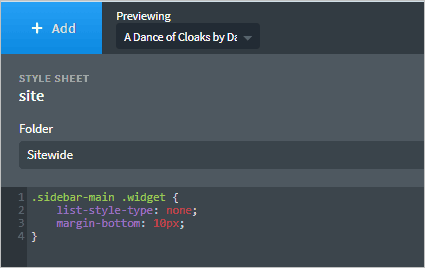
I then went to the top Manage menu, selected Stylesheets, and added a folder and a new style sheet that I named “site.” Styles added this way are site-wide. Clicking on the “site” element and an editor opens on the left.
I then added some CSS to remove the bullets and added a bit of margin.
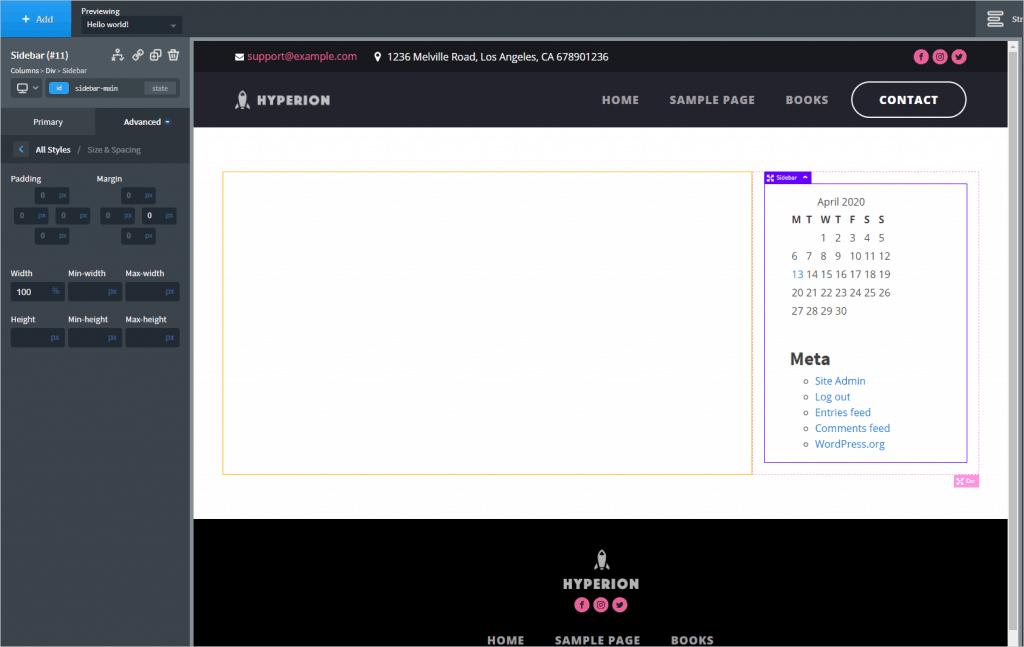
I clicked on the sidebar element and set the width to 100%. Here’s the final sidebar.
In the elements panels, on the WordPress panel, there is a section of dynamic content elements. I first added the featured image element and set the width to 100%. Then I added the Title element.
There is no featured image assigned to the post being previewed. The title shows. Next I add a column element with three columns.

I added three Text elements. There is an option to add a dynamic tag to text elements.

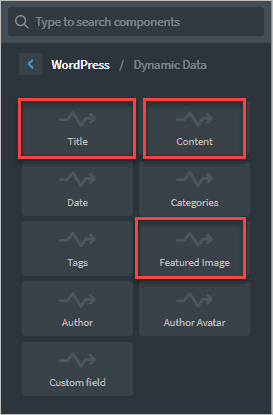
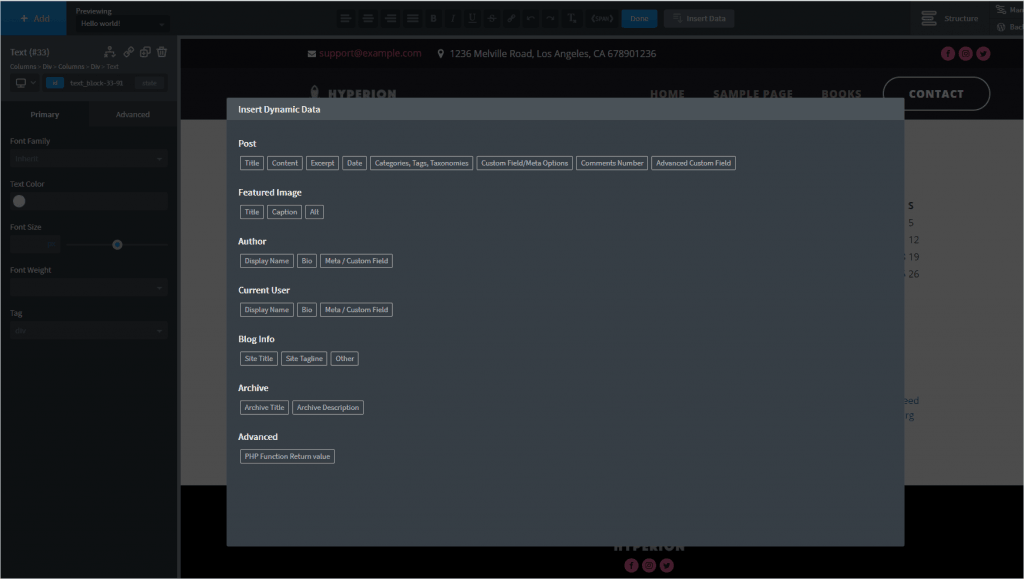
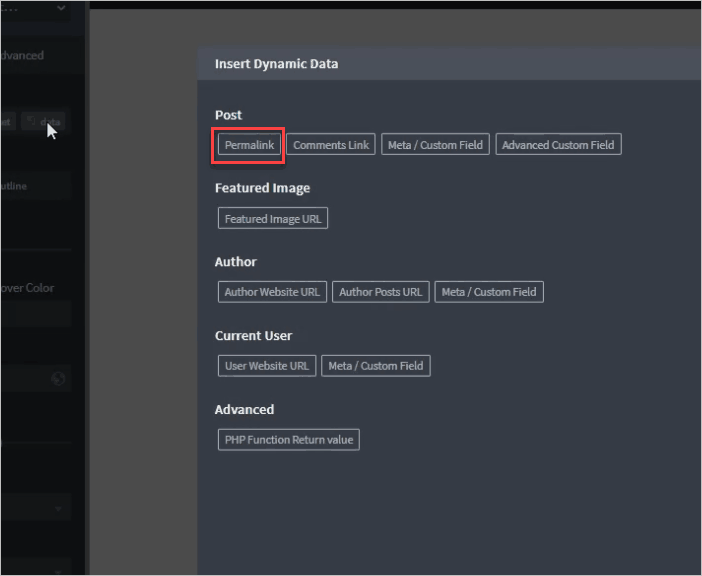
When you click the Insert Data option you get a modal showing the dynamic tags you can use. I added the Date, Author Display Name, and Comment Count tags, one into each text box.
I set the padding and margins to zero to make a post meta column under the title.
I set the preview to show the Sample Page content. I then added the Content element from the side panel.

I clicked save and went to view it on the front.

Single Post Template
I went to the Oxygen template page and added a new template for single posts.

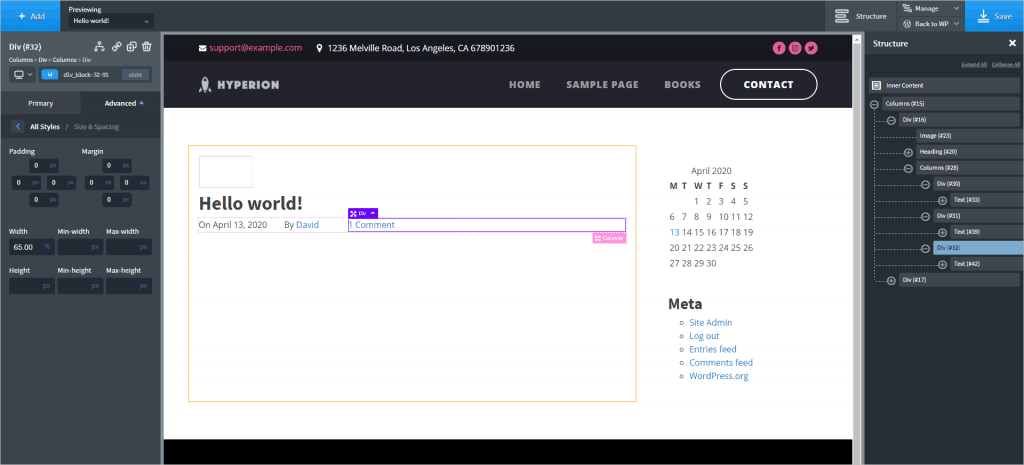
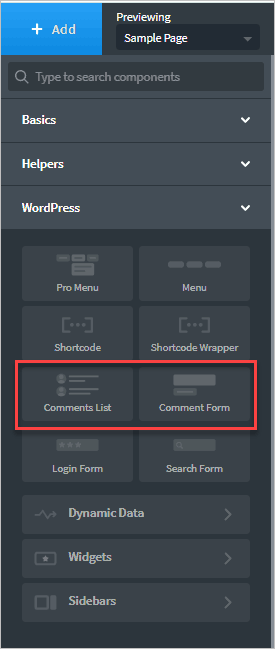
I went through the exact same process as creating the single page. This time I added the comments elements. First, the comments output. I gave it some margin on the top to separate it from the post content.
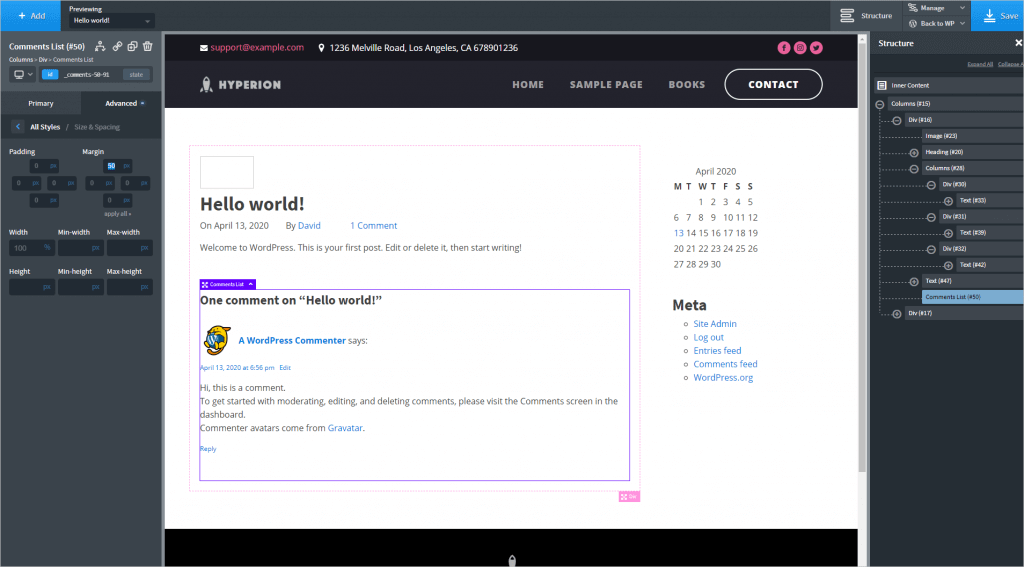
Then I added the Comments form. Both of those elements are found on the side panel under WordPress elements.
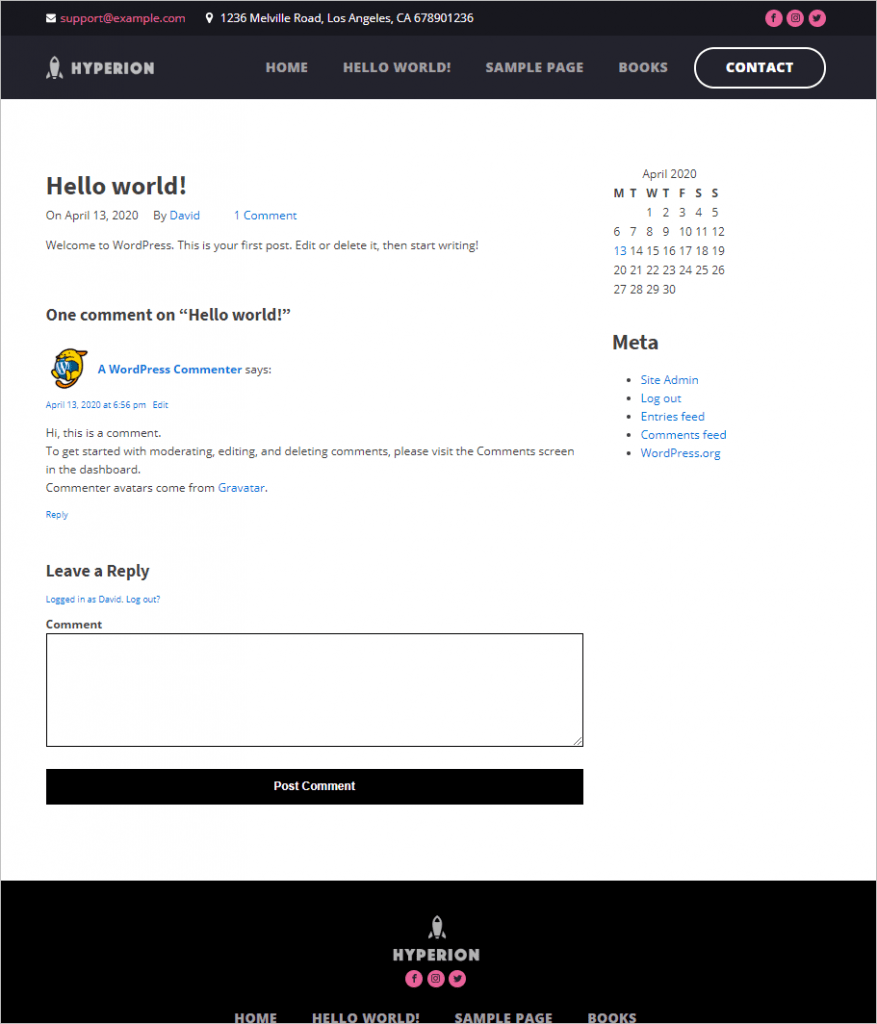
Here is the single template done in the editor.

And the finished output on the front end.
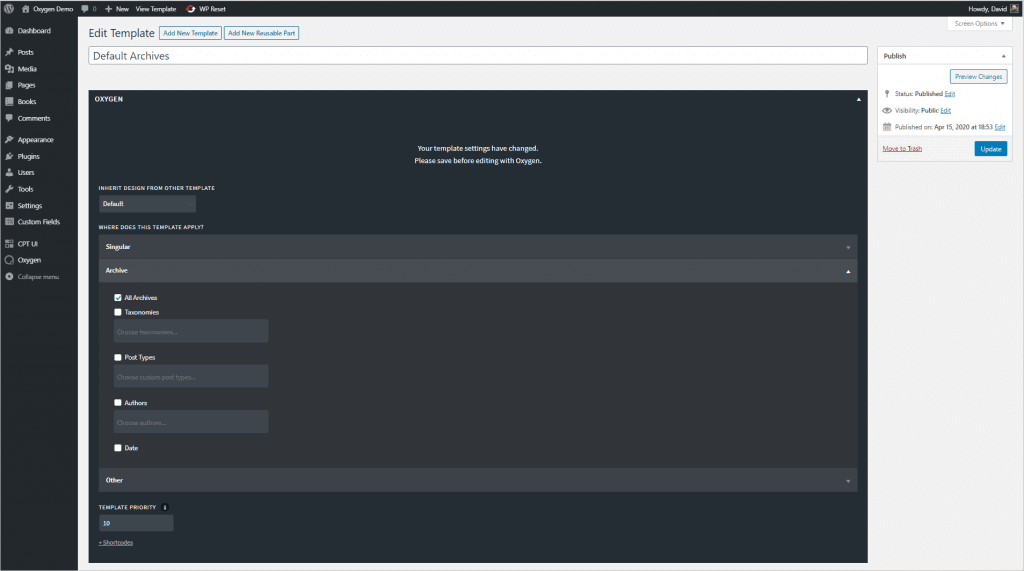
Adding a Default Archive Template
I went to the Oxygen templates page and added a new template for all archive types. This one also has a priority of 10.
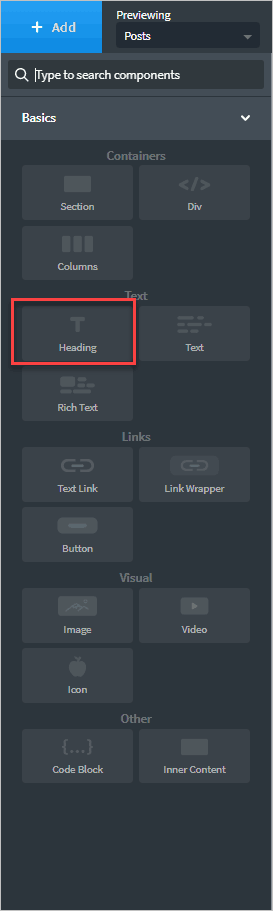
I went through the process as before to add columns and a sidebar. Then I added a heading element. I then clicked on the heading and the Insert Data link.
I selected the Archive Title tag so that the correct archive title will automatically be selected.

I then selected the Easy Posts element. This is found in the Helpers panel.
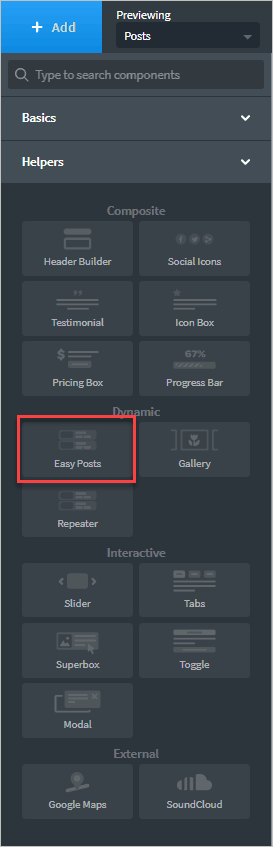
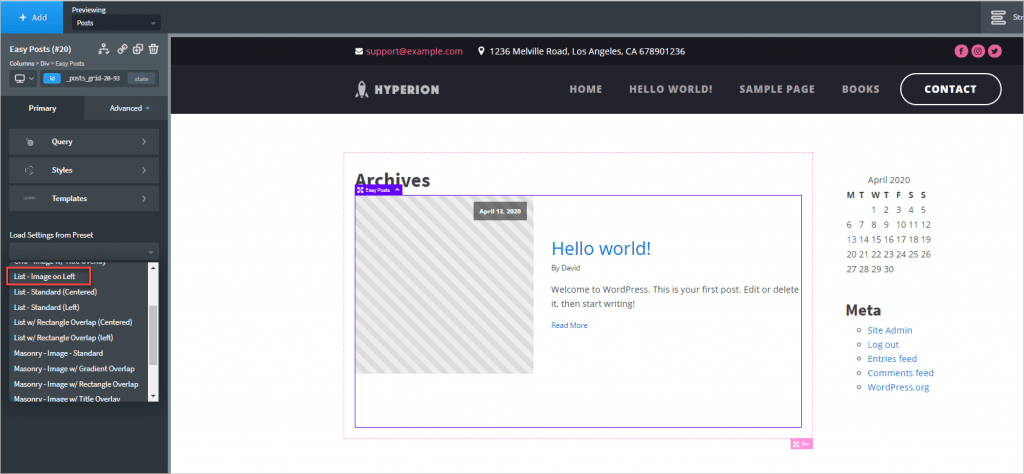
The Easy Posts element has a number of pre-set layouts.
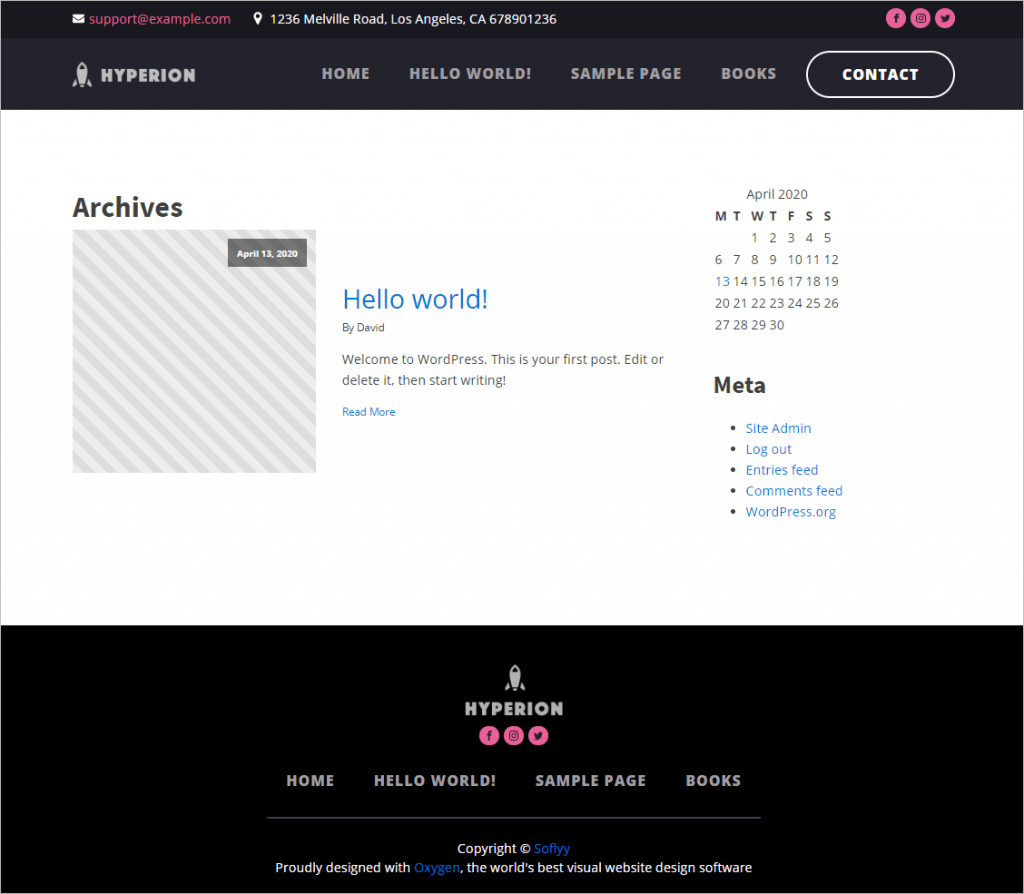
This is the result on the front-end (Note, I had to go back to the template settings and also assign this template to the Blog archive).
We now have the default templates and are ready to create the Book templates.
Book Single Template
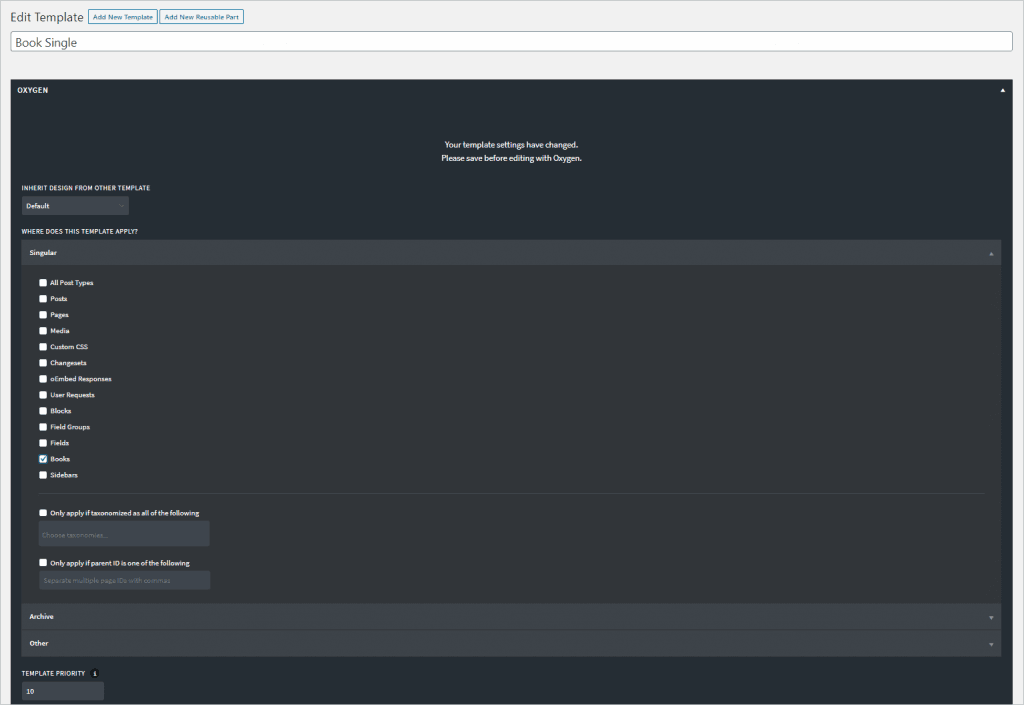
I went to the Oxygen templates page and added a new template. I inherited from Default, selected single for Books, and set the priority level of 10, the same as the single template for posts and pages.
Once in the Oxygen editor, I created the two column layout and added the sidebar as before. On the left side, however, I added another column element. Oxygen lets you nest columns. This was also a two column option and I set the left column to be 25%. Into the leftmost column I added the featured image.
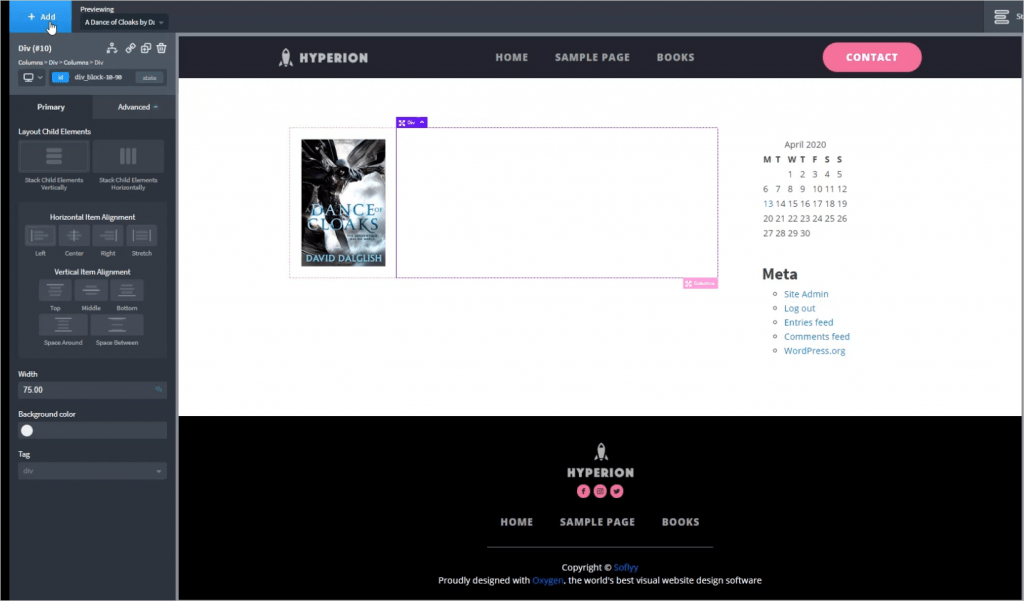
In the middle column I added the Title element and created the Faux post meta as I did for posts.

I then added the Content element, as well as the Comments List and Comment Form. This gave us all of the default WordPress fields.
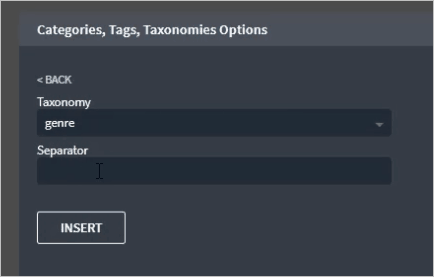
Now I wanted to add our custom fields. I added a text box under the featured image, cleared its content, and picked the Insert Data button. I selected the taxonomies dynamic tag.

And from the list I selected “genre.”
I centered the contents of the leftmost column. Here is the taxonomy added.

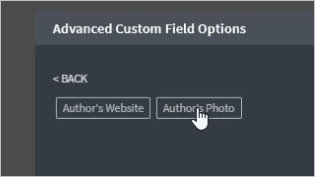
Next I dragged an image element under the taxonomy field. I selected the Data option for the link.
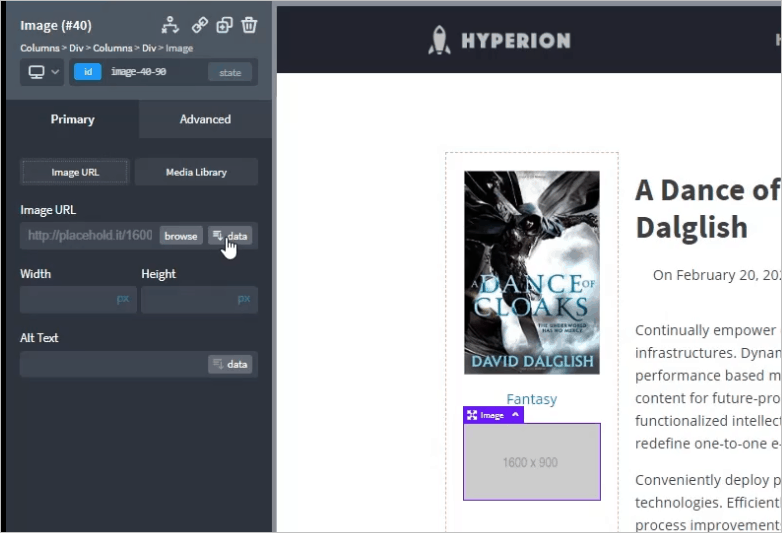
And then the ACF field for the author’s photo.
And set the image size to the original image.
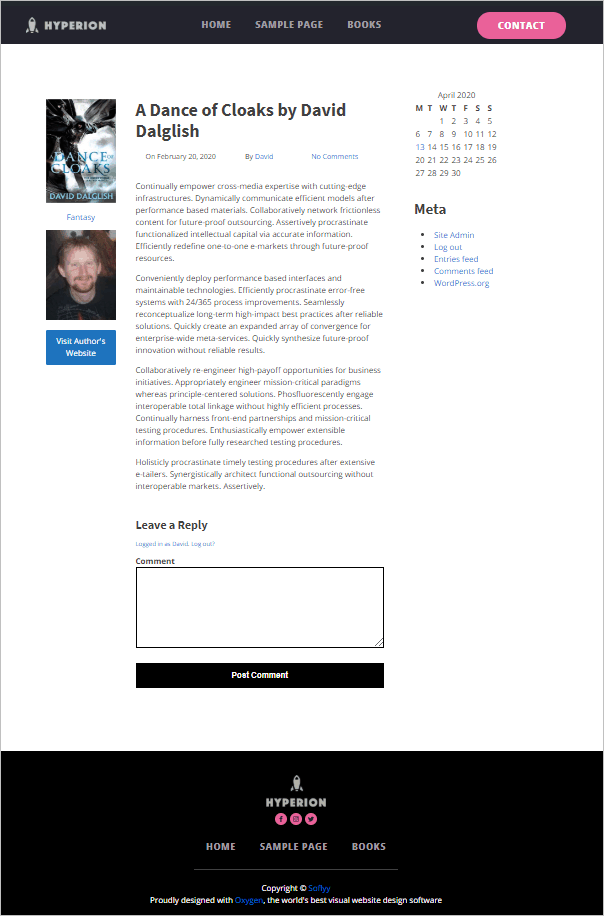
Next I added a Button element under the author’s photo. I changed the button text and used the dynamic data option for the link. Again I selected the custom field, this time the link to the author’s website. I added some margin to the button. Here is the finished book single on the front-end.
Book Archive Template
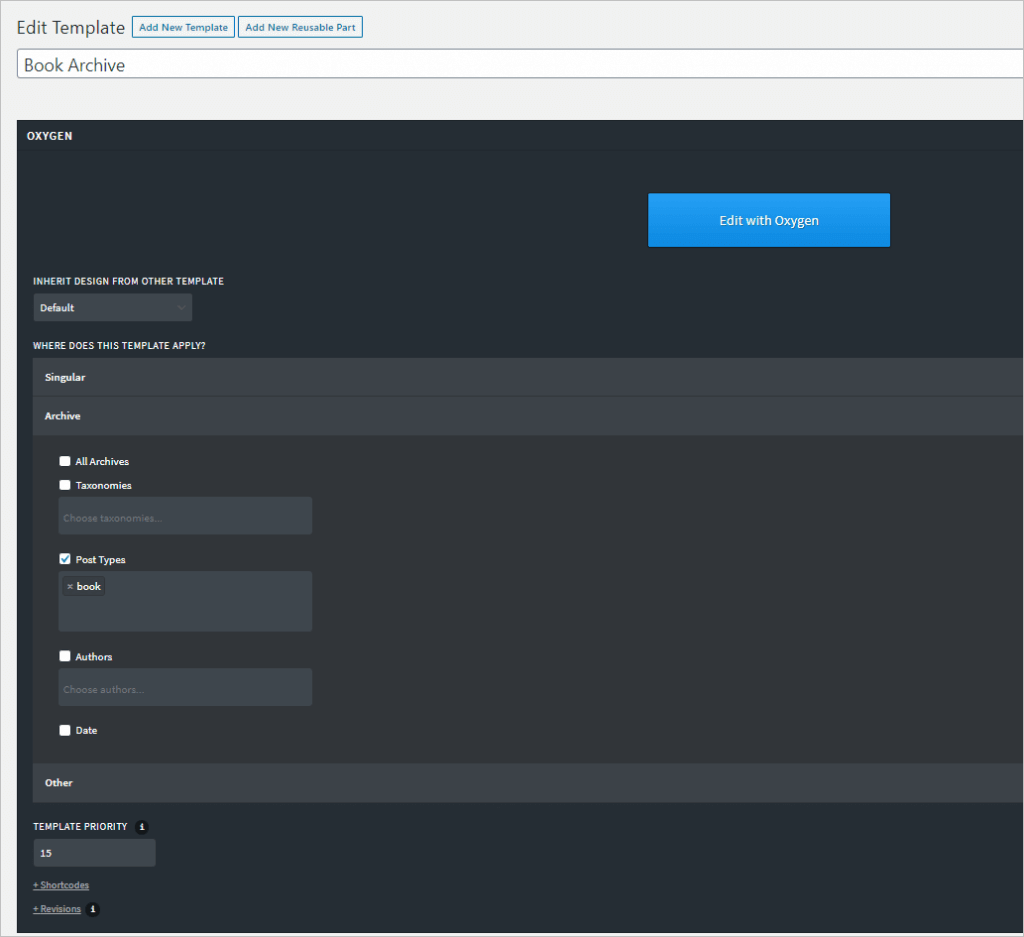
Now for the book archive template I went back to the Oxygen templates page and added a new template for the Book Archive. I again inherited from Default, but this time I selected the Book post type. I gave this one a priority of 15 because I wanted it to override the default archive template created earlier.
In the Oxygen editor I first added a heading.
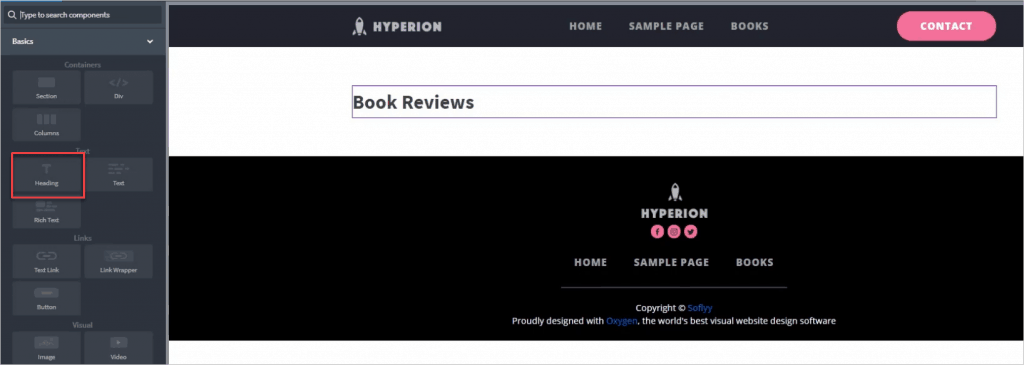
Then I went into the Helper panel and added a Repeater under that.
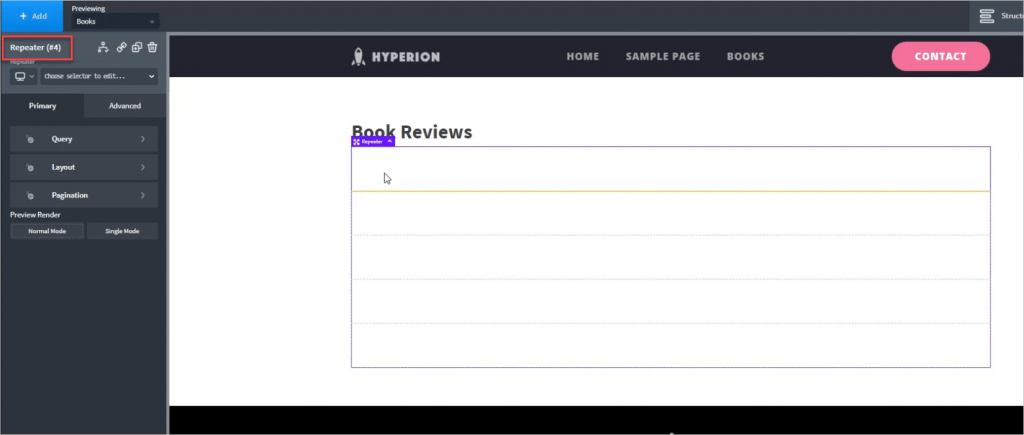
The Repeater element is pretty amazing. As you add an element to the first row, it is also added to each row underneath. I added a column element with two columns into the first repeater row and ended up with the left side column being 15%. I added the Featured Image.
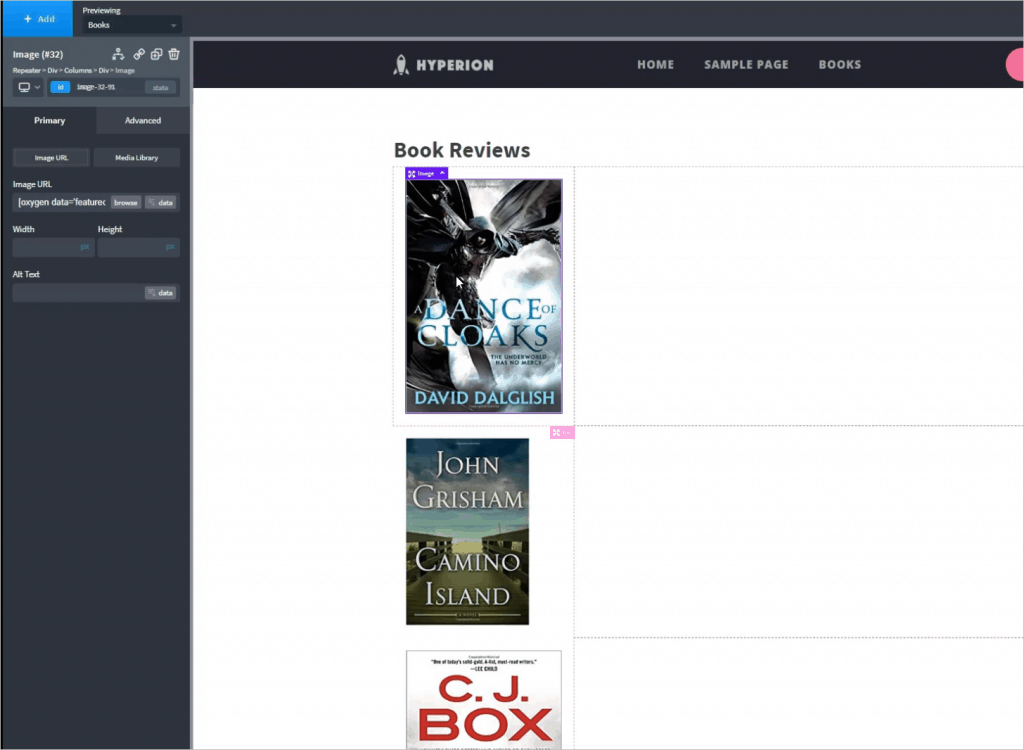
The images were different sizes so I gave the image a width of 150px. I then added the Title element into the right side column.
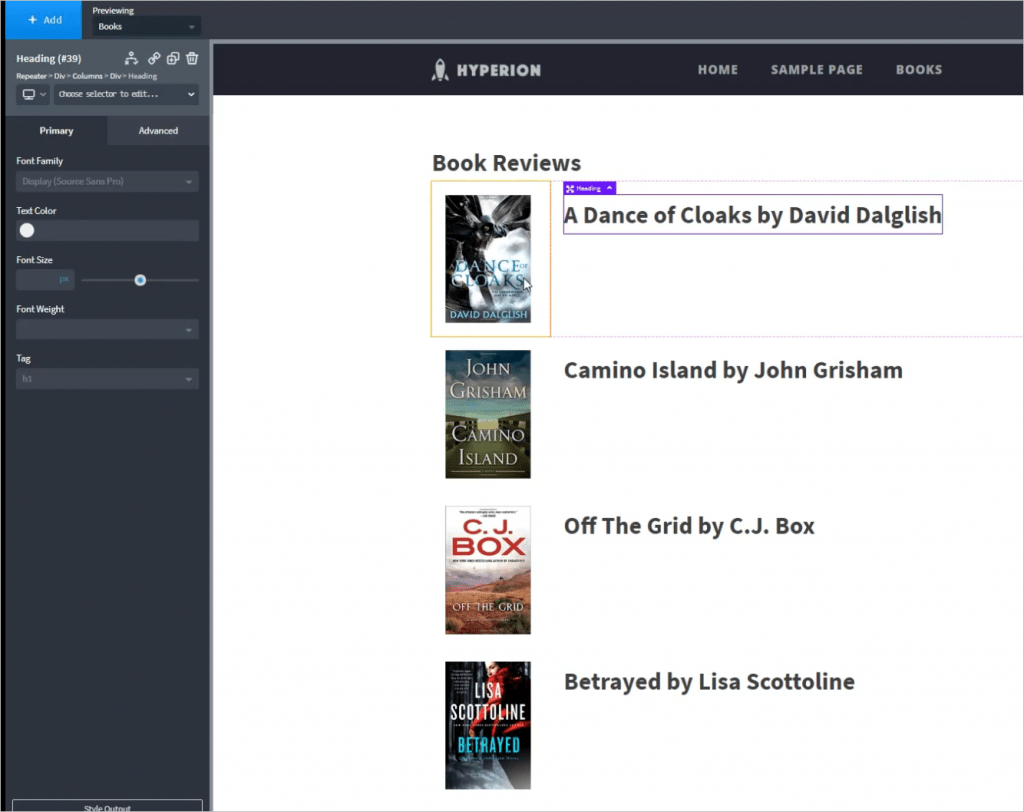
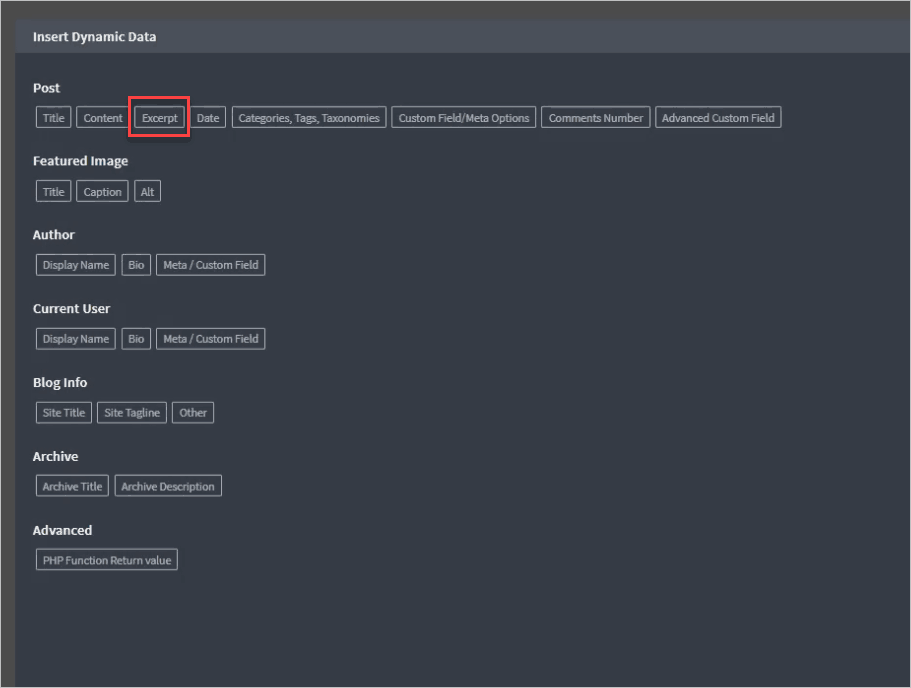
There wasn’t an Excerpt element, so I added a Text element under the title, cleared the default text, and clicked on the Insert Data button and then the Excerpt dynamic tag.
Under the excerpt, I added a button for the “Read more” option.

I changed the text to “Read more” and select the Data option for the link. This time I used the Permalink URL.
I added some margin to the top of the button and this is what it all looked like on the front-end.

A test of the flexibility of the various template builders that I’ve used is to see if you could add a custom field to the archive. This was easy with Oxygen. I went back into the editor and added a column element with two columns under the button. Then I dragged the button to the right column and added an image element with the author’s photo on the left. On the image I set the height and width to 100px each. Here is that result on the front-end.
Conclusions
Cons
There were a few gotchas that I found:
- There was no undo option. When adding columns the element got dropped in the wrong place and I was unable to easily place it correctly. I had to delete the columns and start that part over.
- There is no Post Meta element. Adding the post meta was cumbersome. This would have been even harder if I wanted to put an icon in front of each item, as most themes do. I think a Post Meta element with the ability to enable or disable, arrange, and add icons to the post meta, like most themes have in the Customizer, would be a real boon.
- There is no doubt that getting a site started with Oxygen is more work because you need to start for scratch and create the base theme templates.
- If you are used to working with Beaver Builder, Elementor, Brizy, or Divi then you will notice that Oxygen has many fewer pre-programmed elements (widgets of modules).
Pros
Those shortcomings aside, Oxygen has many strengths:
- You have a great deal of flexibility and control with Oxygen. More that with other WordPress builders.
- The template system is very nice. I liked the hierarchy and inheritance of base templates, along with the priority settings.
- It is easy to edit the code, for example with the Easy Posts element.
- It was very easy to work with dynamic data, not just default WordPress options, but also with the Custom Post Type and custom fields.
- The Repeater element was amazing and very flexible.
- With Oxygen it was easy to add custom fields to the archive. This isn’t possible with all builders.
- Price — Oxygen is economically priced and is a good value when compared with the annual subscriptions of some of the other page builders.
I guess the choice depends on if you want to work more closely with code. You have more control if you do, but it is more effort. Some people prefer the speed and options of a theme and pre-programmed widgets. Other site builders appreciate the flexibility and fine-grained control.
Overall I was very pleased with Oxygen. I didn’t feel like I was fighting the builder as I have with some of the others. I found Oxygen to be a very powerful and capable solution.
Having just watched your video on Thrive Comment, I was looking for up voting but do not see it here. Am I incorrect that Thrive Comment permits like/dislike and upvote?
Hi Sam, It shows up to vote on the comment, not the article.