
Table of Contents
Introduction
This post is part of a series looking at Custom Post Types and theme builders. In part one I used Custom Post Types UI and Advanced Custom Fields to create a custom post type. The plan in subsequent parts of the series, is to use the theme builder functionality built into popular page builders. In this, the second part of the series, I’m going to use the theme builder that was just released as part of Divi 4.
Video Version
Setup
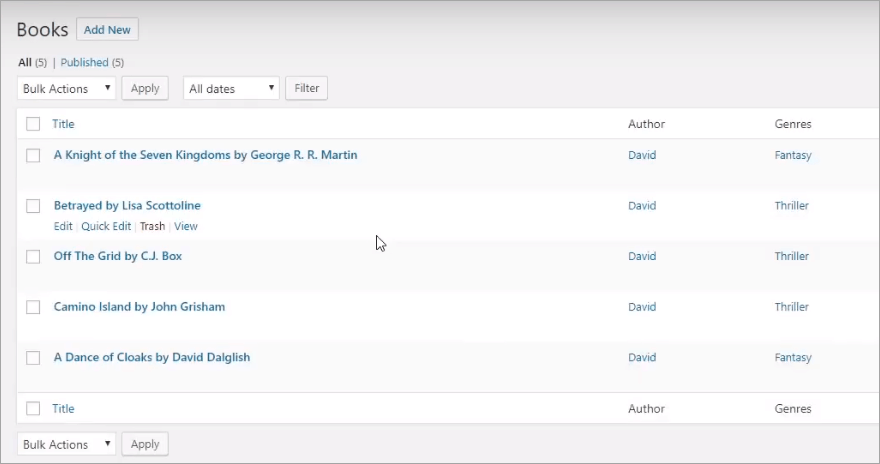
I created some records for my Book Custom Post Type.
And here is the view of one of the books in the editor. Note the custom taxonomy “Genre” and the book custom fields at the bottom.

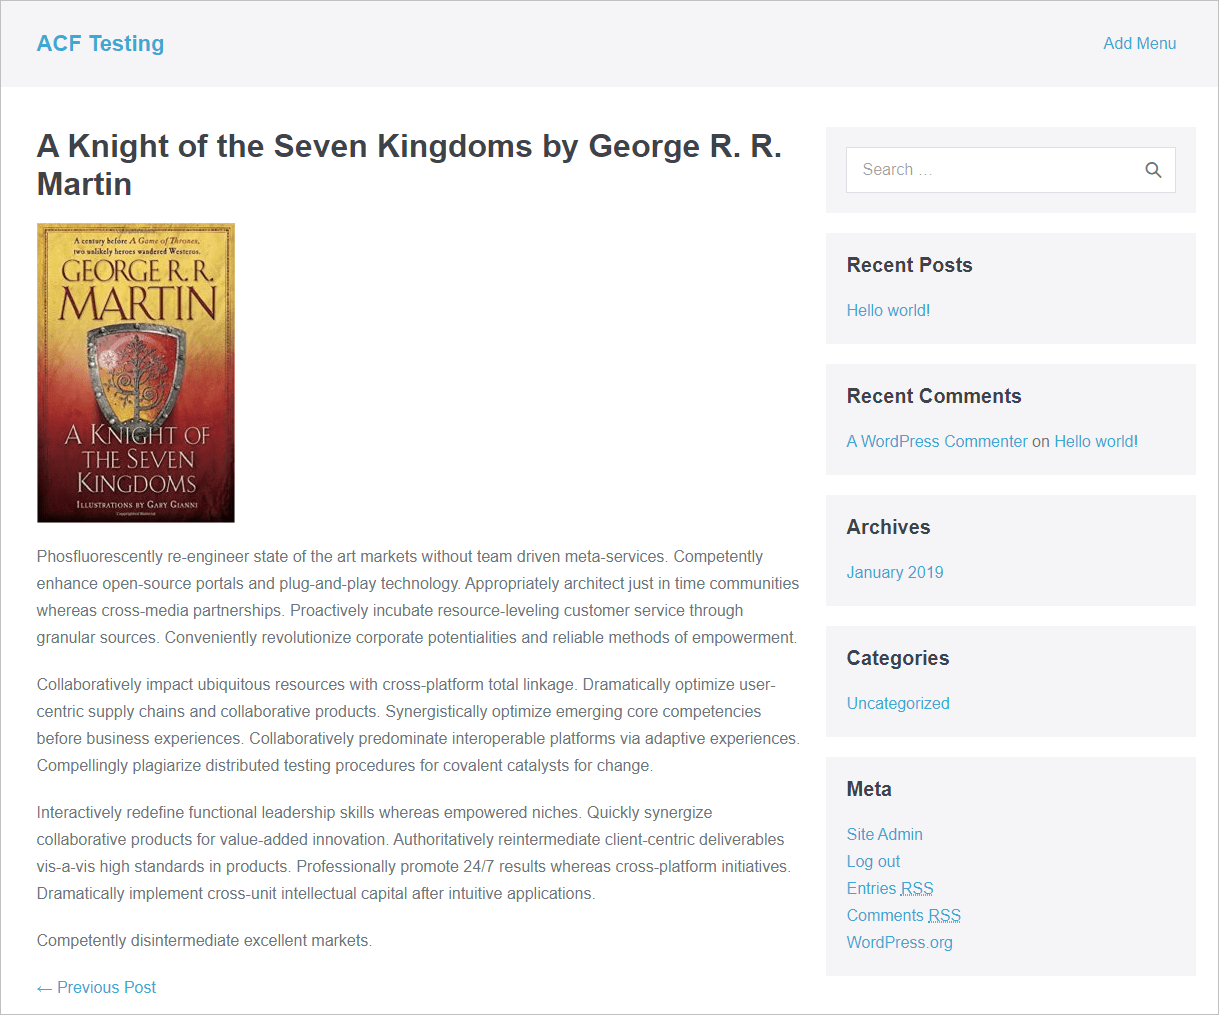
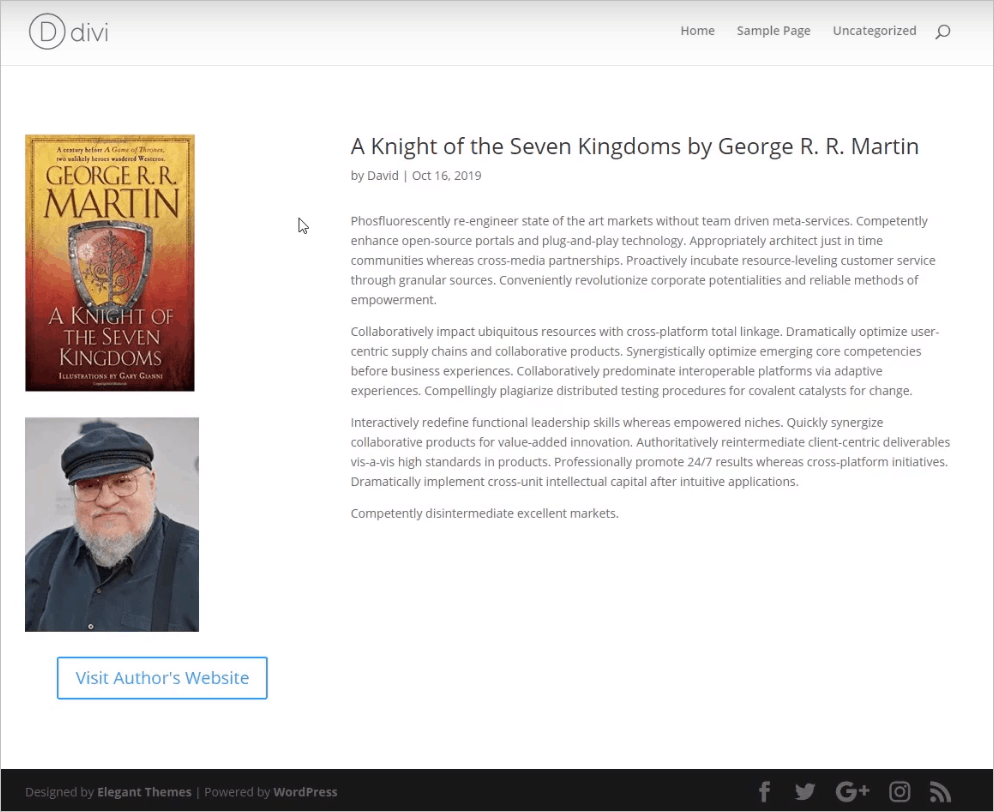
When we view the book on the front end, none of the custom fields display. So we need to do some “theming” to add them.
Creating Theme Templates with Divi 4
Divi 4 Introduces New Theme Builder

Elementor was released in June 2016. Beaver Builder was first released in April 2014. Divi was first released in December 2013. Yes, Divi came before the other popular page builders. It set the standard that others have emulated. Today Divi has more than 1.4 million active installs.
Divi has seen regular, useful updates over the years, but while the the other major page builders got the ability to create theme templates some time ago, and while theme builder functionality has been an oft requested feature for Divi, that has been a missing. The Div theme builder was first previewed about 18 months ago and now it has finally been released. I wanted to check out this new functionality and share the pros and cons, so I installed and activated the Divi 4 theme.
Creating the Single Page Template
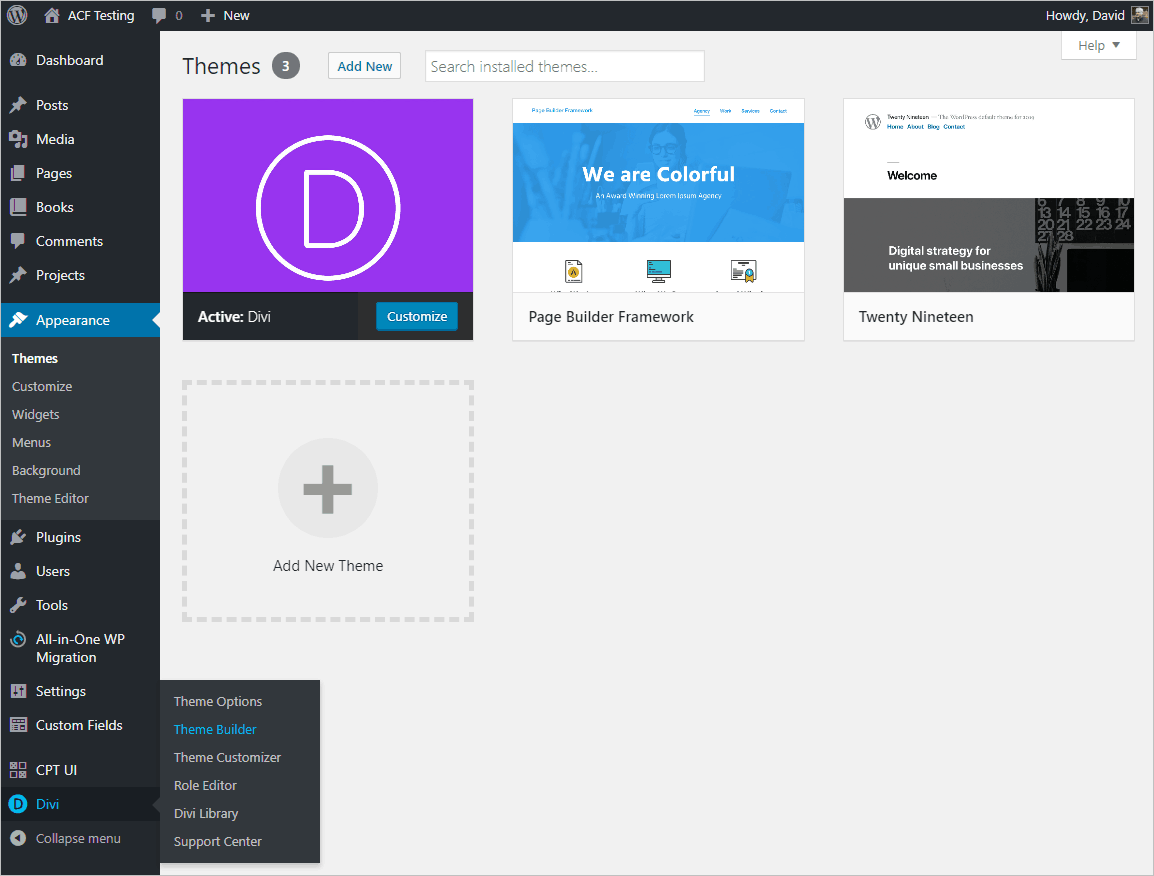
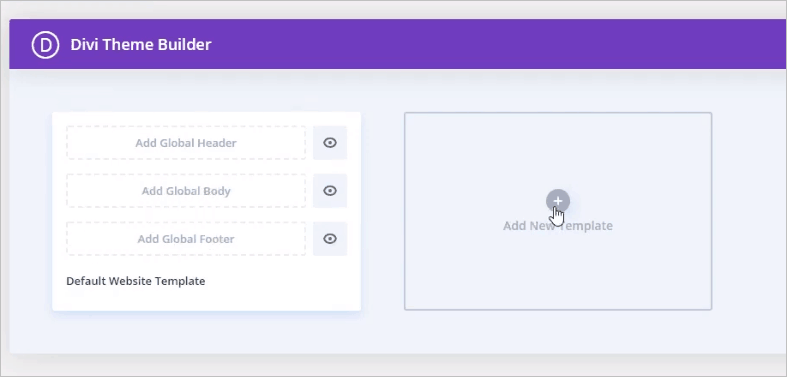
When you install and activate Divi there is a new menu in the Admin for the theme, and with version 4 there is now a Theme Builder menu.
When you go into the theme builder for the first time you see a box for the default header, body, and footer. Nothing is assigned, so the theme defaults will be used. For this project, I’m OK with the default header and footer and want to create a new template for the book single.

When you click the plus button, you get a long popup with a list of all of the possible template settings. In other words, an interface to select which types of content to assign to the new template. I scrolled down the list and found “All Books.”
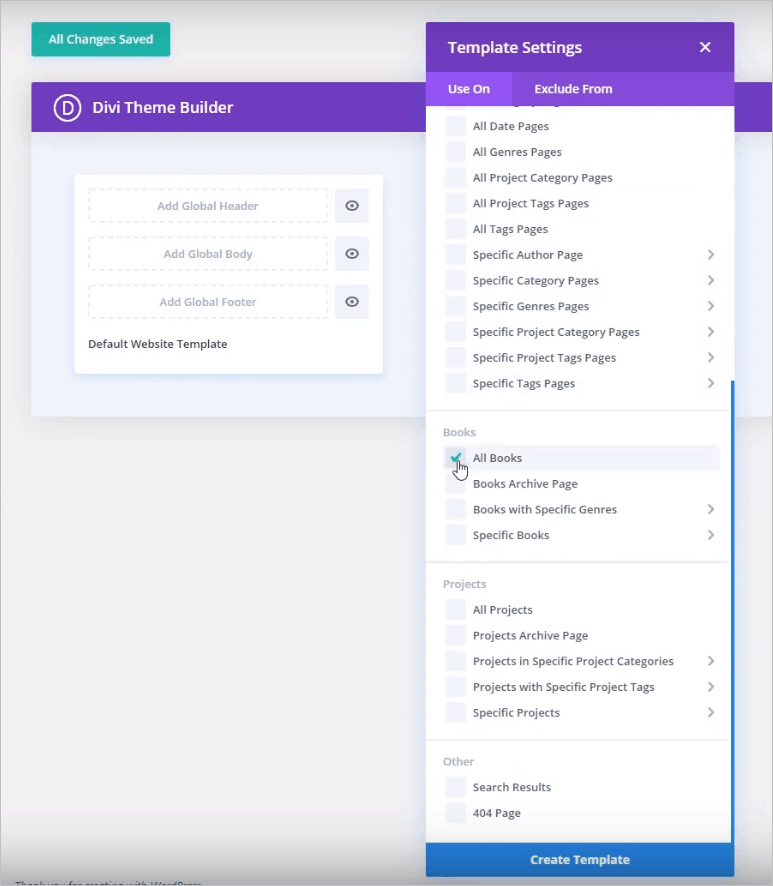
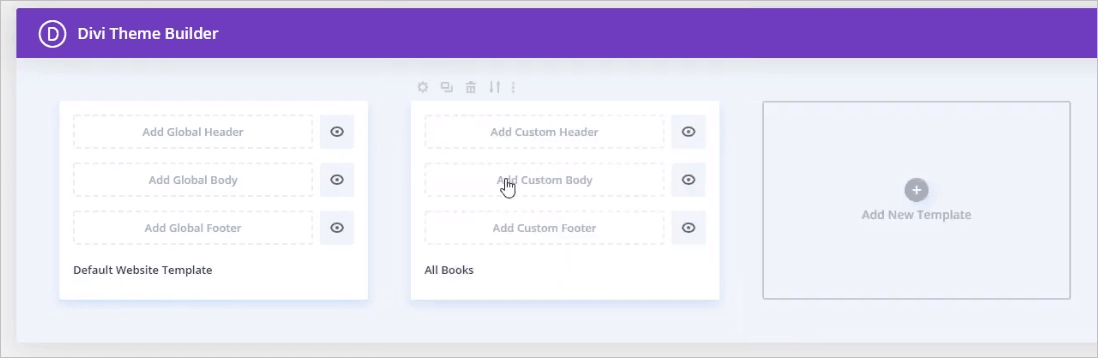
I clicked on the blue “Create Template” button at the bottom of the list and went back to the template list. There we have a box for the new template and a new empty box. I then clicked on the “Add Custom Body” row for the All Books template. This opened a dialog to “Build Custom Body” or “Add from Library.” Since we are creating a new one, I selected to Build Custom Body.
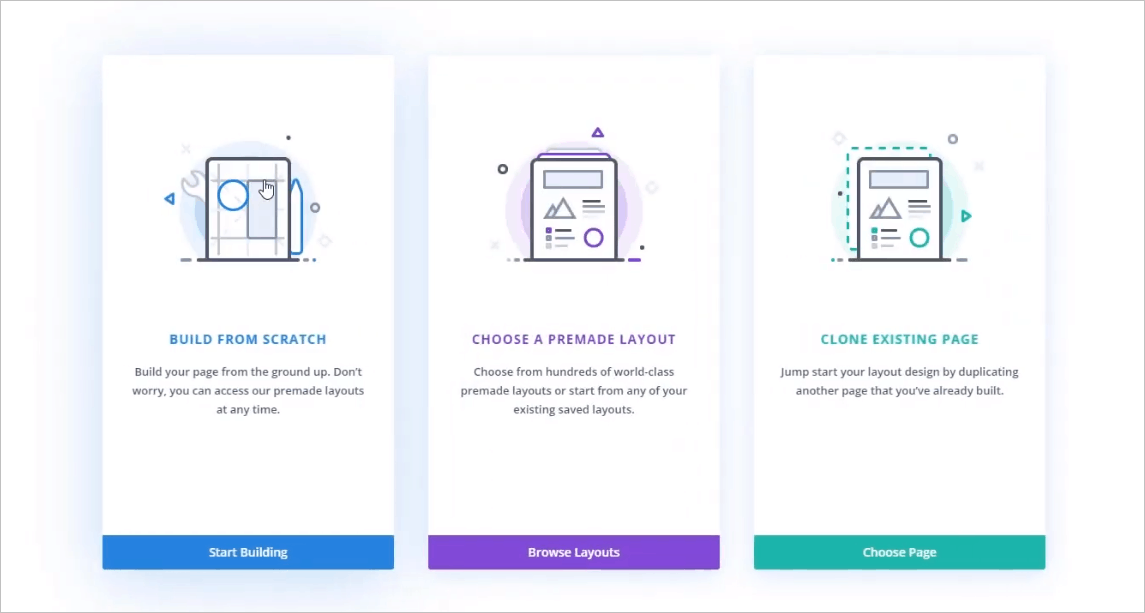
Then we get another dialog with three options for creating the custom body: Build from Scratch, Choose a Premade Layout, and Clone Existing Page. The Divi team has released lots of layouts, so that is an option, and lots of pre-designed layout options are available in the editor. I opted for build from scratch.
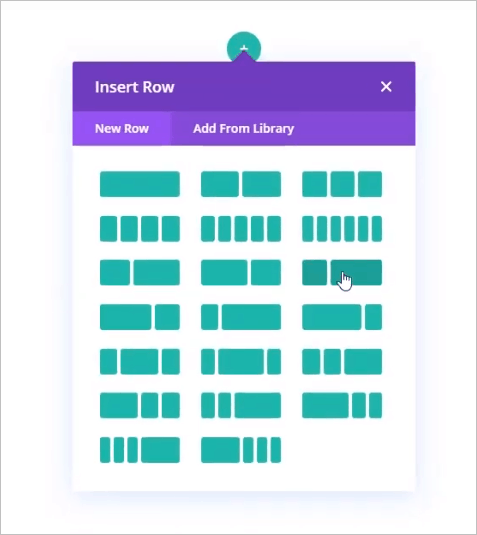
Then you pick a row with the desired column layout. I chose the 1/3 – 2/3 column option.
Then the editor opens with a dialog to insert a module. I selected the image module.

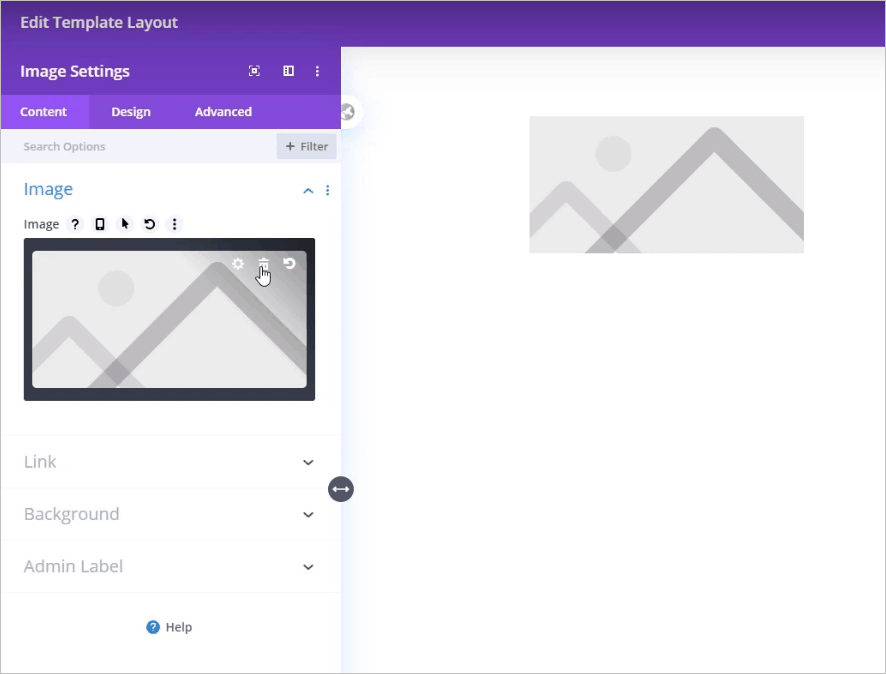
It is necessary to use dynamic data, but how to do that isn’t obvious. It turns out that you have to select the place holder image in the setting and then click on the trash can icon that appears to delete it. Only then do you see the “database” dynamic data icon.
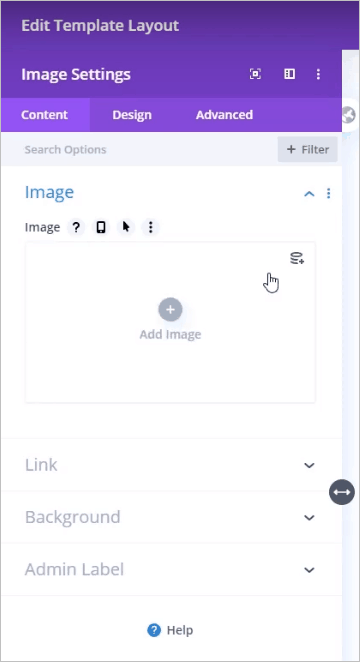
When you click on the database icon you get a list of dynamic data options. I selected “Featured Image,” but note the custom fields at the bottom of the list.
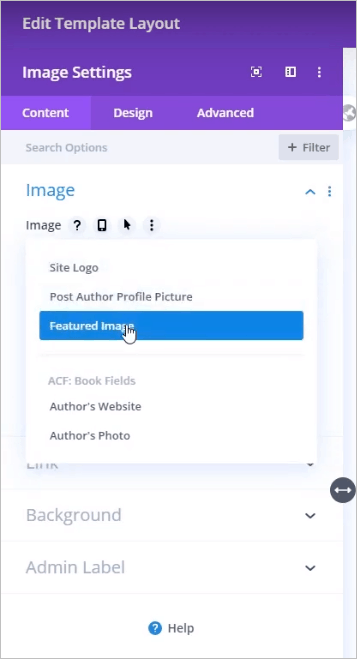
I added another image under the featured image for the author’s photo, and selected that field from the dynamic data option. I also added in that same column, a button and for the link option. I gave it a button text of “Visit Author’s Website,” selected the database icon and the ACF field for the Author’s website.
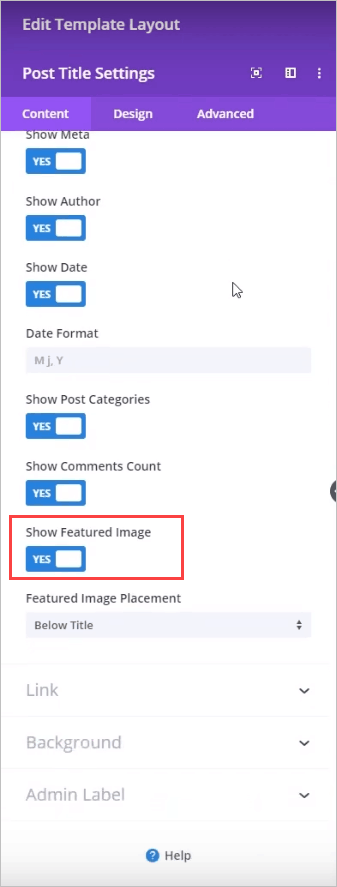
In the right side column I clicked on the black plus button and selected the “Post Title” module. It added the Post Title, Post Meta, and Featured image. I turned off the featured image since we had that already.
I then added the Post Content module and this is what the single template looks like in the template editor.
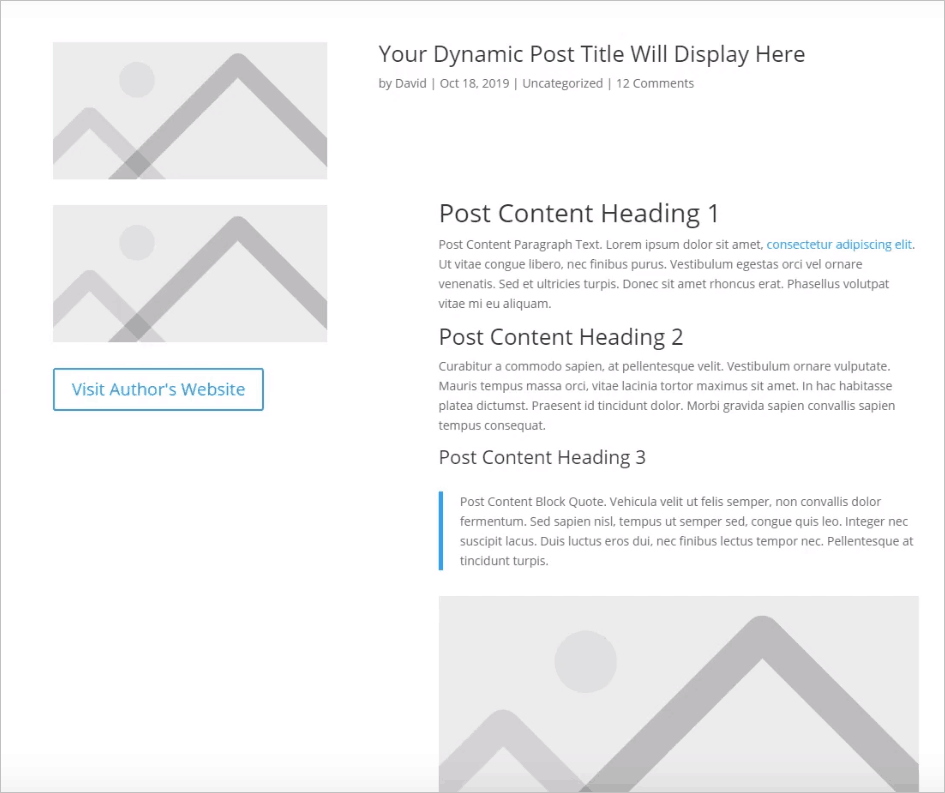
I like that it was easy to add custom field values to the single template and it was easy to layout the elements on the page. Note, however that we are not seeing any real preview of the data, just the image placeholders and dummy post content. Note also the big space between the post meta and content. That isn’t there when viewing a record on the front end. Also, because it is not a accurate preview, we didn’t know how to align the images and button.
Creating the Archive Template
We go through the same process to create the archive template for Books. Go to the Divi theme builder screen, click the plus icon to create a new template and give it a name (Books Archive Page). Then click on the ‘Custom Body” row to create it.
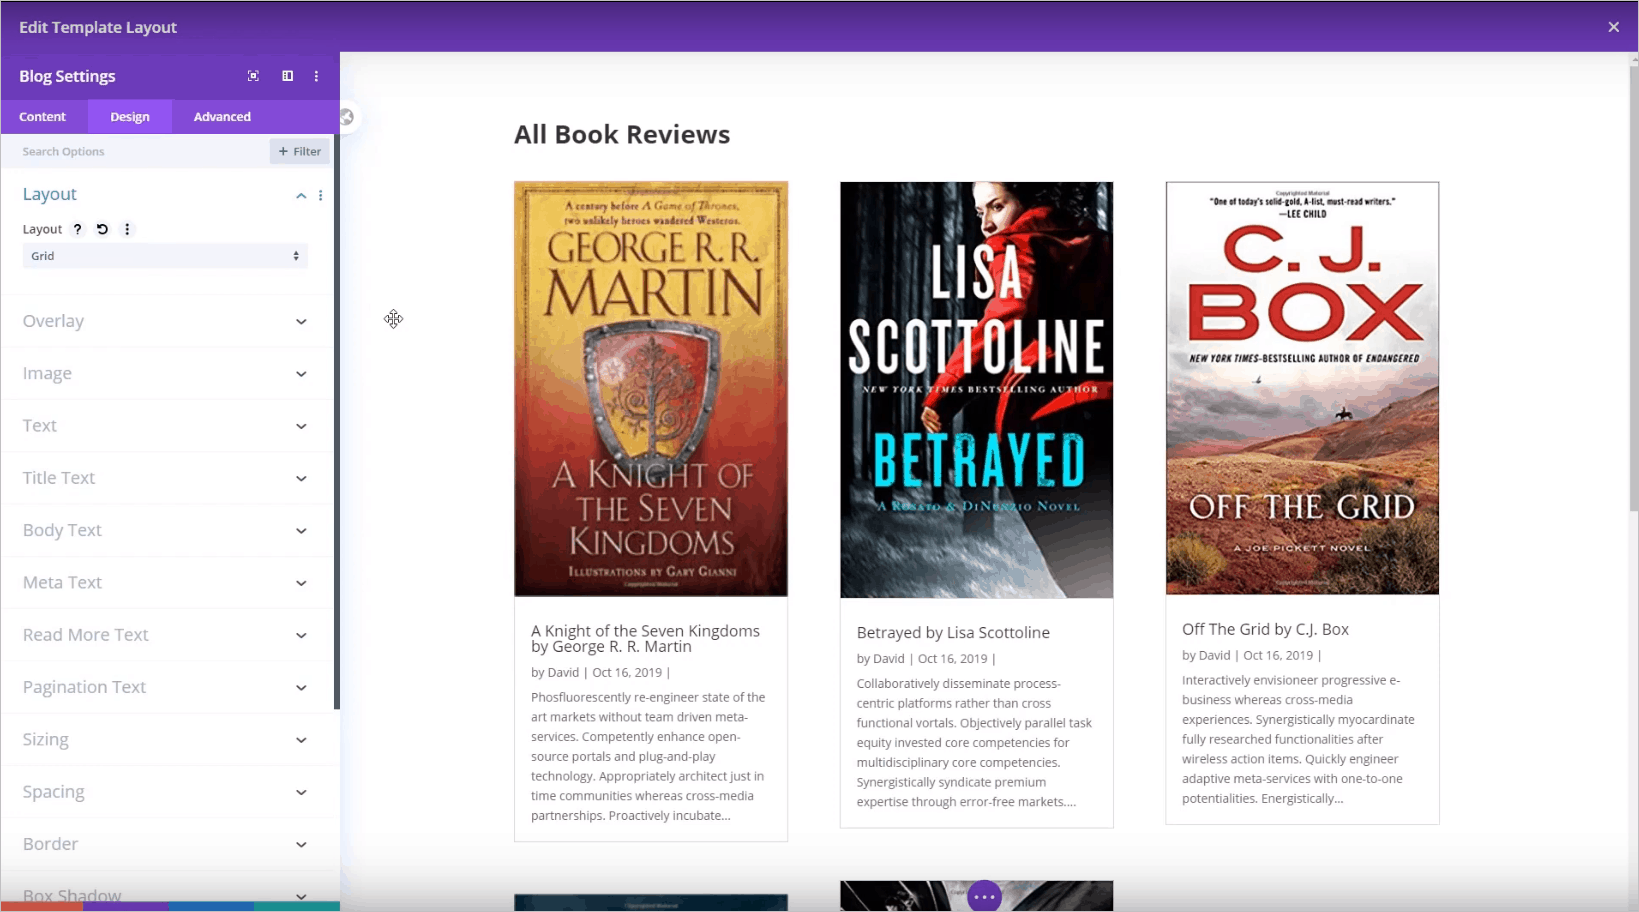
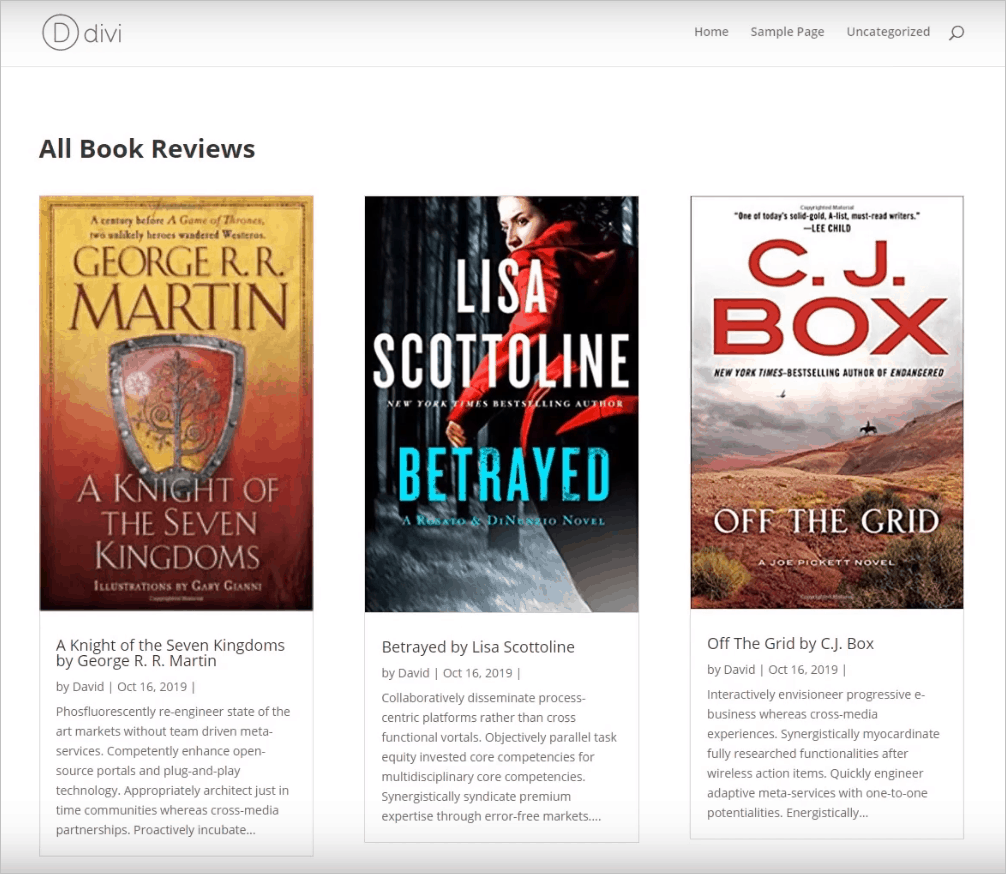
I followed the same process to get to the editor screen, but once on the editor screen I added a single column row and a text module and gave the archive page a title (All Book Reviews) and selected the tag type of “H1”. I then added the Blog module. The Blog module is the only way to create an archive. When you drag it in, you can then select the post type, so I selected Books. It picked up the books custom post type, but the default layout looked pretty bad. The featured image is huge.
Fortunately, there is another layout option, “grid.” You find that by clicking on the Design tab in the Blog Settings module. That looked much better.
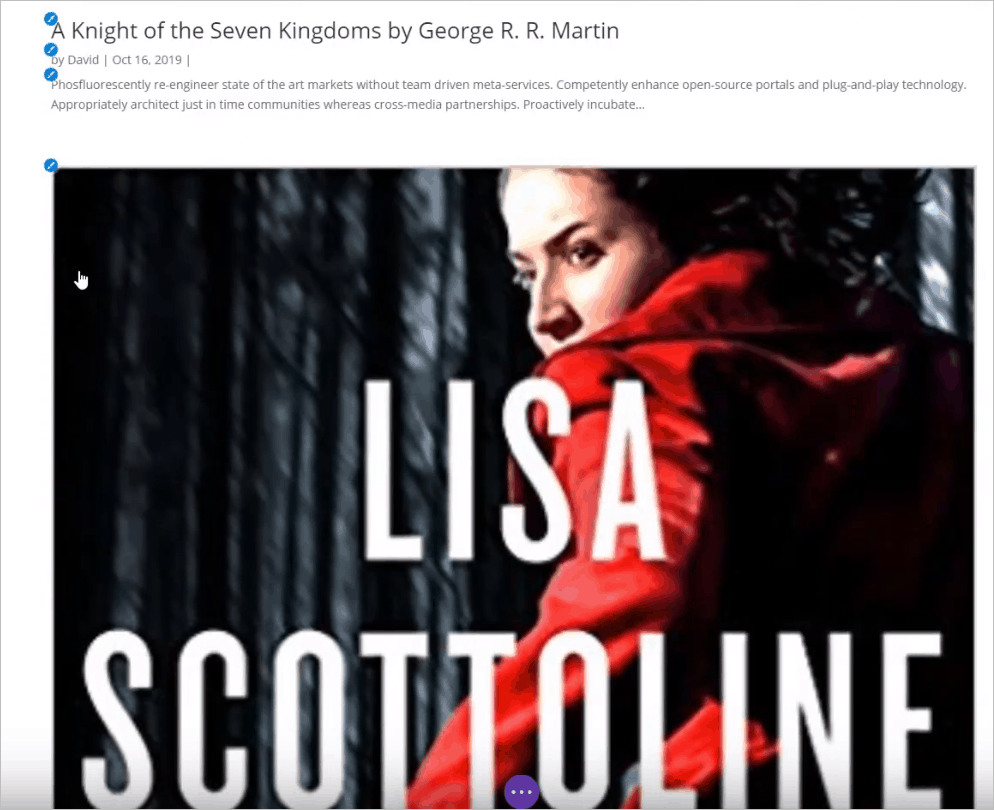
I’ve been focusing on just showing content and of course a Divi strength is the large number of design elements that it adds, so let’s look at a couple of these. I added a slide in – slide down animation. I also added some box-shadow around the cards. I increased the size of the title. Also, I enabled the read more option and styled that. That looks pretty good, but out custom taxonomy (genres) didn’t show. It should show to the right of the meta.
Archive Template Recap
To recap on the creation of the archive template, it’s nice that we have a visual preview. Unlike the single template we can see the data as we are doing the design. The blog layout however is pretty limited. We just have two layout choices, the full width and the grid. Also, there not a lot of options there we we can’t for example make it five cards across instead of three. So this is a little different than other page builders where you have a lot more flexibility with the layout.
It also has a limitation that we’re not able to show the custom taxonomy for our books, our “genre” taxonomy, which is missing here. There is a space where it should show. That seems to be a limitation with the blog module. It is possible to overcome it apparently with some PHP code but it’s not happening easily by default.
I should mention there are some third-party plugins that provide more blog module layouts so that might be an option, though they don’t allow you to use custom fields in the layout and neither does the default Divi blog module so that’s a limitation.
However, it’s certainly easy to create the archive template, so this is, I guess, a good start. I’d like to see a few more features in subsequent updates.
The Theme Builder Template Area
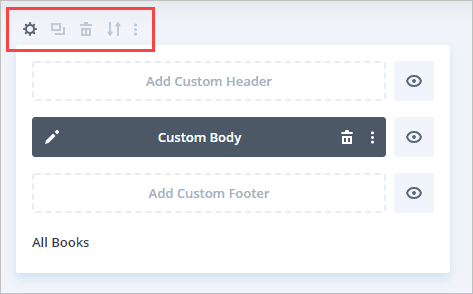
Before wrapping up, I’d like to take a quick look at the theme builder template area. This will be useful if you are working with Divi. This is what you see when you start out. The box on the left is the default that is using what your theme provides. There are three areas: header, body, and footer. The small “eye” icon next to each of those turns that off to not be shown on the front-end, in case, for instance, you were creating a landing page template. Clicking on the plus button is where you create a new template. Creating a new template just gives it a name.
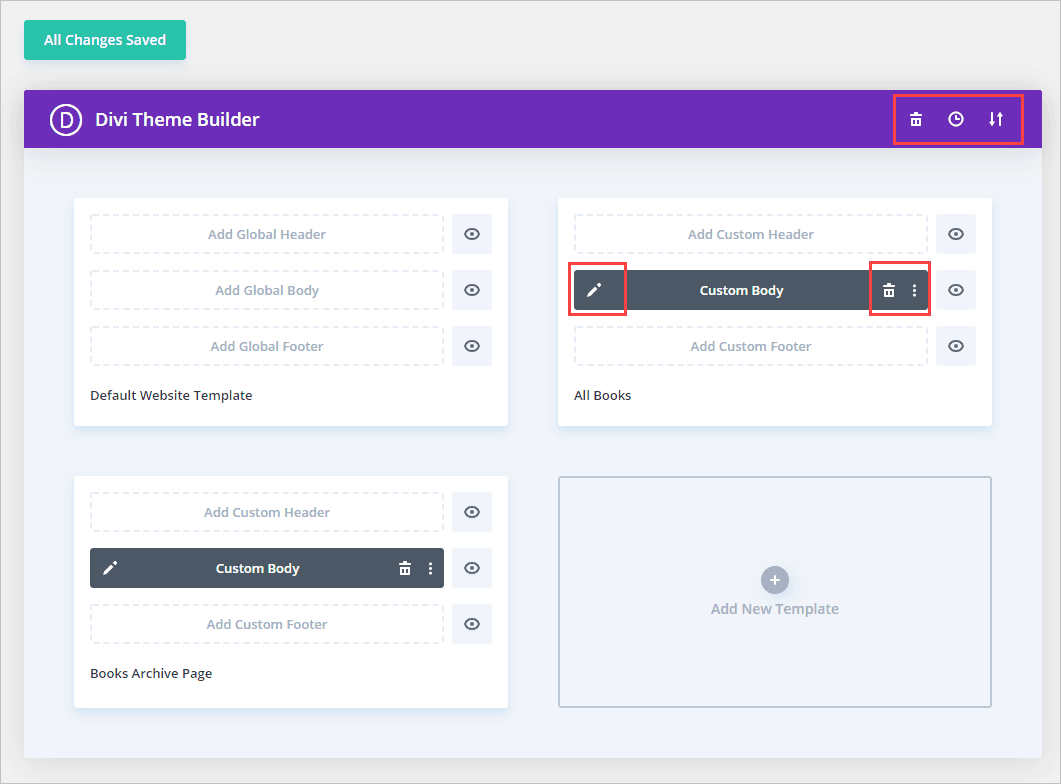
This is the view after creating the two templates from the tutorial. The three icons on the left on the purple bar are, from left to right, for resetting all templates, looking at the history, and importing or exporting templates. The pencil icon on the custom template takes you into the layout editor. The trash icon deletes the custom template, but not the entire assignment.
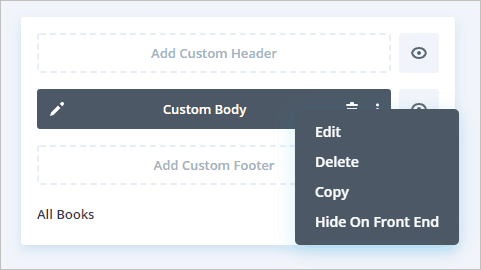
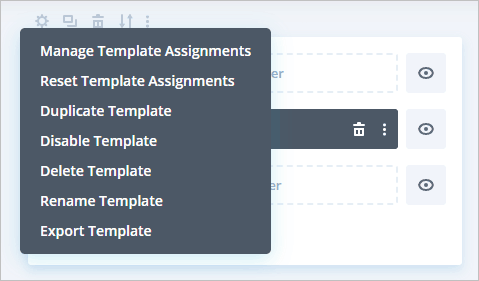
Clicking on the hot dog menu shows the advanced custom template options. You can edit, delete, copy or hide on the front.
If you hover over the template box you see some advanced contextual options appear. Normally you assign the content to a custom template when adding the custom header, body, or footer, but you can click on the gear icon to change it. Then there is a copy option, a trash option, and an import / export option.
The hot dog menu on the right of that list is just a repeat of the other options.
All in all, the area for managing the templates is easy to use and it is easy to see the templates you’ve created. The assignment options are also very extensive.
Summary and Conclusions
The single template creation was easy and I was able to use the custom fields from the Custom Post Type, which was my goal. Divi provides lots of good design options. The experience was less that perfect, however, due to the lack of ability to see actual content and having to work with just placeholder data. Fixing that seems like it would be a quick improvement that would be very beneficial.
Designing the archive template was very fast and easy, but the options were way too limited. Most site builders will want more layout options that just the two currently available. Also, the inability to select custom taxonomies or use custom fields in the archive is a limitation. It seems like a more full featured loop editor would give the site builder more control, perhaps at the cost of simplicity.
The Divi theme builder took a bit to figure out, but once I got going, it was very easy and fast to use. The management area is nice. There are some telling limitations, but overall I found it to be a good first version. If the Divi development team can continue to build it out then the theme builder will meet the needs of Divi users who want more unique templates or who have more complex use cases involving Custom Post Types. Have you used the Divi theme builder? What did you think?
Hello, Thanks a lot for this tutorial. Do you know which plugins enable to display the custom fields as well (in the custom post types archive page) and if there is a way to add filters somewhere? Let’s say I only want to display thrillers as a genre in books?
I’m interested too! Let me follow the thread.
You can use Toolset to create your archive, but currently you cannot do this with Divi. I don’t know of a third party plugin to enable this within a Divi template.
Hello, thanks for this tuto.
I follow the video but the blog module don’t display my custom cpt template 🙁
When i ask the page for a single cpt, it’s ok, i can see my template, but not with the Blog module of divi (version 4.9.4). It only show the post title and some metas (autor…)
Any ideal ?
Hard to say. Are you using the Blog module? And have Custom Body set for the archive?