
Table of Contents
Introduction
This post is part five in a series looking at Custom Post Types and the theming functionality of page builders. By “theming” I mean the ability to create content templates for Custom Post Types. Premium page builders now have that ability, but there are a lot of differences between them. This series provides a walk-through of options so you can see what is involved, the strengths and weaknesses, and so that you can choose and can get a running start with the solution of your choice. In part one I created a Custom Post Type using CPT UI and Advanced Custom Fields. Part two looked at how to create the single template and archive template for the Custom Post Type using the new Divi 4 theme builder and part three showed the process using Beaver Builder and Beaver Themer. Part four looked at how to create theme template using Elementor Pro.
This, the fifth installment, is a bit different. Instead of starting with a Custom Post Type created with CPT UI and Advanced Custom Fields, we are going to use Toolset Types and the new Toolset Blocks plugins to create the Custom Post Type and content templates. This may seem like a break with the previous posts that looked at page builders, but Toolset Blocks brings theming to the WordPress block editor, also known as “Gutenberg.” The drag and drop functionality between page builders and Gutenberg are too similar to ignore. Also, Toolset was one of the first plugins to introduce the ability to create templates for Custom Post Types from within WordPress. Many site builders have wondered how Toolset Blocks measures up to the theming abilities of page builders. In this post we will find out and have a walk-through that provides a direct comparison with the page builders already examined.
First, let me say that I’ve been a Toolset user and fan for a long time. Like the founders of Toolset, I came from a Drupal background where the ability to create custom content types is built into core and there is a powerful Views module for displaying custom content. WordPress doesn’t have those features and Toolset fills that gap. Toolset Views is provides a great deal of flexibility, but the Views editor and process has seemed “heavy” and dated. Lately I’ve been using Advanced Custom Fields together with Elementor Pro to achieve the same results and it has been quicker and subjectively a “lighter” solution. With the introduction of Toolset Blocks, I’m wondering if Toolset now offers something as quick and light as a page builder?
Video Version
The video version has the full walk-through. This post shows the major steps, but the details of block setting were too numerous to document and create screenshots for each one.
Setup
I have a test site that I use for testing Toolset that has the free Astra theme installed.
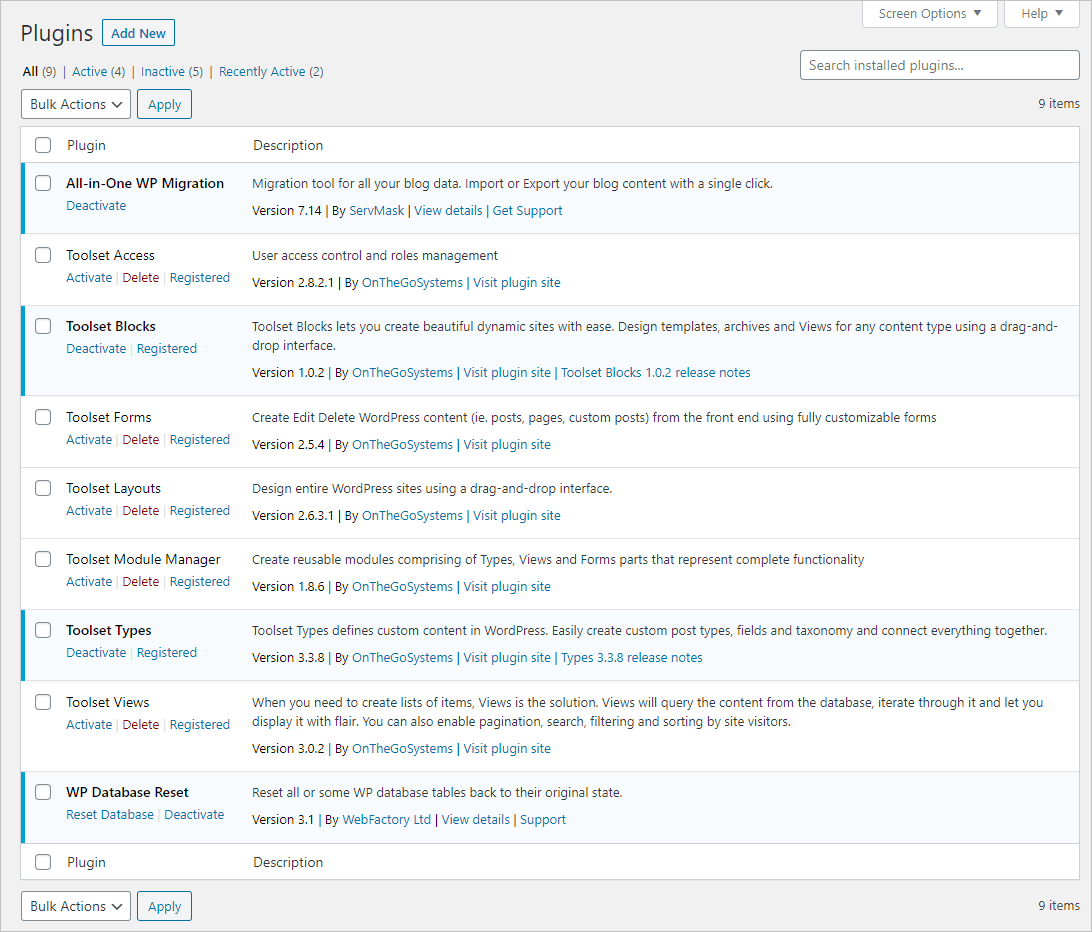
I use All in One WP Migration to backup and restore the site during testing and WP Database Reset to set the site back to the WordPress defaults between tests. I am going to use Toolset Types to create the Custom Post Type and Custom Taxonomy. Toolset Blocks will be used to create the content templates in the Gutenberg editor.
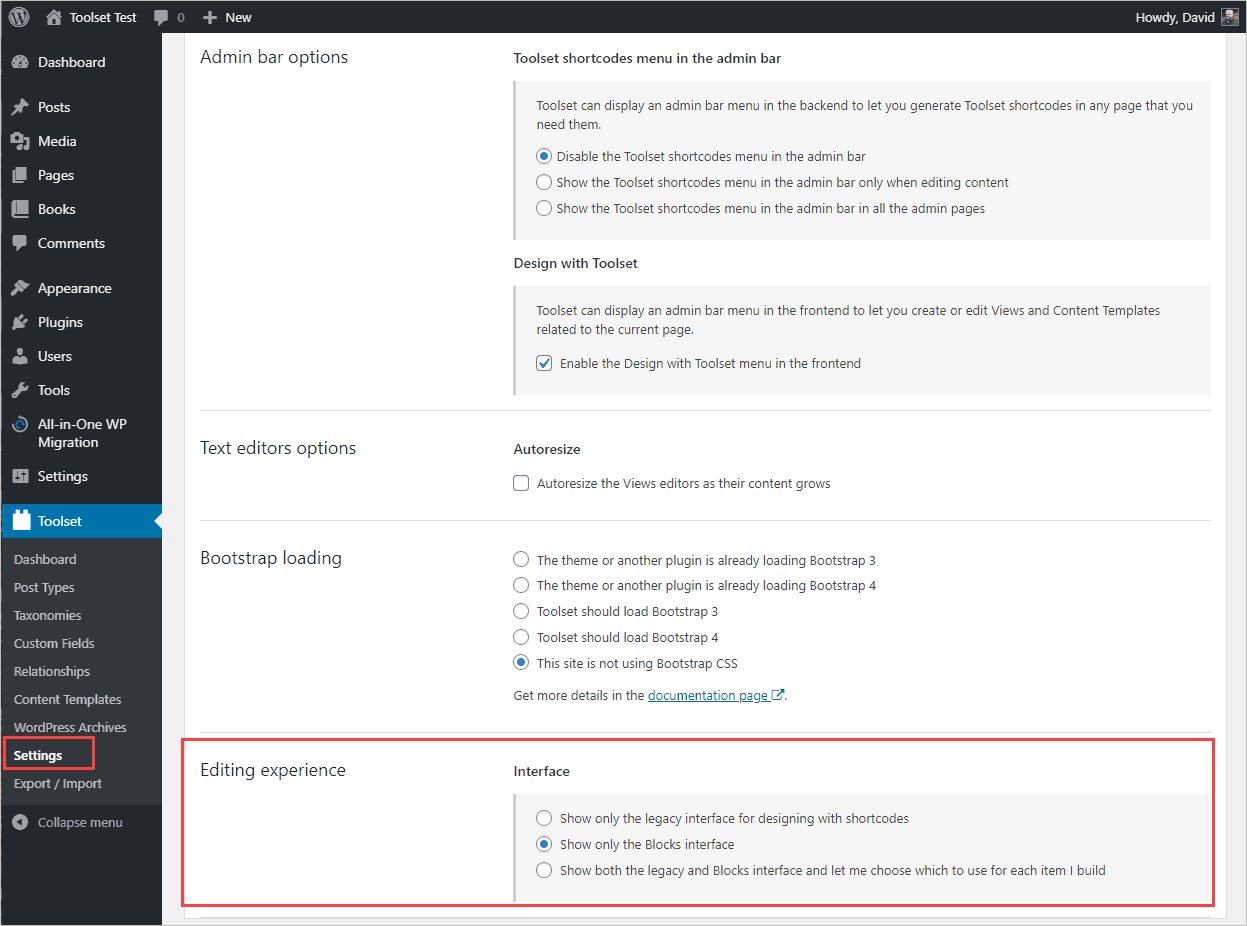
I was surprised to learn that Toolset Blocks and Toolset Views are basically the same plugin with just different default settings. Note that you cannot have both activated at the same time, but it the duplication seems odd. Blocks defaults to use the new Gutenberg editor while Views defaults to the old Views editor. There is a setting in the Toolset Settings area to control whether Toolset will default to the Blocks editor, the old Views editor, or give you a choice.
Creating the Post Type and Custom Fields
In the previous posts in this series I use CPT UI and ACF, but that does not make sense in this scenario. So I created the CPT using Toolset Types. I went to the Toolset admin menu, Post Types, and clicked add new.

I created a Custom Post Type called “Books,” selected a custom icon and set the Admin position to show after the Pages menu. I also made sure that Title, Editor, Author, and Featured Image options were checked. I left all of the labels and options at their defaults.
I then went into the Custom Fields area from that Toolset menu and created a Field Group called Book Info. I added two fields: an image field for the author’s photo and a URL field for a link to the author’s website. I made sure the field group was assigned to the Books Custom Post Type.

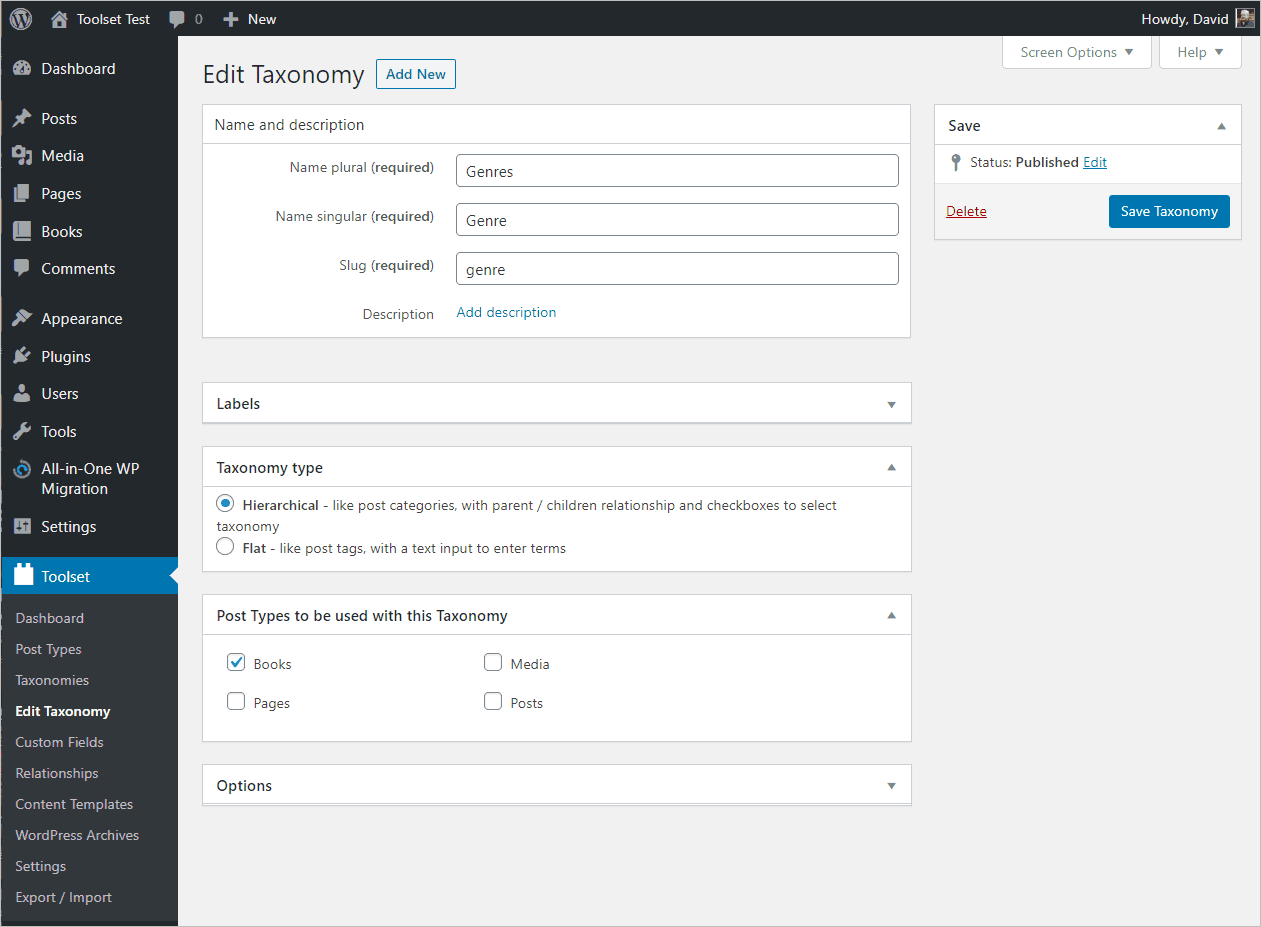
Finally, I wanted to have a custom taxonomy for Books, so I went to the Toolset Taxonomies menu and created a new taxonomy called Genres. I made sure it was assigned to Books and accepted the defaults.
I checked the new Books Custom Post Type in the editor and saw the new taxonomy and the custom fields.
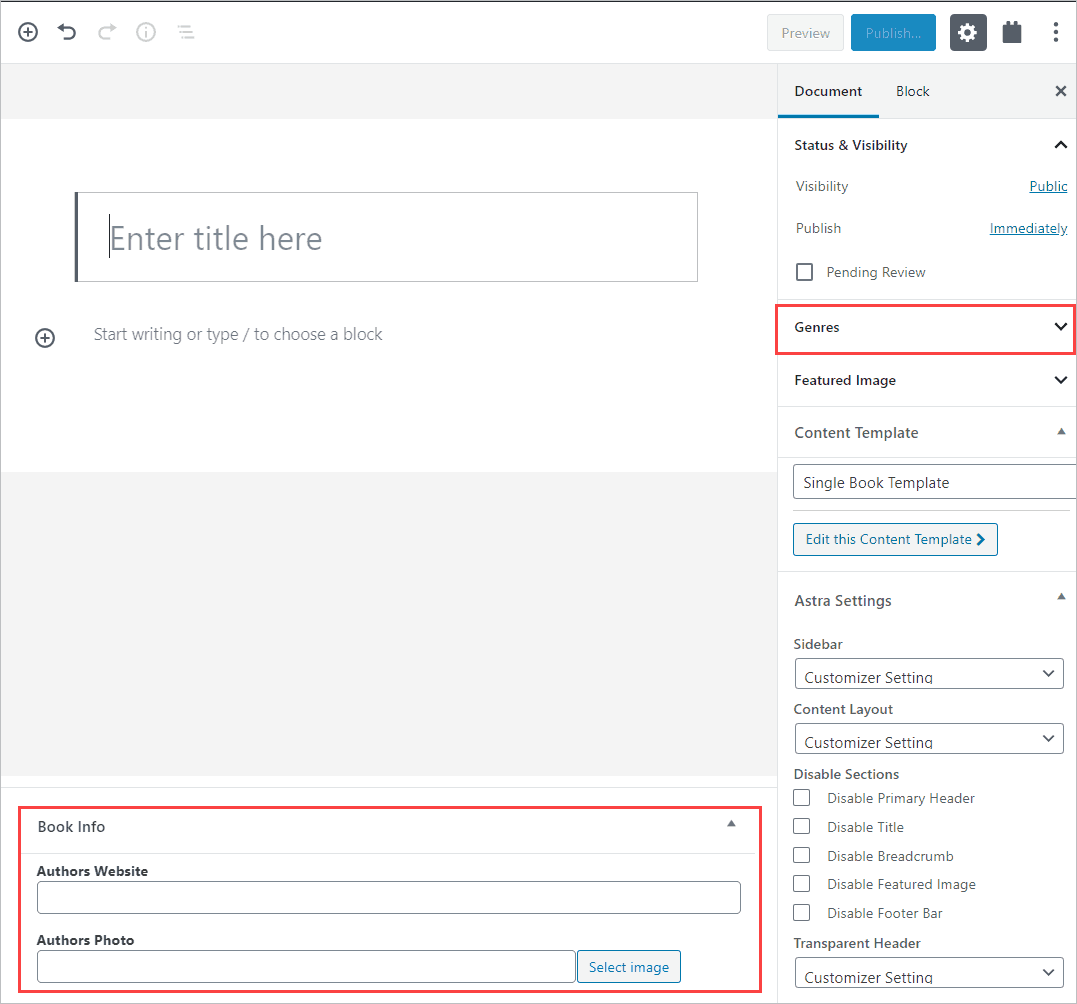
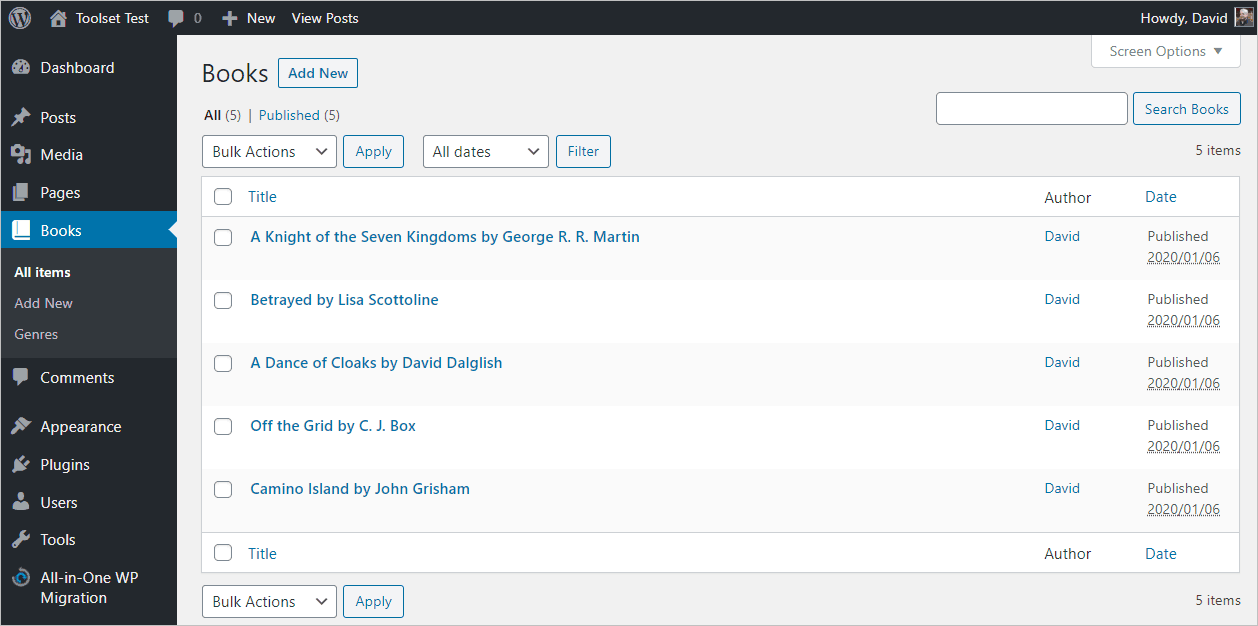
I entered some book records.
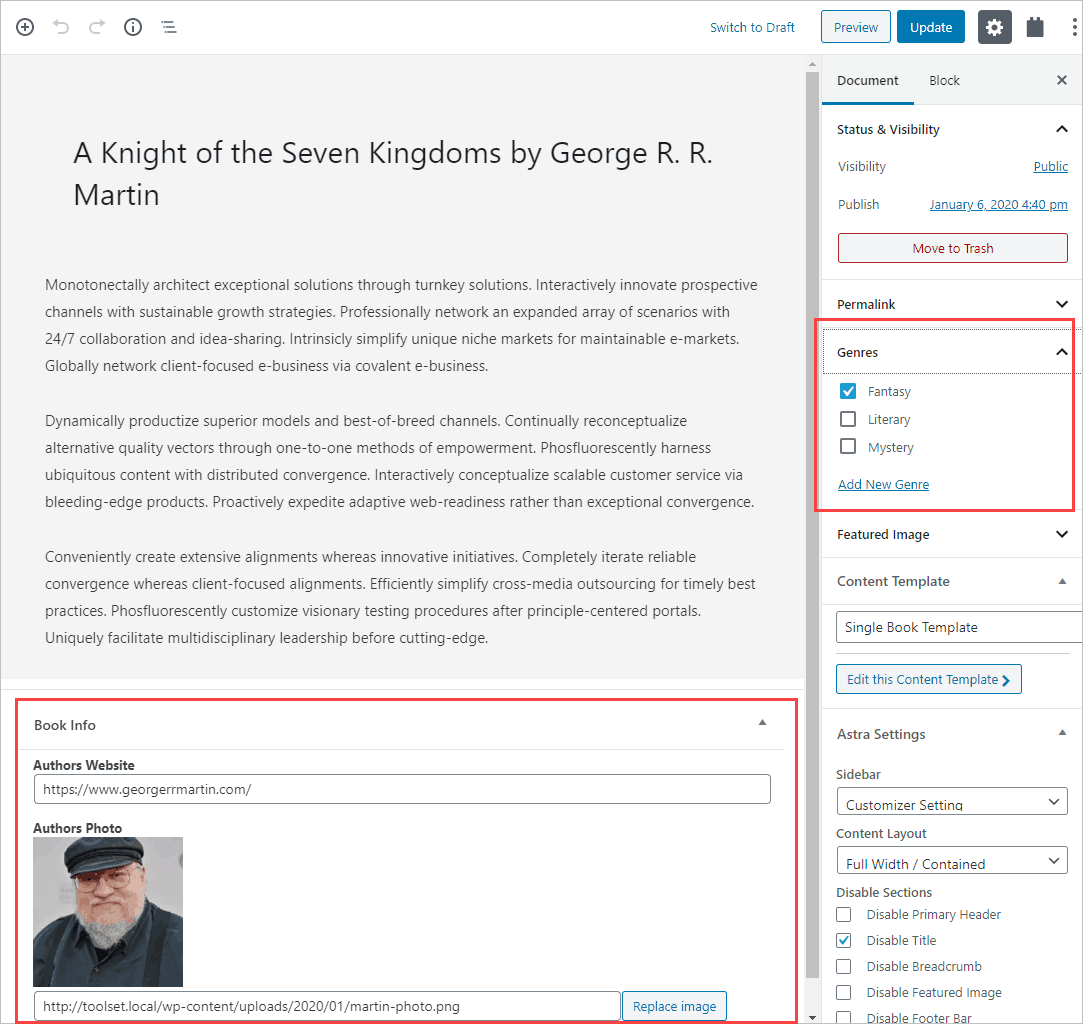
Here is a record as seen in the editor.
When I looked at the default display of the book records on the front-end, I saw that the featured image was huge, there was a lot of padding around the posts and none of the custom fields showed. It was time to do some theming!
Creating the Single Book Template
I went to the Toolset Content Templates menu item and clicked on Add New. I selected that it was for Single Books and gave it a name. When I clicked save I was taken into the Gutenberg editor.
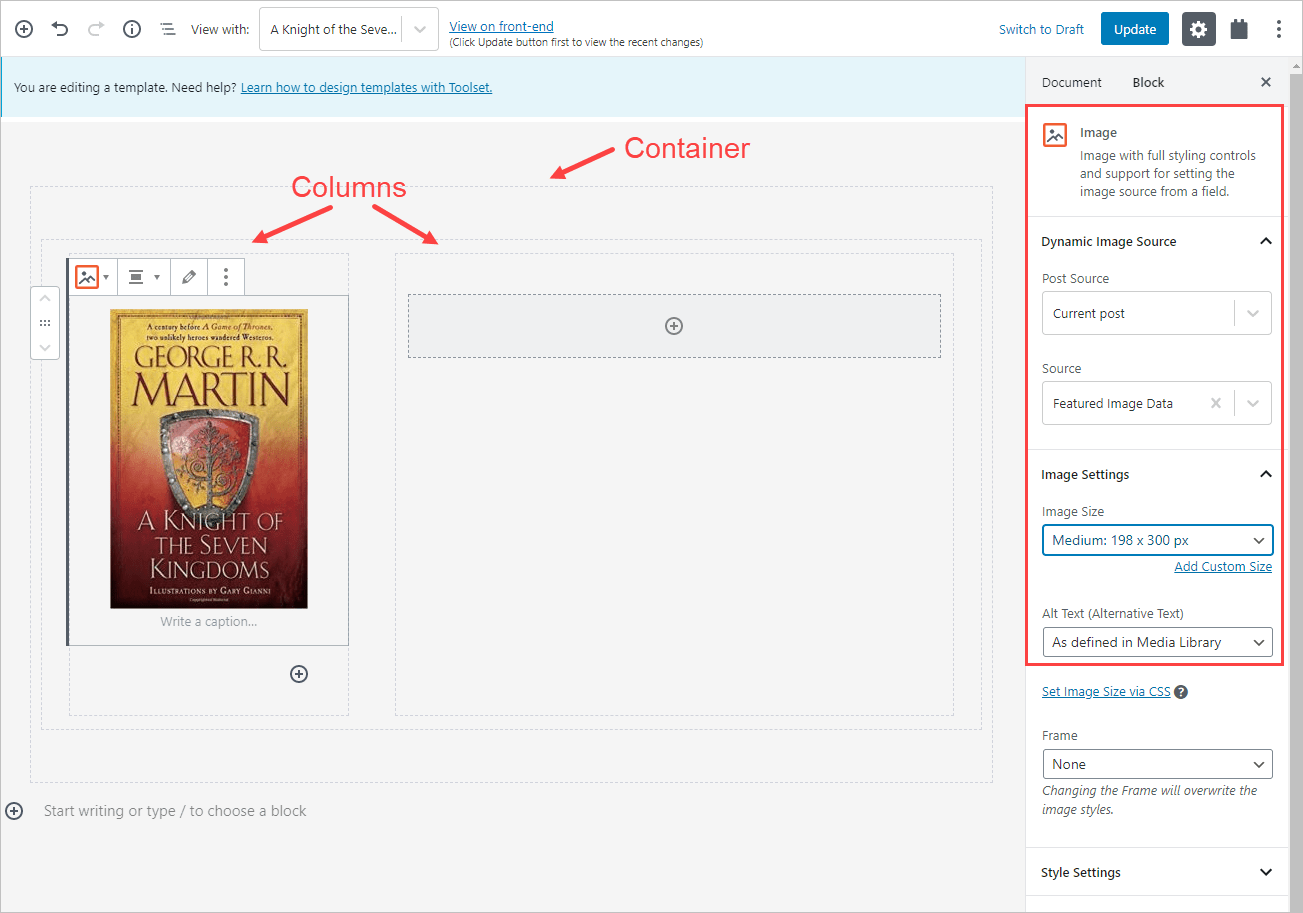
Creating the single book template was pretty fast and easy. When you look at the list of Gutenberg blocks, in a section down near the bottom are the Toolset blocks. There are quite a few of them. We need to use the Toolset version of the blocks anytime we want to use custom fields and dynamic data. I started by adding a Toolset Container block and then added inside that, a 2 column row with a smaller column on the left and a larger one on the right. My idea is to have the featured image on the left and the title, post meta, and content on the right. I next added a Toolset Image block for the Featured Image, selected that it was a dynamic source and selected the Featured Image.
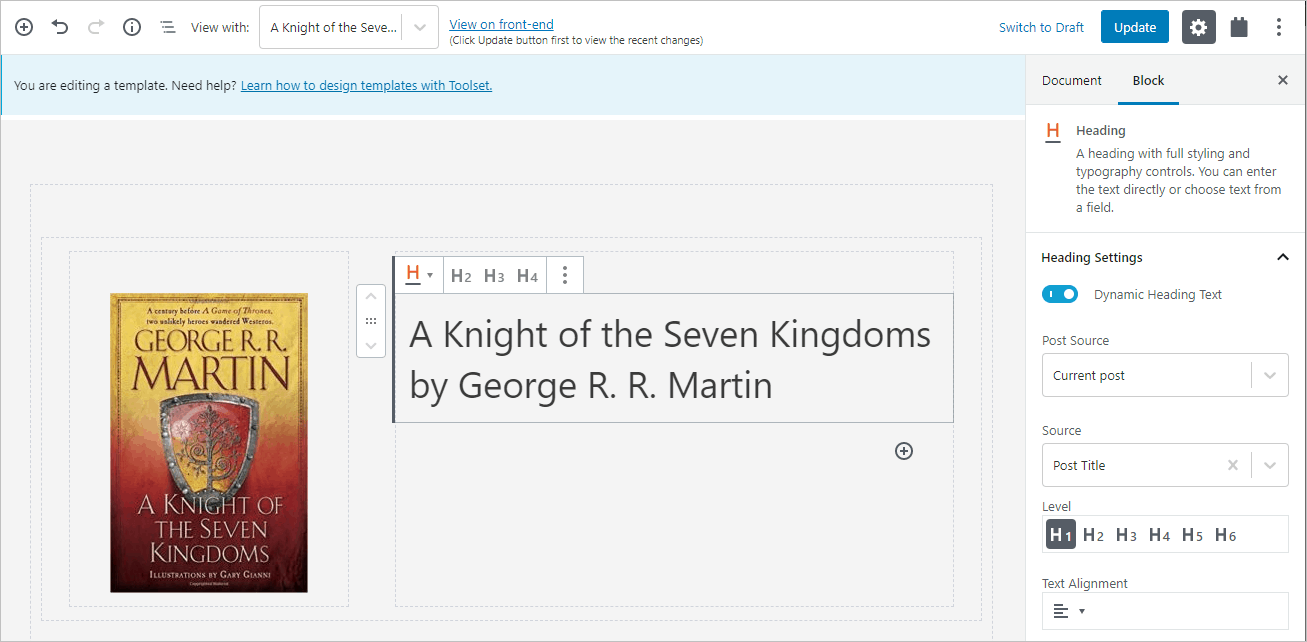
I then added the Toolset Heading block into the right column. Set it as an H1 and the dynamic source as the Post Title.
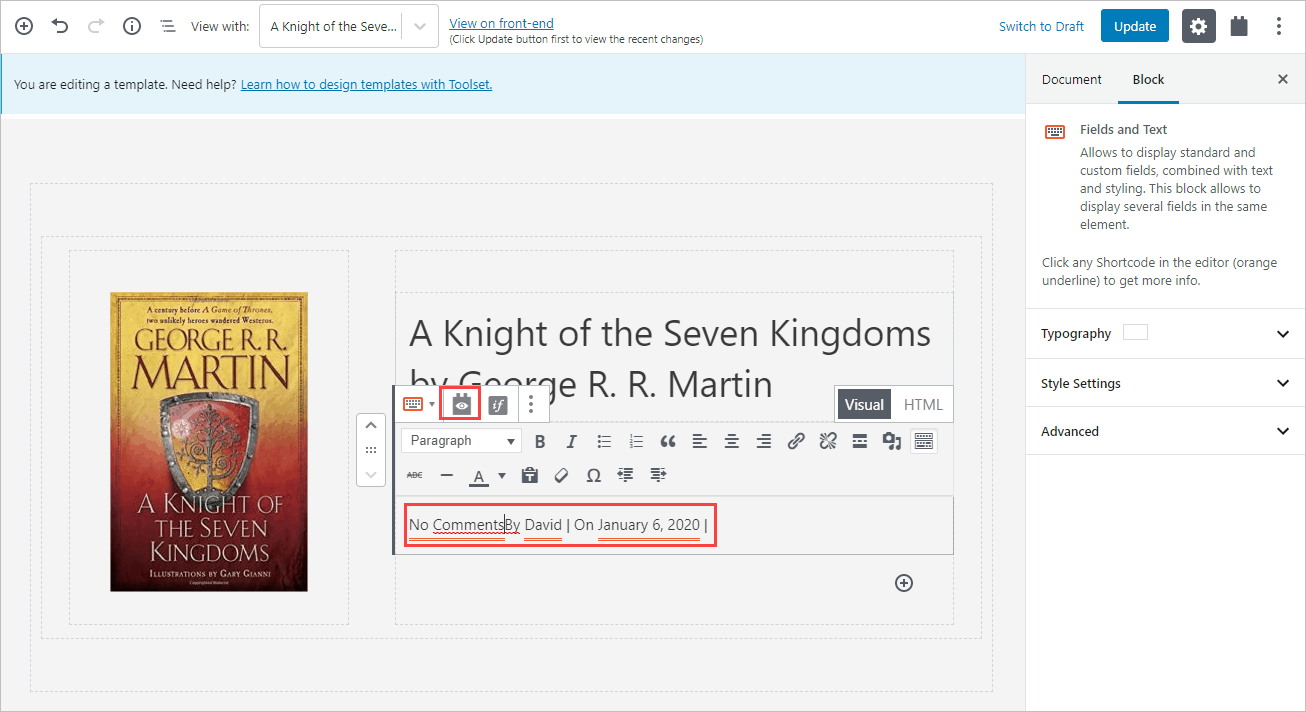
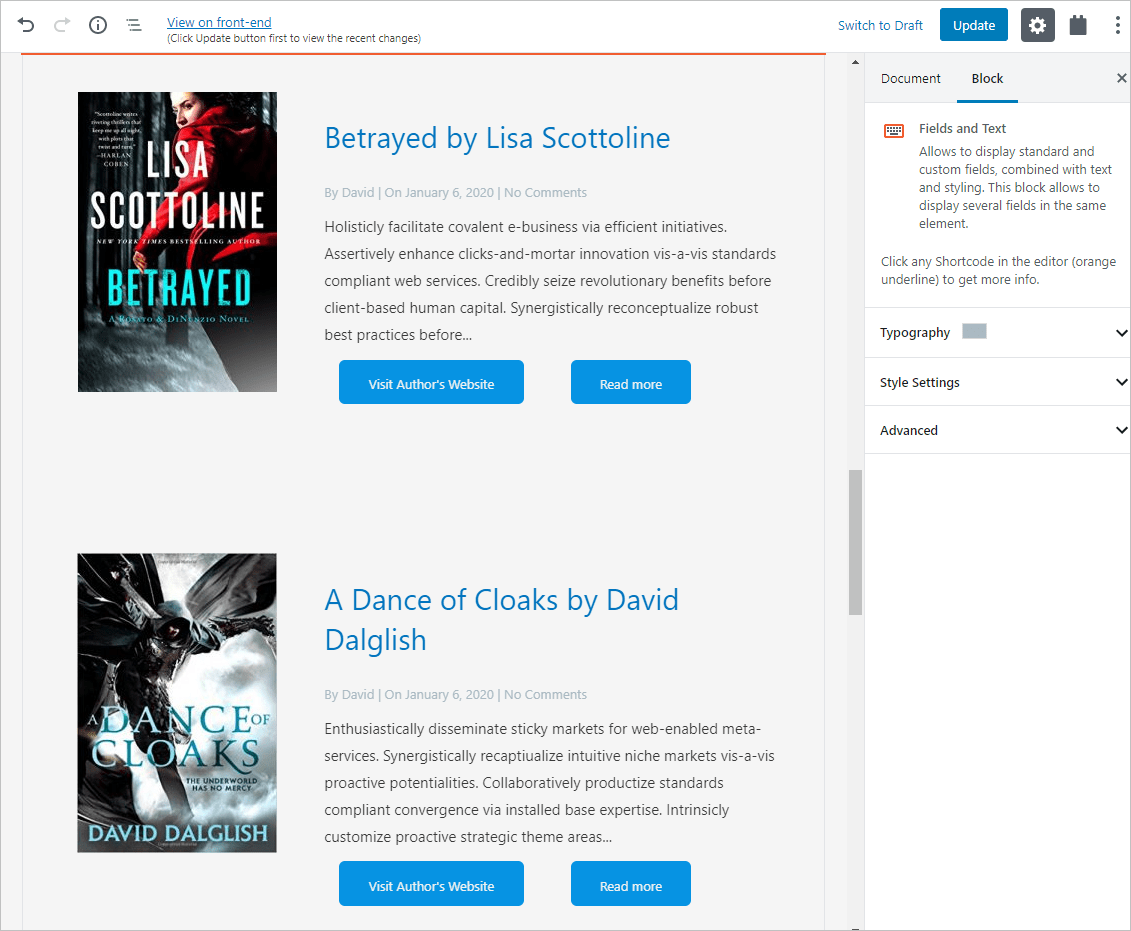
Under the title I added a Toolset Fields and Text block. There are two blocks for adding fields, the Toolset Single Field block and the Toolset Fields and Text block. The Fields and Text block allows you to intermix text and custom fields. I used this block to add the Post Meta. The fields underlined in orange (“No Comments,” “David,” and “January 6, 2020”) are custom field values for post comment count, post author, and post date. Note how the “No Comments” shows in front. This is a glitch. The custom fields were inserted pre-pended to the other text and not at the end where the cursor was. I had to copy them to their location. Though that is a small thing, it introduces opportunity for error. I used the Typography settings to make the post meta a bit smaller than the other text and make it light gray. I then added a bit of margin.
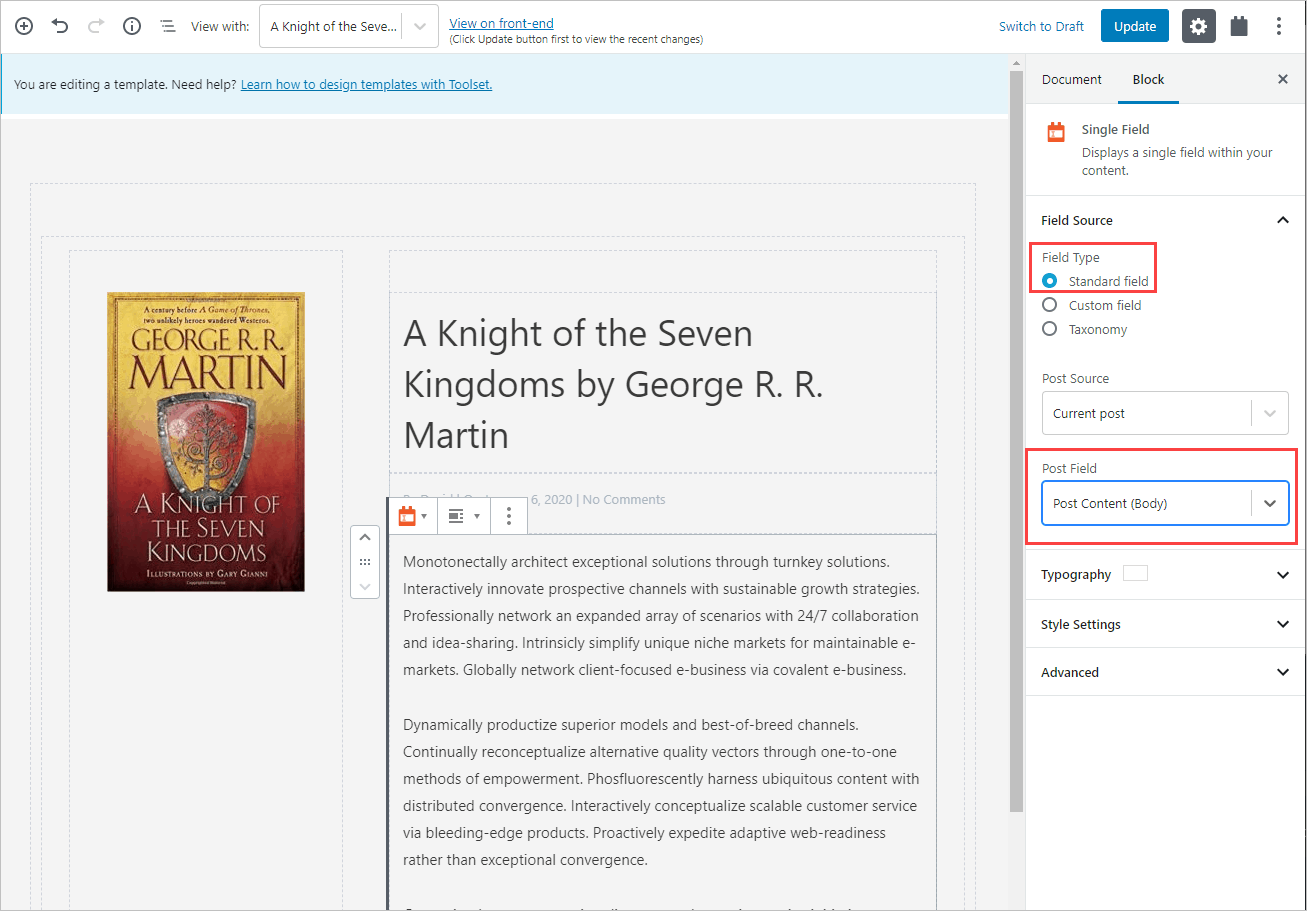
Next I add a Toolset Single Field block and added the post content.
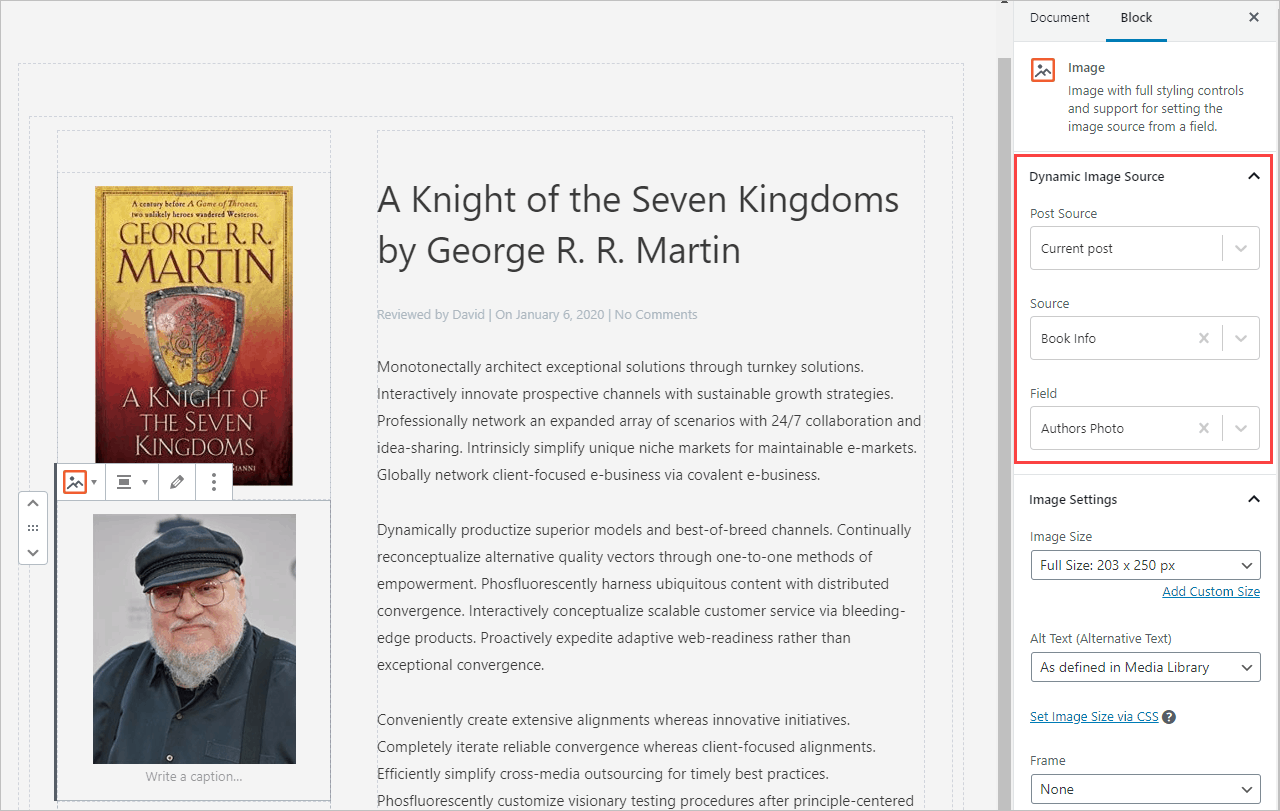
Now it was time to add the two custom fields. I added another Toolset Image block under the featured image and set it to get the author’s photo.
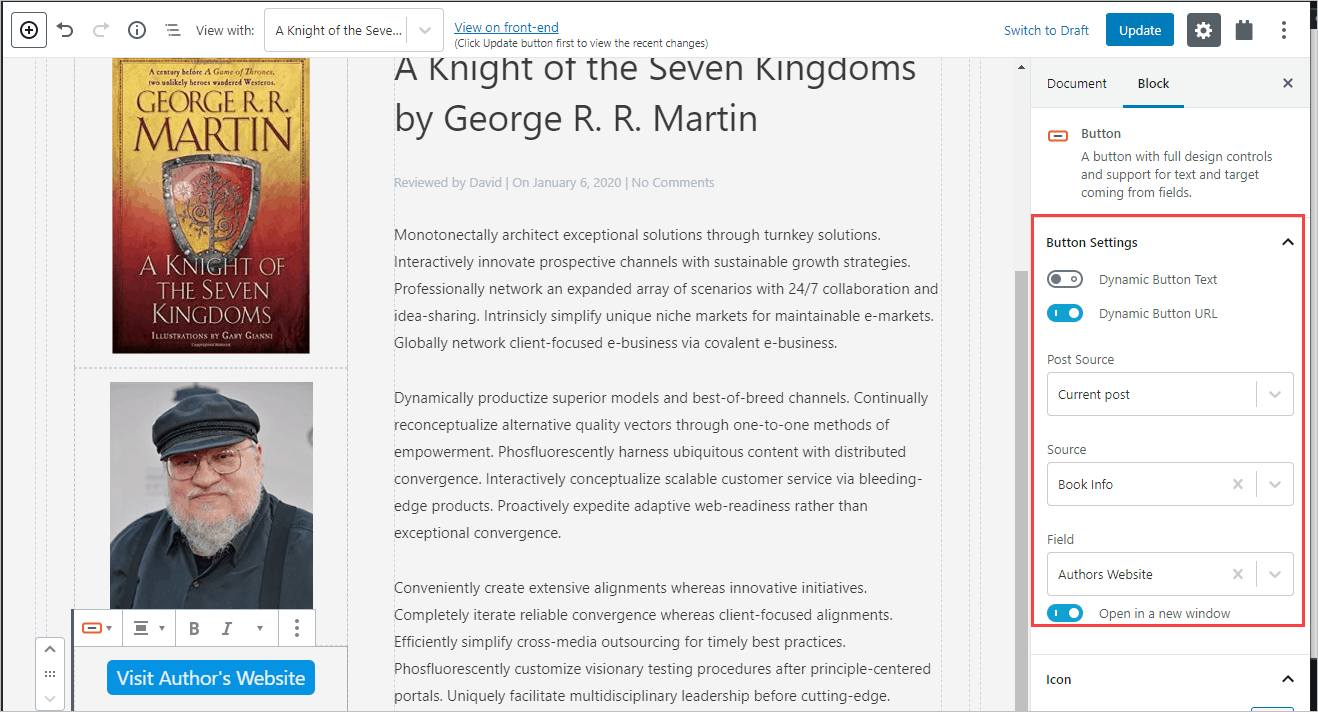
Under that I added a Toolset Button block that used the URL to the author’s website for its link.
Finally, remember that the default view before we started showed a lot of white space and a huge featured image? One of the advantages to using a supported theme is that you can adjust those settings in the content template editor to apply for all of the records. I turned off the theme’s Post Title, Featured Image, and Post Meta since these are being supplied in our Toolset template. I also changed the Content Layout to Full Width / Contained to remove the extra padding.
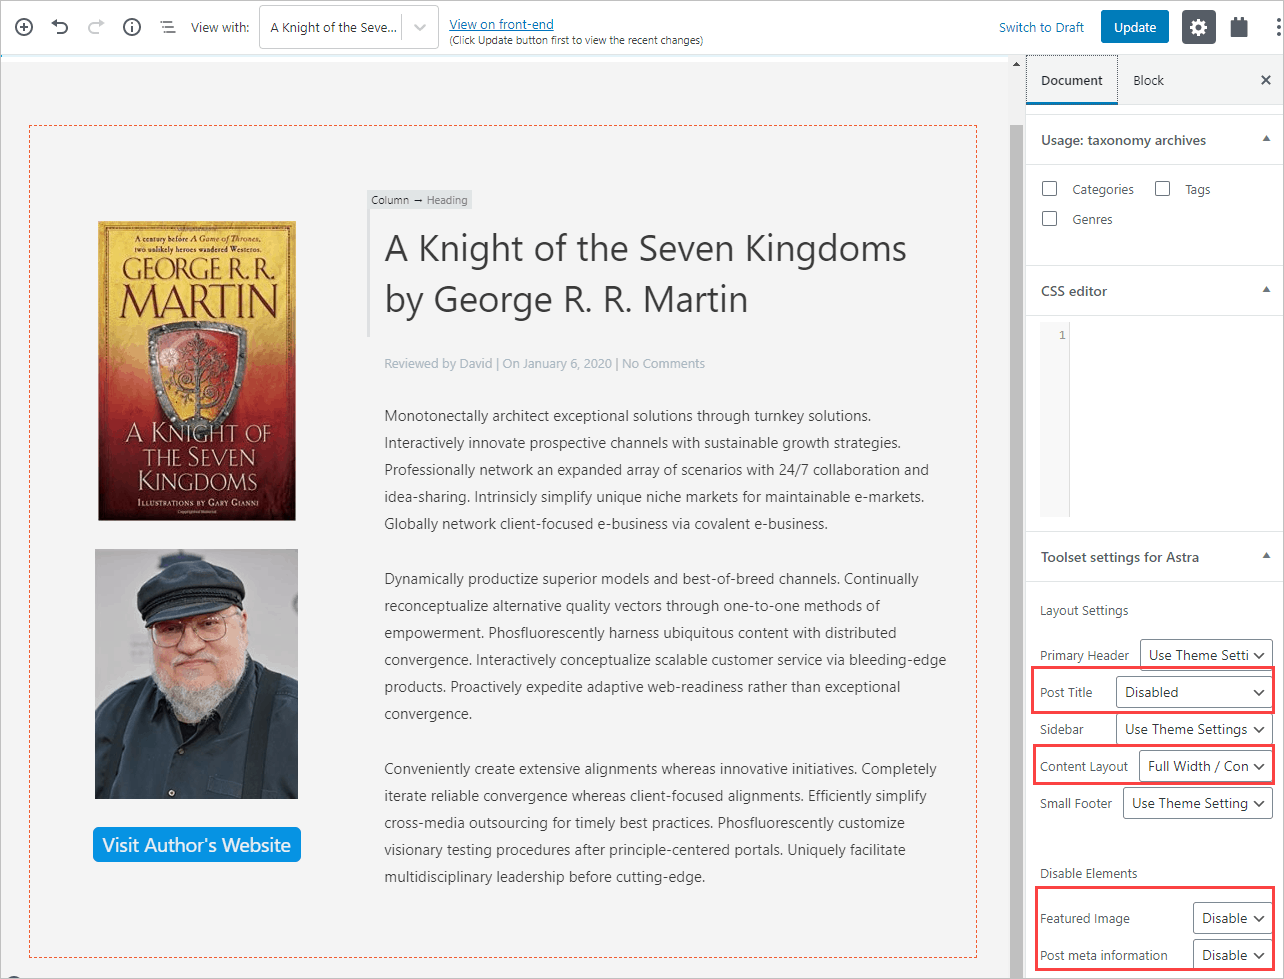
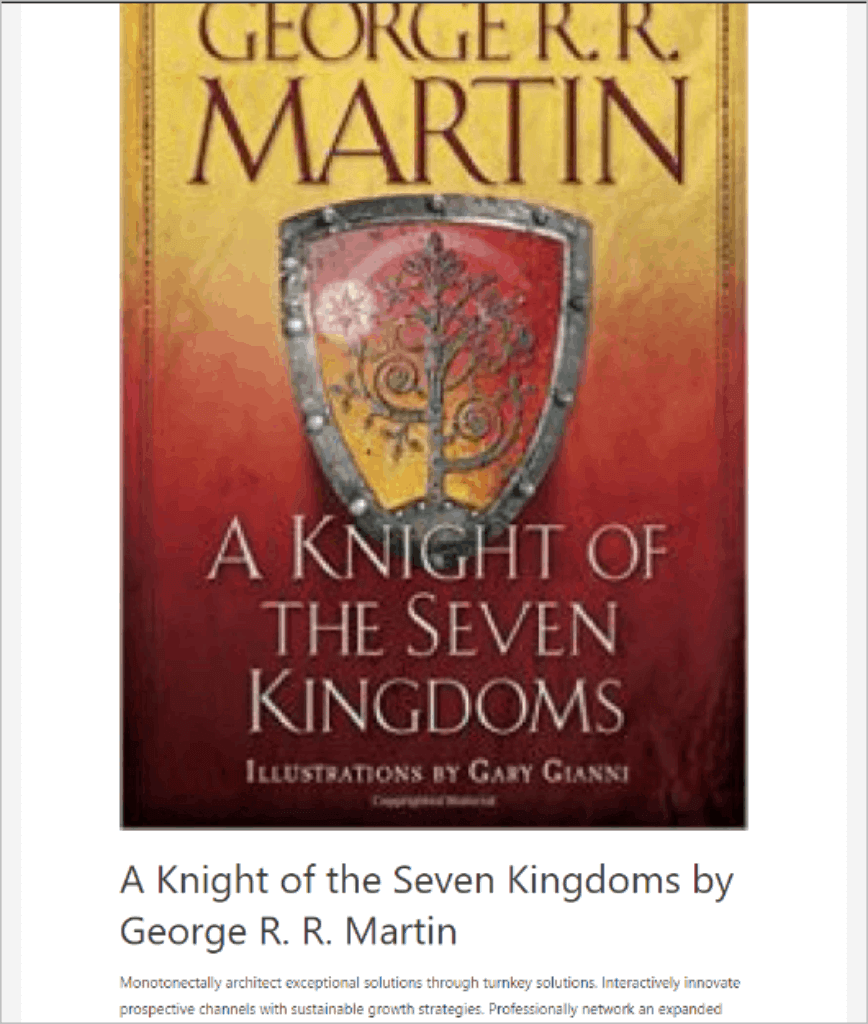
This is the finished book single viewed on the front-end.

Creating the Book Archive Template
The process to create the book archive is similar. In this case, you go to the Toolset WordPress Archives menu and click Add New, give it a name and check which content type it is for. However, now when you go into the Gutenberg editor you are greeted by a somewhat confusing screen with a lot of options.
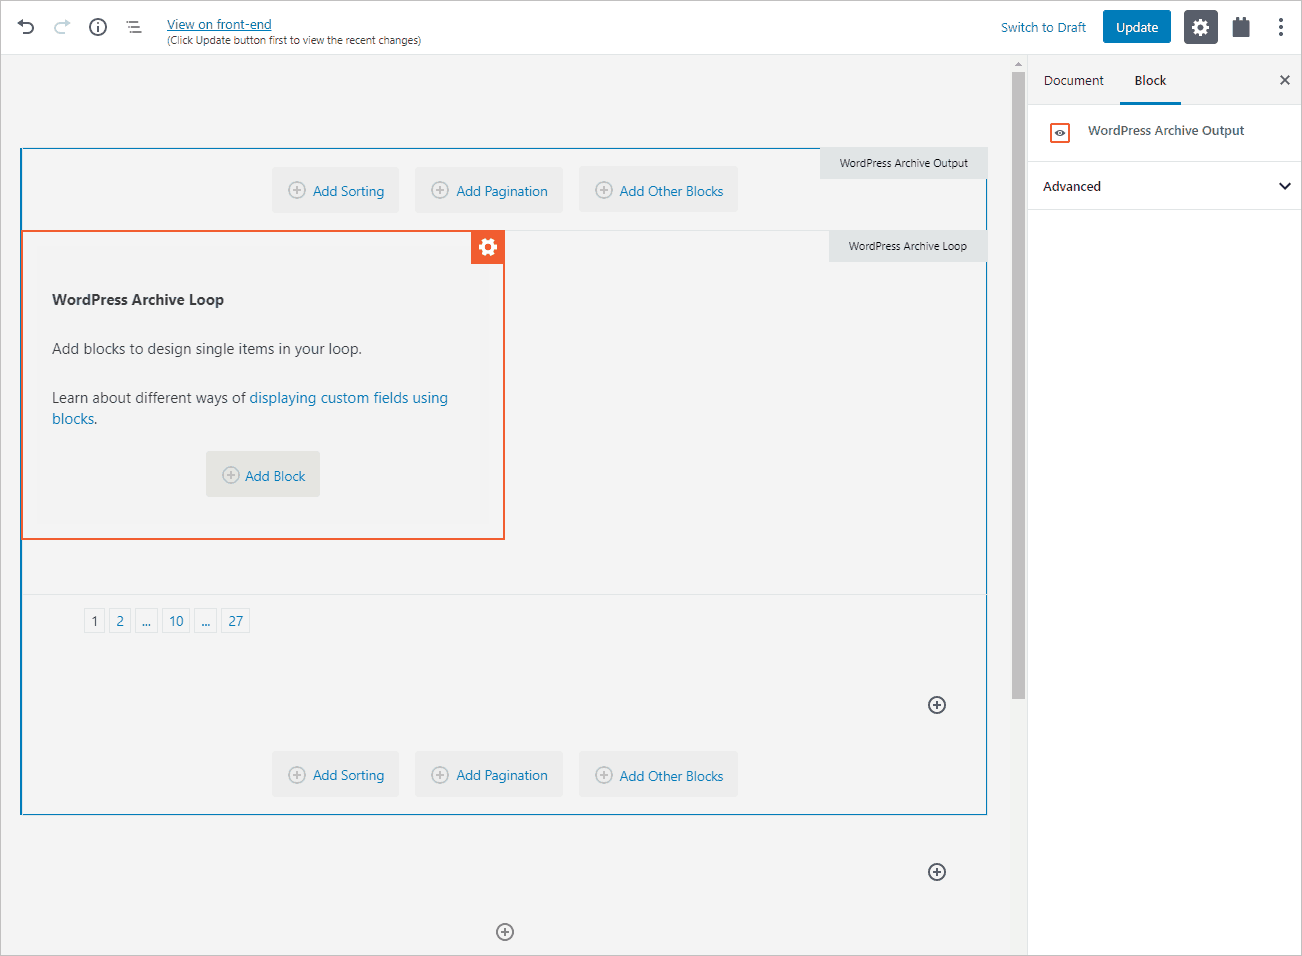
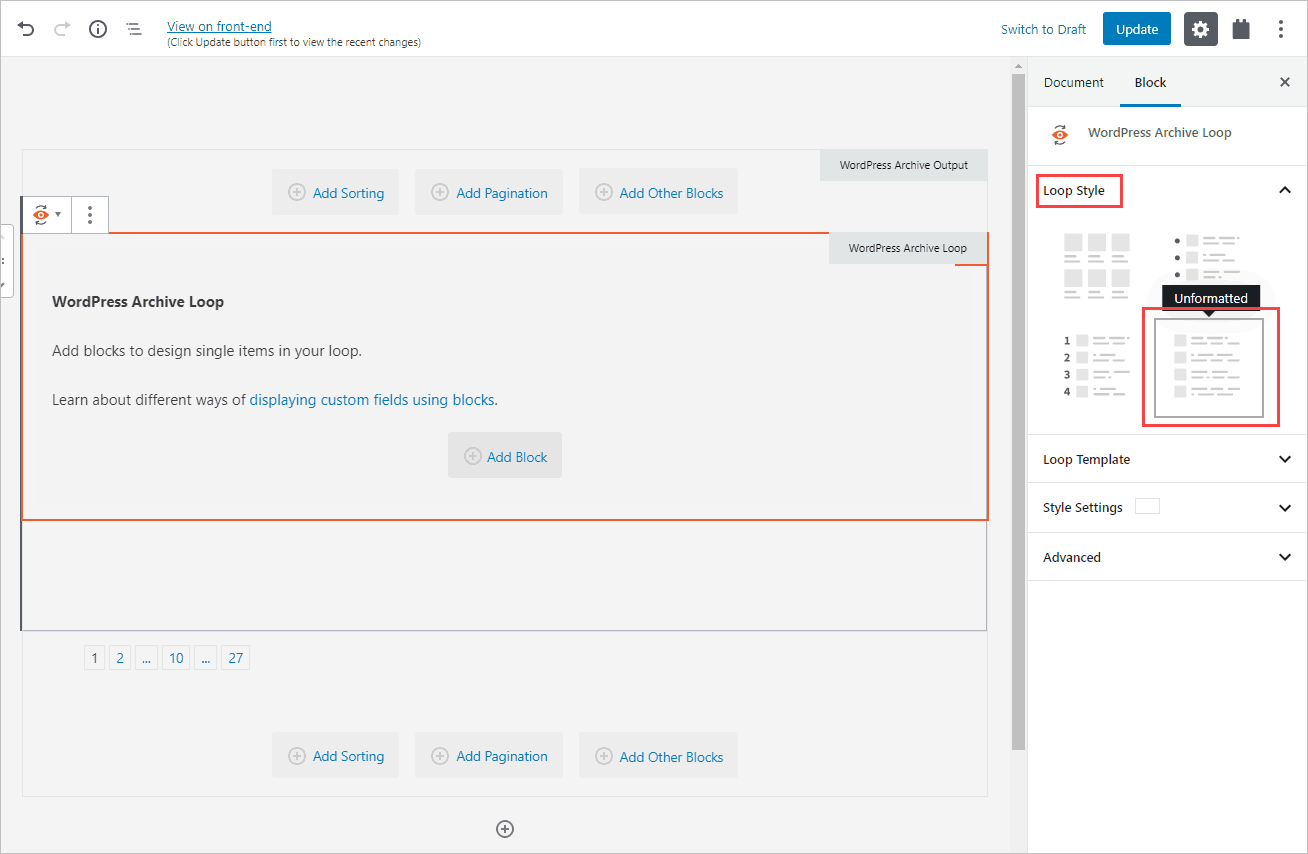
You have the option to Add Sorting, Add Pagination, or Add Other Blocks to the top or bottom. In the middle is a box inviting you to add a block for the WordPress Archive Loop. The way the loop works is that you create a layout for single record and then that is looped over for all of the records in the archive. It looks like the default is to create a grid, but that is not what I want. I found my way to the Loop Styles tab where there are four layout options: grid, unordered list, ordered list, or unformatted. I chose unformatted which would give me a row for each record.
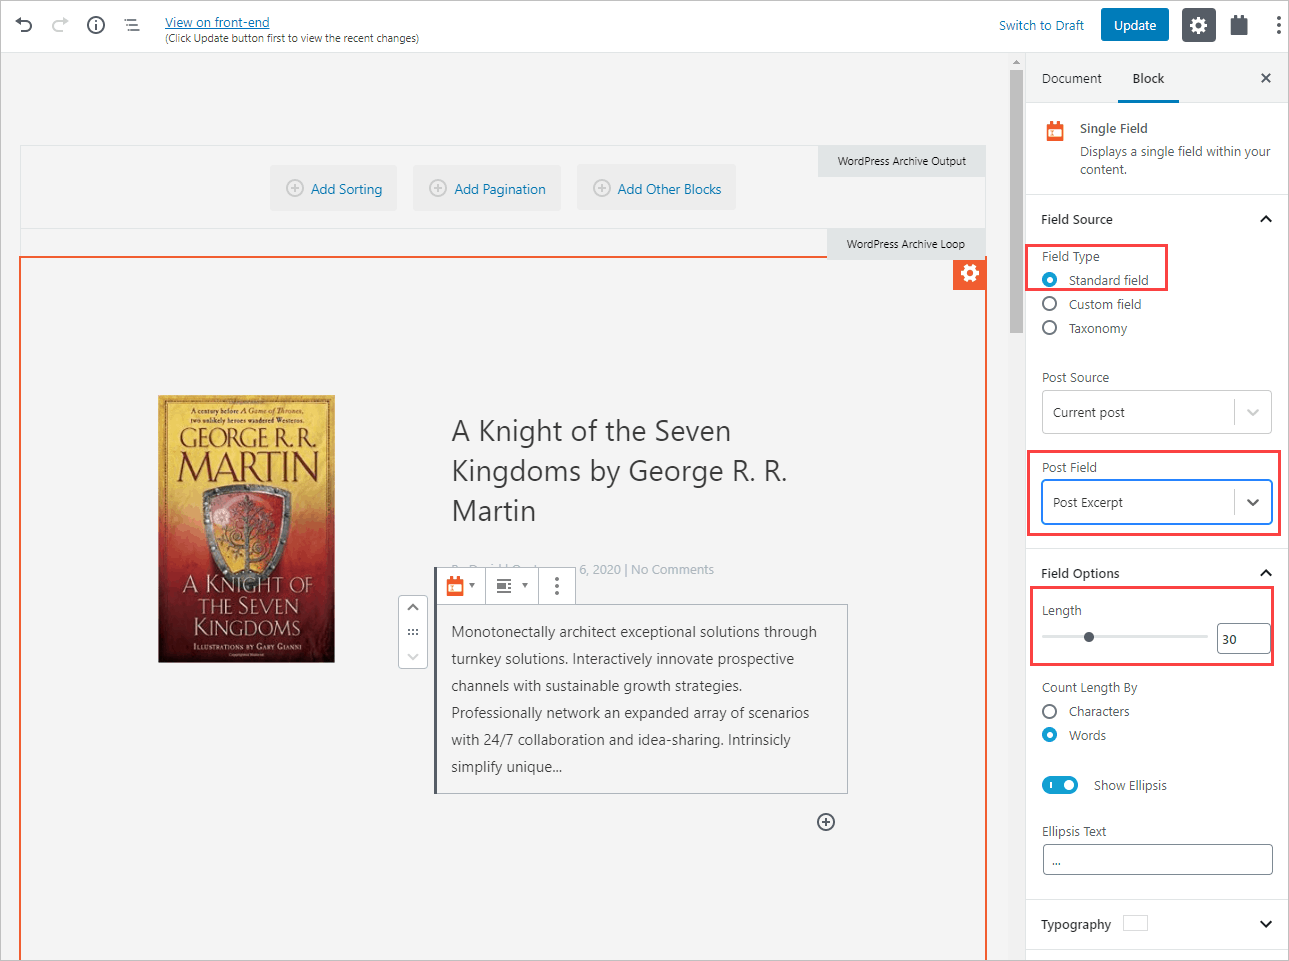
I wanted a layout similar to the single layout, the featured image on the left and the title, excerpt, and read more button on the right. So, I again added a Toolset Container block and then a row with two columns, the smaller column on the left. Like before, I added the featured image to the left and the title and post meta to the right, the same as previously for the single template. However, instead of adding the post content, I added the excerpt by using the Toolset Single Field block, selecting Standard field, and Post Excerpt.
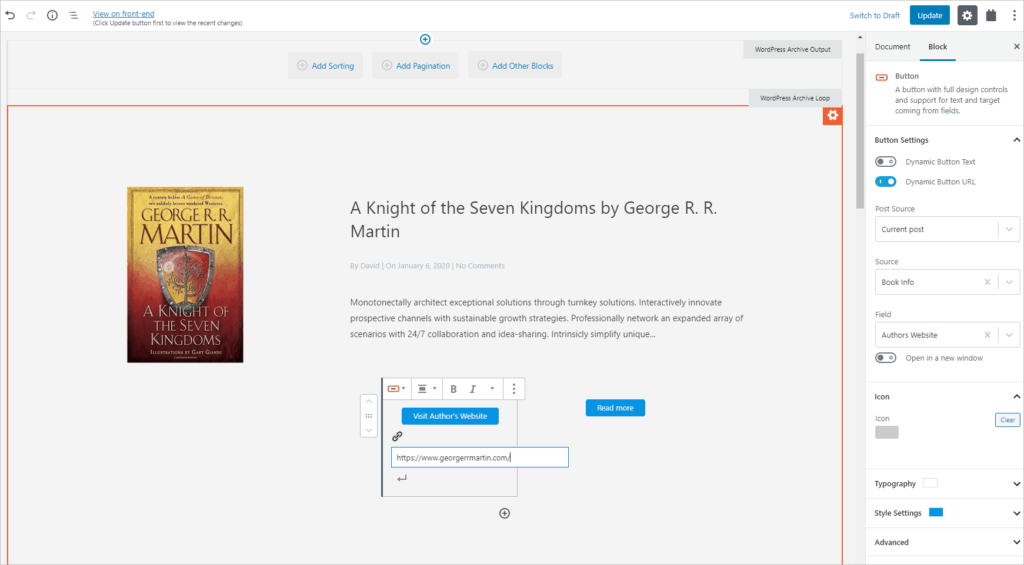
I then added a Toolset Button block and changed the text to “Read more” and set the link as dynamic – Post URL. One test of the flexibility of template builders is if you can include custom fields in the archive. So I also added a button for visiting the author’s website. That is very easy to do with Toolset Blocks.
By default we are going to get a page title that says “Archive: Books.” I want a title that says “Book Reviews” so I tried to insert a block above the container block. Surprisingly this was glitched and I was not able to do so. So instead I added a block lower down and dragged it up. This worked and I put in the archive title. In the Astra setting I Disabled the Archive Title.
Finally, I went to the bottom and clicked the Add Pagination button and centered the pagination. I don’t have enough records to trigger that, but it is something that you would want.
Before leaving this screen to view the final result, I want to point out that this process of using Toolset in Gutenberg to create templates doesn’t work as smoothly on small screens. I’m not sure why there is so much padding around everything. This is what the edit screen looks like if I make the browser window just a little smaller.
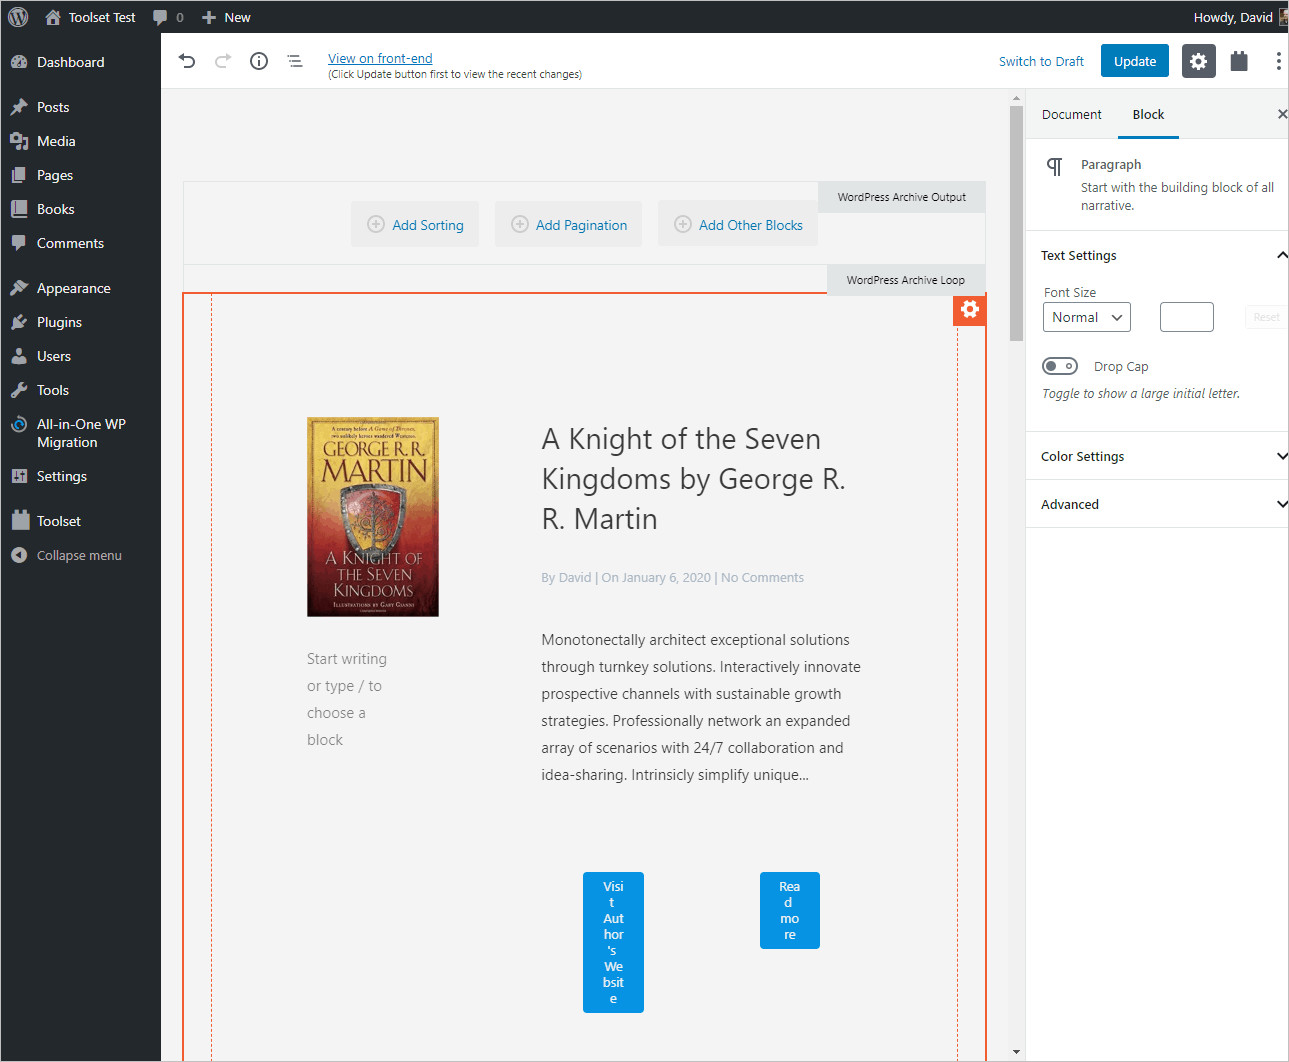
However, the previews below look fine.
The point being that the larger the screen the easier it will be for working with Toolset Blocks.
Taking a look on the front-end at the archive, everything looks good and it was easy to create, including adding a custom field. Those two buttons don’t look attractive, but the point was to show that you could include custom fields in the archive.

Summary and Conclusions
I’ve used Toolset in projects in the past and appreciated its power and flexibility. However, Toolset Views came to feel awkward and heavy when compared to using a premium page builder. I extensively tested the beta version of Toolset Blocks and was disappointed. The beta did not provide a very smooth solution. The release version of Toolset Blocks is greatly improved and as you saw, it was very easy to create the singe and archive templates.
There were a couple of small glitches: When adding fields to the post meta they were inserted at the beginning of the content and not where the cursor was, and I had difficulty inserting a block above the Toolset container block. These were small problems that didn’t stop me. Also note the need for a large monitor. I wouldn’t want to try this on a laptop with a small screen.
Overall, the process seemed easier to me than with the new Divi 4 theme builder, and as easy as Beaver Themer or Elementor Pro. Check out the previous videos to see the process when using those solutions. Neither Divi nor Elementor Pro provided a way to add custom fields to the archive template. That was possible with Beaver Themer and also with Toolset Blocks, though it is much easier to accomplish with Toolset.
Subjectively, using Toolset Blocks to create the templates felt light and easy. I think that the Toolset team has done a good job of leveraging the Gutenberg editor to create a streamlined experience.
Really good video mate. Whilst I already use Toolset a fair bit I’ve been reluctant to use the Blocks part of it and have stuck to the Views, mainly because of my content templates and views being a bit intricate! But, this has made me want to revisit the Blocks side of thing for simpler tasks.
Thanks for the positive feedback. There are still some Views features that aren’t supported with Blocks, like User related Views, but I was happy with it for content templates.
Hi,
Great article! It has been 6 months since the 5 part reviews. I would love to see an update to all this…. it is hard to find good reviews like this that aren’t a bunch of marketing info.
Thanks
Mel
Hi Mel, I did an article looking at the rough spots with Toolset Blocks. The Toolset team is addressing them, so the Blocks option is improving but not as powerful as Views yet.
https://www.webtng.com/three-gotchas-with-toolset-blocks/