Table of Contents
The WordPress admin dashboard is not optimized for any particular use case, it is not that attractive, and can become cluttered. There are a number of plugins available for “taming” the admin. Some try to make the admin more attractive, some let you apply branding, some make navigation more efficient, and some let you provide helpful information for end users.
Ultimate Dashboard is a popular plugin for customizing the admin area of your WordPress site. It doesn’t just provide one feature, but instead is a “toolbox” type of plugin that includes a number of features. In this walk-through I’m going to take a look at Ultimate Dashboard to see what features it offers and get a sense of how well it implements them. Please note that I was given a copy of Ultimate Dashboard to test with no expectation except that I share my honest views. I do that in this post where I show what the plugin does and point out its strengths and weaknesses.
Video Version
Free and Pro Versions
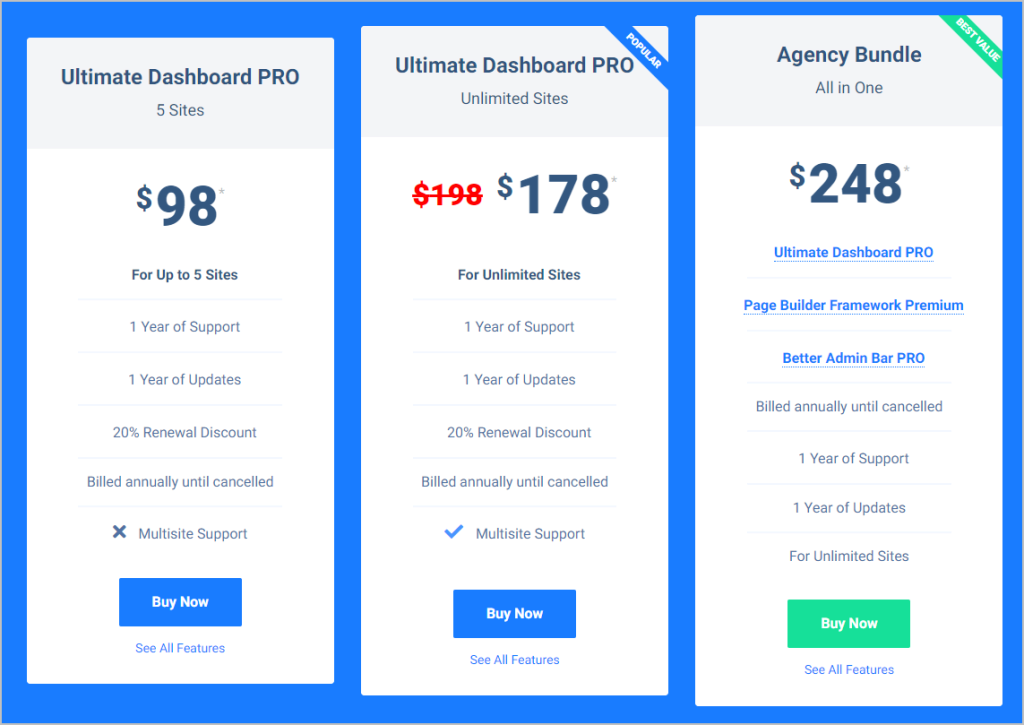
There is a free version of the plugin available in the WordPress plugin directory. It has more than 20,000 active installs and 40 five star reviews. Ultimate Dashboard Pro requires that the free version is also installed and activated, but it is not necessary to install it first. If it is not already installed, when you activate the Pro version you’ll be prompted with a link that downloads the free version and activates it.
The pro version is available for purchase from the Ultimate Dashboard website. The packages are for 5 sites or unlimited sites. There is also a bundle that includes the other products from the same developer: the Page Builder Framework theme and the Better Admin Bar plugin. Directly under the pricing grid is a list with a full feature comparison of the free and pro versions.
There is a pretty good documentation section on the website that provides an overview of most of the features.

When you install and activate Ultimate Dashboard there is a new Ultimate Dashboard menu in the admin. Here I’ve installed, activated, and entered my license for the pro version. Lets start looking at the features.
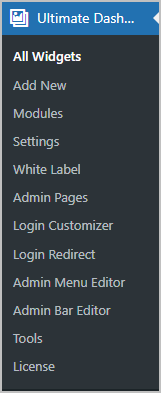
Modules Page
There are six modules available: White Label, Login Customizer, Login Redirect, Admin Pages, Admin Menu Editor, and Admin Bar Editor. There are also options for customizing the dashboard page, which cannot be disabled as a module.
Customizing the Dashboard Page
As the name of the plugin suggests, a core feature of Ultimate Dashboard is the ability to customize the dashboard page. This is the default page that users see after logging in. Options for the dashboard page are on two menu areas.
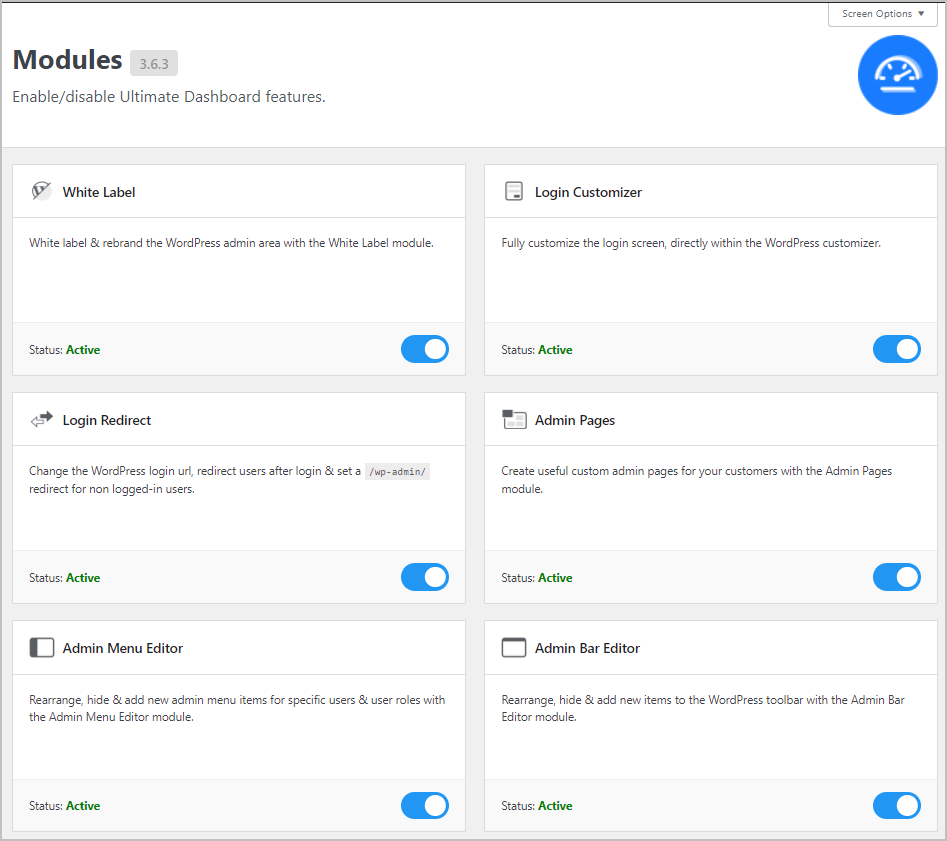
Settings Page
There are four tabs across the top of the Settings page. Most of the settings provide options for the dashboard page.

Dashboard Widgets
At the top of the dashboard widgets area there is the option to remove core and third party widgets. This is a great convenience. I remember creating a course site and after you set up all of the membership options, LMS related plugins, and general WordPress plugins you end up with a number of widgets. I was surprised by the number that showed for non-admin users.
On this screen you can also change the default text and headline color. At the top of the dashboard page there is a welcome panel. You can change that here using the classic editor.
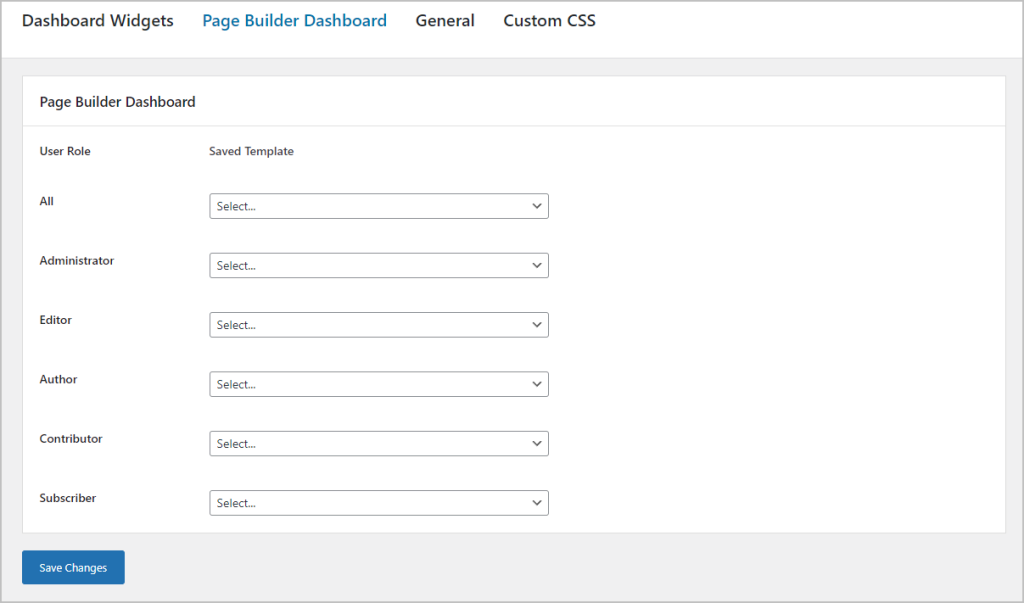
Page Builder Dashboard
If you create a section template using your page builder then you can pick it on this screen to show at the top of the dashboard above the widgets. It is possible to set a different template for each user role. If you had a course student role, for instance, then you could show students a distinct message. One thing to keep in mind here is that while you can use you page builder to create a template, if you use addons these might not show correctly because by default they don’t load their assets in the admin.
General Settings
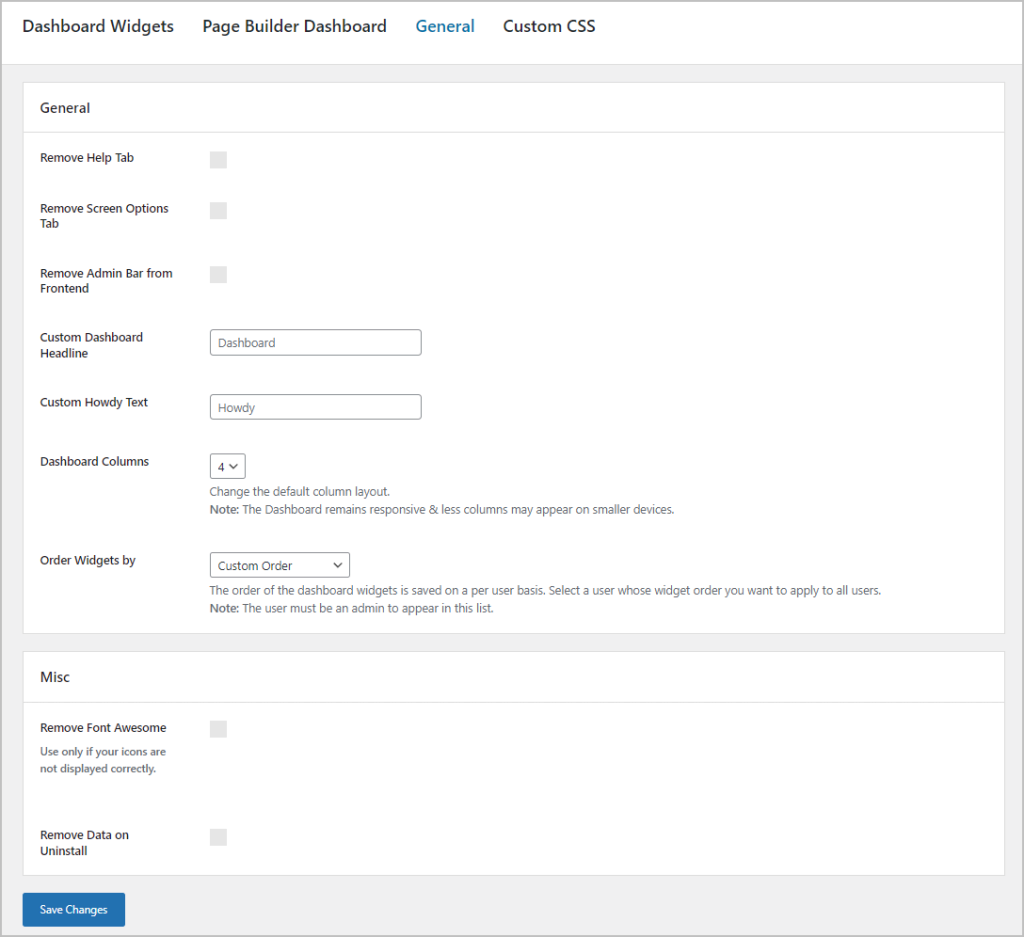
The options on the General tab allow you to disable some defaults. You can remove the help and screen options tabs, as well as disable the admin bar for the front-end,. There are also options to change the dashboard page title, the admin bar “howdy” text, the number of columns in the dashboard, and set the widget order. By default WordPress lets each user set the widget order, but you can override that and pick a user whose choices override that default. There is the option to remove Font Awesome and to Remove the plugin’s data if the plugin is uninstalled. It is good to see a plugin author supplying this option as all too often there is data left over in the dashboard when a plugin is removed. One oddity about the settings here is that some of them apply to the dashboard page and some of them apply more generally. It might be good to separate those.
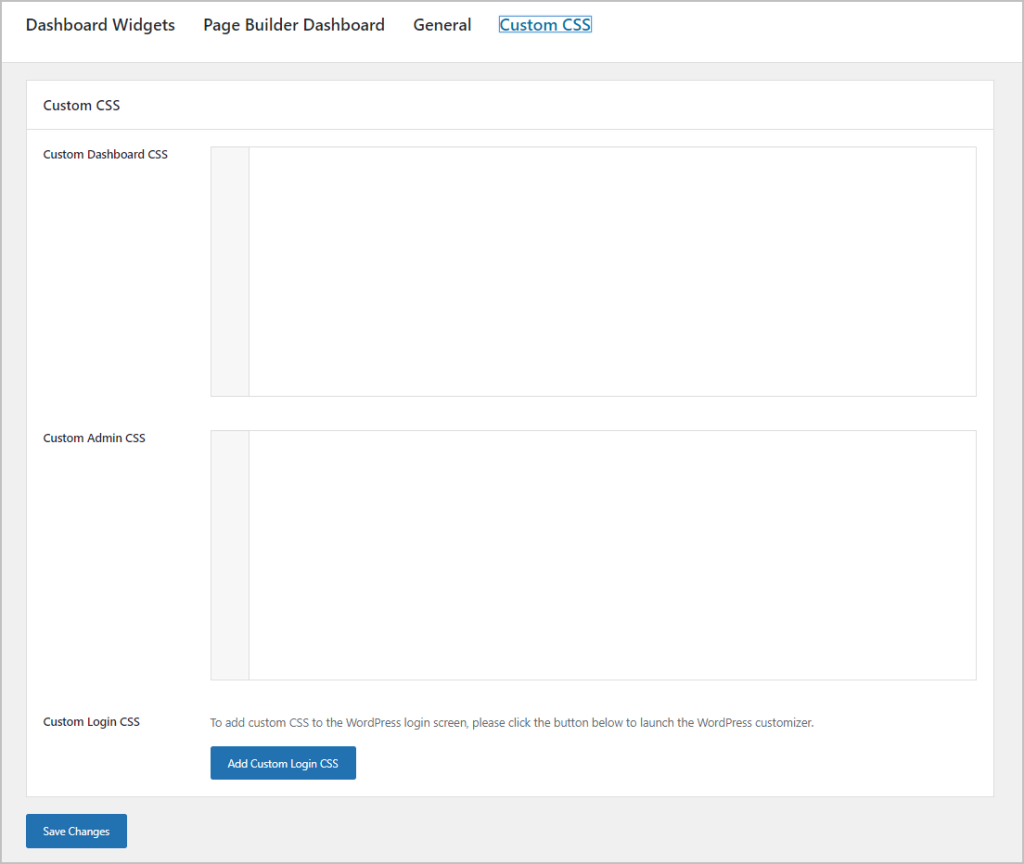
Custom CSS
Finally, there is an area to add your own CCS, either to the dashboard page or to the admin.
Custom Dashboard Widgets
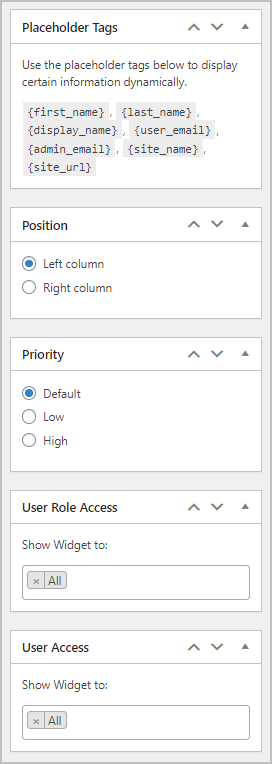
The other way you can customize the dashboard is by creating custom dashboard widgets. On the Add Dashboard Widget screen, after you click Add New, you go into an edit screen for creating a custom widget. You start by giving the widget a title. Note it won’t show without one.
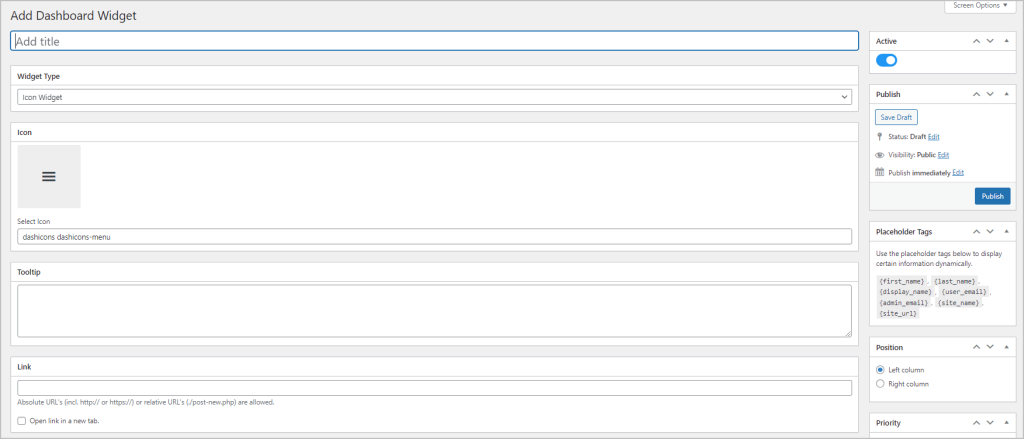
Along the right side you have an enable / disable toggle, the ability to set the top to bottom placement priority, the default column, some placeholder magic tags, and the user roles to show it for.
There are several widget types available.
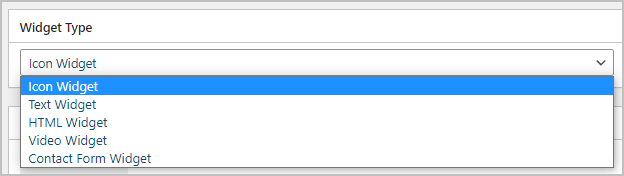
The icon and text widget types are pretty basic. With the icon widget you just have an icon, which if clicked on takes the user to a URL you specify. The text widget displays text.
A video widget is cool as it lets you add some help videos to the dashboard.
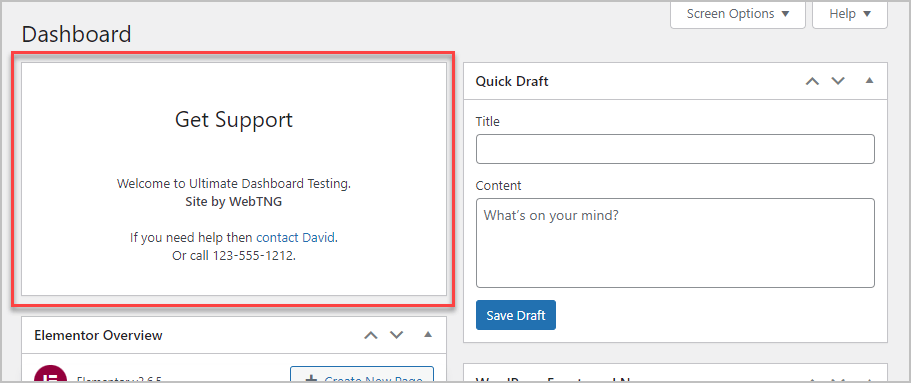
I created an HTML widget where I gave it a title of “Get Support” and added this HTML code:
Welcome to {site_name}.<br>
<strong>Site by WebTNG</strong><br><br>

If you need help then <a>contact David</a>.<br>
Or call 123-555-1212.
The resulting widget looked like this.
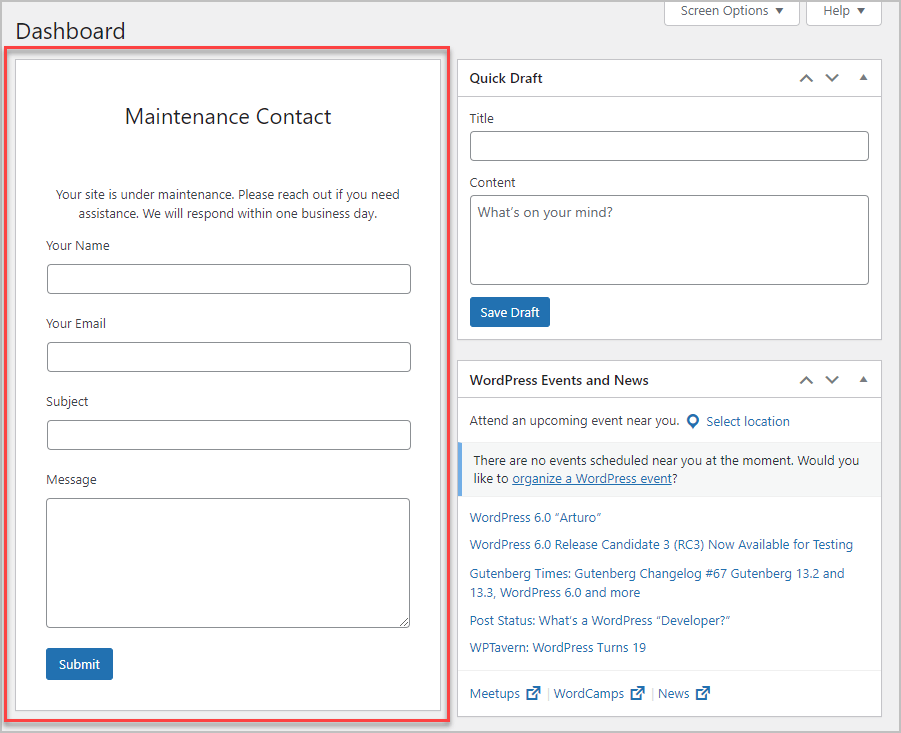
Another very cool feature was the Contact Form widget. This lets you add a contact form to the dashboard, which is a great idea for a membership site or when handing a site with maintenance off to a client.
There are options for an auto responder to send a copy of the form to the logged in user, the messages to show on success or failure, to send a copy of the message to another address, and to save the submissions in the database. The option to send to another address is nice because the maintenance provider might not be the same as the admin email. Having a record of requests sent is also nice.
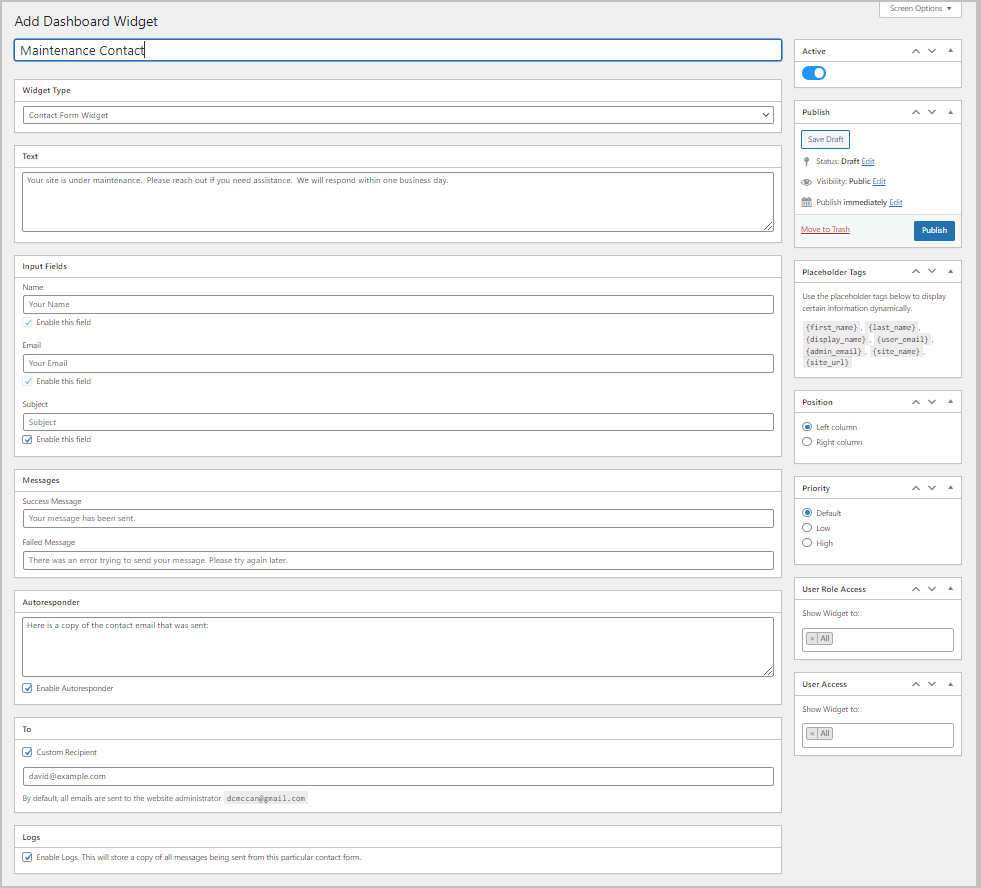
And here is what that looks like:
Appearance – White Label
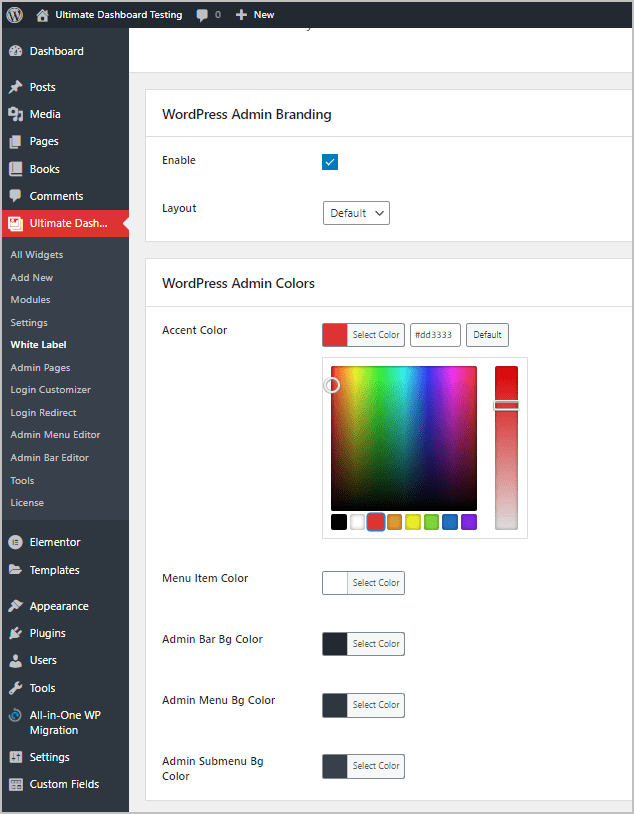
Ultimate Dashboard has several options for customizing the look of the admin. To enable these options, click the Enable button at the top.
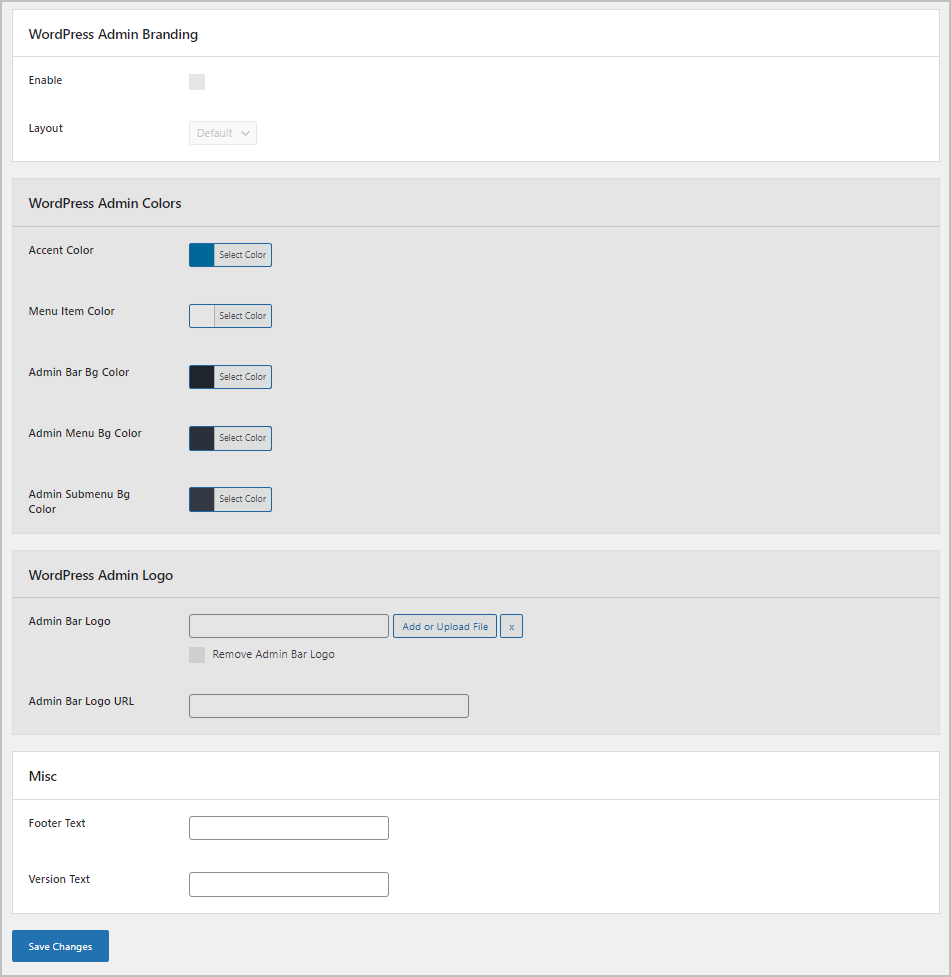
At the bottom of the screen there is the option to change what shows in the footer of the admin pages. While only text boxes are shown, I tested and it is possible to enter simple HTML.
There is the option to remove or change the default logo in the top left of the admin and/or you can change the logo’s link.
You can change the basic colors of the admin. An easy change that has a quick impact is to change the accent color. If you pick a color that works with the default light gray icon and text colors then you don’t have to change anything else.
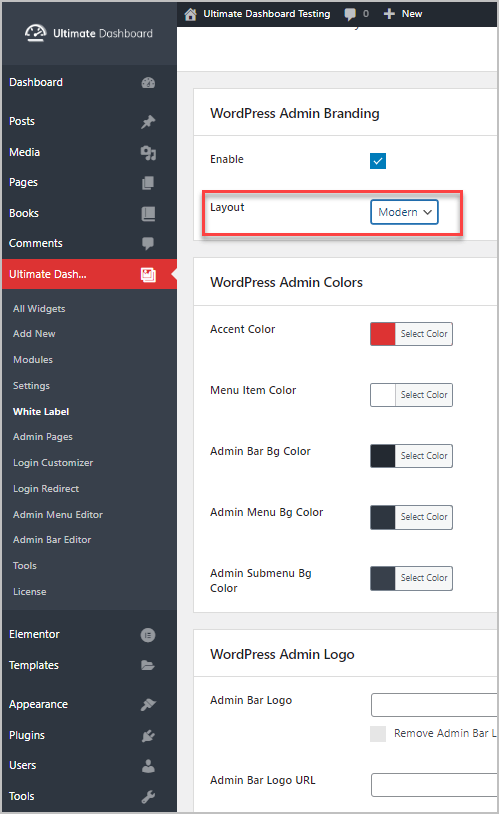
Then there is the option to change the layout. This is a simple, but clever way to change the look of the admin. What it does is it moves the logo to be justified to the right side of the menu bar.
Creating Your Own Admin Pages
When customizing the admin for a client, or to provide information to users, the ability to add a custom admin page is a typical requirement. Ultimate Dashboard has this feature. When you click on the Add New button you go into an edit screen.
There is an active toggle, the ability to set the page position and icon, the user roles it shows for, and to remove the title and margins. The ability to remove admin notices from the page is a nice touch At the bottom of the page is an area where you can add custom CSS or Java Script.
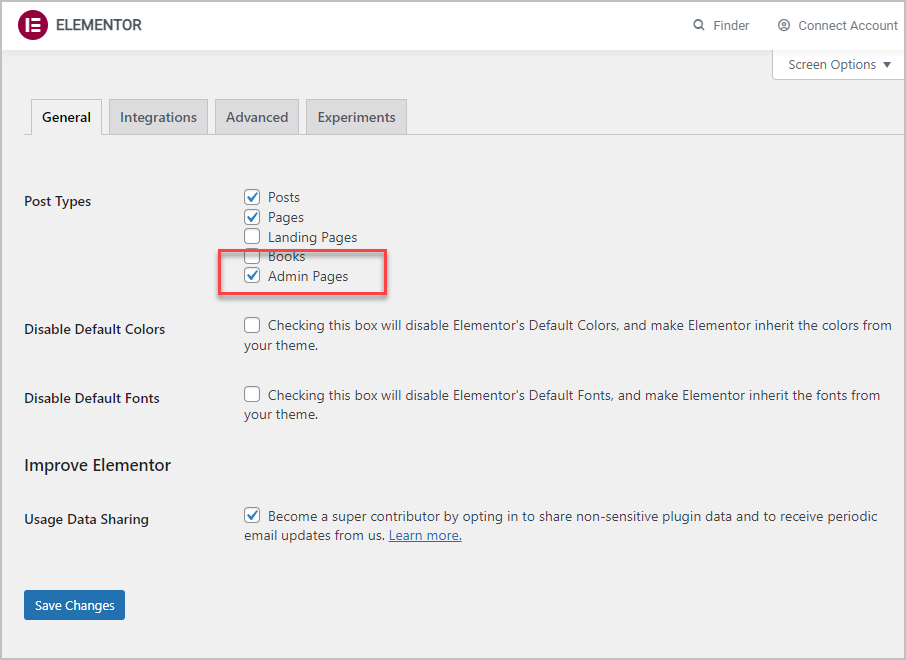
While there is the option to select the Content Type, I was surprised that you couldn’t use Gutenberg, however, you can use Elementor, Beaver Builder, Brizy, or Oxygen to create your page content.
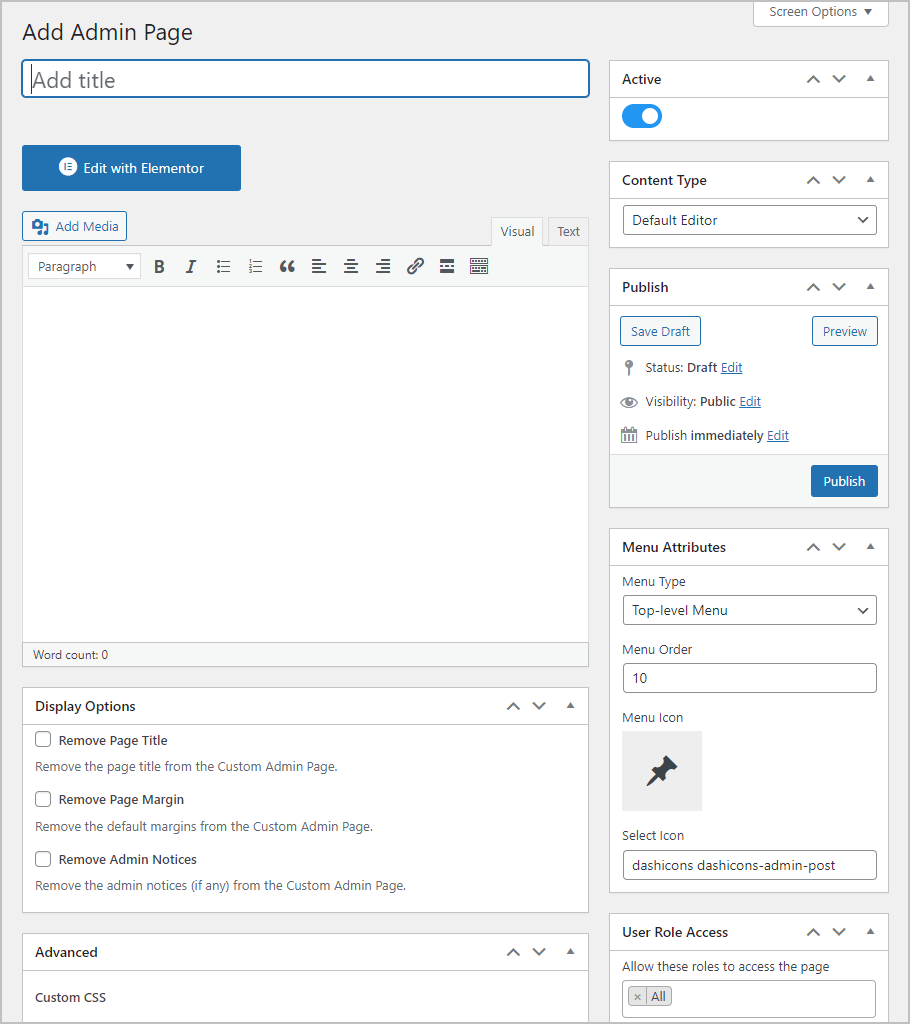
Note that you must enable the post type “Admin Pages” on your page builder’s settings screen.
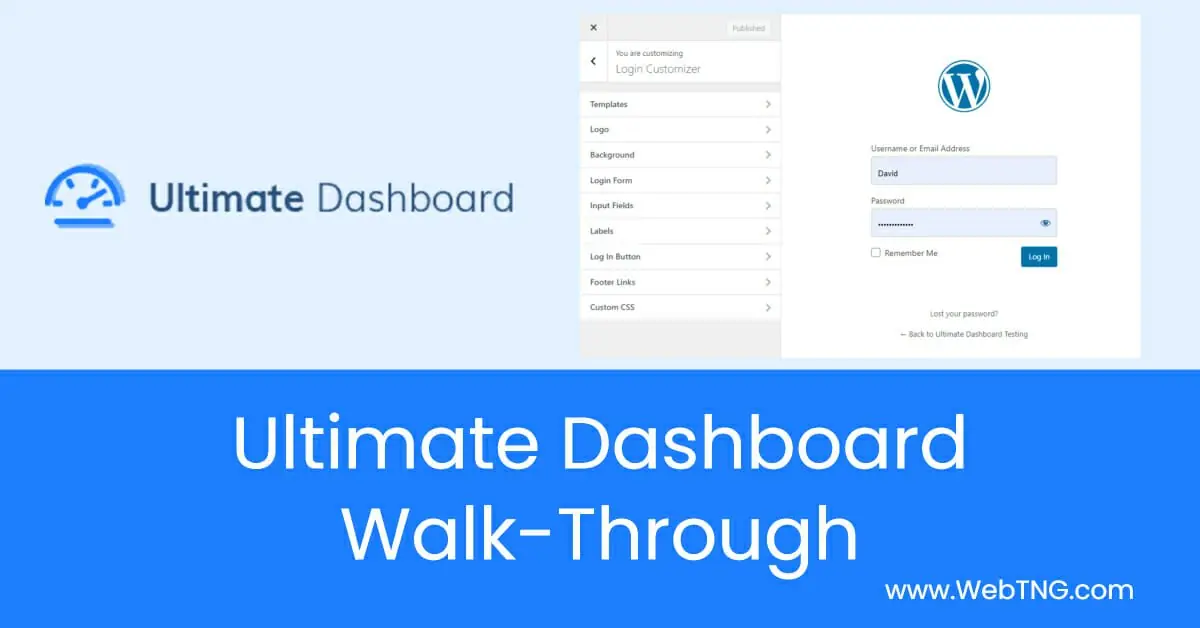
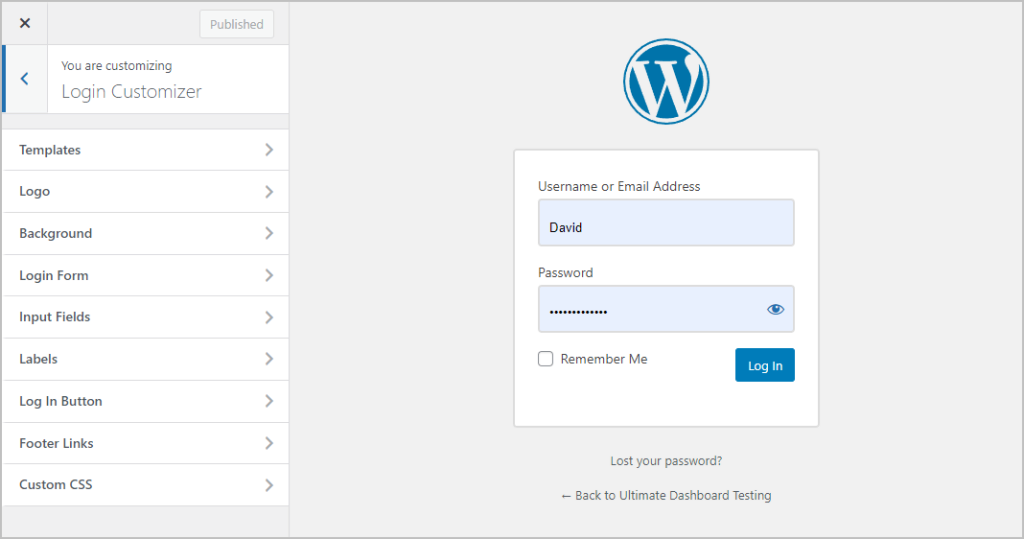
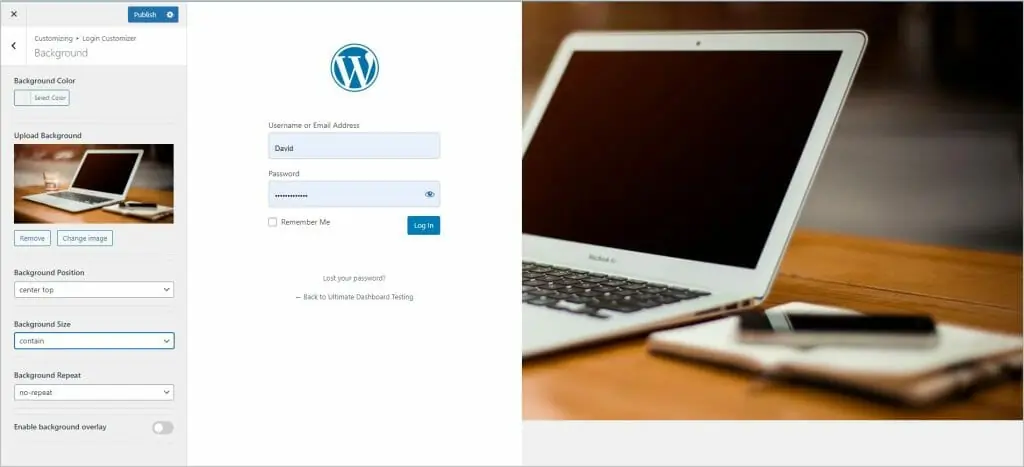
Login Customizer
When you click the Login Customizer menu item then you go to the theme Customizer. Here you see the login page on the right and Customizer panels on the left. The Login Customizer is full featured. You can upload a logo and set its size, and set a background color or upload a background image. You can style the login form, input fields, labels, button, and footer links. You can also add custom CSS.
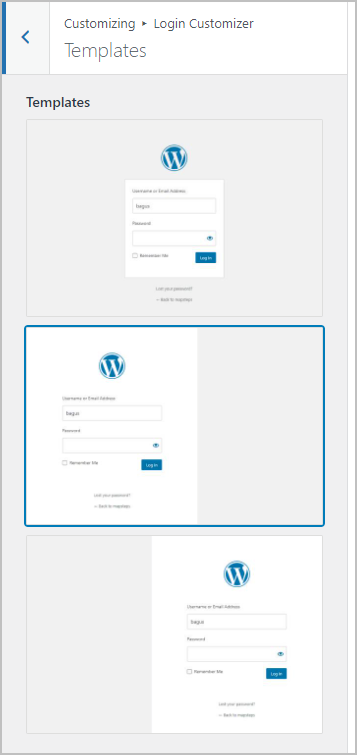
There are predesigned templates, but these only show the default form in the center or to either side.
After uploading a background image, here is the template with the form on the left.
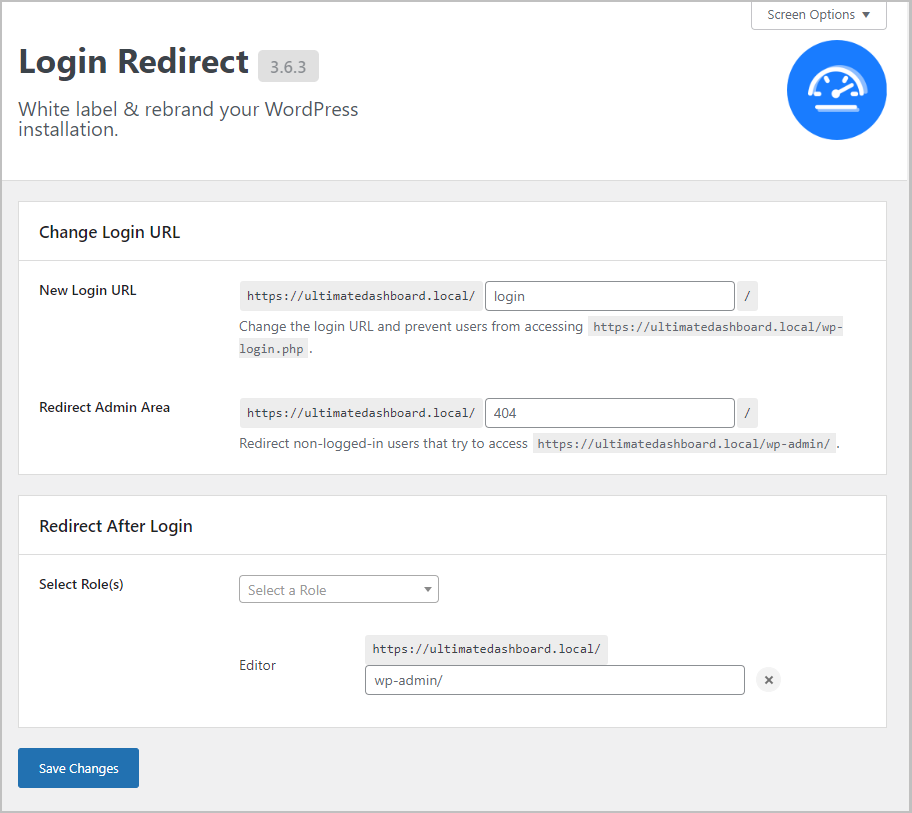
Login Redirect Options
These are options that provide some nice functionality. You can change the login URL. This is a security through obscurity feature which is helps to cut down on churn from bad bots trying to hack the login screen or admin area.
By default when users login they go to the dashboard page However, there is the option to direct users when they log in to a special page and that page can vary by user role. Another nice convenience for membership sites.
Admin Menu Editor
Ultimate Dashboard comes with an admin menu editor. A very nice feature is that at the top of the editor you can switch between user roles (or users) and customize the menu by role that way. The items in the list are role sensitive, so that you can see exactly what the user will see.
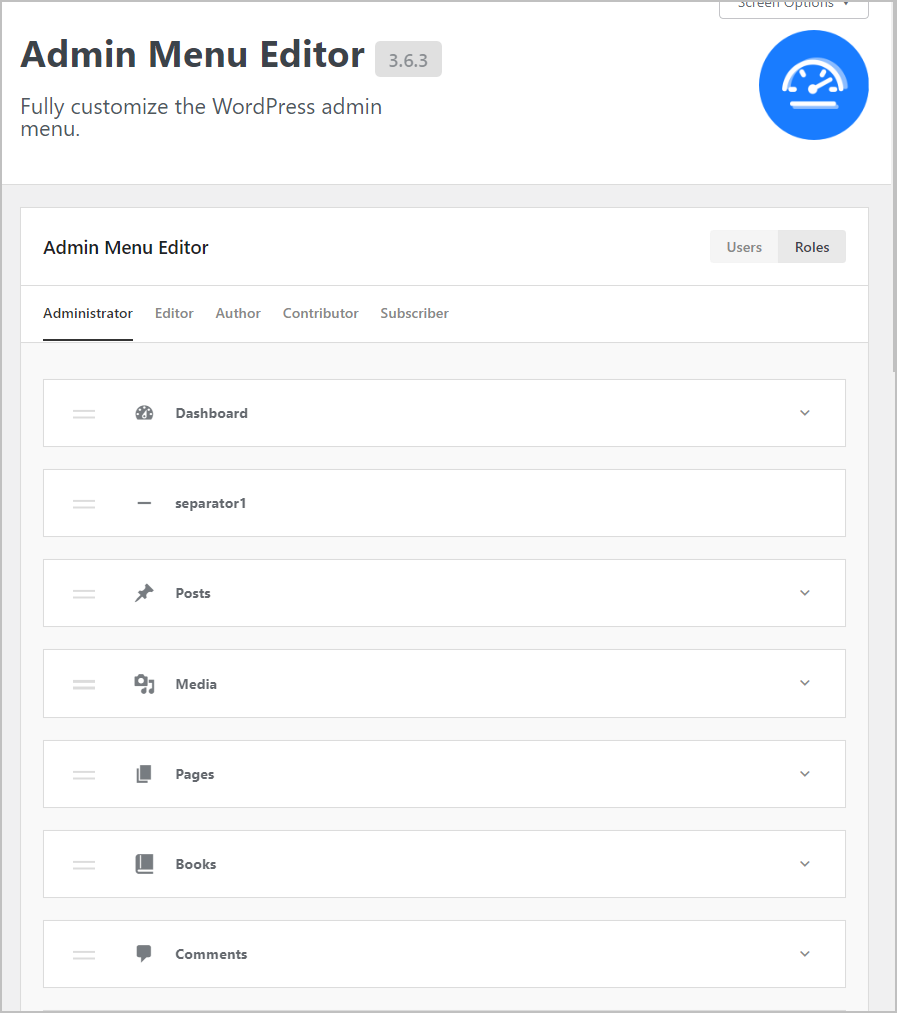
Each menu item is shown as a panel and there are drag handles on the left side so you can reorder the menu items. I didn’t see a way to nest high level menu items inside other ones.
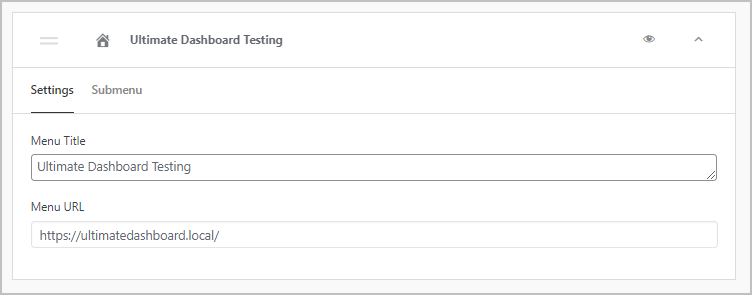
When you click on the down arrow on the right side then you see the menu options. You can change the title, URL, and the icon. Note the “eye” icon on the right side of the top bar. You can toggle visibility by clicking on it.

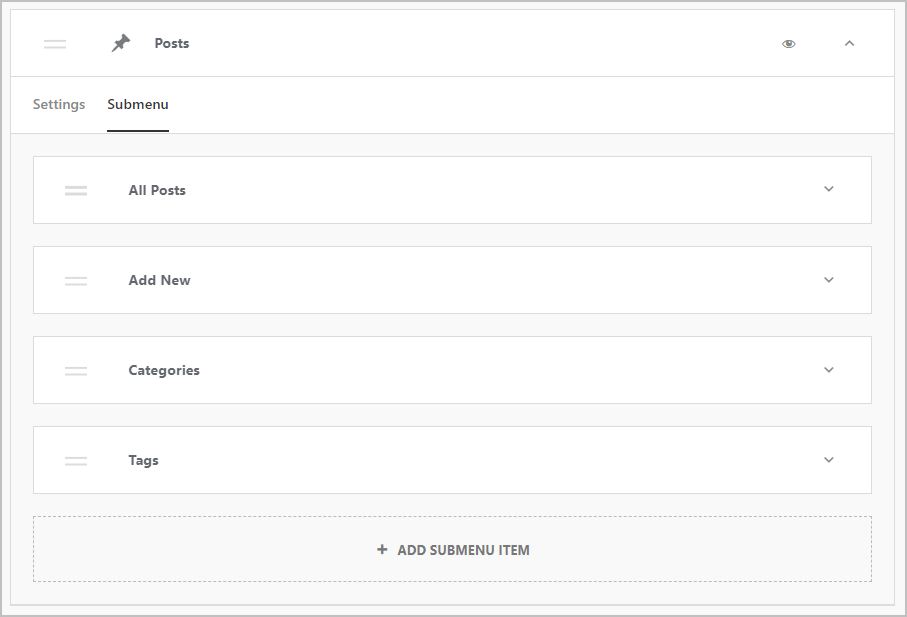
It you click on the Submenu tab then you see the submenu items. You have the same option to reorder the submenu items, change their name and URL, and add a new item, as well as toggle visibility.
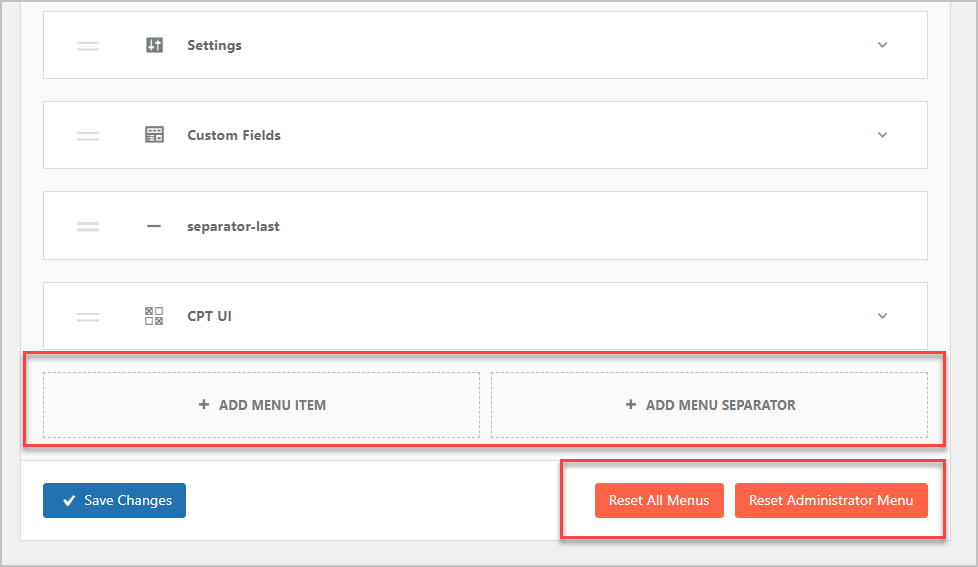
At the bottom of the menu list there are buttons to add a new menu item or separator. There are also reset buttons if you need to start over.
Admin Bar Editor
Ultimate Dashboard has a nice admin bar menu editor. If you hover over a panel then the “eye” icon appears and you can toggle an item’s visibility. There are drag handles so you can reorder the items. You can edit the items that show on the front and in the admin.
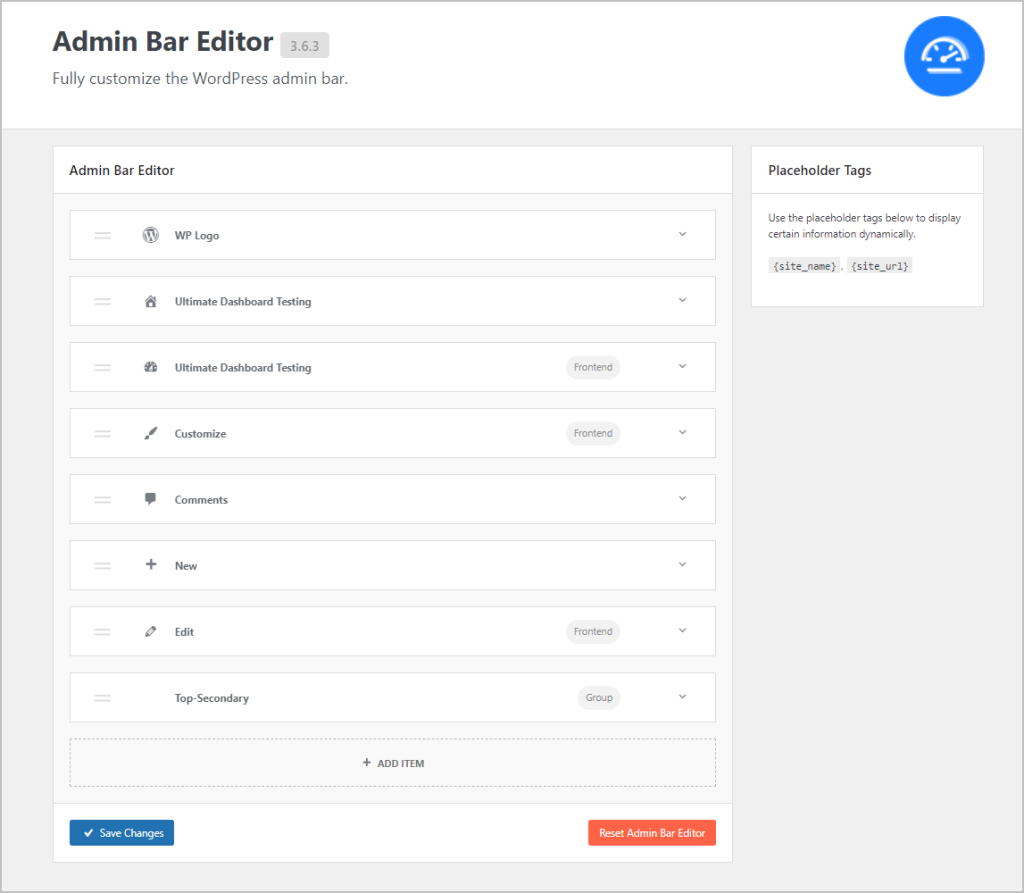
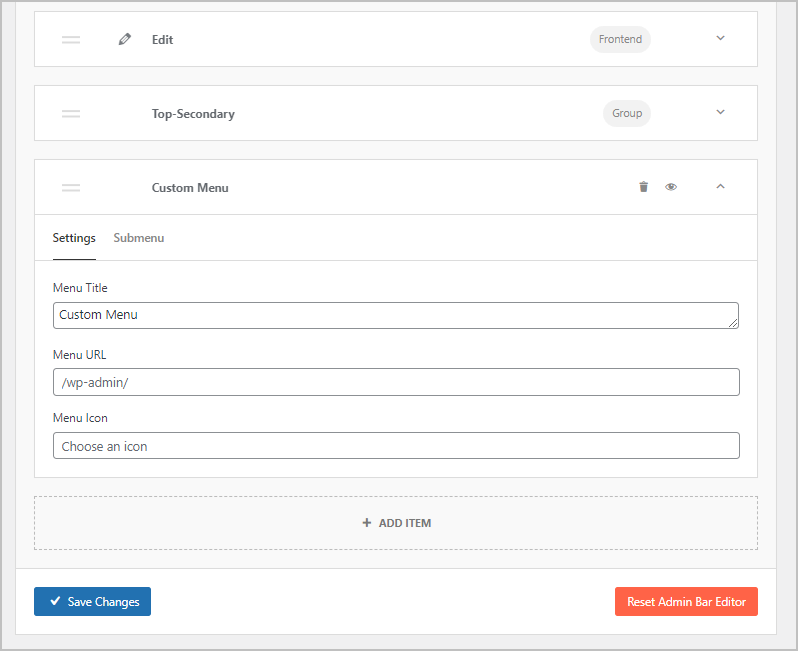
If you open a panel then you can change the title and URL. You can also manage the submenu and add items to the submenu.
At the bottom is the option to add your own custom menu and add items to it. A custom menu like this can be a huge convenience feature.
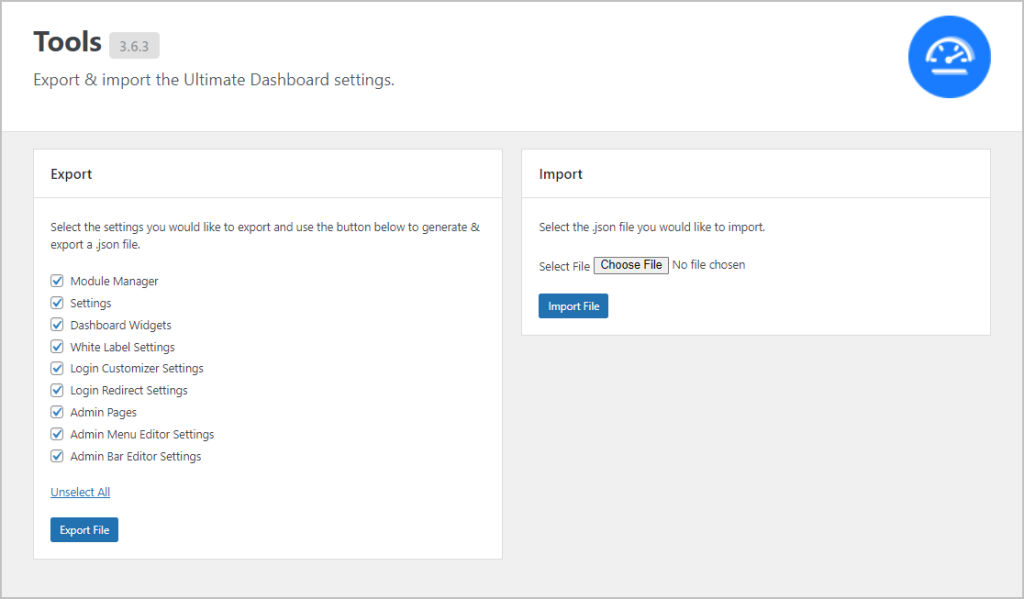
Tools Page
There are export and import options on the Tools page. You can pick the feature settings you want to export. On another site you can import these to save setup time.
Discussion and Conclusions
The Ultimate Dashboard plugin comes from the same team as the Page Builder Framework theme. The Page Builder Framework theme is known for being very capable, but also for not going overboard with features. The same approach was evident here.
I got the feeling when testing the plugin that there were two criteria for determining which features were included. First, there was an emphasis on utility over design. For example, Ultimate Dashboard didn’t have any predefined admin theme sets or a dark mode and the white label options were minimalistic, just enough to get the job done.
Second, features seemed to be chosen to match the typical scenarios that require dashboard customization: membership sites, course sites, an ecommerce site, or for client sites. Focusing on those types of use cases seemed to be the guideline for feature inclusion. From that perspective the feature set makes sense:
- White label options
- Widget maker and other dashboard page customizations
- Ability to create custom admin pages, using a page builder if desired
- Admin menu editor that has the cool ability to see the menu structure according to the capabilities of each user role
- Admin bar editor where you could edit the default admin bar items and create your own custom menu
- Login redirect module is a feature that membership sites often need
- Login page customizer
What was missing? Since features are constrained to what’s essential to get the job done, users may feel that a feature falls just short of being complete. For example:
- While label options didn’t include a full admin theme or dark mode
- The menu editor didn’t have the ability to move top level items created by plugins and nest them under Settings or Tools
- The login customizer had a panel for templates. Based on using other login page customizers, I expected some fully pre-designed login page options
In conclusion, if you don’t need extra features and the minimalist approach is OK, and you don’t need design features like an admin theme or dark mode, then Ultimate Dashboard is a solid option. I didn’t see any bugs or glitches. This is what you want if you are preparing a site for paying members, to hand off to clients, or for a team of users.