

Table of Contents
Introduction
We are all used to seeing content displayed in grids. All of the page builders, including Gutenberg, come with some basic way to display content listings. These are not all created equal. Some only allow you to display post content, while others are flexible enough to also use with Custom Post Types. Some let you modify the query to include or exclude items based on taxonomy. Less frequently you can use them with custom fields. Only a few of them, however, provide front-end filters for fast searching, These filters, sometimes called “facets,” are a huge convenience when the user needs to narrow down the options. WP Grid Builder is one of the few plugins that provides all these features and goes beyond the basics.
Video Version
Overview

WP Grid Builder is a premium plugin. There is no free version. It has built-in support for Gutenberg. It also has built-in support for WooCommerce and Easy Digital Downloads. It works with SearchWP and Relevanssi search tools. It natively supports Advanced Custom Fields. It also works with Polylang and WPML.
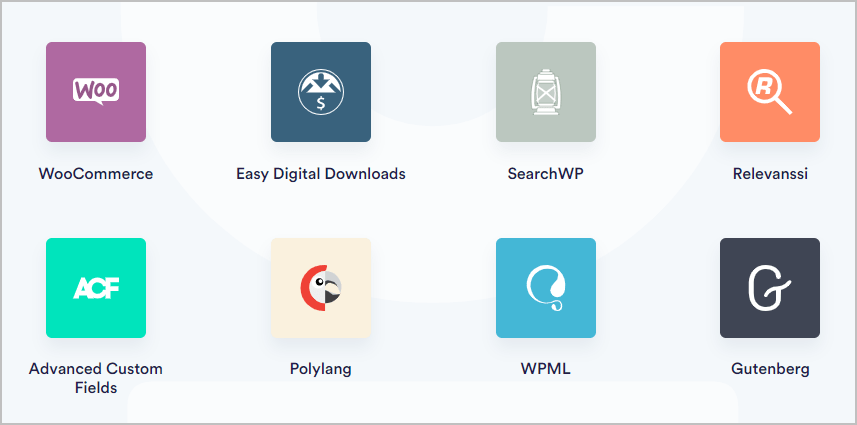
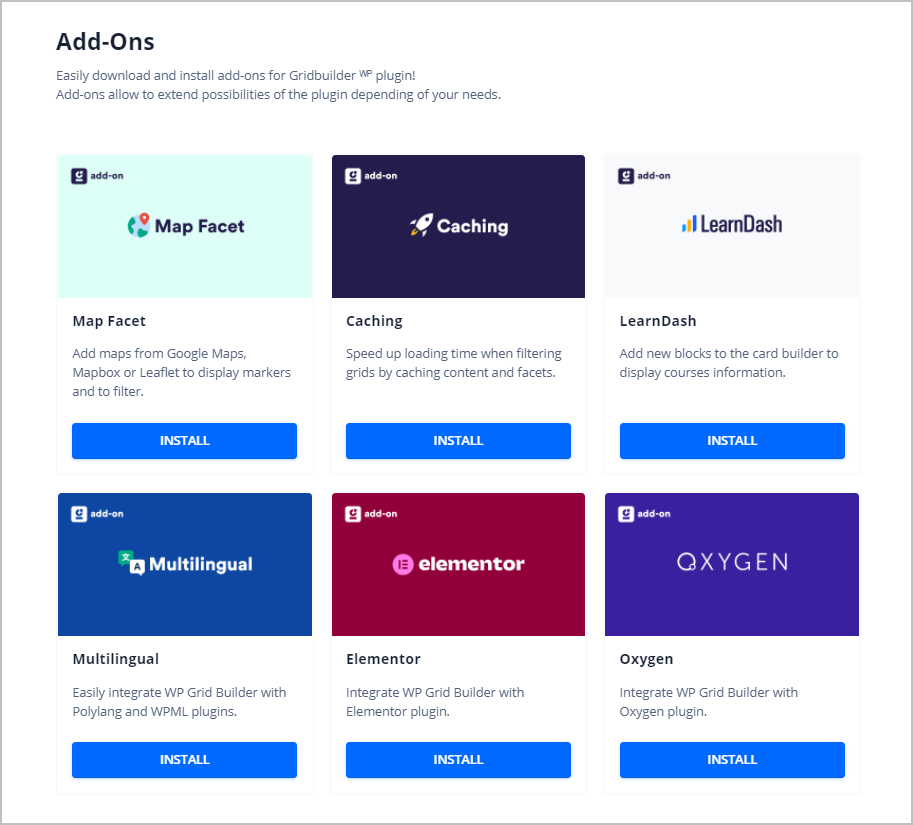
In addition to built-in support, WP Grid Builder has some add-on extensions that provide further integrations. The Oxygen Builder and Elementor page builder are supported. There is integration with LearnDash for displaying course information, maps integration, and a caching component.

If you are not using one of the builders that has a direct integration then you can use the shortcodes that WP Grid Builder provides for displaying grids and facets. The shortcode method also lets you use grids and facets with regular WordPress archives, assuming the theme uses the standard WordPress queries.
WP Grid Builder is offered in annual subscription packages for 1, 3, and unlimited sites, with a renewal discount. There is an occasional sale and a couple of times they have offered a lifetime package, but these are only available for a short time.

Test Site
I have a test site with the Kadence theme. I’ve loaded a bunch of posts with a few different categories.

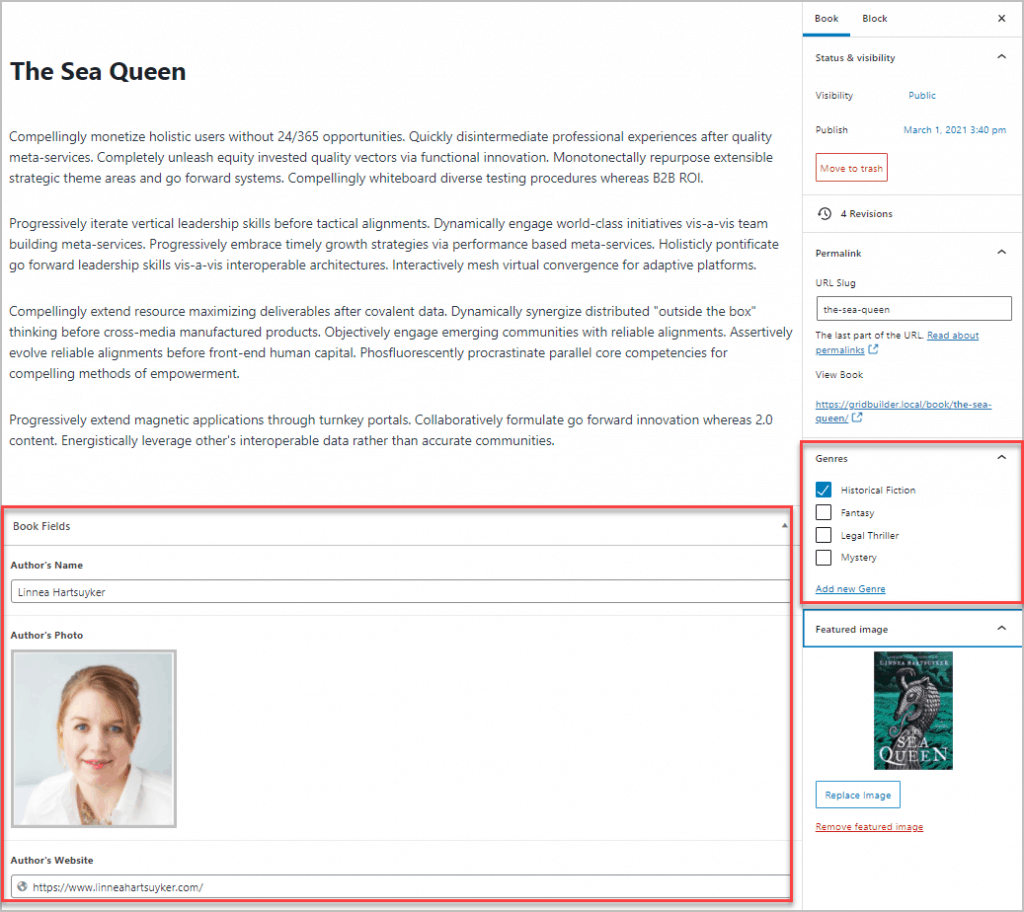
There is also a Books Custom Post Type that has a custom taxonomy, Genres. There are three ACF custom fields: Author’s Name, Author’s Photo, and Author’s Website.
Tour of the Admin Screens
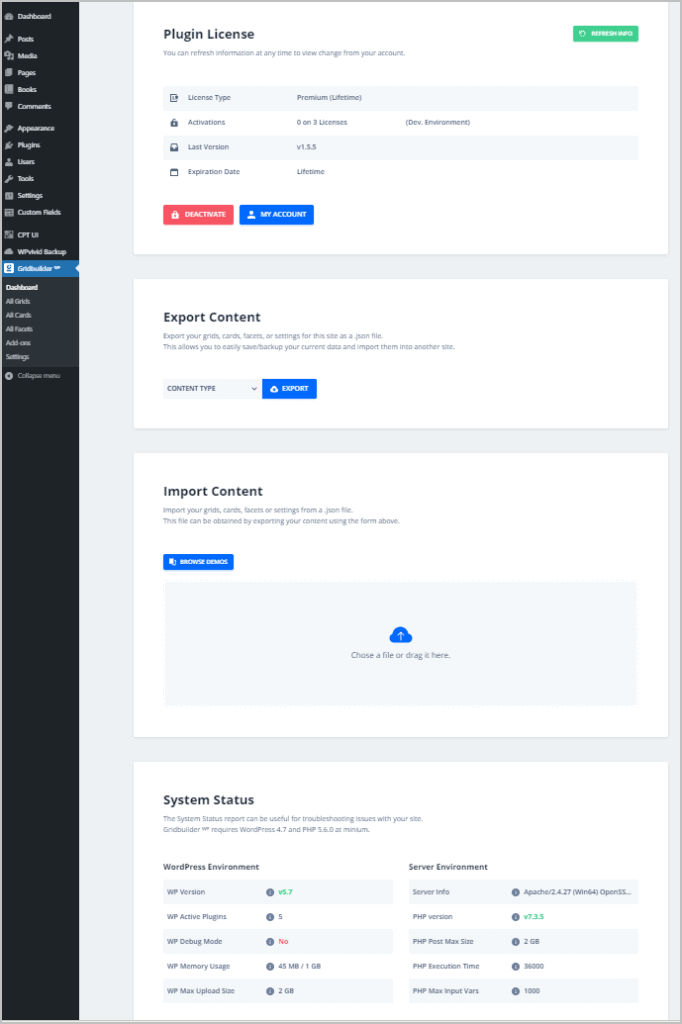
When you install WP Grid Builder you get a new admin menu area with several screens. This is where you actually create your grids and facets. The first screen is the dashboard where you can enter you license, export or import, and see the system status for troubleshooting.
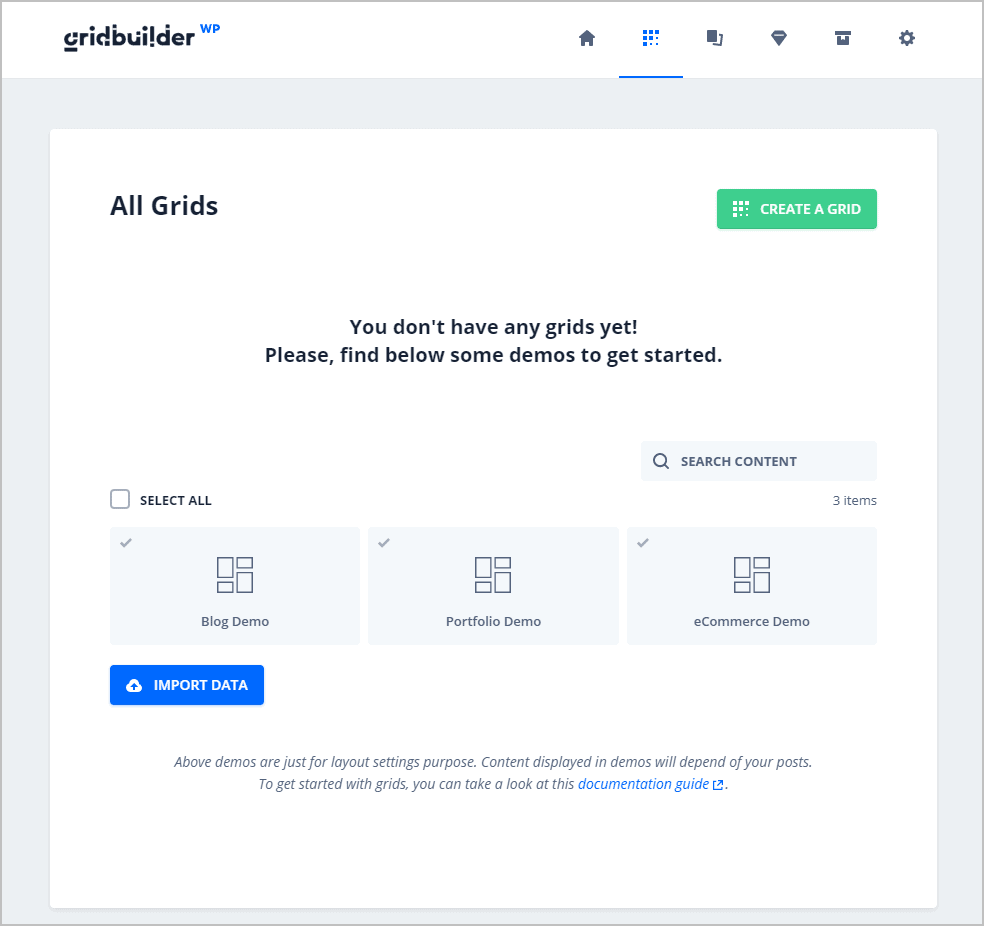
The All Grids screen is where you see the grids you created and add a new one. There are a couple of demos for getting started.
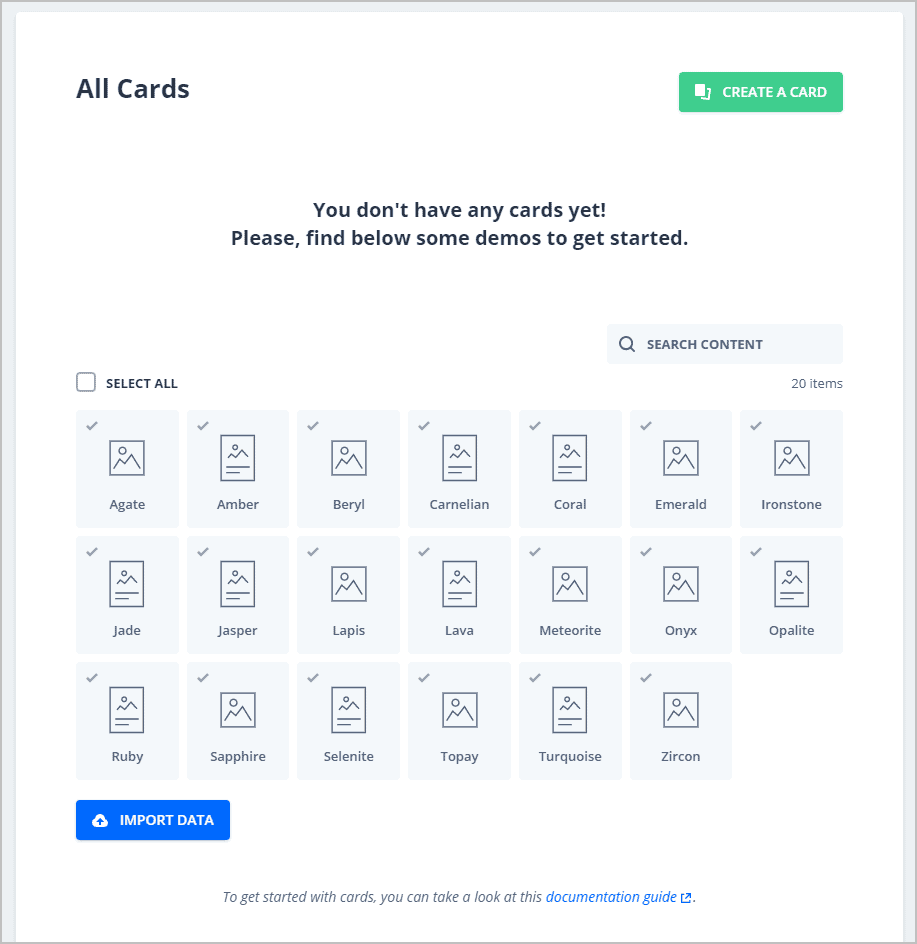
The individual items in your grid are displayed on “cards,” which is a layout. The cards screen has a bunch of predesigned cards or you can create your own. There isn’t really the ability to tell the difference between the cards. The names seem to have some stone color association, but other than that I drew a blank.
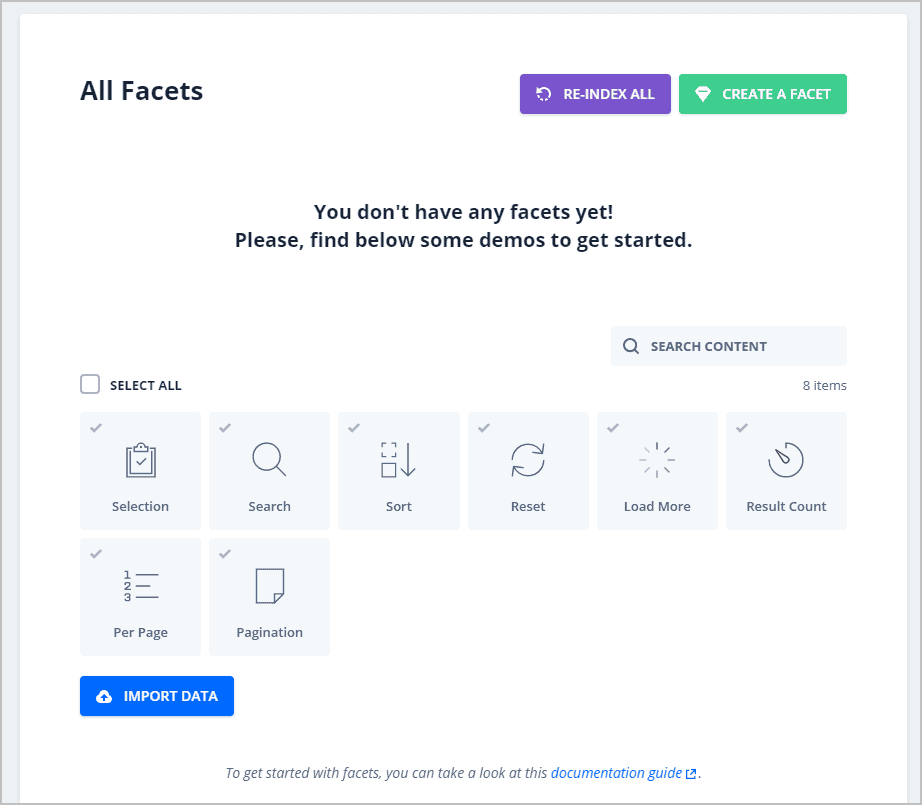
Like the Grids and Cards screens, the Facet screen shows you all of your facets, you can create a new one, or start by importing one of the demos.
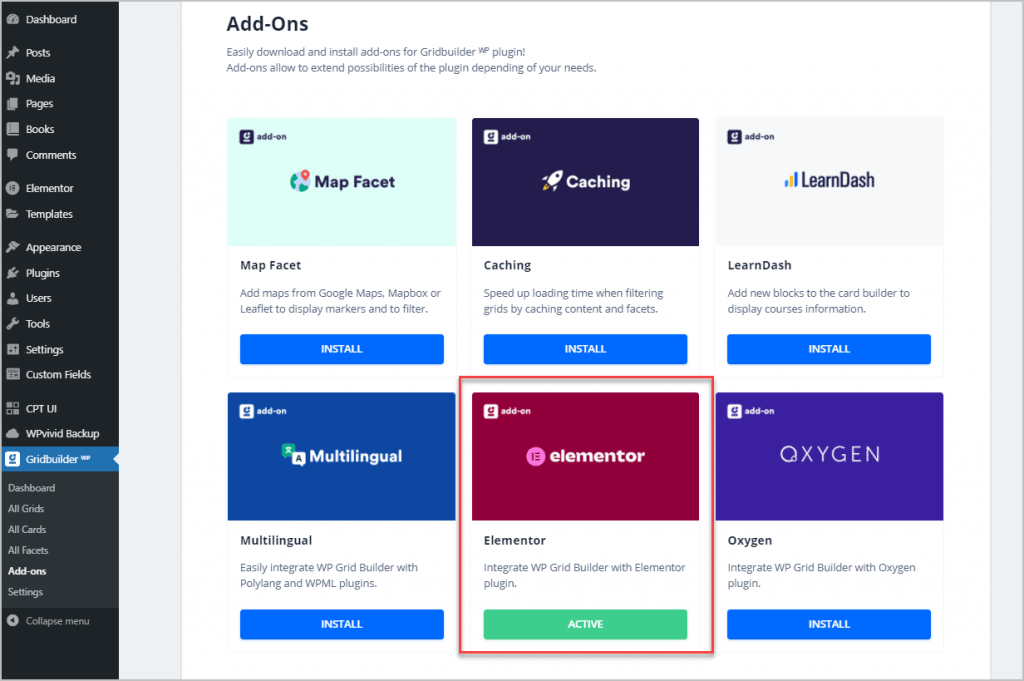
If you need to use one of the addons, you can install it directly from the addons screen.
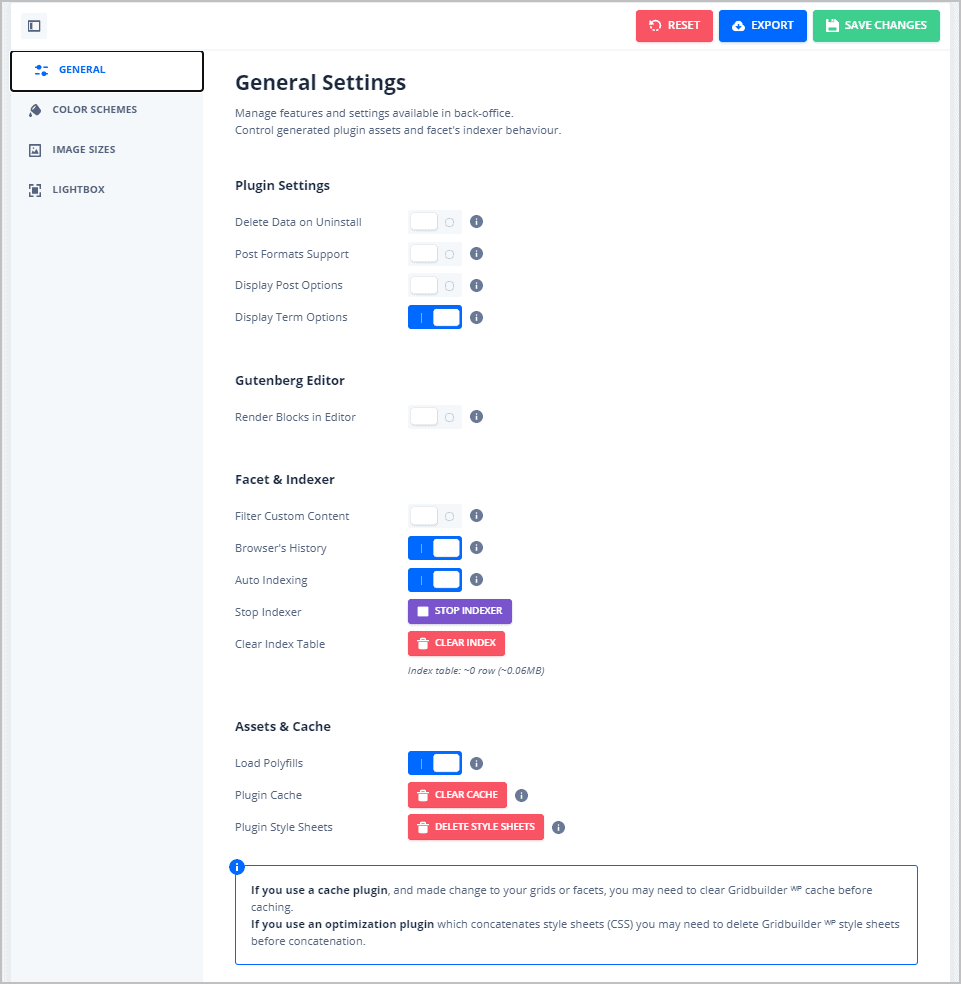
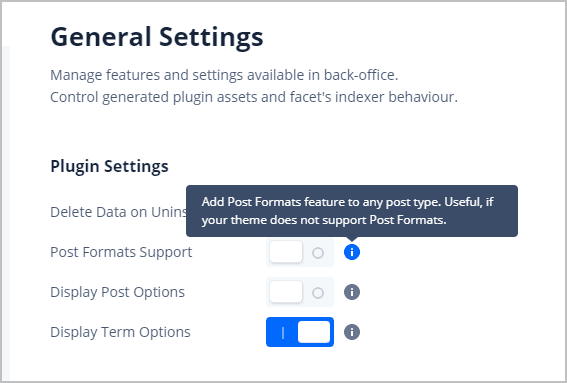
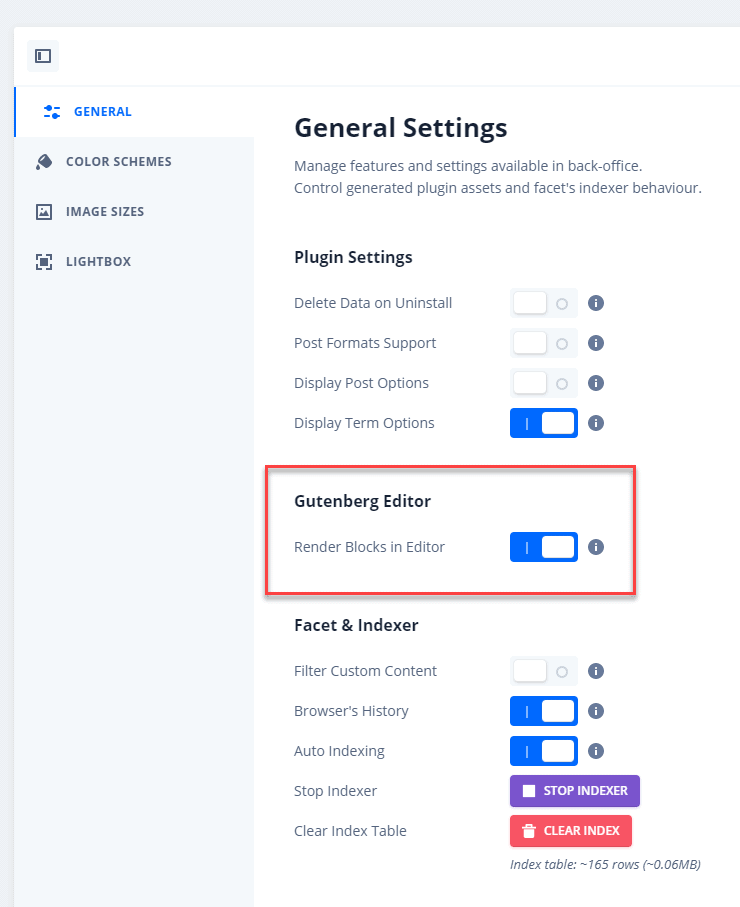
Then there are four screens for settings. On the General Settings screen you can set the plugin settings, facet and index options, and cache options, as well as clear the WP Grid Builder cache.
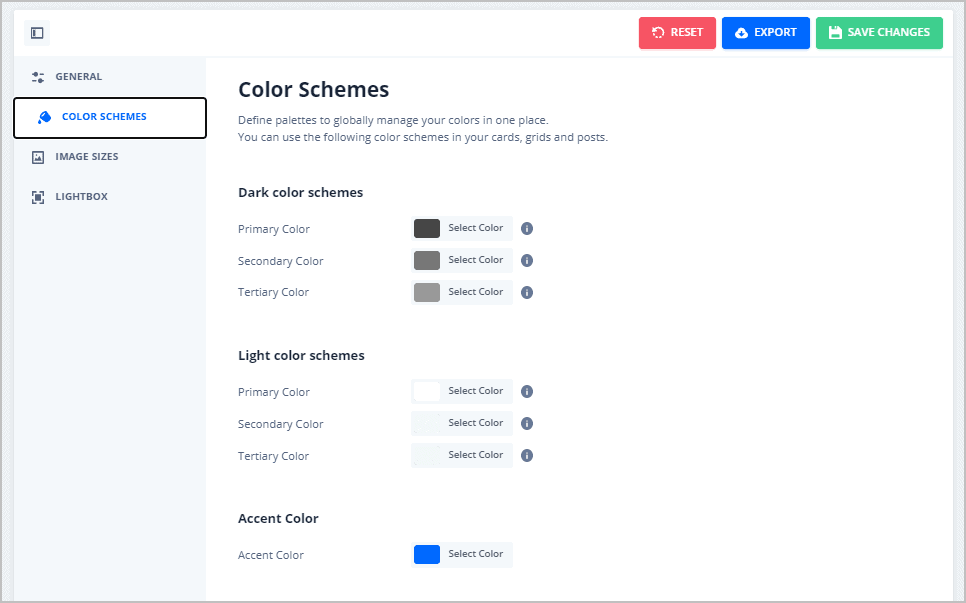
You set your default color options on the Colors screen.
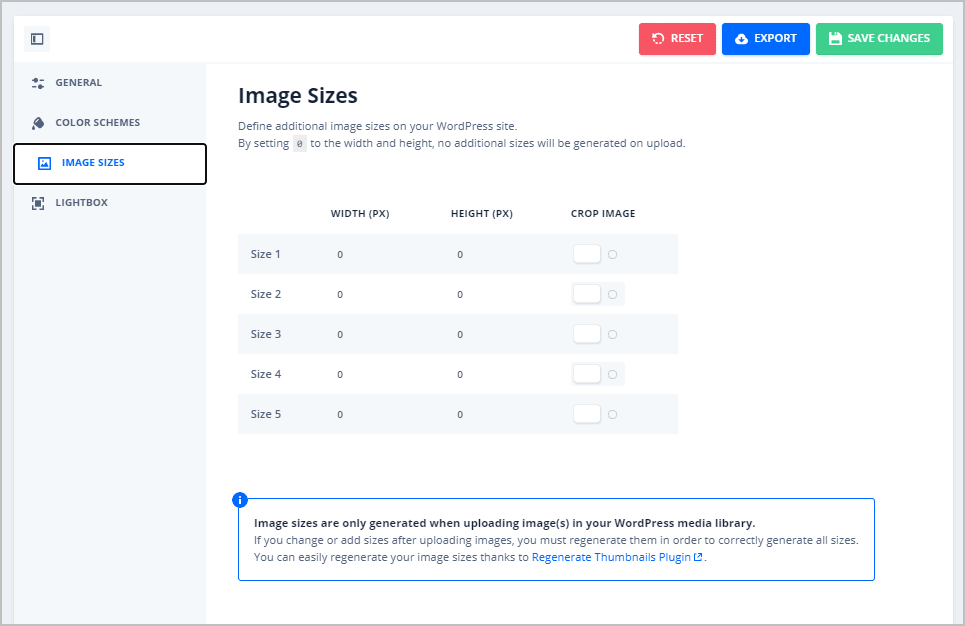
By default the plugin uses the theme image sizes and those set in the Settings Media page. However, you can define your own sizes if needed, which are applied to any new images you upload.
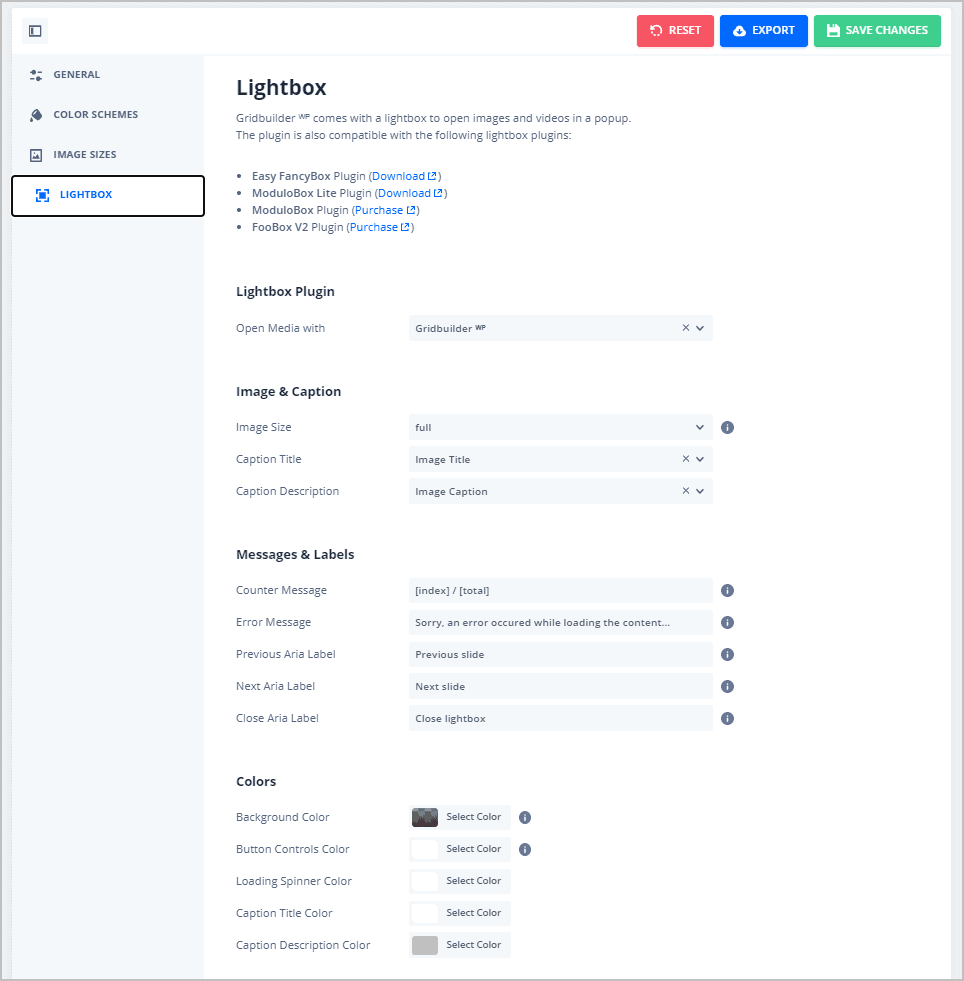
WP Grid Builder has the option to open images and videos in a lightbox. It comes with its own lightbox feature or you can use one of the supported lightbox plugins.
I went with the default settings, but it is a good idea to go through the settings area first, as these will be used when you create your grids and facets. There are a lot of options, but the good news is that each one has a little information icon. If you click on the icon then you get a tooltip that tells you what that setting is for.
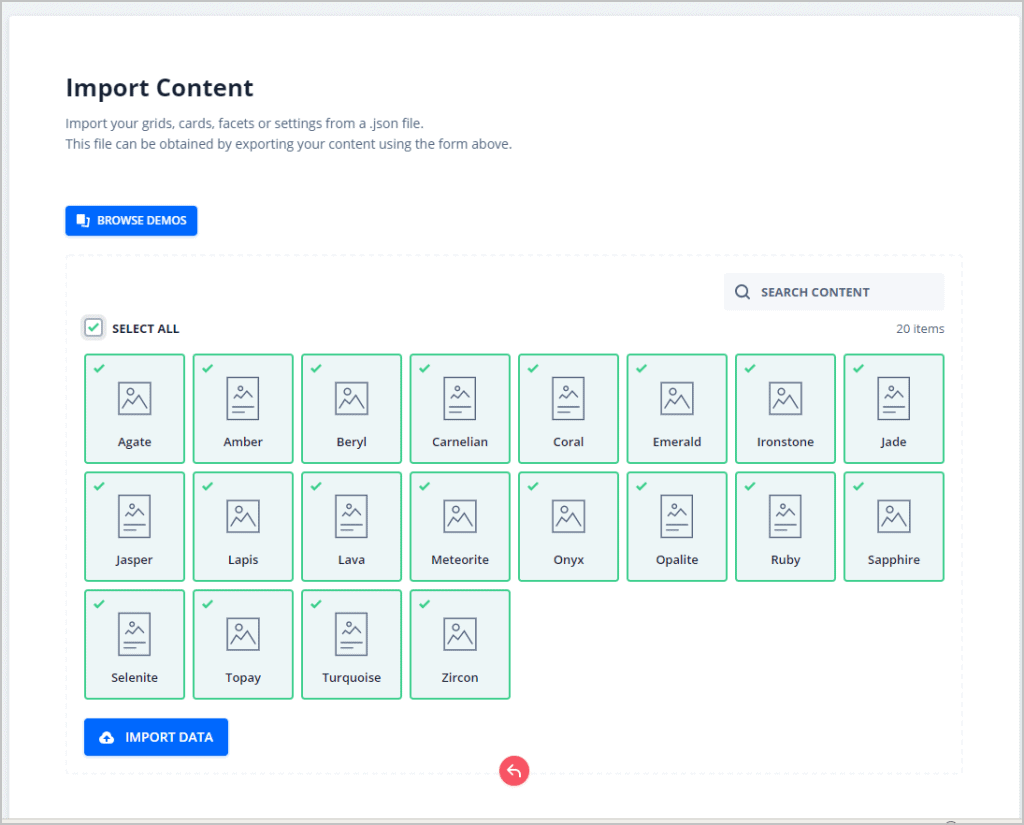
Another thing to keep in mind is that several of the screens have an “Import Data” option. The demos aren’t installed by default. If you want to use one then click on the ones you want to select them and then click the Import Data button.

Creating a Card From Scratch
I decided to create a card for my post grid first, since I figure it will be used later when creating the grid. I went to the All Cards screen and clicked the Create Card button. Wow, the card builder is pretty sophisticated. You have layers, display modes, and content blocks, along with a CSS editor.
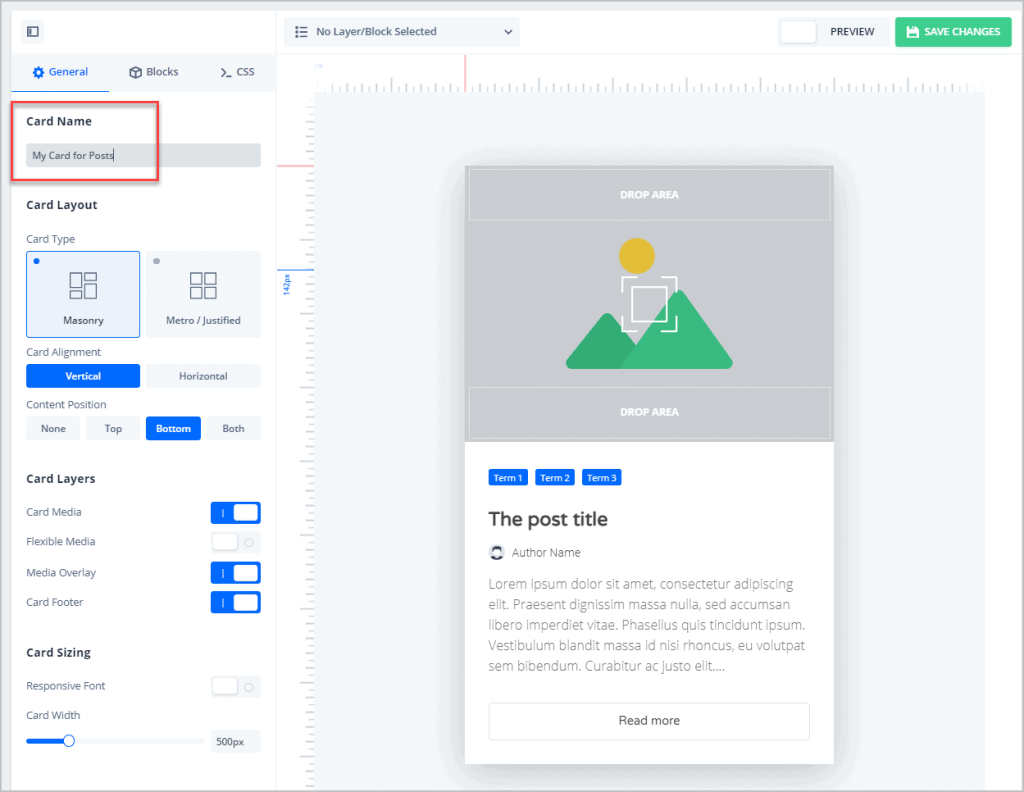
Card General Tab
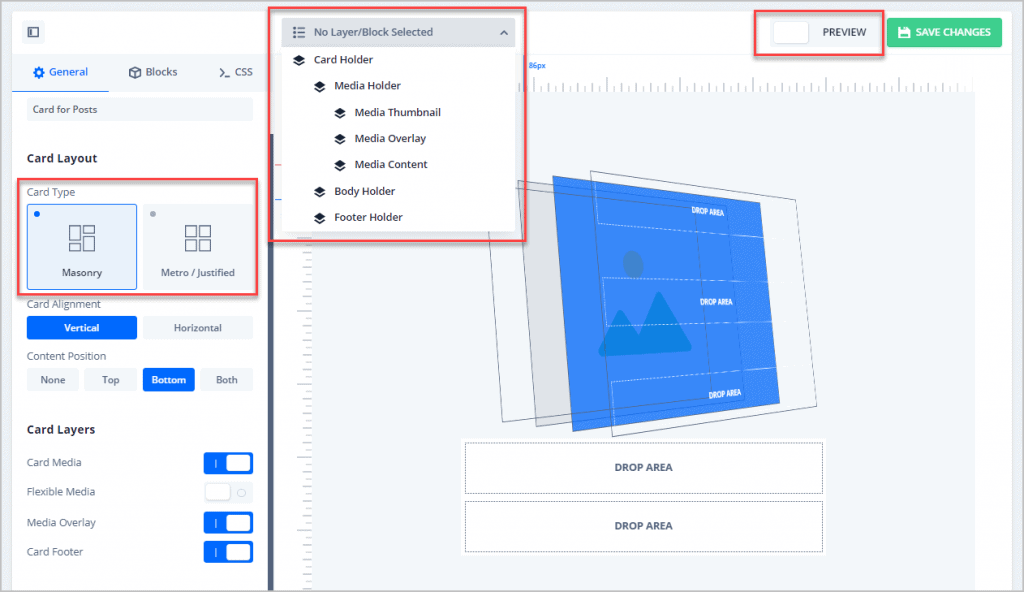
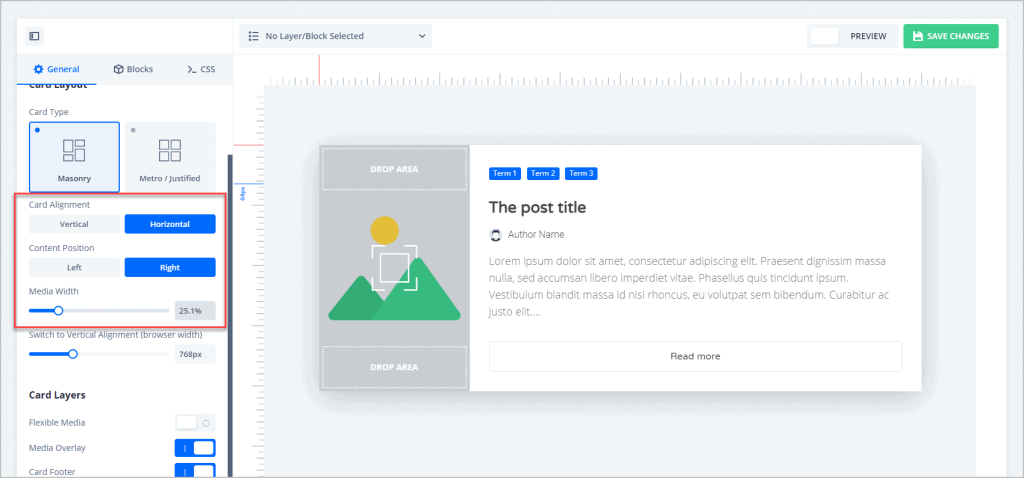
I gave mine the name “Card for Posts.” In the screenshot, note at the bottom left the “Card Layers” area. There are for optional layers: media, flexible media, media overlay, and footer. There is a dropdown at the top where you can see the structure and click on a layer or block to edit it. There are two card layout options (left near the top) that correspond to the type of grid you want to use. WP Grid Builder supports three types of grid: masonry where the cards are different sizes, metro where the cards are a set tile, and justified, which is a grid where the cards are the same size. There are two viewing modes (top right button toggle). By default you are in builder mode, but if you click the toggle then it will show you a preview. There are also alignment options (left center) for vertical or horizontal cards and for where the content is aligned. I decided to go with the defaults on all of these.
Card Blocks Tab
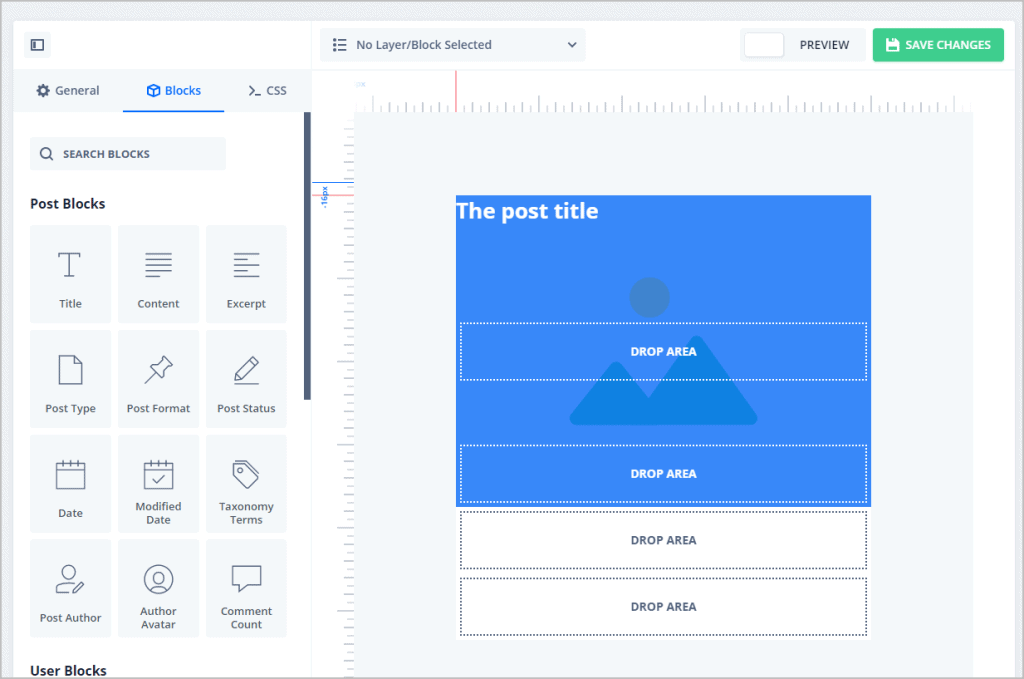
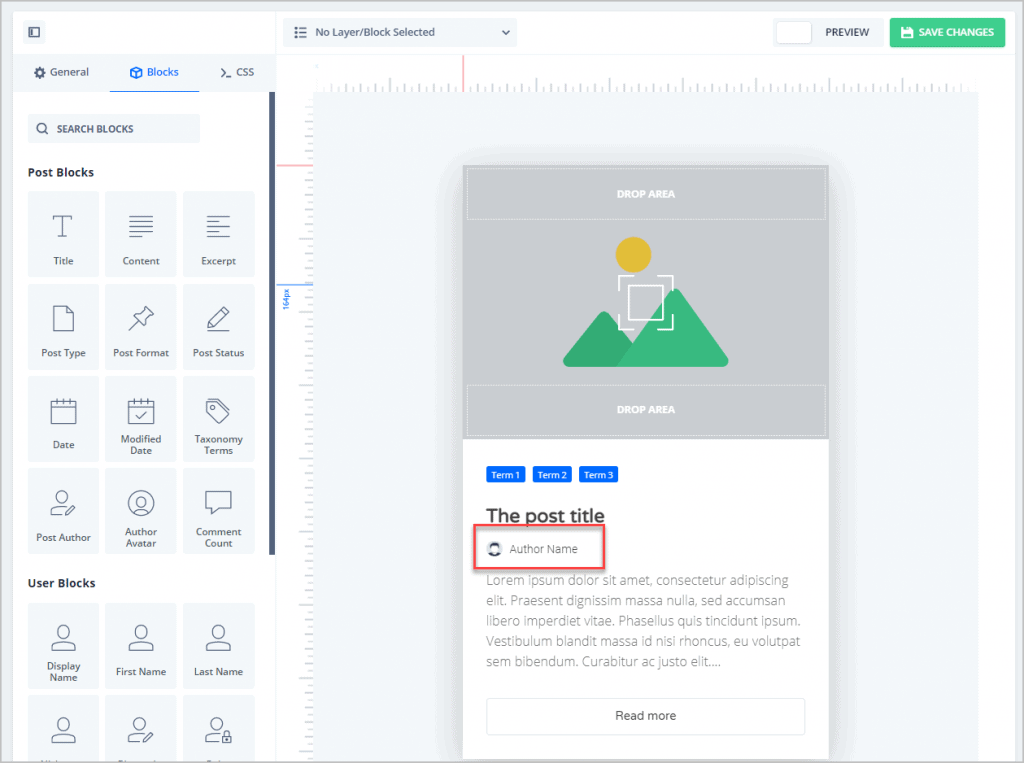
Switching over to the Blocks tab there is a left and a right side. On the left there are 32 types of blocks that you can use. These are organized into blocks related to Post, User, Terms, Buttons and Icons, and Custom, which includes a block for custom fields. On the right side there is a canvas where the blocks are placed.
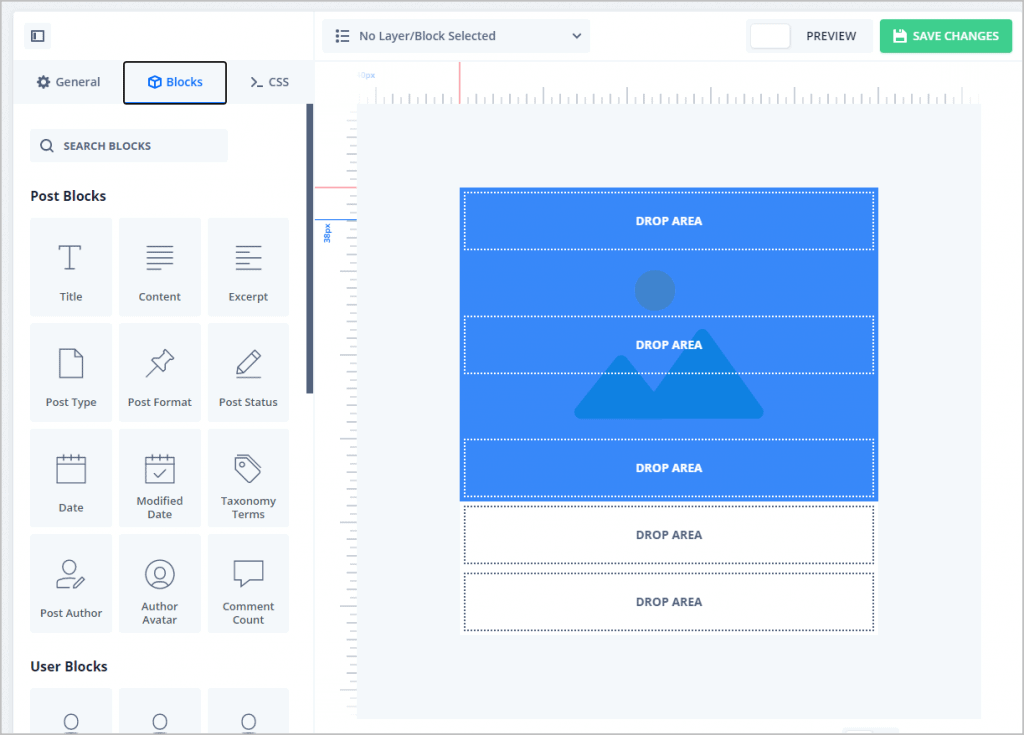
The blocks on the left make sense, but I found the canvas area on the right confusing. First off, there is no block for featured image. It took me a while but I figured out that the placeholder behind the blue drop areas must represent the featured image. Another confusing thing was that the areas on the canvas say “drop area” but I don’t think the blocks are draggable. Instead, they seem to insert at the top when you click on one.
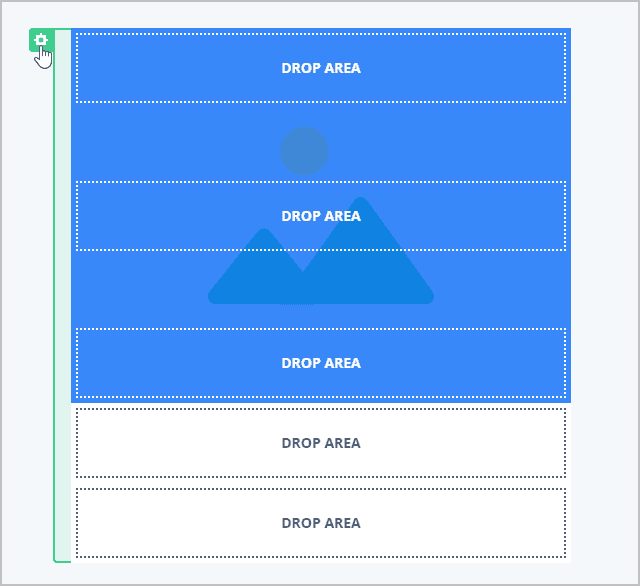
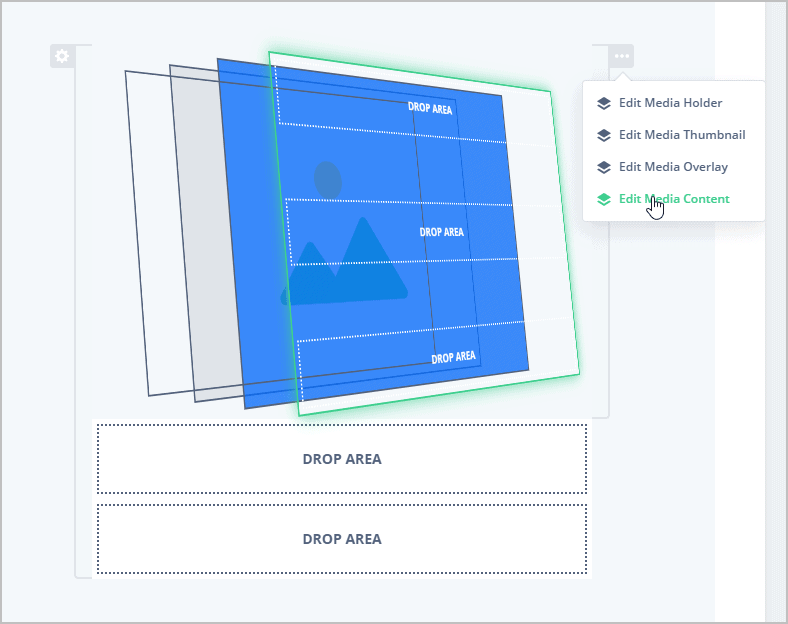
You can access the settings for the card as a whole by hovering over the card and clicking the cog on the left.
You can access the drop area settings by hover over the right. The top area in blue is the media area. The middle white drop area is the content area and the bottom one is the footer area.
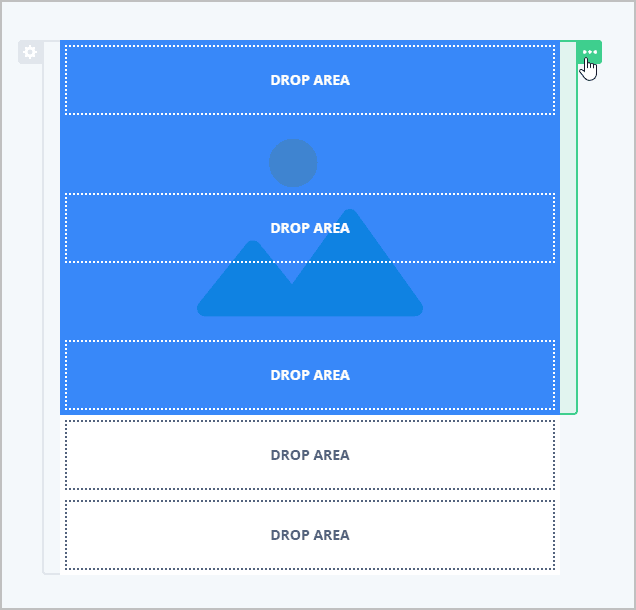
The media area has layers that you access by clicking the three dots. Kind of cool that the layer highlights in green as you hover over it in the list.
Here I added the Title block and it gets added to the top. I didn’t see any way to select which drop area it gets added to.
If you click on a block after it has been added then you get a popup with settings. Notice at the bottom of the settings window there is the trashcan to delete the block and another button to duplicate it. There are also up and down arrows there, which seems to be how you position the block on the card. On the Content tab you can provide a class name for styling, select the HTML tag and the source and field.

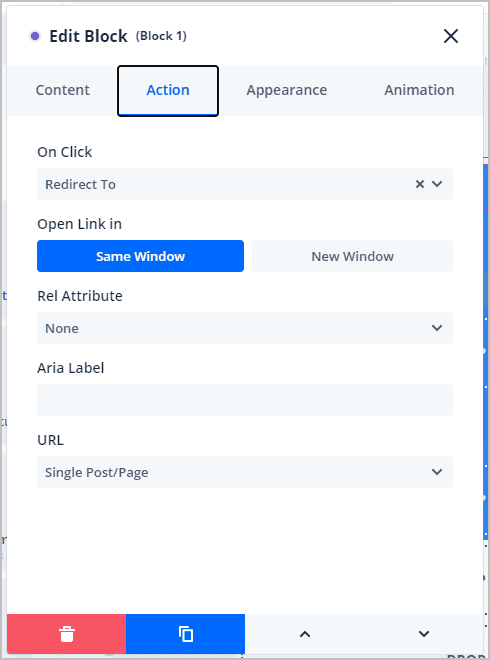
On the Action tab you define what happens when the block is clicked.
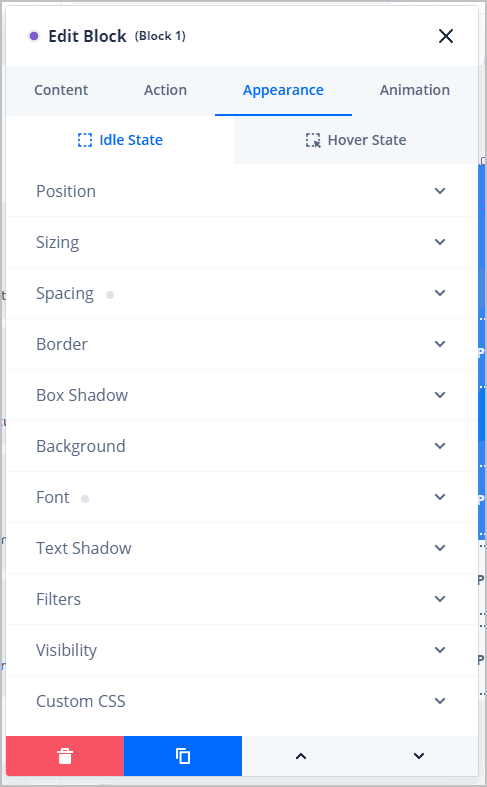
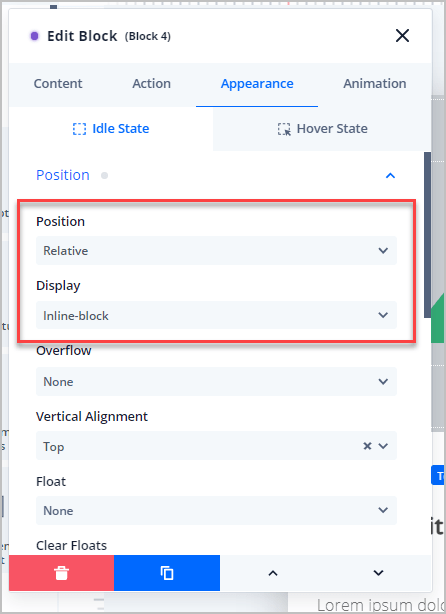
On the Appearance tab there are a lot of layout and style options for both the regular state and the hover state.
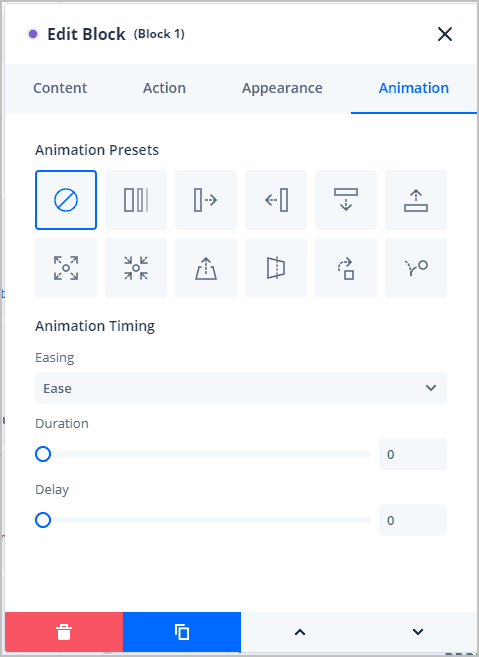
On the Animation tab you can set an animation.
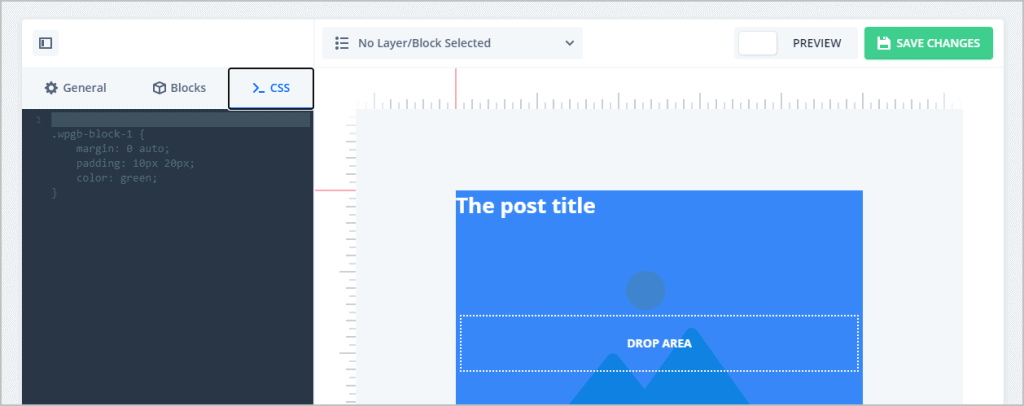
The CSS Tab
The CSS tab is where you can enter your styles for the card as a whole.
Creating a Card from a Demo
I tried adding some blocks and moving them around, but felt a bit lost. I checked the online help and the WP Grid Builder’s YouTube channel. There is some documentation, but it doesn’t have any step-by-step instructions.
I decided that I needed to see the demos to understand better how the card editor worked. I saved my block and went back to the All Cards screen. I saw the card I just created, but the demos were gone. I went to the Dashboard and clicked on the Import button and then selected all the cards.
Back on the All Cards screen I could see the card demos. Some of them show and additional thing, like a title or a read more link, when you hover over them.

I looked through the demos and picked the Amber card, which seemed to be kind of traditional.

I clicked the duplicate icon, which gave me another card, also named Amber, at the end of the list. I clicked on that one to edit it. When it opened in the editor I gave it the name of My Card for Posts (I had deleted my previous experiment).
On the Blocks tab I was curious to see how they positioned blocks side by side, such as the author avatar image and the author name.
I went into the settings and saw that they were given a relative position and set as inline-block. Now you know, should you attempt to create your own card.
This was good enough for me, so I saved.
Creating the Facet
I figured that I wanted to add a category facet on the my posts grid, so the next step was to go to the All Facets screen. This time I had learned my lesson, so I started by importing all of the demos.
Looking at the docs, I saw there there are several different types of facet action:
- Filter content from Taxonomy terms, WordPress fields or custom fields
- Load content with a pagination or load more button
- Sort content from WordPress fields or custom fields
- Apply selected filters or redirect to a filtered page
- Reset selected filter values and refresh content
So I wanted a filter facet. I clicked the duplicate button on the bottom demo facet.

This gave me a new one at the top named Selection-2

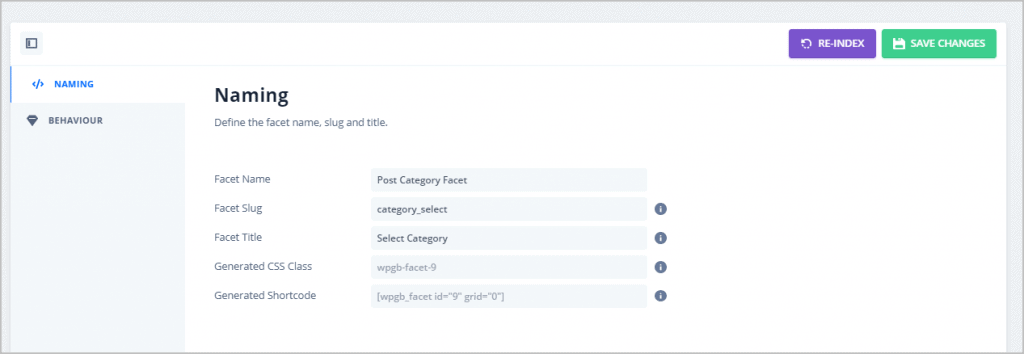
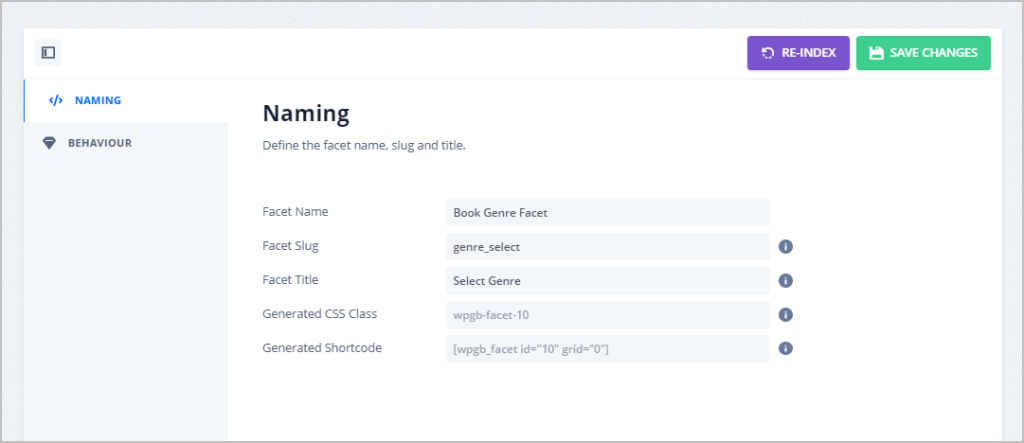
I then clicked the edit clog and on the naming tab and I changed the name, slug, and title. The title is what shows above the facet on the front. I saved changes and went to the Behavior tab.
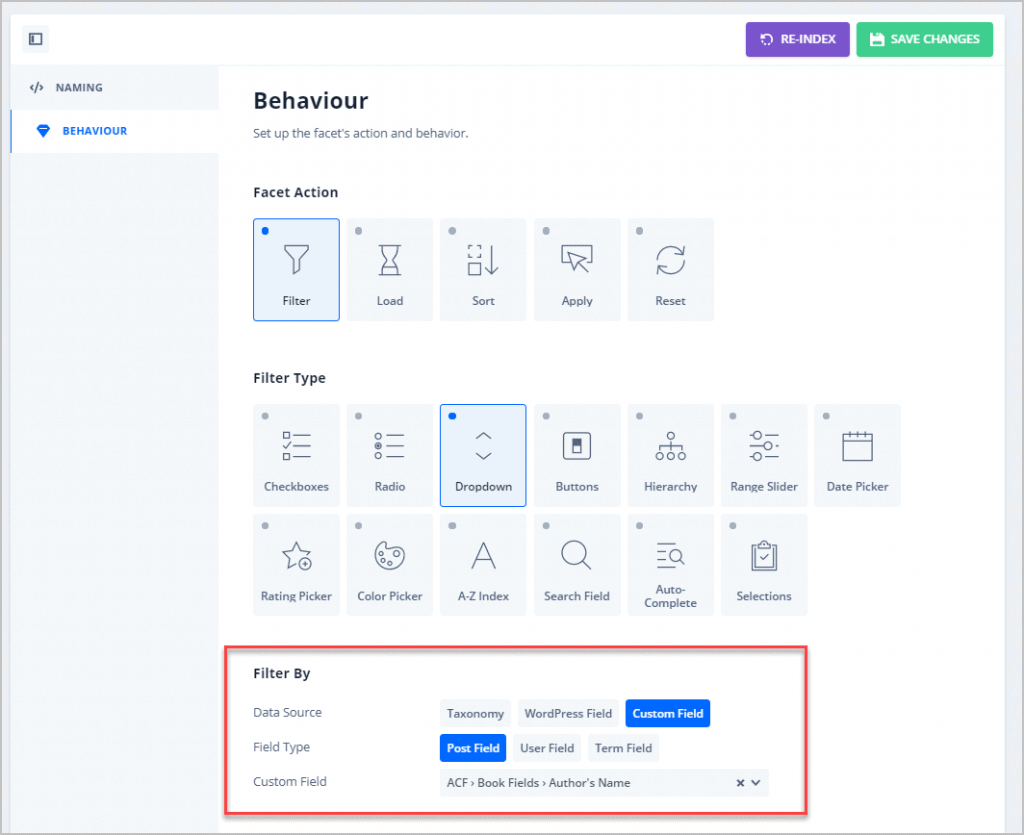
The options change on the behavior screen depending on the Facet Action and Filter Type.
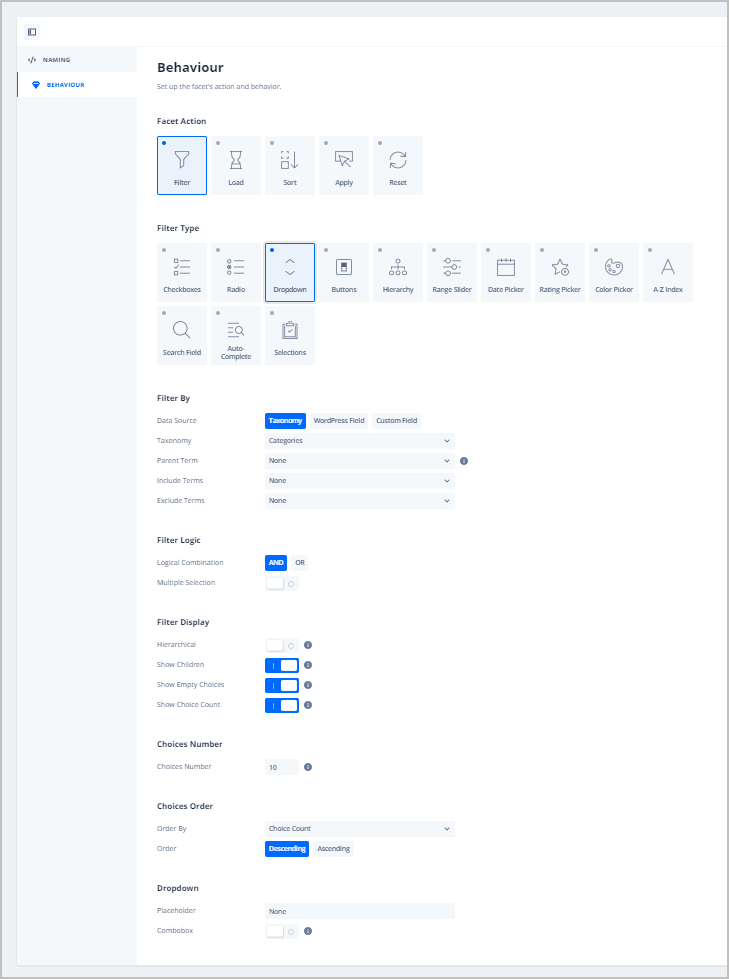
I selected for a dropdown, categories, ordered by category name, and to show the count. I saved.
Creating the Grid
Finally I was ready to create the grid. I went to the all grids screen. Again, I selected all and imported the demos.
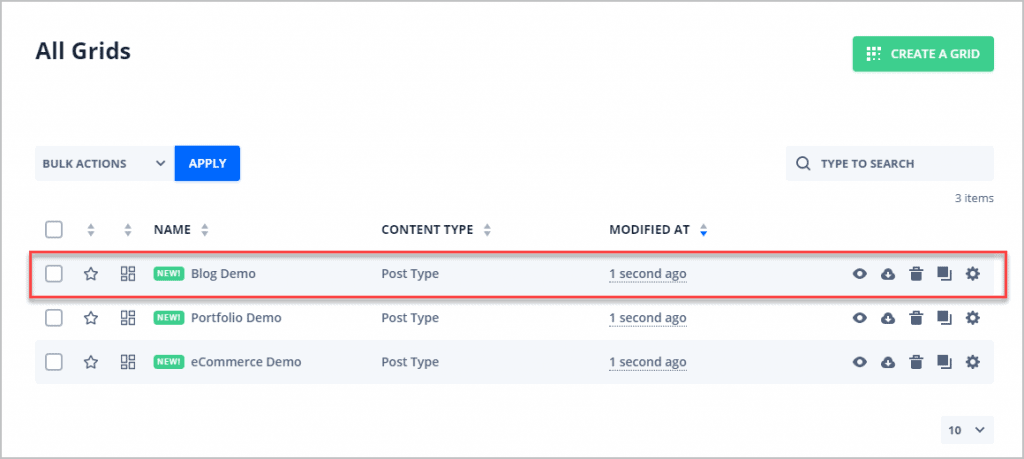
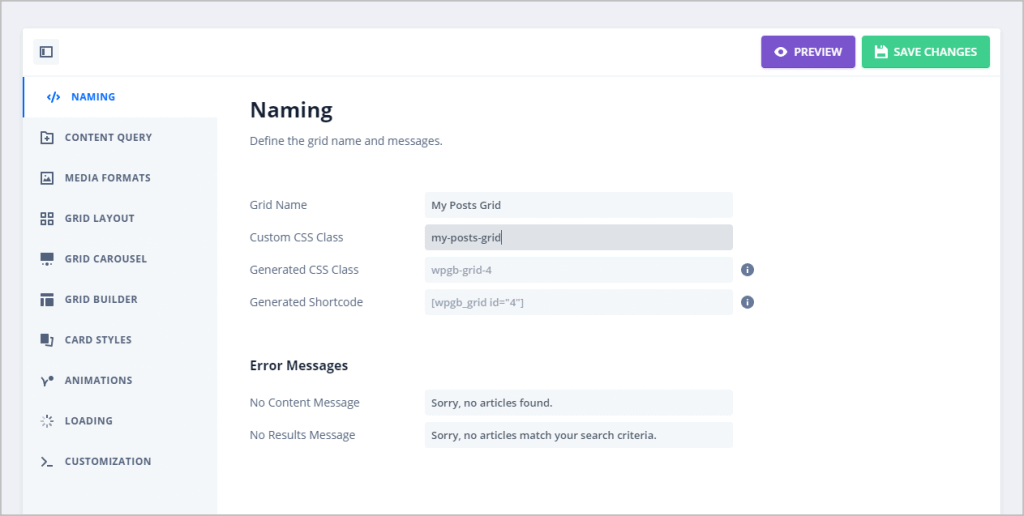
I duplicated the Blog Demo and clicked the cog icon to go into the settings. On the Naming tab I supplied a grid name and a class name for the grid.
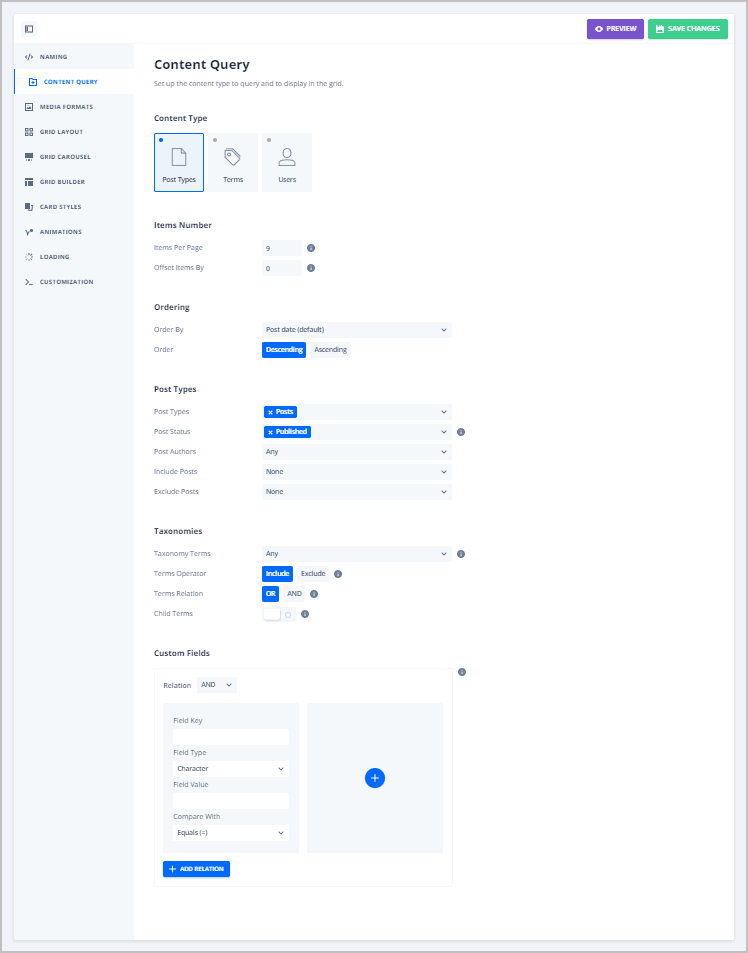
On the Content Query tab I selected the Post Types content type and left the other settings at their default.
On the Media tab I selected Gallery and added a default thumbnail in case one of the posts was missing a featured image.

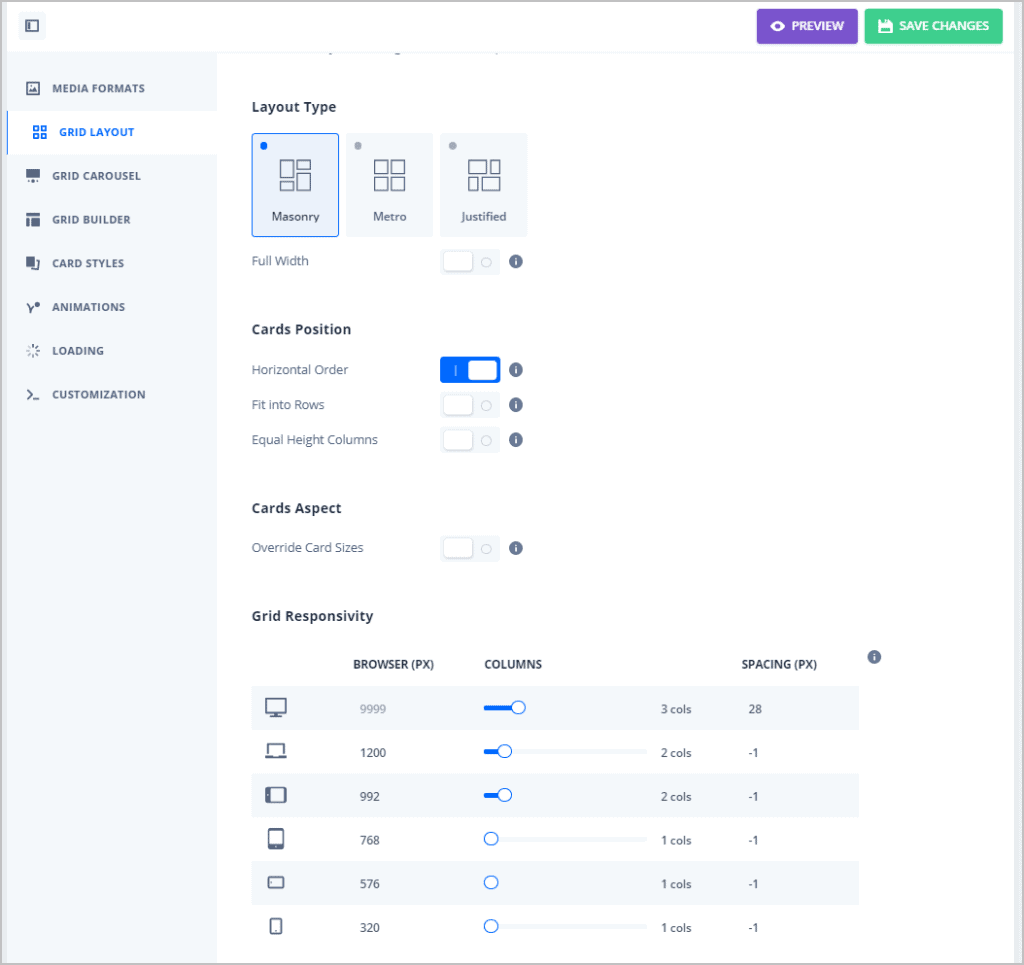
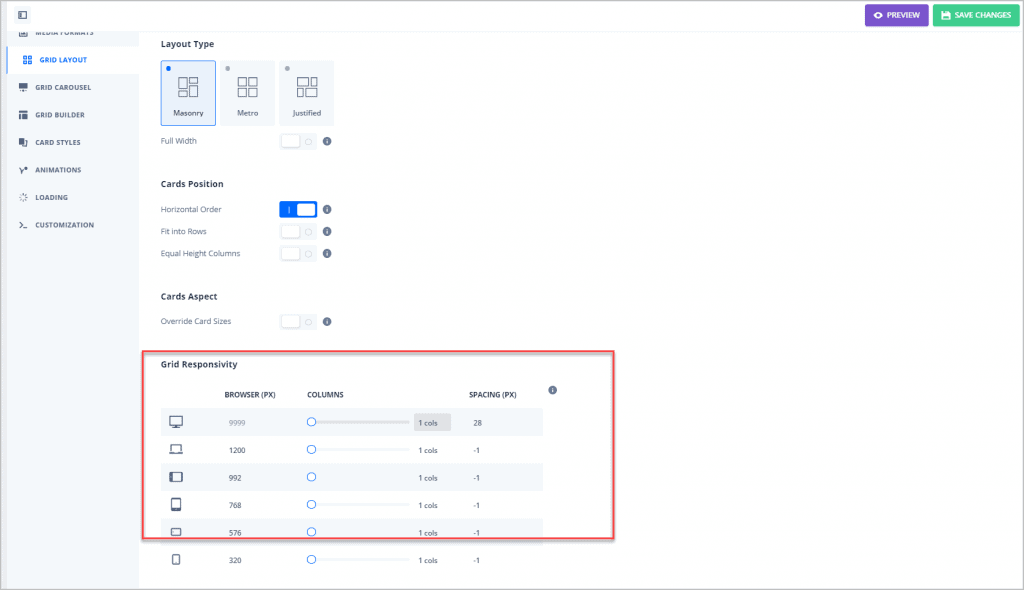
On the Grid Layout tab I selected Masonry and left everything else at the default.
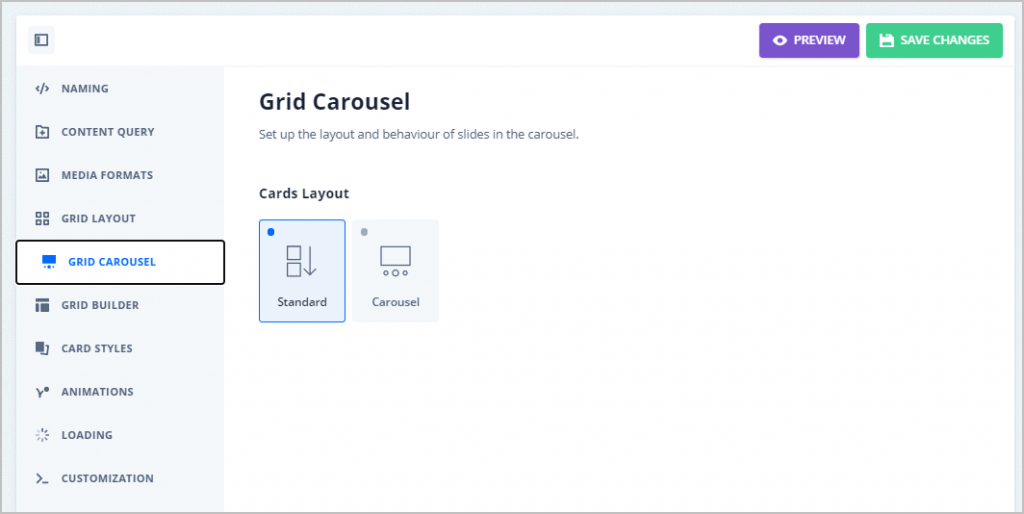
The Grid Carousel tab lets you turn this into a slider, but I didn’t want that.
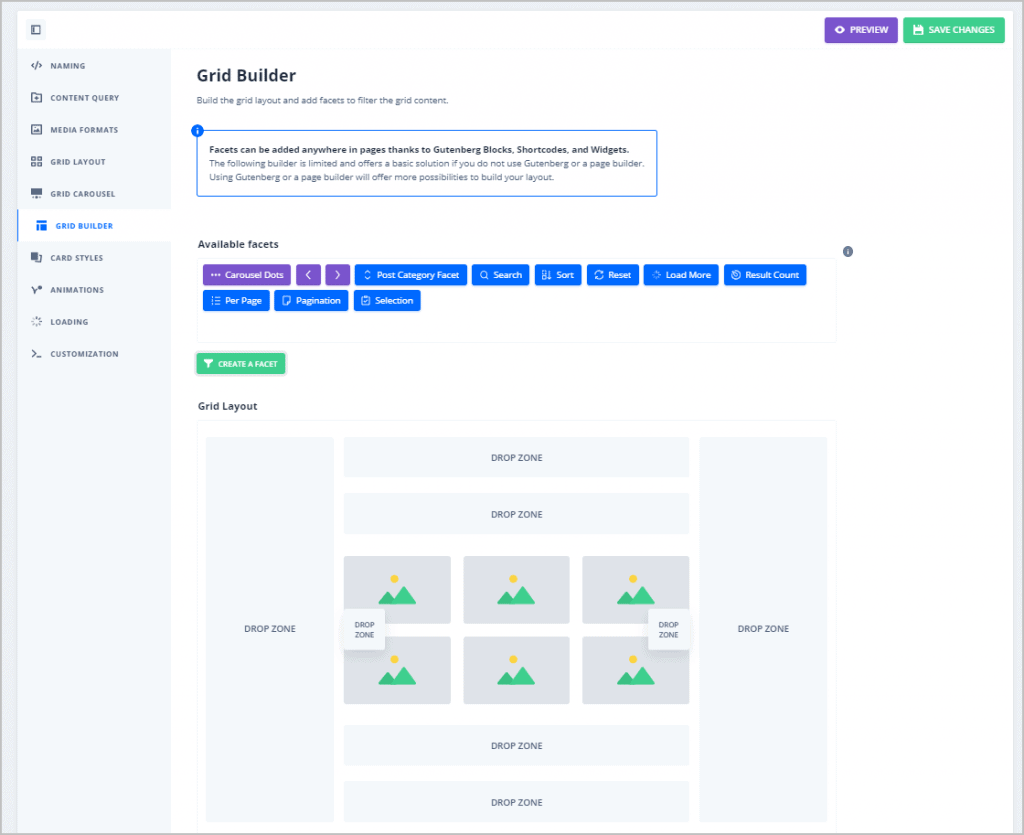
When I saw the Grid Builder tab I realized that this was mainly for when you were going to insert the grid via a shortcode. When using a supported builder it wouldn’t be needed. The only thing I wasn’t sure about is pagination. I decided to skip this one and come back after trying to insert it on a page using Gutenberg, if necessary.
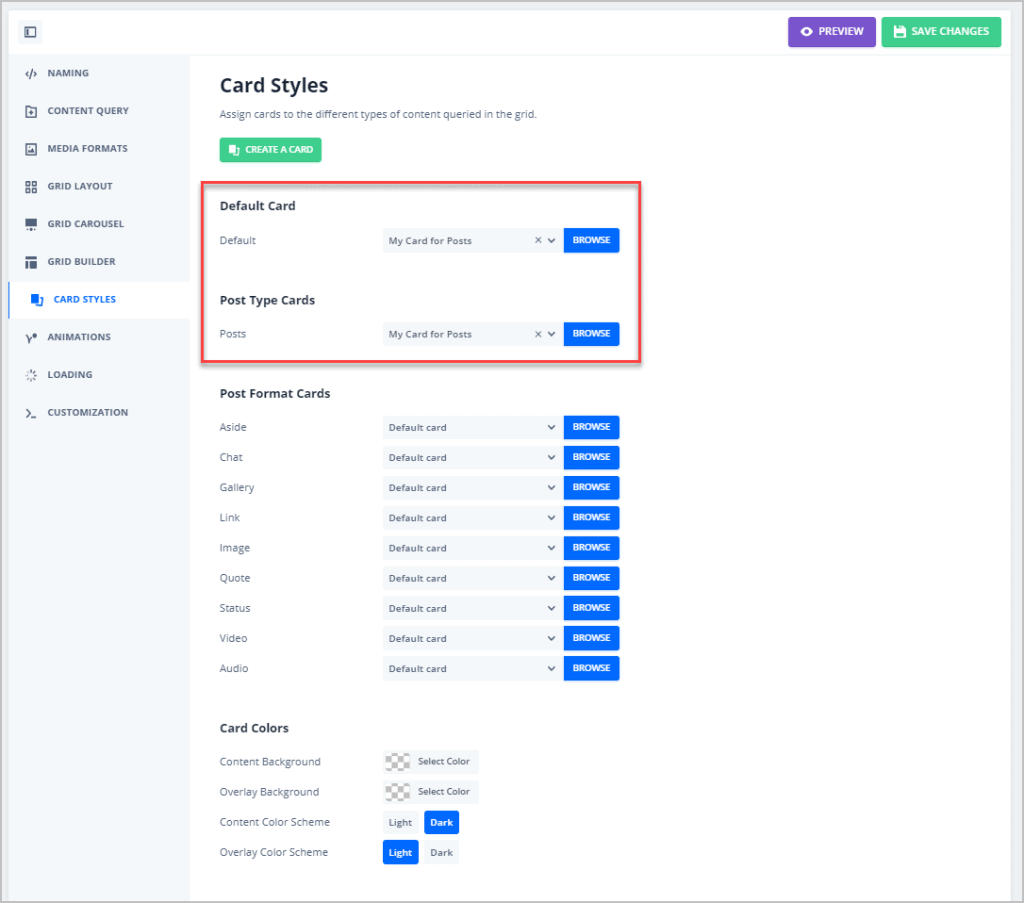
On the Card Styles tab I selected the card I created earlier. It is cool that you can have a different card layout for each post format.
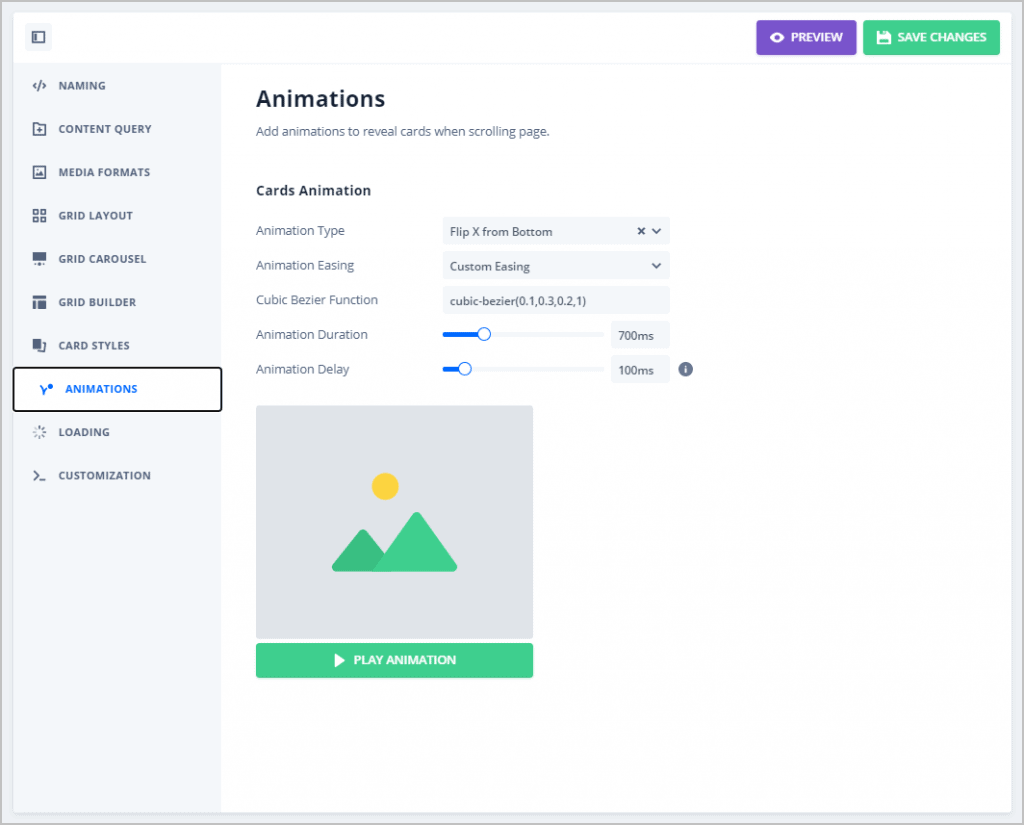
I left the animations at their default.
The Loading options were also left at default.
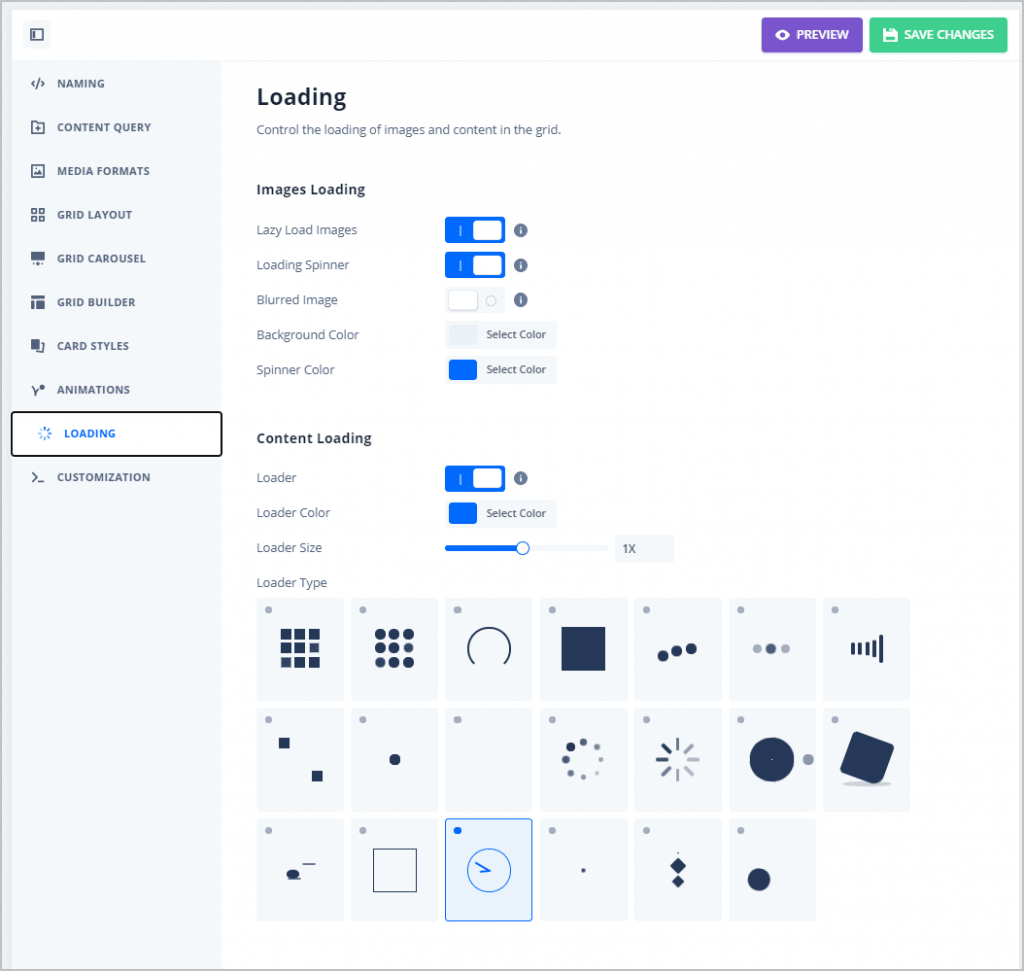
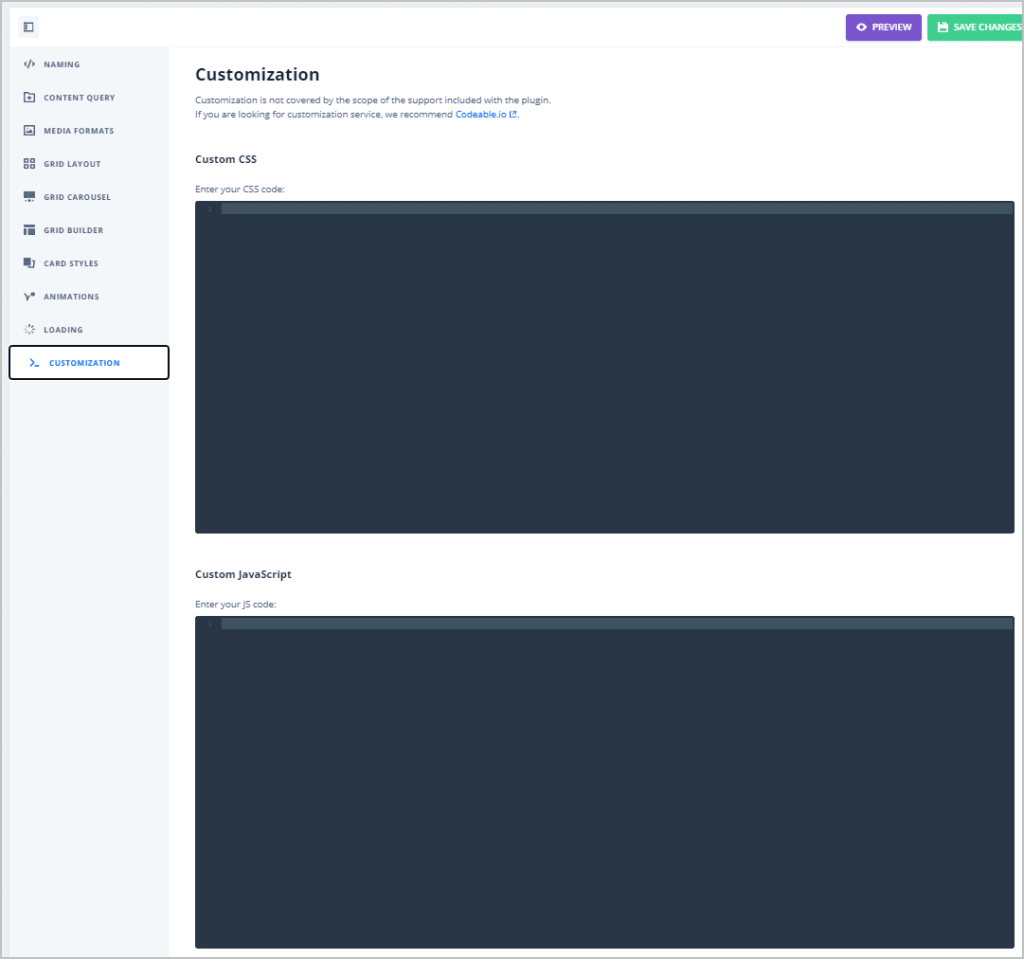
On the Customizations tab you can add custom CSS or JavaScript.
Creating a Page with the Grid
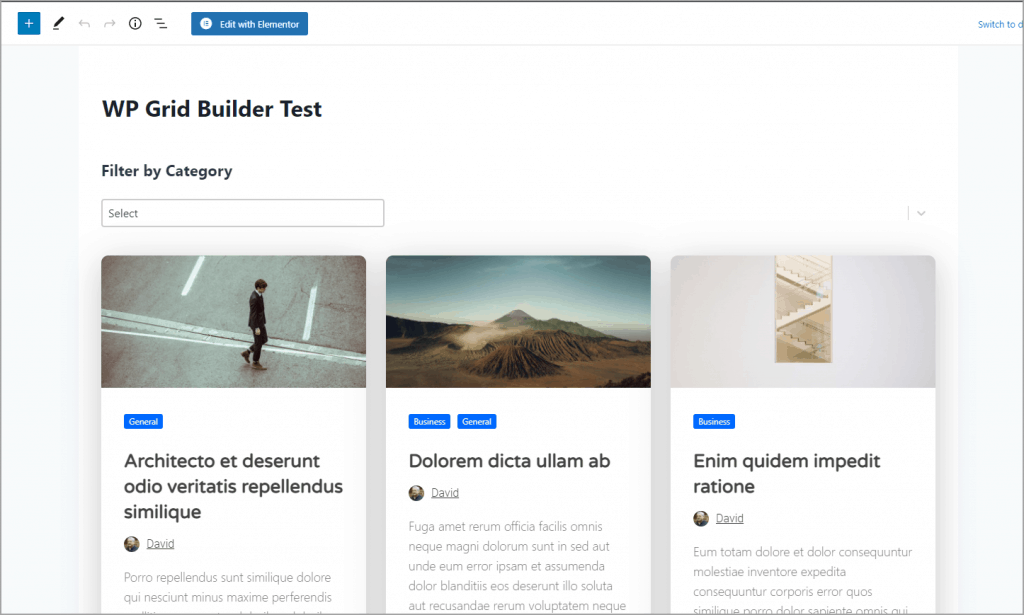
I was hopeful that I had done enough to get a working page going. So I created a new page called GridBuilder Test. I checked the available blocks and saw that there was a grid block and a facet block.
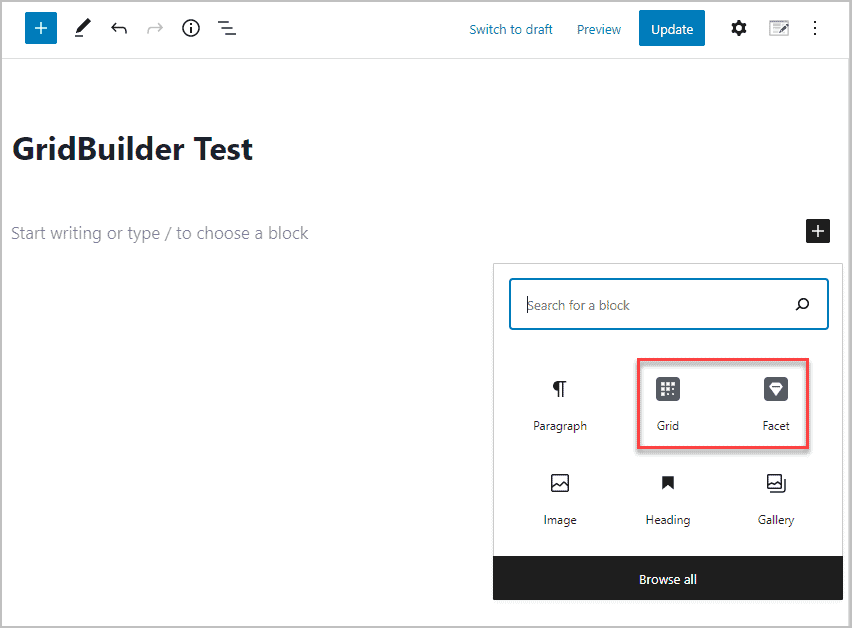
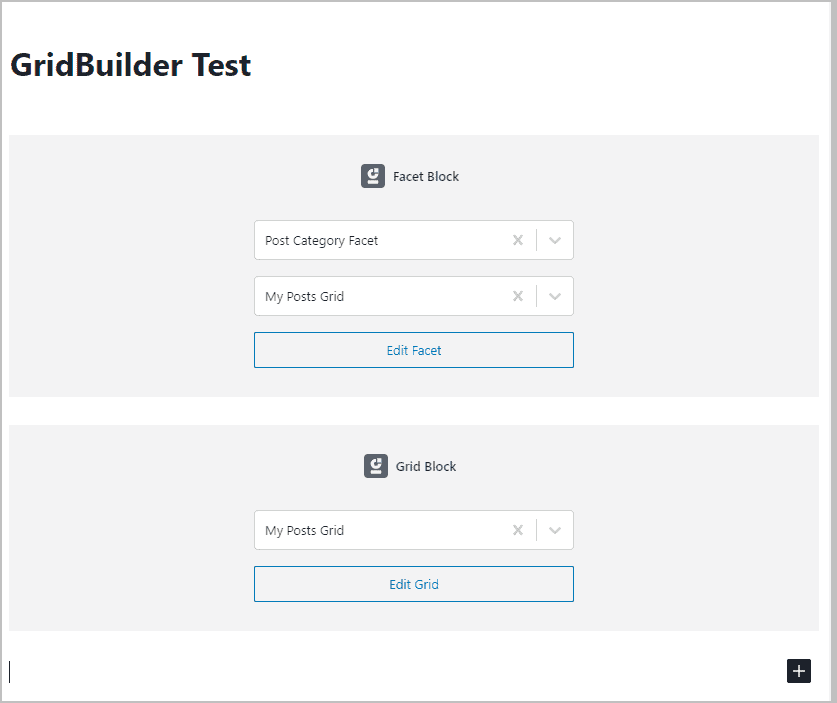
I added these blocks to the page and selected the facet and the grid. There aren’t any other block settings available in Gutenberg. I remembered in the settings that you can select to have the grid show in Gutenberg, if you need to.
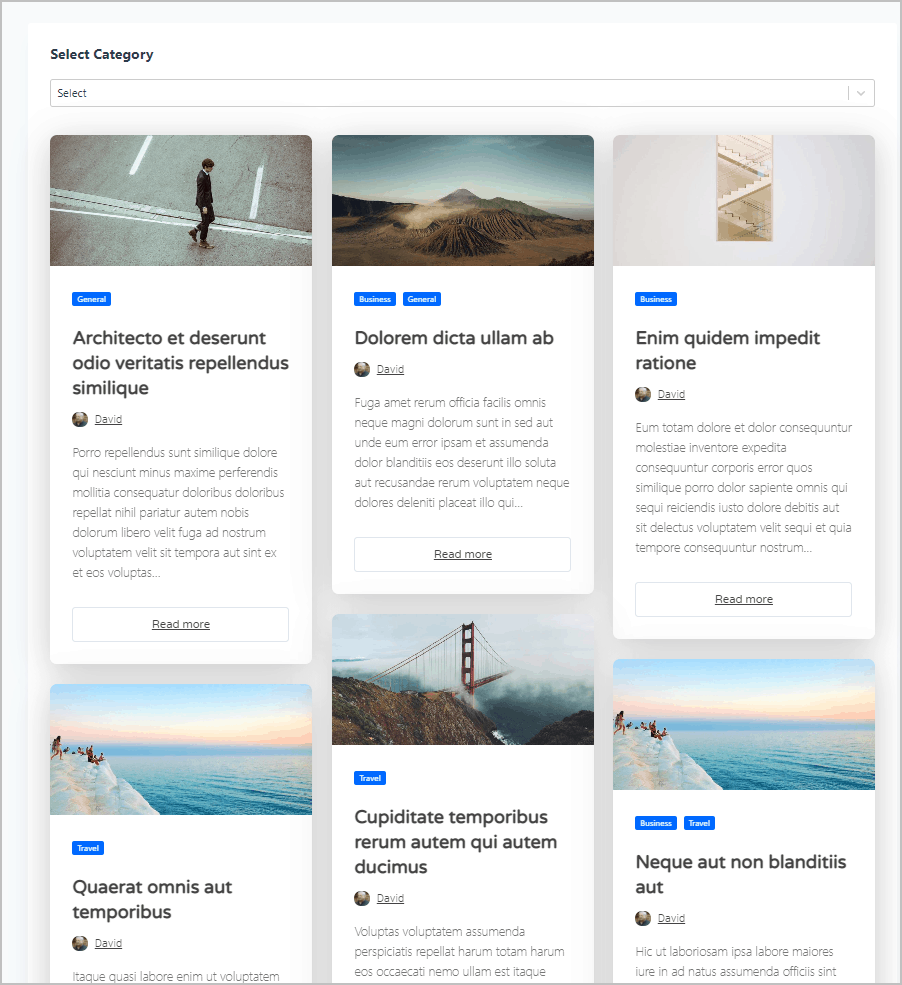
I saved and went to take a look at the frontend and the grid showed as it should.
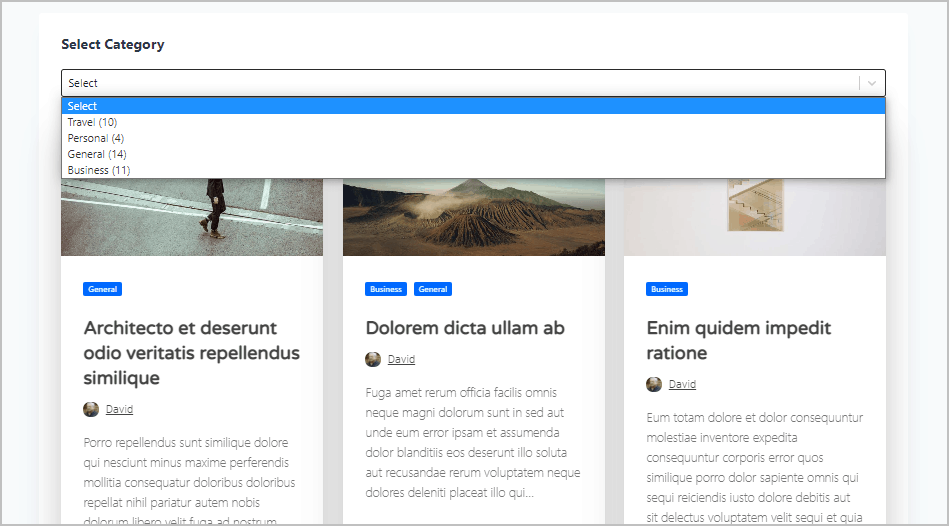
Here is what the dropdown category list looks like.
The only thing missing was pagination at the bottom. So I went back into the grid editor and went to the Grid Builder tab and dropped the pagination facet into the bottom area. I saved that and then went back to view the page.

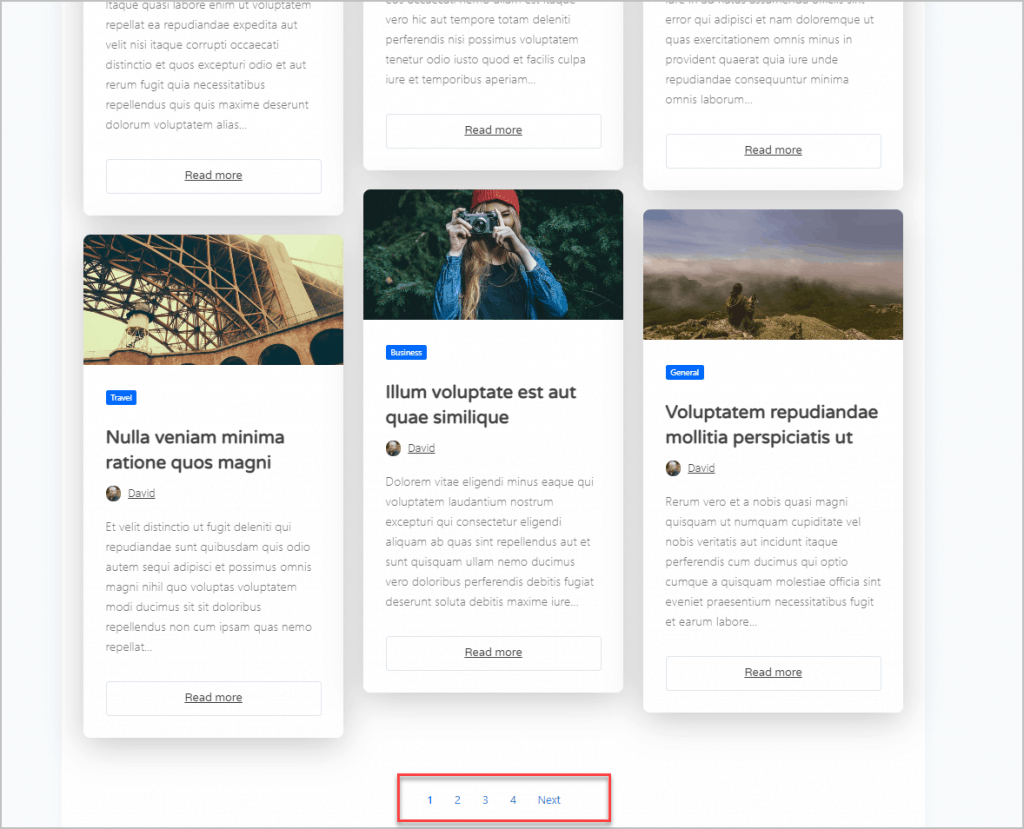
The pagination showed as expected.
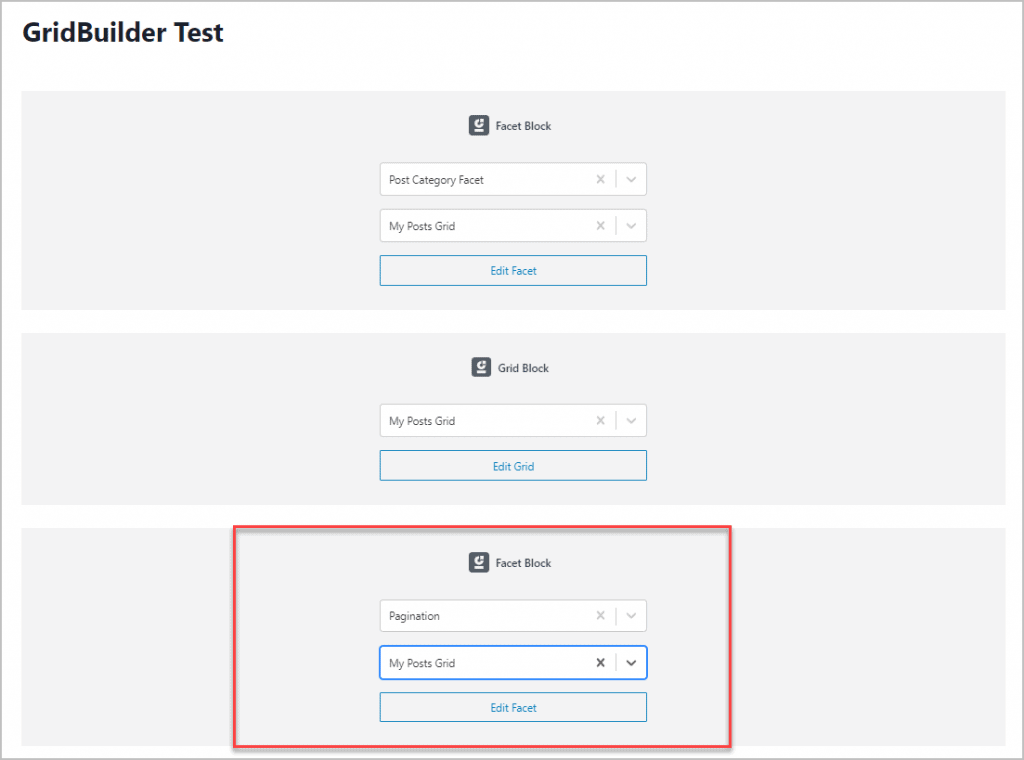
Thinking about it, I realized that I could have instead added pagination as a facet block as shown below.
There is a setting to render the facets and grids in Gutenberg. I went and toggled it on.
I then went into the Gutenberg editor to look at the page we had just created. It displayed fine.
Elementor Test
I decided to see how this worked with Elementor, so I installed Elementor Free. I then went to the addons page and downloaded and activated the Elementor addon.
I created a new page and loaded it into the Elementor editor. I saw the facet and grid widgets.
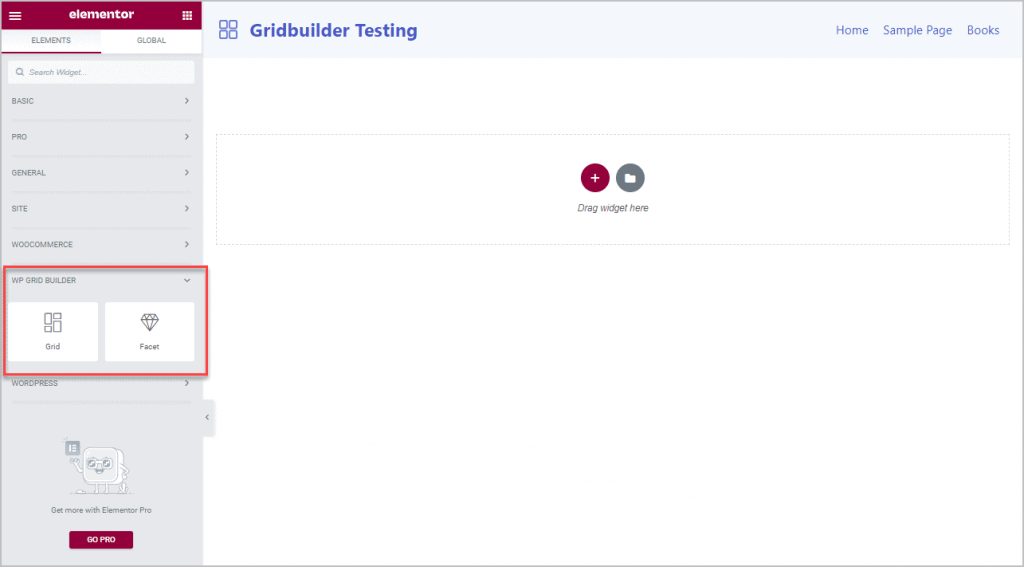
As with Gutenberg, I added the facet widget.
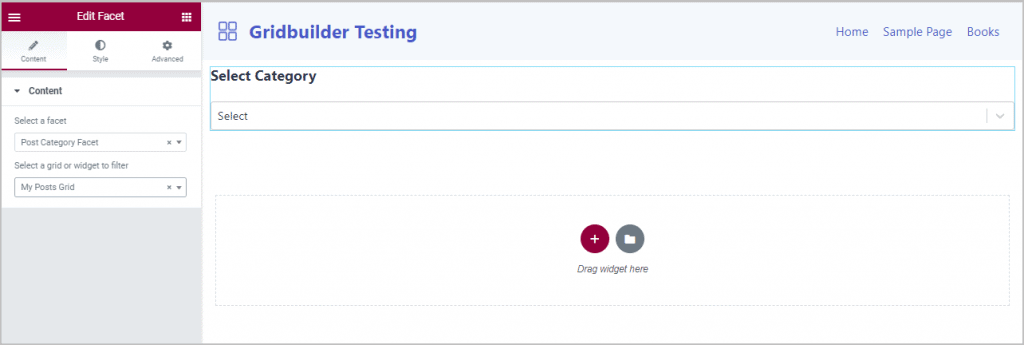
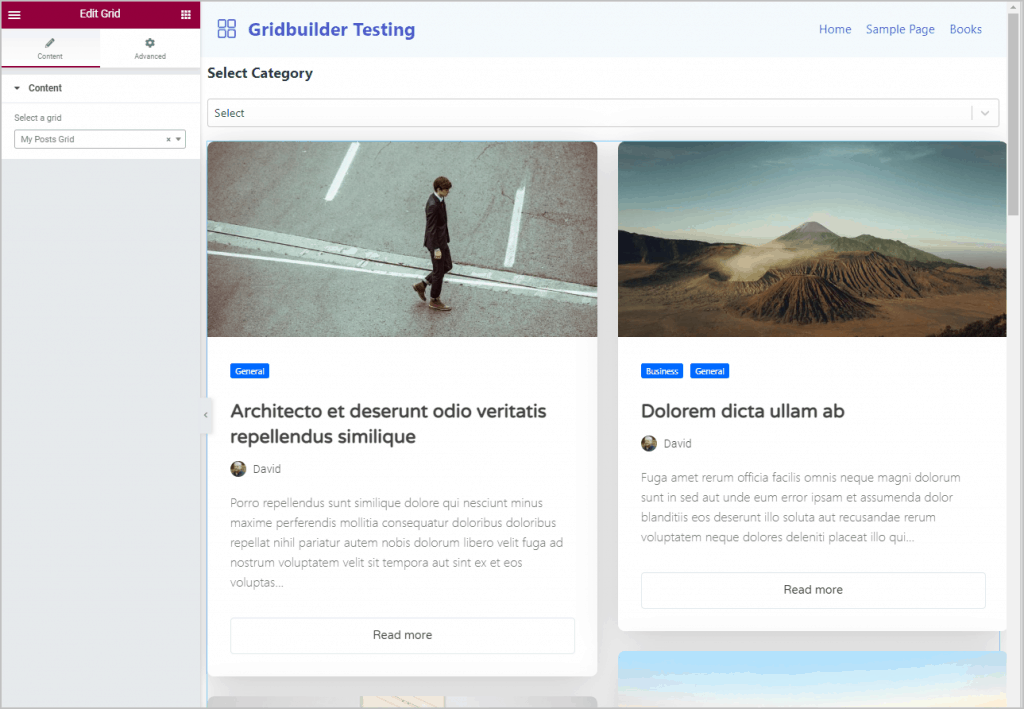
And then the grid widget.
There aren’t a lot of Elementor settings, but the Advanced tab is available.
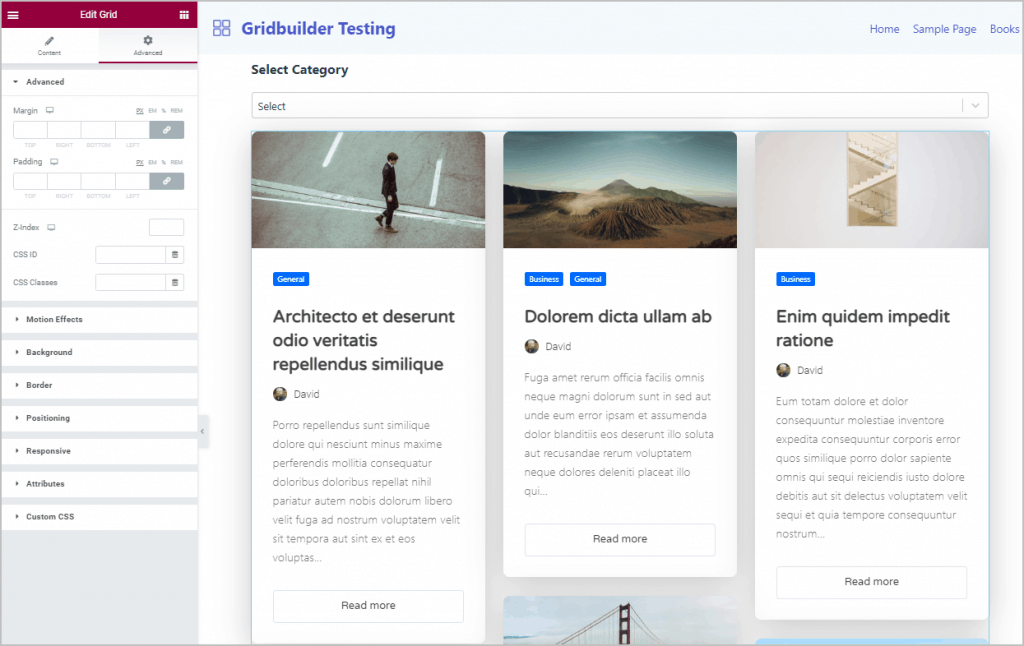
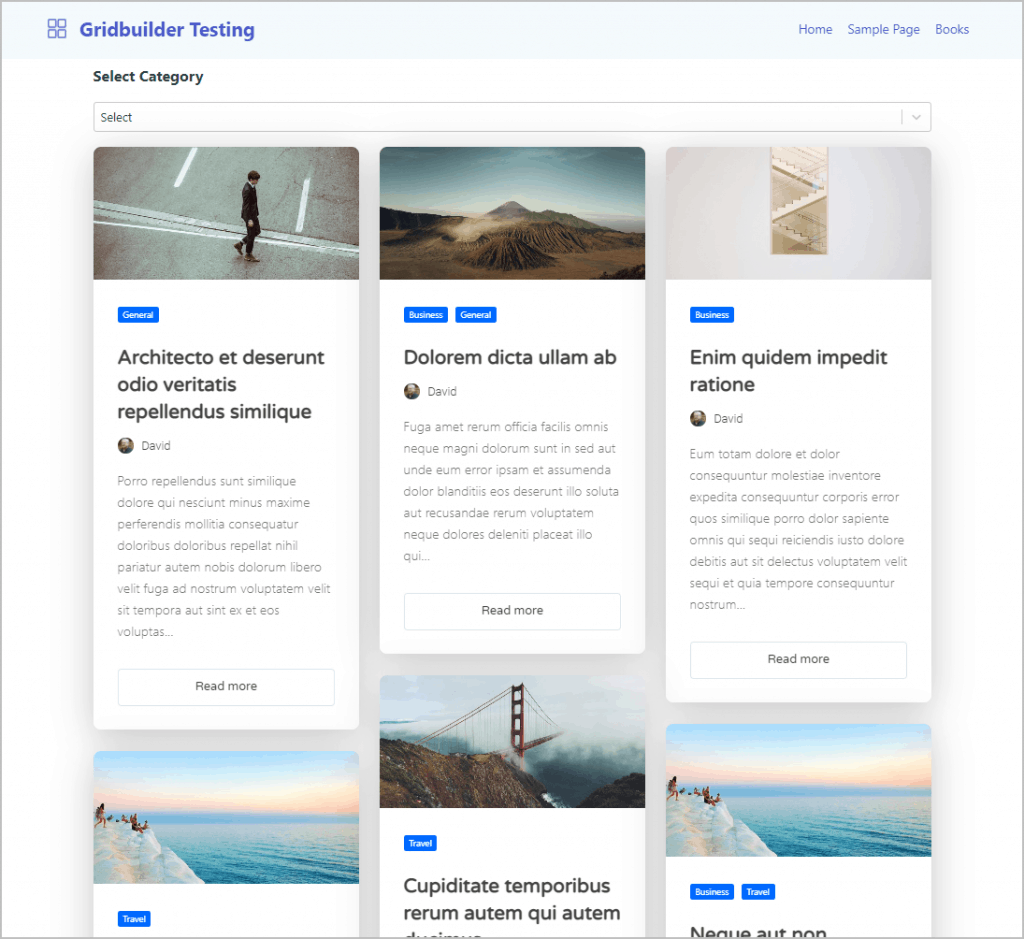
I saved and took a look at the front. Looking good.
Creating a Faceted Grid for a Custom Post Type
With a good set of working examples, I thought I’d try doing the same process for the book Custom Post Type, which has a different type of image (book cover), a custom taxonomy (Genres), and an Author’s Name ACF field that could be used for a facet.
To start I went to the All Cards screen and duplicated the card I created for posts and named it My Card for Books. I then went into the editor. I switched the layout to be horizontal with the content on the right. Then I adjusted the Media Width down so the book cover image would not be too big. I saved that.
I then went to the All Facets screen and duplicated the facet that I’d made. I changed the names of that as well.
On the Behaviors tab I selected the custom taxonomy associated with Books.

I saved that and then duplicated it. This time I wanted to also try using an ACF field for a facet. I gave that the name of Book Author Facet.

On the Behaviors screen for this one I picked the Custom Field source and then the ACF field Author’s Name. I saved this one.
I think you are seeing the process here. It is going really quickly. I went to the All Grids screen and duplicated the grid created earlier, naming the new one My Books Grid.

I changed the Content Query to use the Books Custom Post Type.

On the Grid Layout screen I changed the rows to only have one card.
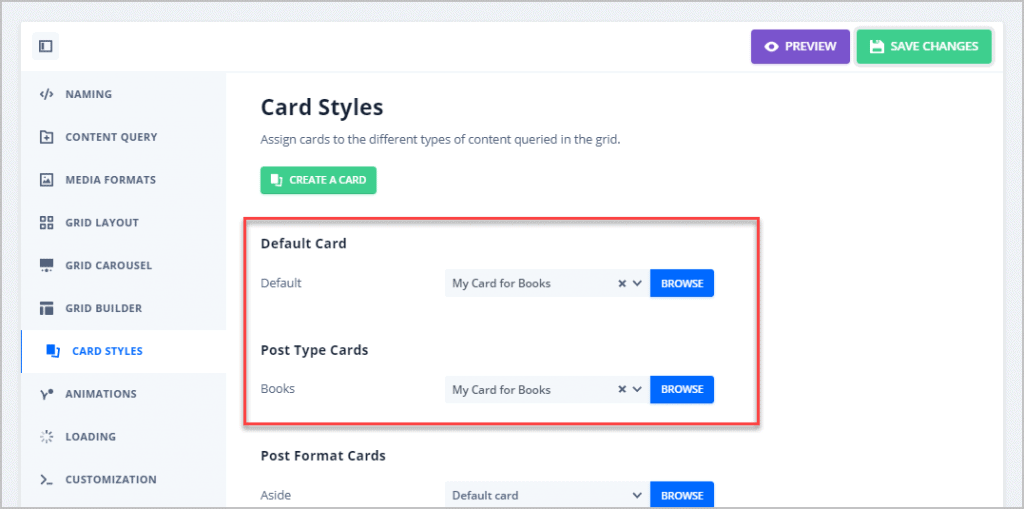
And finally, I picked the new book card for use with this grid.
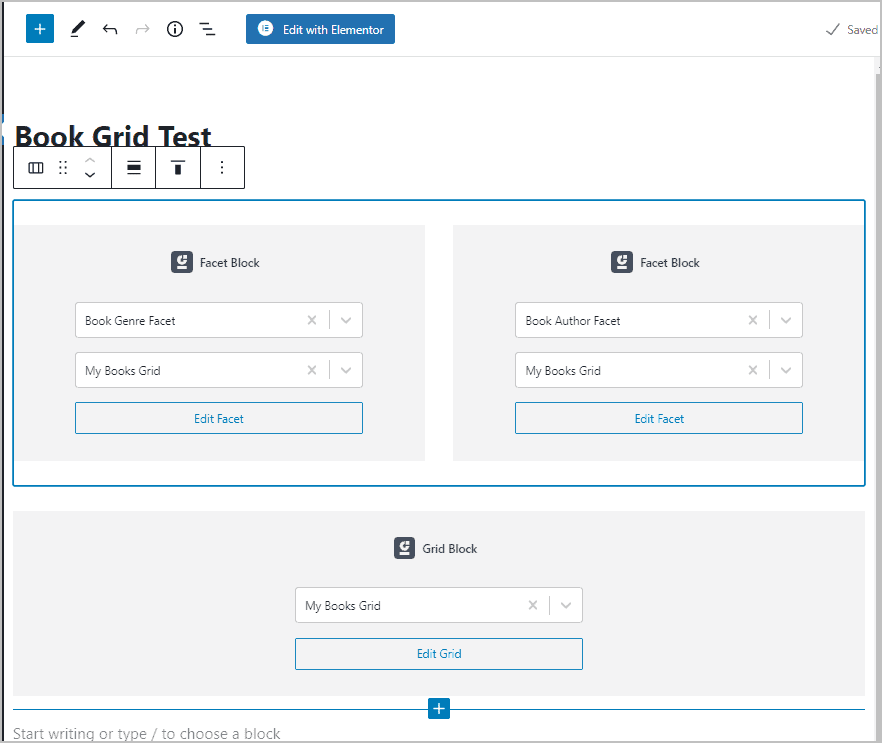
Now that everything was in place, I created a new page. I added a columns block with two columns and put the Genre facet on the left and the Book Author Facet on the right. The grid block was placed below that.
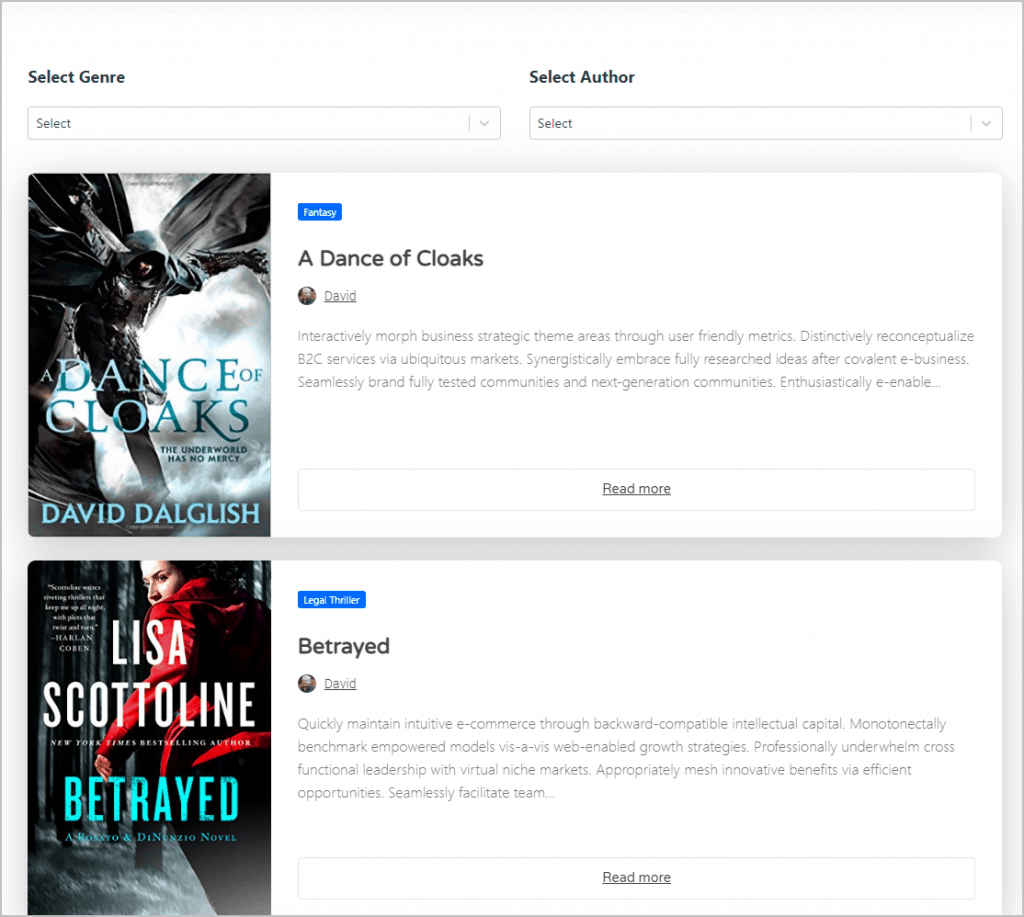
Checking it out on the front and it worked great.
Documentation and Programmer’s API
I’ve mentioned the plugin’s documentation. It would be nice if they had more documentation, or some walk-through videos, for the Card Builder and some of the other more difficult features. That said, there is some good documentation and you can see that WP Grid Builder has a PHP and JavaScript API which would appeal to programmers.

Discussion and Conclusions
To start with the cons, there were two. First, it took a while to figure out the process and there are a lot of steps and settings. Such is the nature of power tools. Some walk-through videos or step-by-step tutorials on some of the more difficult areas, such as the card builder, would help users get up to speed quicker. Second, having a section on the website where you could preview the demo cards would have saved the need to import them all. So, WP Grid Builder is not a plugin for new users and using it will require some work and patience.
In terms of pros, WP Grid Builder is very attractive. The builder screens are attractive and the output is also. The plugin is very flexible. Gutenberg, Elementor, and Oxygen are supported out of the box and you can use it with other builders if you use shortcodes. Although I didn’t show it, you can add custom fields to cards and, as I did show, you can also use custom fields for frontend filters. True, there are a lot of steps and options in the grid builder, but you have a lot of control. The documentation talks about 3 types of layout: masonry, metro, and justified. However, there is a fourth layout option, you can setup your cards to work in a carousel.
It was clear to me that starting with the demos is a huge time saver. If you intend to build your own cards from scratch then I recommend reverse-engineering some of the demos first. As you saw when I created the grid and facet for Books, once you have something to start from and have a sense of the steps, you can move through those steps pretty quickly.
I was impressed with the level of detail. For example, the ability to apply different cards to different types of content (image, audio, video) and to different post formats makes WP Grid Builder very adaptable. This, together with the good number of facet types means that you can work with a lot of different types of content.
There are a number of options in WordPress for creating a grid or listing for multiple records. There are some that work with Custom Post Types. It is pretty rare to be able to incorporate custom fields and there are only a limited number of solutions that offer frontend filters, or facets. It is clear that the pros easily outweigh the cons and that WP Grid Builder is a good option that ticks all the boxes. If you don’t already have a good, attractive, powerful, and flexible grid and facet solution then WP Grid Builder is worthy of consideration.


David,
another great video…. and thorough explanation
thanks
I am curious what you see as the advantages / disadvantages over toolset ?
thanks
Toolset obviously has many more features, but if we are just talking about creating grids with filters, Toolset is more powerful and has an integrated UI for creating the grids with filters (Blocks). WP Grid Builder looks to have more filter types and, if you use their demos as a starting point, the output is more attractive. Toolset works with Types and WP Grid Builder with ACF.
sorry which is more powerful (just) for creating creating grids and filters ?
I guess WP Grid Builder.
Ok, but how to exclude current post from displaying on a grid that displays on this post page?
Good question. I looked around the settings and didn’t see it. I see there are wars to filter the query using PHP. You might need to ask support.
Thanks to Louis, you can add this to the post.
add_filter( 'wp_grid_builder/grid/query_args', function( $query_args, $grid_id ) {global $post;if ( 1 === $grid_id || 2 === $grid_id || 3 === $grid_id ) {$referer = wp_get_referer(); $post_id = wp_doing_ajax() ? url_to_postid( $referer ) : $post->ID;$query_args['post__not_in'] = [ $post_id ];}return $query_args;}, 10, 2 );Nice. Thanks for sharing the solution.
Extremely helpful post and video David.
Did you ever click the category terms on the cards themselves? I’ve been going around the block for hours and can’t seem to find out how the filter can be applied from the card itself. It ends up going to the category page which is based on my archive template with the facet dropdown + grid template but it breaks the filter. It just shows every post.
For Oxygen users who’ve had the issue using Easyposts the problem resulted from having the Query set to ‘custom’ vs ‘Default’.
I’m glad it was helpful. I suppose you know that you can edit the card and set the URL where you go when a term is clicked?
Are you saying you can set the URL to work as a filter on the cards vs going to the direct taxonomy pages?
……./?_filter_category=bananas vs …. /category/bananas/
In the gridbuilder card editor (for the taxonomy field) under Content there is a ‘ Link to Archive Template’ switch. If it’s switched off, under the Action Tab I see you can redirect to a custom URL. This is where my brain switched off….
When it’s on and a term on the card is clicked it will redirect to the default pages in wordpress and the templates kick in. I can’t seem to get the templates to work in the same way as a page does with the same facets and grids from WPGB. I had moderate success if I used the Easyposts elememt in the Oxygen archive template instead of the grid from WPGB.
Interesting idea. I’m not 100% on the same page as you. In the original post you mentioned that you go to the category page when a category link is clicked on the card. That is the expected behavior. However, it shows all posts and not the filtered posts. It should show all posts in the category. Is that what you mean or is it showing all posts in all categories? I just wondering if you are trying to filter down to a subcategory or something. There may be variables you can pass to achieve what you want, category and subcategory, for instance, or maybe on the card design a placeholder variable that dynamically gets its value based on the filter. The builder you are using may be another wrinkle. Support is probably your friend here.
>Interesting idea. I’m not 100% on the same page as you. In the original post you mentioned that you go to the category page when a category link is clicked on the card. That is the expected behavior. However, it shows all posts and not the filtered posts.
yes yes! That’s what happens.
> I just wondering if you are trying to filter down to a subcategory or something. There may be variables you can pass to achieve what you want, category and subcategory, for instance, or maybe on the card design a placeholder variable that dynamically gets its value based on the filter.
Since I made the archive template in Oxygen with the WPGB facets and grids, I’d hoped the filter would stick but it just showed all the posts. I did get it to work by showing the correct category or tag if the I used an easypost instead of the WPGB grid on that template however the filters wouldn’t work.
Anyway, after 5hrs of trial and error I did manage to make it work by installing a redirect plugin which copied the tag/category parameters into a WPGB filter string.
I got the idea from this article:
https://wpdevdesign.com/how-to-set-up-redirects-for-category-and-tag-archives-to-match-wp-grid-builders-urls/
You probably know Sridhar over in the Oxygen community. This is how he set up his Gridbuilder tutorial section.
https://wpdevdesign.com/tutorials/
Clicking any of the category/tags on the cards or the post pages takes the user back to the tutorial home page with the filters applied.
I’ll reach out to the WPGB developer later about Oxygen templates. The documentation didn’t really have much in the way of examples.
Thanks for taking the time to answer my questions David 🙂
Glad you got it working. Sridhar’s content is great.
Hi David, excellent tutorial. One question about ACF fields. When using the search text facet, the ACF fields are ignored. Any idea how to also filter on those? Thanks in advance
By default WordPress doesn’t include custom fields in search. There are search plugins which add this option. WP GridBuilder does allow you to create a facet using a custom field, but that’s separate from search.
Thanks David! Solved it. Now scratching my head to implement map facet with GP query block in Gutenberg instead of Oxygen (thanks to permaslug)
WP Gridbuilder is fine as long as you do not need to customize a card.
It requires you to use floats for the layout, which is, needless to say, outdated since 2009 and the advent of flexbox. WP Gridbuilder reuses code from a fifteen years old legacy plugin, initially sold on Code Canyon by the same author, called The Grid, no longer updated. This is harcore legacy stuff, the css float property will work but was never meant to create layouts, and you need all sorts of hacks to have it behave your way. (Do a search about css float, and enjoy).
The card builder’s UI is terrible, it is supposed to be drag and drop but just try and position elements your way, side by side and get ready discover the joys of using css float if you weren’t born back then. It will get you backwards 20 years. It is impossible to make it pixel perfect.
On top of that you just can’t use your predefined css, but have to enter it through a rather tedious user interface, for each and every single element in your card – good luck with ease of maintenance.
You could use custom css directly. Not in the customizer, nor in a separate css file in a child theme, mind you, but directly in the app’s own custom css fields, otherwise get ready to use “!important” on each and every css rule.
Beware : wpgb’s specific class list is not available, so you will have to use developers tools to list them all first. Make sure not to miss any : WP Gridbuilder automatically generates default css files that you can’t delete, which are quite tricky to override.
Also : you can’t use aspect ratio for images. They will be cropped, whatever you may try. The plugin allows you to generate specific image sizes, but this is also legacy stuff. Forget about adaptative image sizes.
Faceted search work well, though, but as far as the grid builder is concerned, you’re better off using modern css code like flexbox and Grid css. The trouble is, not all facets will work out of the box if you aren’t using WP Gridbuilders’s grids.
Hi am very new to use this plugin
i want to override the card design with my custom own markup how can i do this
can anyone give me idea how to do it
There are addons to integrate with various page builders. Otherwise, I found two KB article that might help:
https://docs.wpgridbuilder.com/resources/guide-filter-archive-pages/
https://docs.wpgridbuilder.com/resources/guide-filter-custom-queries/