Table of Contents
The ability to conditionally display content is an advanced feature in the dynamic data toolbox. Conditional display is useful for membership sites, for instance, to only show certain content if the user is logged in. It is useful for showing information based on user role, the author, the post category or tag, or any number of other variable conditions. The conditional display of content based on date range is a common requirement to show if a business is open or not, if a deadline is approaching, to show holiday information, or to show information about an active sale.
Conditional display is not available at all in some builders. In others you can get the feature using an addon. Oxygen is one of the few that has conditional display options built in. Oxygen’s conditional display feature is very robust with a lot of options available in the user interface as well as a published API for creating your own conditions. In this post we will look at two ways for conditionally displaying content in Oxygen based on a date range, either by manually entering the dates or by coding a custom condition to read the dates from a Custom Post Type and apply display rules.
Video Version
The Setup and Scenario
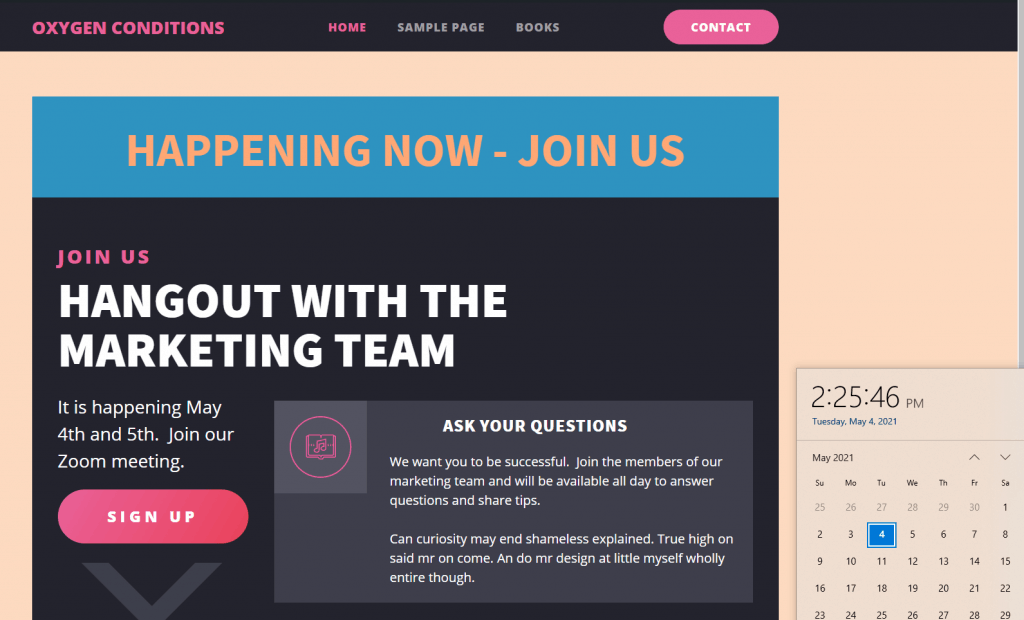
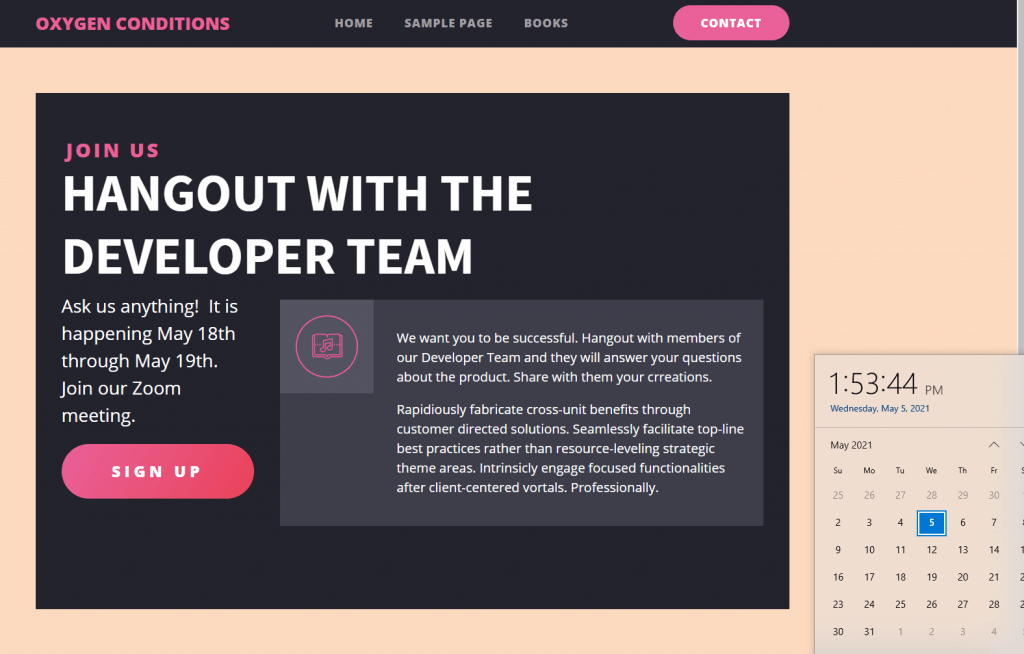
In our fictitious company there is a desire to engage customers to help them to better use the platform. I’ve created a test site with Oxygen installed and on the home page, created with Oxygen, there is a section at the top an upcoming “Hangout” with the company’s marketing team.

This is a two day affair and customers are encouraged to drop in and ask their questions and share. The hangout is scheduled for May 4th and 5th and the marketing team would like to show a banner “Happening Now. Join Us” on those days, but hide the banner on other days.
Of course, one option is on May 4th you can login and update the home page and later after the hangout you can remove it. However, you know that Oxygen can handle it for you.
Conditional Display Based on a Static Date Range
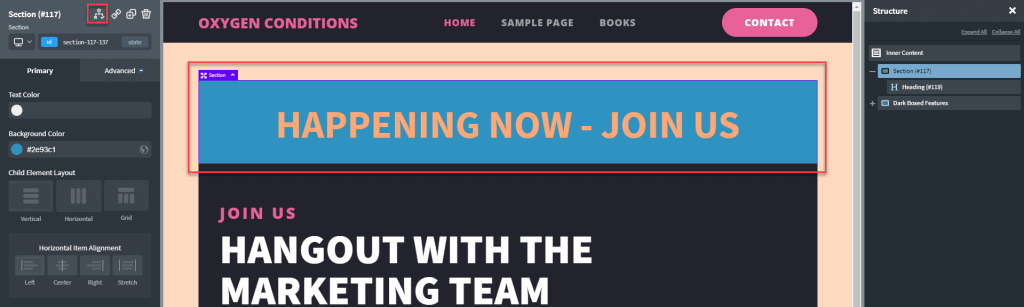
In the Oxygen editor, we can select the section with the banner. The easiest way to make sure we have the right elements selected is to use the structure panel. Here is a screenshot where you can see that the banner section is selected. Note the conditional display button on the upper left.
With the sales section selected, click on the conditional display button. This opens the first level of the conditional display settings. Here, if you are going to have more than one rule in the condition, you can set whether all conditions must be true, or any one of them (AND, OR). To do a date range, we will need more than one conditions, so I pick AND. The bottom section is just for behavior in the editor.
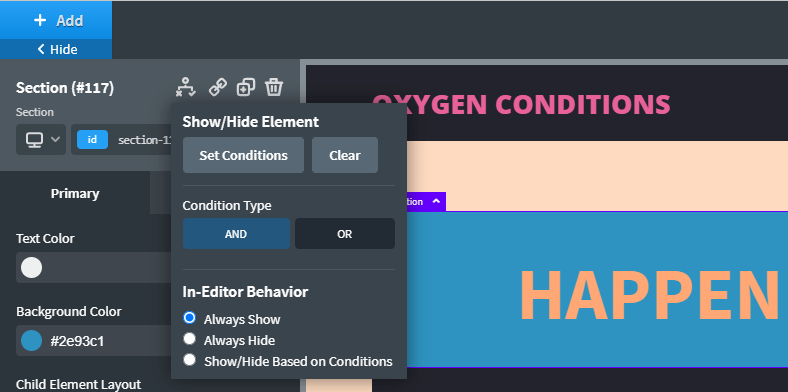
When no conditions have been set, and you click on the Set Conditions button then you see a button to add your first one. Note the bit at the top reminding us of the rule we set.

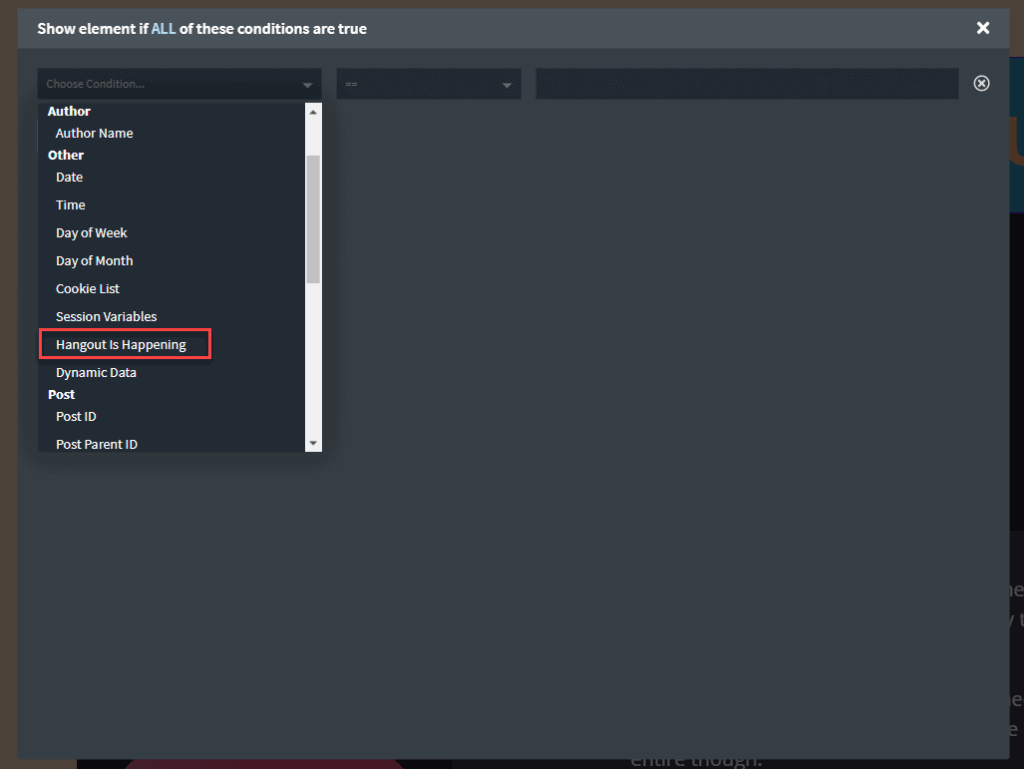
When you click to add a condition then another dialog opens where you can enter the desired conditions. On the left there is a long list of built in condition types to choose from. There are built in groups of conditions for Archive, Author, Post, User, and Other.
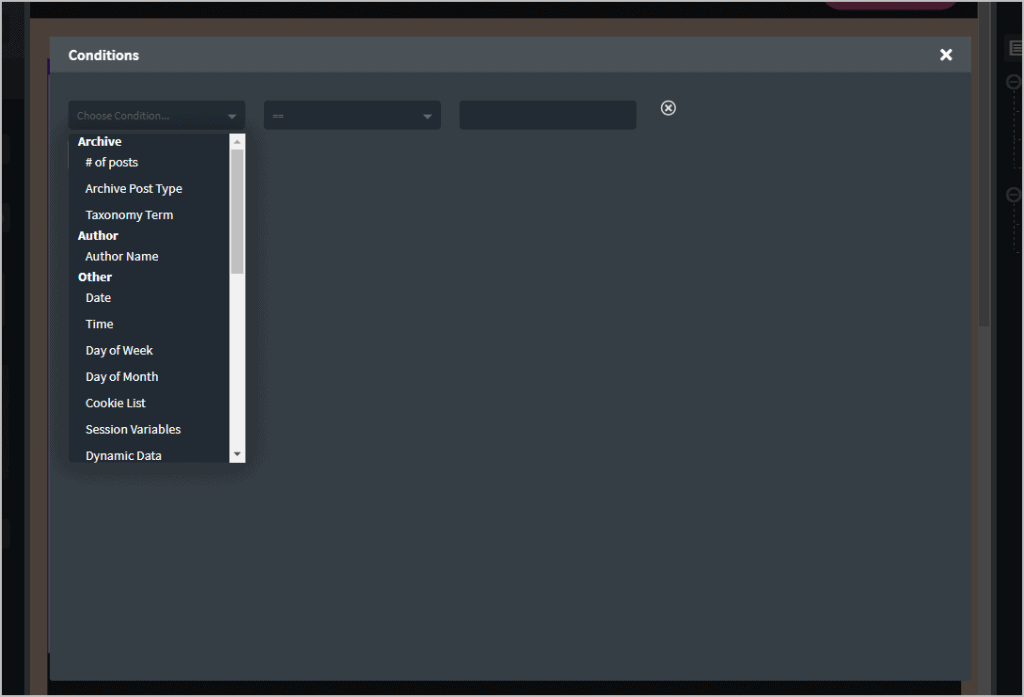
Here, we choose Date from the Other group. Note in the middle is a list of comparison operators that we can use. The list of operators changes based on the type of choice on the left. There is also an input hint for the date format for the input field on the right.

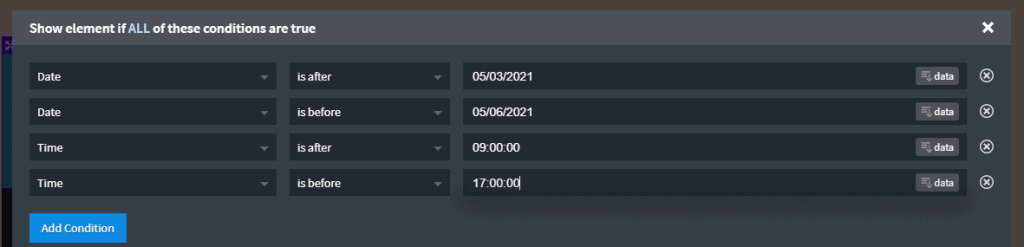
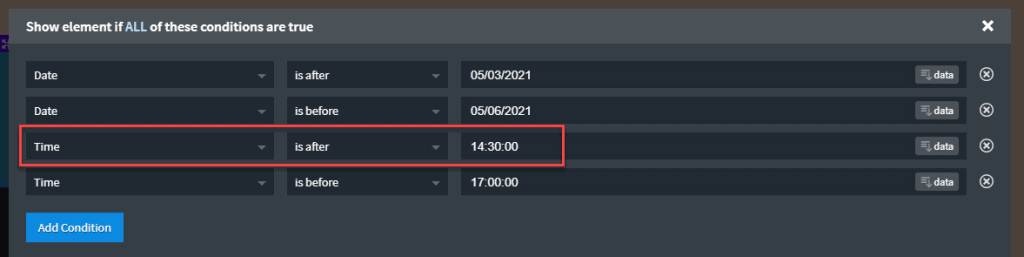
I enter two rules for the date. Since we want to show the banner on the 4th and 5th, I select “is after” and enter 05/03/2021 for the first date. For the second date I select “is before” and enter 05/06/2021. I then do the same type of thing for the time (hours) so that we account for the 9 to 5 office hours.
I save that and test and on the frontend, we see that the banner shows as it should. I’m developing on localhost, so the date and time on my machine is what the local server is using.
It is a good idea to test the conditions, so I play around with them and test to make sure all is working as it should. Here is a screenshot where I changed the start time to 2:30PM (14:30) and another one where we see on the frontend that the banner is not showing because it is before 2:30PM.

Handling Multiple Options Manually?
Let’s imagine that the first hangout was a big success and the company decides to hold two more and feature different teams: one for the Support team, one for the Developers.
One way of handling this would be to make 2 copies of the section telling about the hangout and edit them appropriately. It would look something like this. Each section would get its own manually created date conditions to control when they displayed. You might need two copies of the Happening Now banner also.

As you can imagine, this kind of thing becomes unwieldly when trying to manually control display for multiple sections with different conditions.
Using Dynamic Data with the Conditional Display Options
Wouldn’t it be better to create a Custom Post Type for these hangout meetings? Also, let’s create an Oxygen custom condition to simplify showing the Happening Now banner at the right time.
Creating the Custom Post Type and Templates
So, the first step is to create a Custom Post Type for the hangout meetings. If we abstract out the hangout banner contents we can create a template and pull the information dynamically. For example, here are some content areas that could be made dynamic because they mention which team will host the hangout. Of course, any of the fields could be targeted as needed, but these will do for our example.
We will use the Title field for the “Hangout with the Marketing Team” headline. The Content area will be used for the blurb under the “Ask Your Questions” subtitle. We will add some Date fields for the hangout’s date range.

I used CPT-UI to create a Custom Post Type called Hangouts, and the free version of Advanced Custom Fields (ACF) to add the Date fields. If you aren’t familiar with how to create a Custom Post Type and add fields, then please check the first article in the series on Custom Post Types and Page Builders which walks-though the process.
Here is a screenshot of the ACF fields for the Hangouts Custom Post Type. We have fields for the Start Date and End Date. One thing to pay attention to in the ACF options for a Date field is the format for the date. ACF has two date format options: How the date shows when you pick it in the editor and how it is returned when it is fetched for output on the frontend.

Here is a screenshot of the edit screen for a Hangout record where you can see places to enter values for the two date fields.
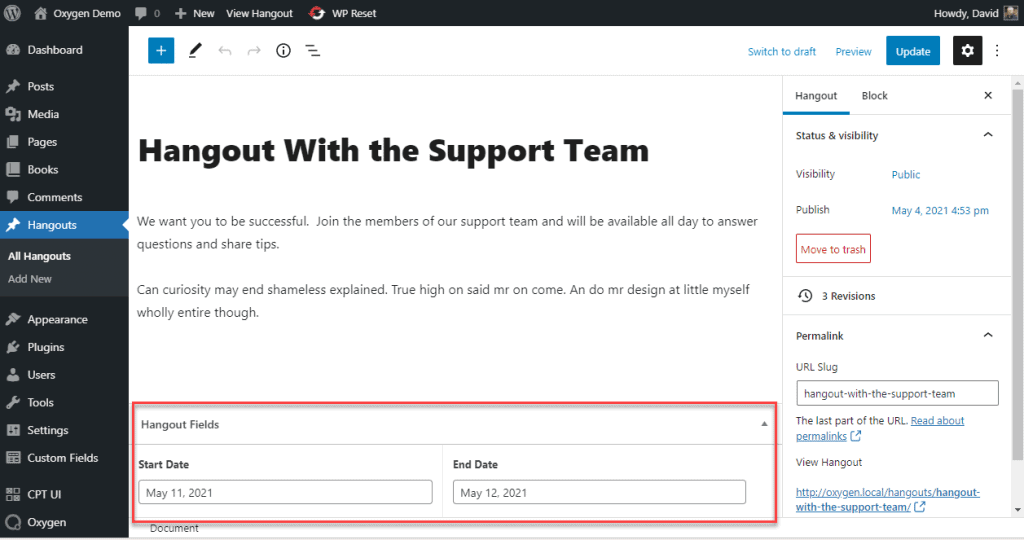
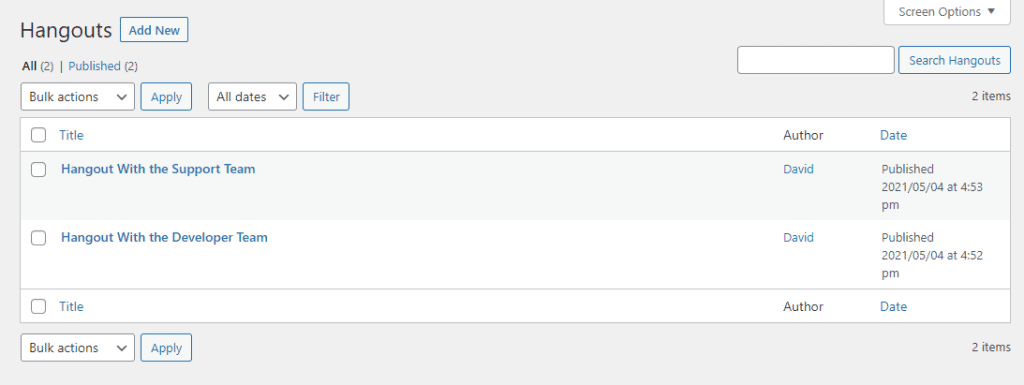
I’ve entered two Hangout records.
Now, back in the Oxygen editor, I create a template for the single Hangout Custom Post Type. I go into this process in more detail in the post about creating a website with Oxygen. Here I’ll just quickly show the steps.

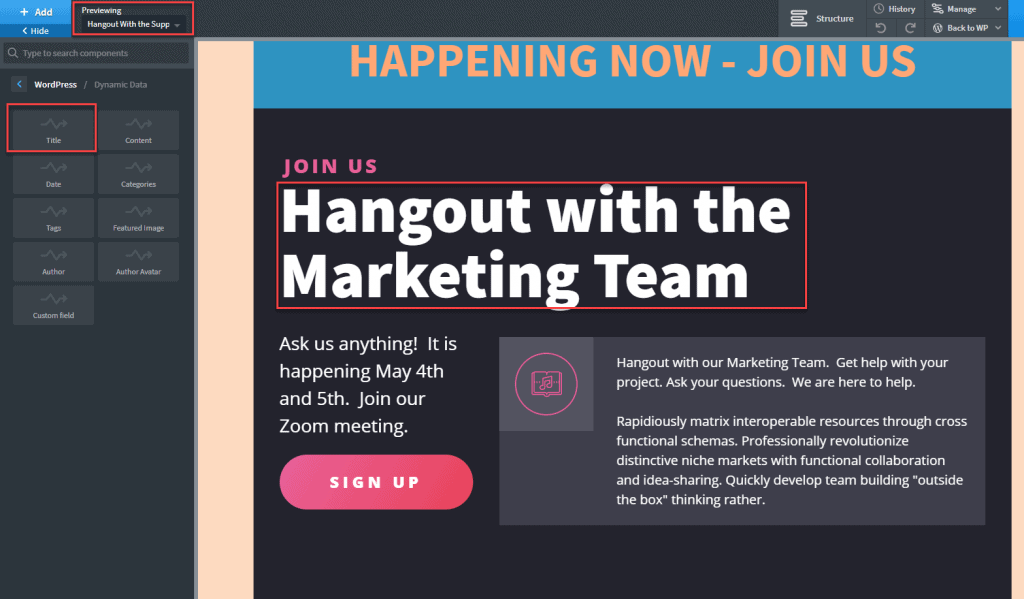
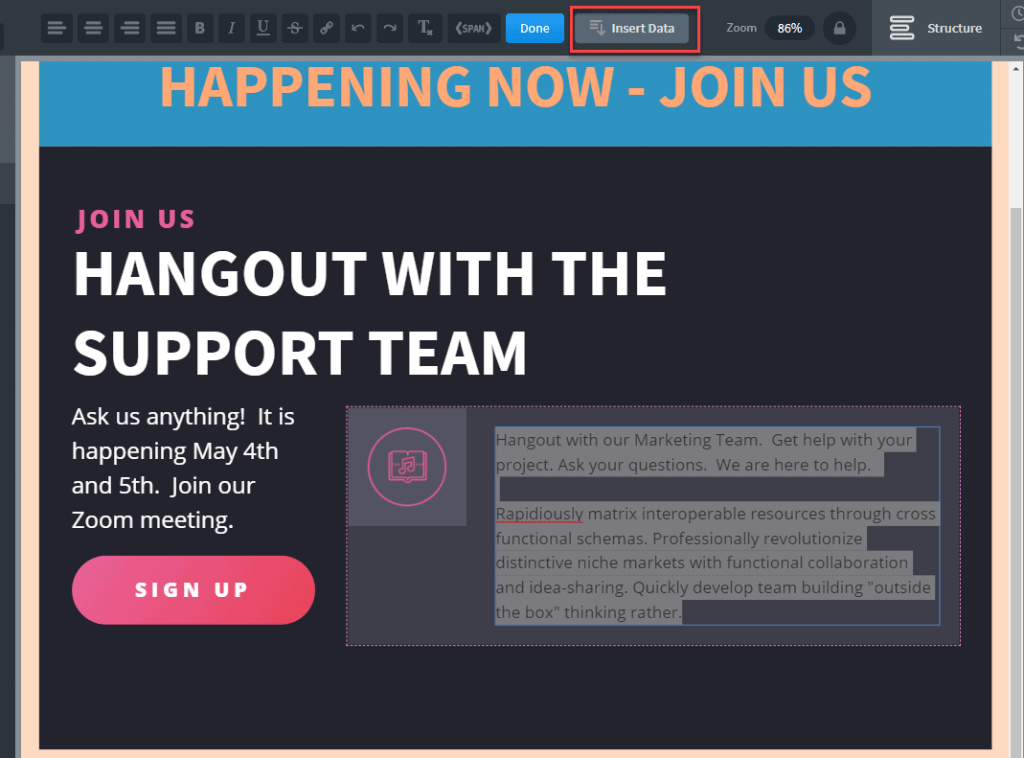
To do that, I copied over from the home page the sections as a starting point. Here in the editor I picked one of the Hangout records to be the preview. The first step is to replace the static title with the Dynamic Title element.
The next step is to replace the blurb on the right with the content. For text elements you select the text and then click on the Insert Data button.
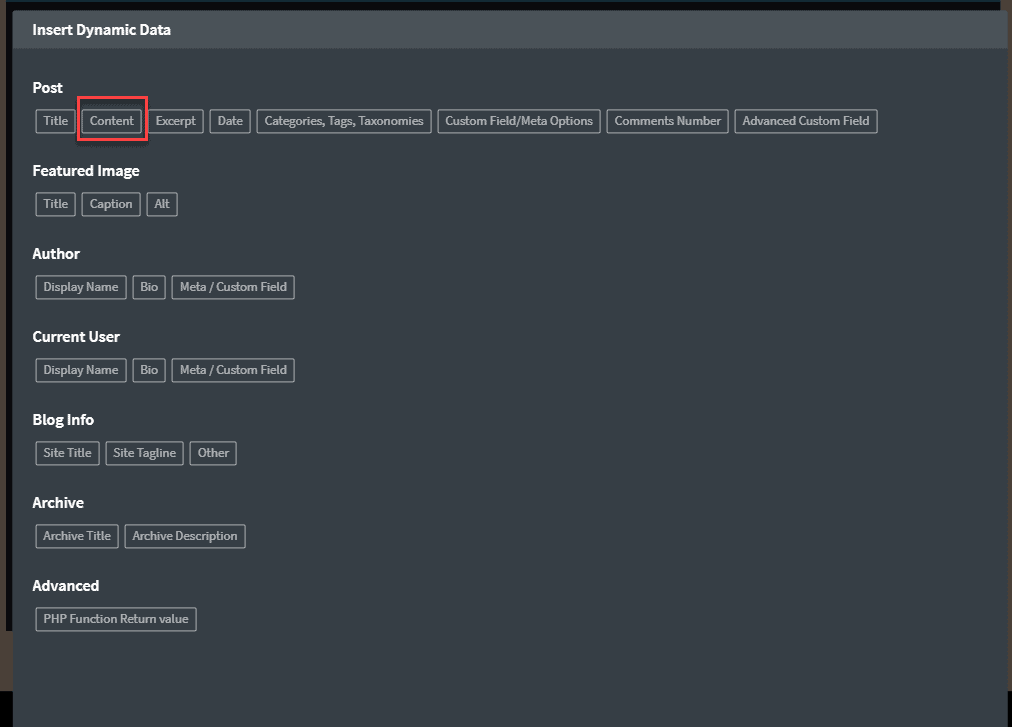
That opens up a dialog where you can pick the dynamic data you want to insert. I picked the Post Content item.
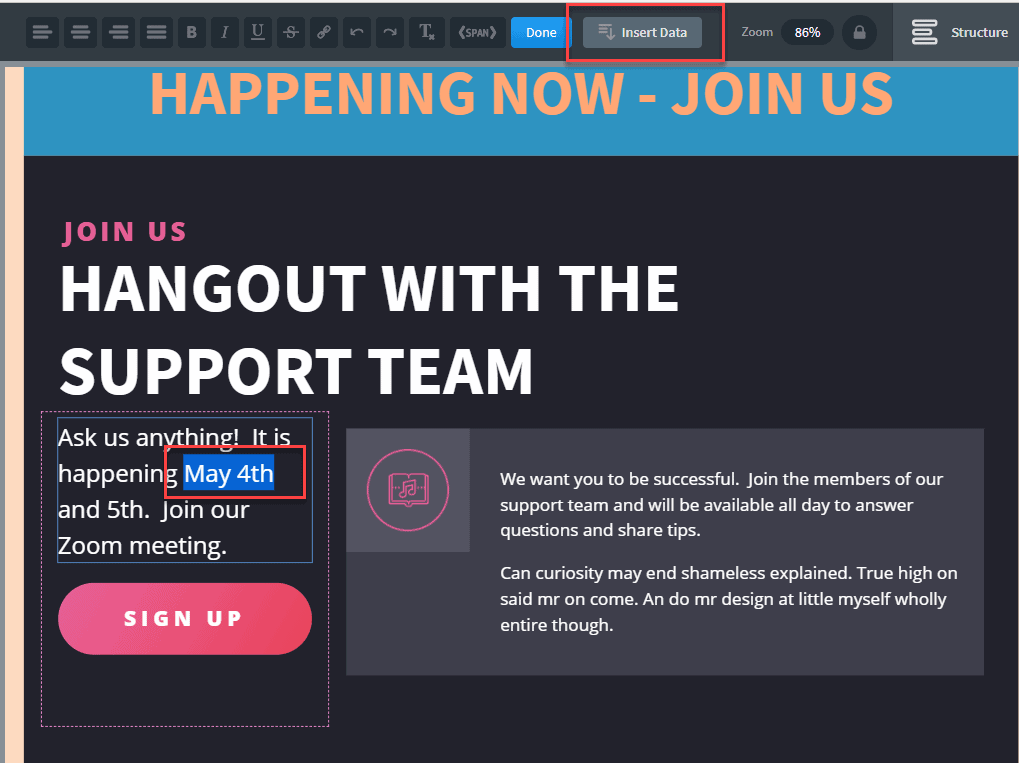
Now the dates. I highlight the start date and click the Insert Data button.
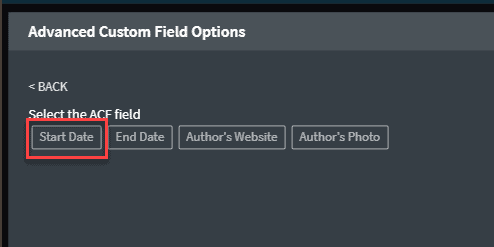
Pick the ACF fields item.
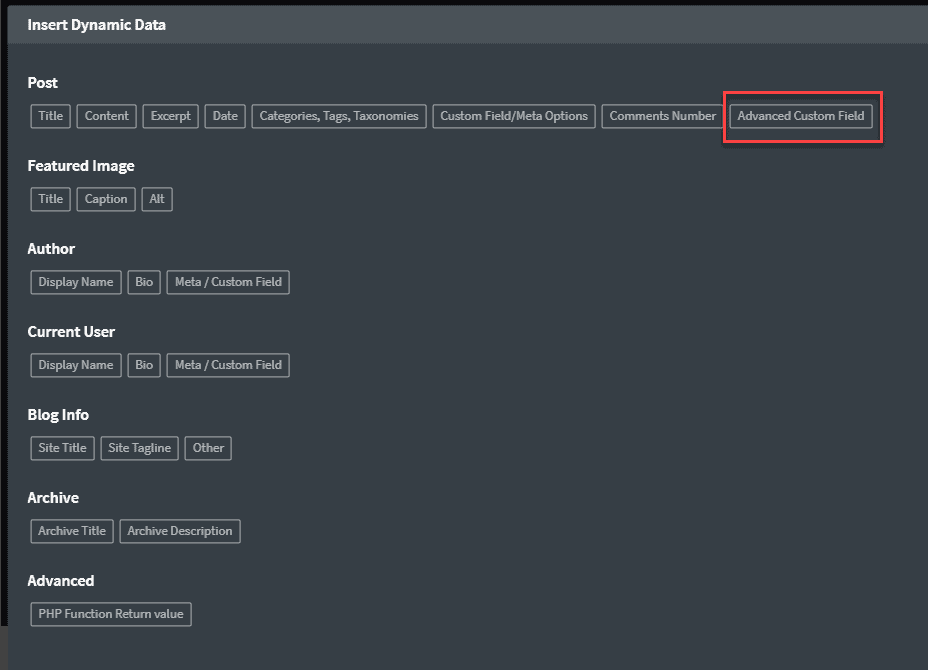
That opens a dialog that shows the ACF fields.
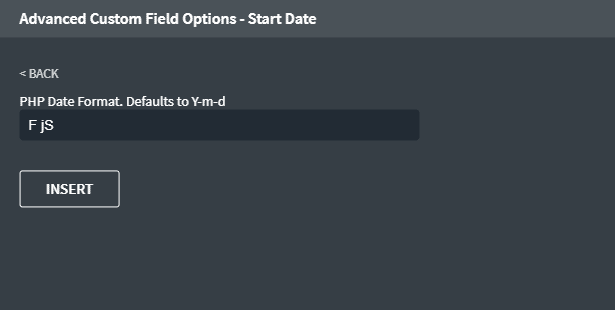
There was an option to set the date format. I went to the Codex page and found the format I wanted. It gives me the month name, the date number, and the suffix.
I repeated the process for the end date.

I then checked the two Hangouts that I had created on the frontend.


They both looked good. The only issue now is to handle the Happening Now banner. So creating the custom condition is next.
Creating the Custom Condition
Oxygen has a published Conditions API where you can register your own condition. There is documentation with good information available. A custom condition has three parts. First, there is a call to make sure that Oxygen is available, so you don’t create errors. Second, you register your condition with Oxygen so that it shows up in the user interface. Third, you create a callback function that accepts the parameters entered in the Oxygen UI, performs the checks for your condition, and returns either true or false.
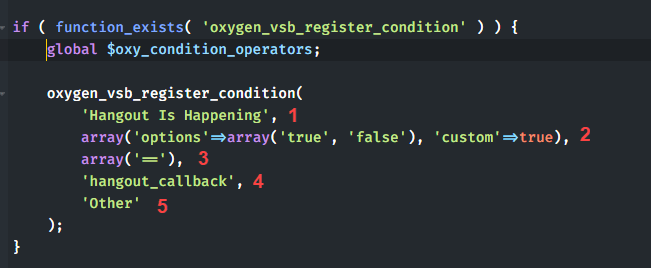
Here is the PHP code for the custom condition. I’ll walk through it below.
<?php
if ( function_exists( 'oxygen_vsb_register_condition' ) ) {
global $oxy_condition_operators;
oxygen_vsb_register_condition(
'Hangout Is Happening',
array('options'=>array('true', 'false'), 'custom'=>true),
array('=='),
'hangout_callback',
'Other'
);
}
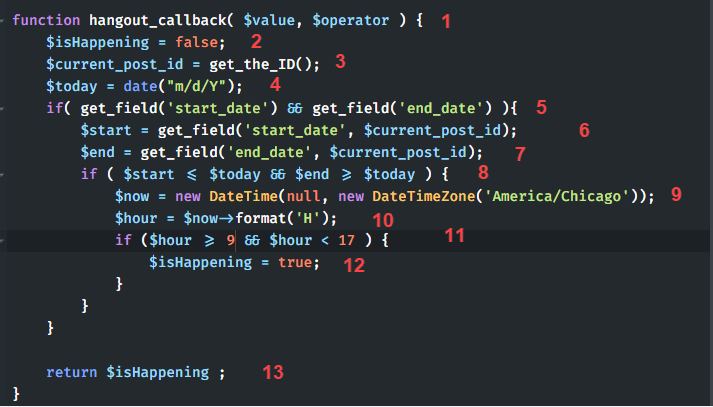
function hangout_callback( $value, $operator ) {
$current_post_id = get_the_ID();
$isHappening = false;
$today = date("m/d/Y");
if( get_field('start_date') && get_field('end_date') ){
$start = get_field('start_date', $current_post_id);
$end = get_field('end_date', $current_post_id);
if ( $start <= $today && $end >= $today ) {
$now = new DateTime(null, new DateTimeZone('America/Chicago'));
$hour = $now->format('H');
if ($hour >= 12 && $hour < 17 ) {
$isHappening = true;
}
}
}
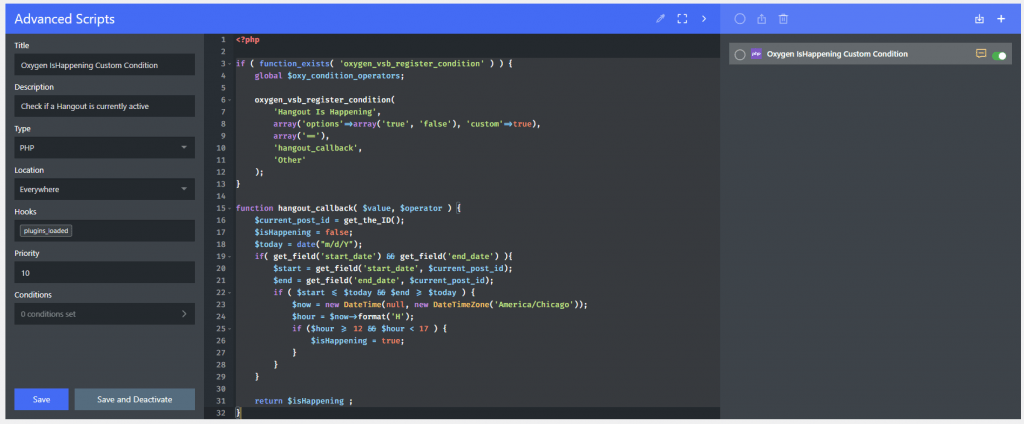
return $isHappening ;
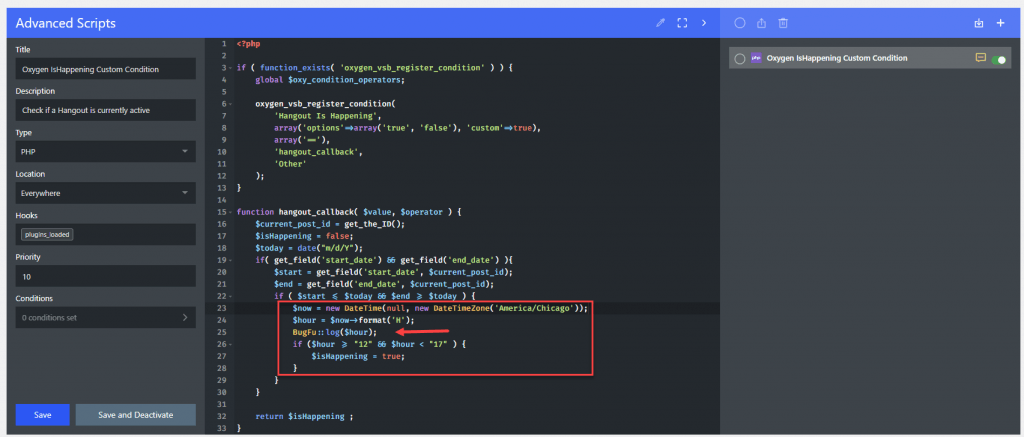
}You can use the free Code Snippets plugin to add this. I like to use Advanced Scripts because it has more features. Here is a screenshot of the code in the Advanced Scripts editor.
So there are two parts to the custom condition declaration: 1) This is where we declare the custom condition. 2) This is the code that is run when Oxygen actually checks the condition on a page.
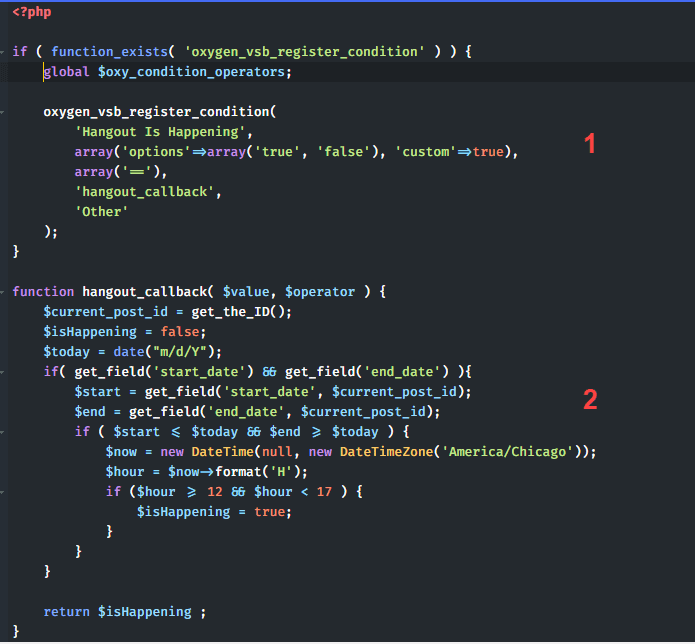
So if we look at the first part, the condition declaration, these are the components of that:
First, everything is wrapped in an IF statement to make sure that Oxygen is available so you don’t create errors if it is not. Here is what the lines do:
- The name that will show up in the Oxygen Condition UI.
- The matching options that show up on the right side of the condition.
- The comparison operators that show up in the middle of the condition UI.
- The code to run to check if the condition is true or false.
- The category of conditions to list it in.
These are the components of the callback function:
- First note that it takes two values. Since my condition, as we will see in the Oxygen editor further on, is so simple, these aren’t used.
- This is the return variable that will be true or false. I set it to false to start, which will be the default returned. A good practice is to “prove true.”
- We will need the ID of the post further on to get the ACF fields. Since the condition is being checked in the context of the hangout page, we can use that simple WordPress function to fetch it.
- Today’s date.
- This IF statement makes sure that there is a value entered for the start and end dates. It seemed to me that ACF returns today’s date if it is blank and we don’t want that.
- An ACF function to pull a field — start date.
- An ACF function to pull a field — end date.
- If the start date is less than or equal to today AND the end date is greater than or equal to today then continue.
- Getting the current date/time. When testing it seemed that setting the time zone was the most reliable way to get the accurate value.
- I just want the hour to make sure the time is between 9AM and 5PM. I’m using 24 hour format to make it easy to compare.
- Checking if the hour is greater than or equal to 9 and less than 5.
- Changing the return variable to true because all of the conditions are met.
- Sending the result back to Oxygen.
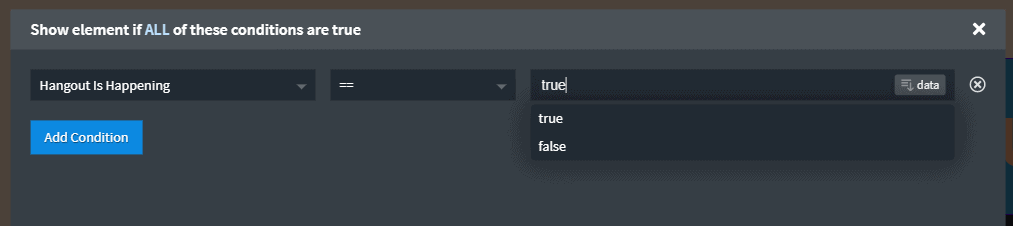
Back in the Oxygen editor for the single Hangout template, I go to add the condition to the Happening Now banner section. We see the new condition in the list.
There is only the one comparison operator and you can select true or false as we specified in the condition declaration.
After saving I tested on the frontend and the banner is now hidden as it should be.
A Note on Testing
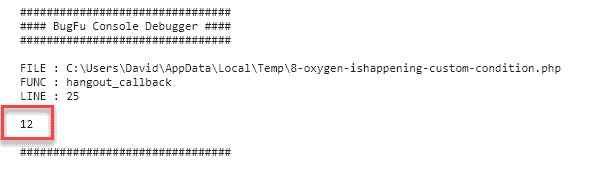
It is of course a good idea to test that your code works as desired. When I was coding the PHP I used a free WordPress plugin called BugFu. It outputs some debug info to the Chrome console. Here is an earlier version of the function with a call to BugFu.
And here is the hour output by BugFu in the Chrome console.
Discussion and Conclusions
The built in conditions that come with Oxygen are pretty extensive. More extensive than anything natively available in any other WordPress page builder. These built in conditions are available for any site builder to use.
The ability to add your own condition provides a lot of flexibility so that you can use conditions in the context of your own site with very few limits. Of course, this requires some PHP programming knowledge, but it is within reach of a power user who is willing to search the web for information and do some trial and error. That is how you learn.
The Oxygen display conditions are a powerful feature and are pretty straightforward to use. The public Condition API is a power tool. It is this kind of feature that helps Oxygen stand out and appeal to developers and power users.