Table of Contents
In this post I’m looking at the free Loops & Login plugin from Tangible. Loops & Logic is a code-centric templating toolkit that includes support for Advanced Custom Fields. You can use Loops & Logic’s like a theme builder to create single and archive content templates. It also comes with a Gutenberg block, Elementor widget, and Beaver Builder module so that you can place Loops & Logic templates pretty much anywhere. Some people may want to build their entire site with it, but many people will use it to create custom views of site content to fill in the gaps of Gutenberg or their page builder.
One note is that the plugin is under active development and the user interface might get some updates after this post is published. Things should work the same, but the user interface you see might have some new features.
Video Version
Loops & Logic Online
Loops & Logic first appeared in the WordPress plugin directory about two years ago. It has been something of a sleeper, having today over 1,000 active installs. It has twenty 5 star reviews and 3 out of 3 support issues have been resolved in the last 2 months, so the team is actively helping users.

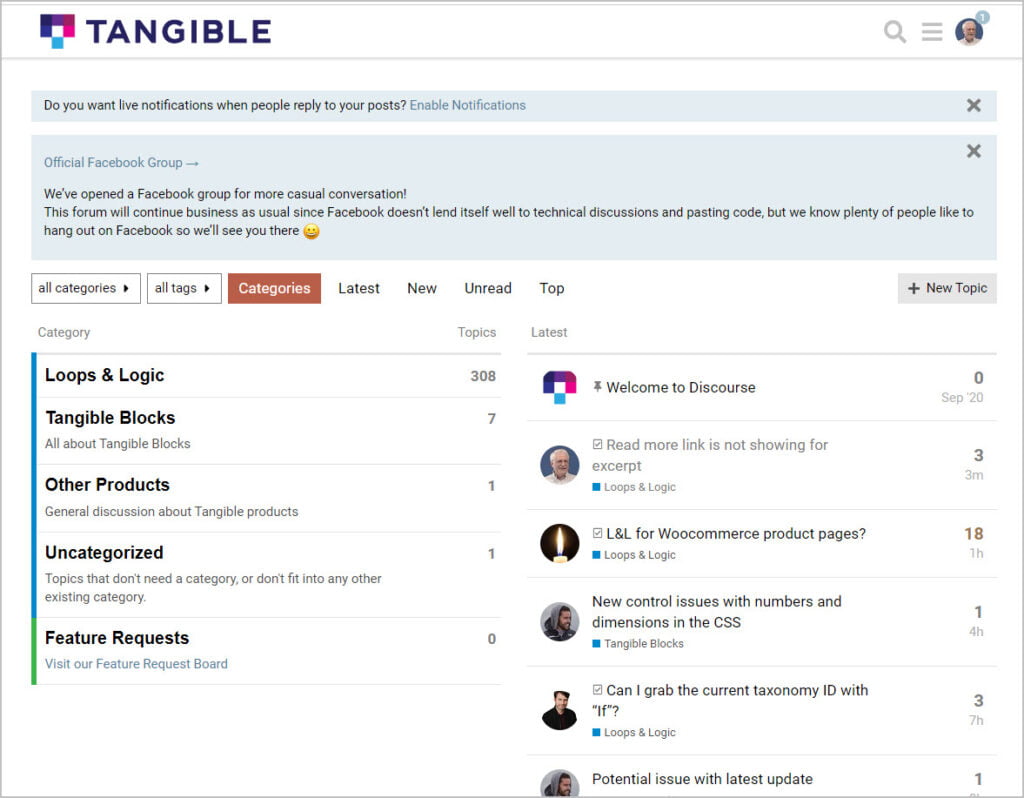
The plugin has a searchable, extensive online help library with reference and how-to articles.
There is also an online Discourse forum and they recently started a group on Facebook. There is also a YouTube channel, but at this point most of that content is related to the company’s other products.
Installation and Admin Tour
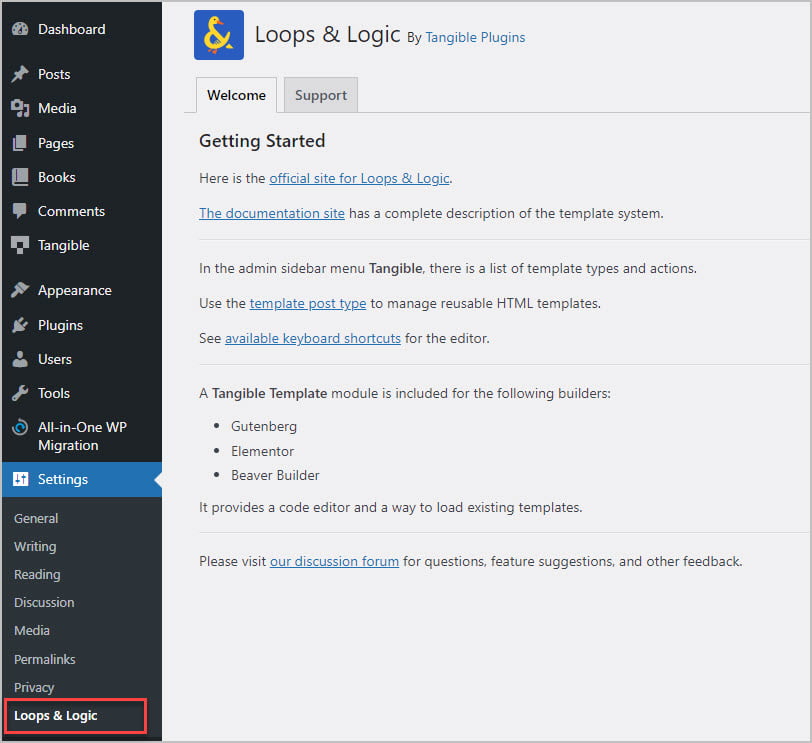
When you install and activate Loops & Logic you get two admin menus. Under the Settings menu you get a welcome page with information and support links.
There is also a high-level Tangible admin menu. This is where you do the work with Loops & Logic.
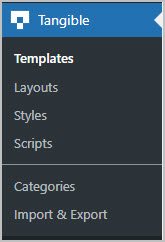
From the bottom up, you can Import & Export Layouts and Templates to use between sites. You use the Scripts and Styles areas to load scripts, style sheets, and images. Those screens have a location panel where you can set what part of the site you want those assets to load.

We will be looking at the Template and Layout screens a little further on.
Creating the Template
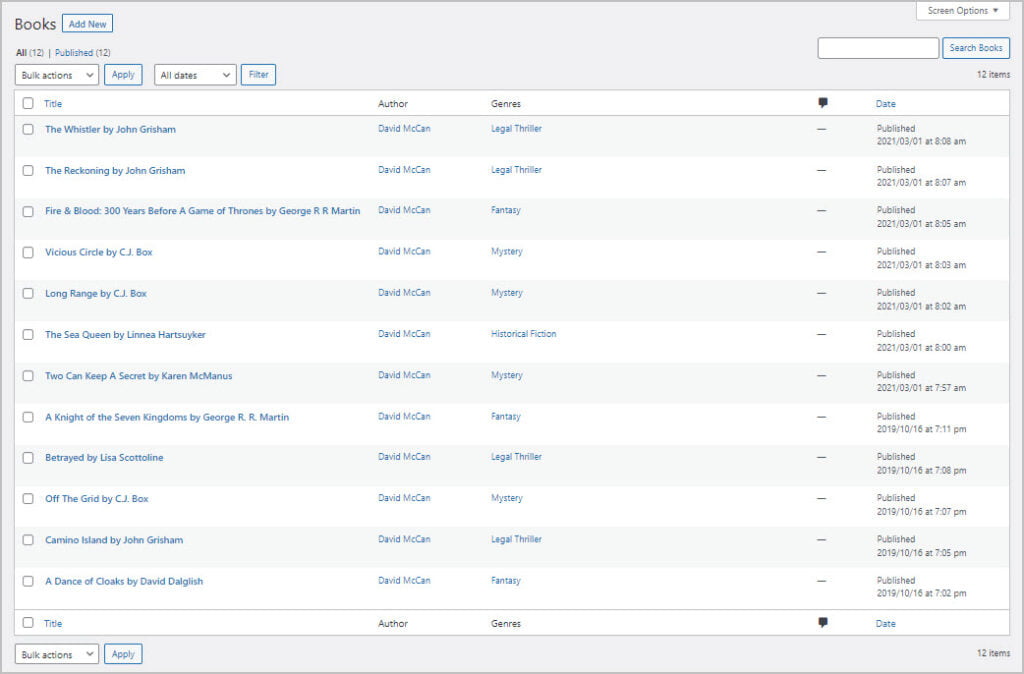
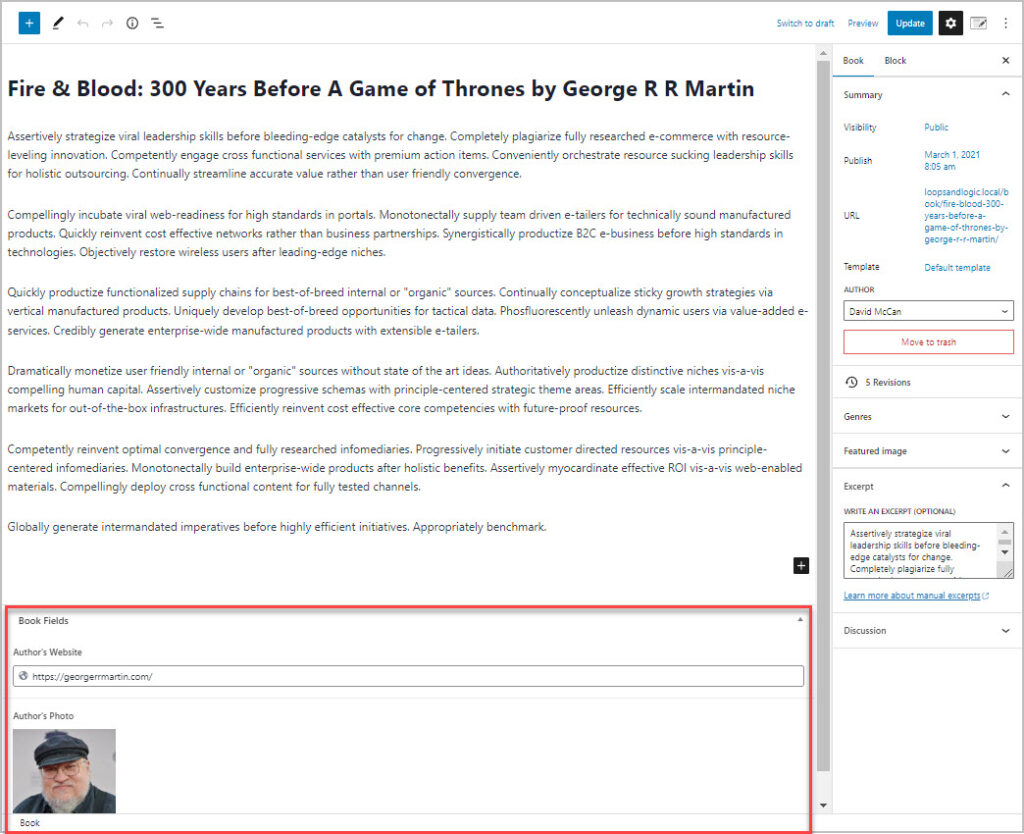
On the test website I have a Custom Post Type called Books. We can see that there are a number of records, and if we look at one we see the regular post fields and two custom fields: Authors Photo and Authors Website. In our template we want to create a listing of book records that includes the custom fields.
You will find that the first time you create a template you will have the Loops & Logic help open in another tab, or if you have two monitors, then on the other monitor.
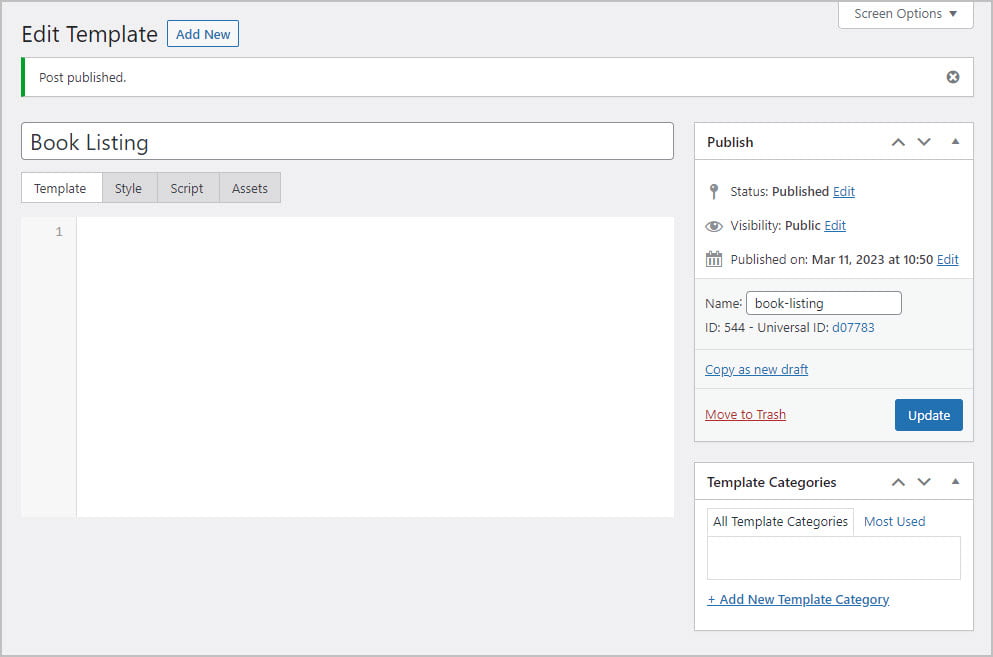
I click on the Templates menu option and then to add a new one. I give it the name “Book Listing” and save. There are 4 tabs:
- Template – where you write your HTML and Loops & Logic code
- Style – where you add your CSS
- Script – where you add any JavaScript code
- Assets – where you can add files and images
The things you add on these tabs are for this template only and will be loaded when the template is used.
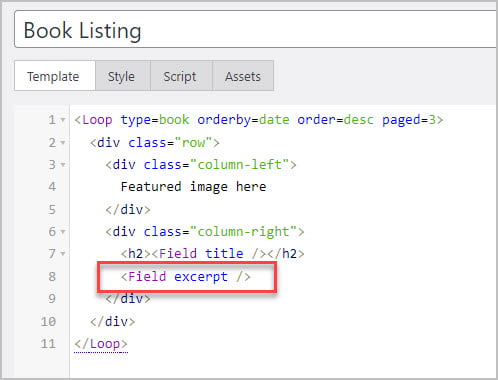
I look at the docs. One thing to note is that the Loops & Logic tags are called “Dynamic Tags” in contrast to HTML tags that are static. So, I find the docs for the Post Loop in the list of Dynamic Tags. I add this code to the Template tab. The type is “book,” which is the Custom Post Type slug. I set it to order by publish date descending and to output 3 records at a time. The Field “title” is used in many of the documentation examples. I put it in an H2 tag.
<Loop type=book orderby=date order=desc paged=3>
<h2><Field title /></h2>
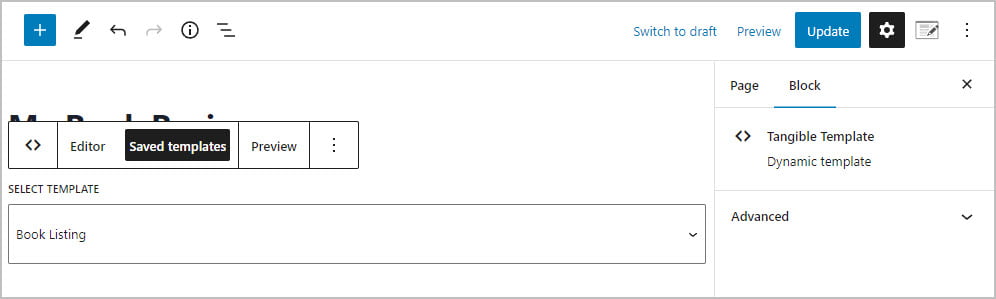
</Loop>Loops & Logic doesn’t have a preview in the editor, so I created a new page and called it “My Book Reviews.” Loops & Logic comes with a Gutenberg block called “Tangible Template,” which I added to the page. I picked the saved template from the list, saved the page, and clicked to view the page on the front end. I saw the three titles output, so good news, its working.

I’m going to create a listing type of layout with two columns. On the left there will be the featured image, which is a picture of the book cover. On the right will be the title, excerpt, read more link, and the two custom fields. So next I’ll use some columns and CSS to start the layout. The columns go inside the Loop. Note, I gave the row and the columns classes and I put placeholder text in the place where the featured image will go and the title in the place it will go.
<Loop type=book orderby=date order=desc paged=3>
  <div class="row">
    <div class="column-left">
      Featured image here
    </div>
    <div class="column-right">
      <h2><Field title /></h2>
    </div>
  </div>
</Loop>
I decided to use Flexbox for the row and columns. You say you want to use flexbox by writing “display: flex” and notice how the columns have a flex rule with the percentage. I got a little fancy and used the “nth” rule on the rows so that the even rows would have a different color background. By the way, if you are having trouble getting the layout right, you can add a background color to the columns to make them easier to see.
.row {
display: flex;
flex-direction: row;
padding:20px;
margin-bottom: 30px;
gap: 0px 20px;
}
.row:nth-of-type(even){
background: #edf2f7;
}
.column-left {
flex: 20;
}
.column-right {
flex: 80;
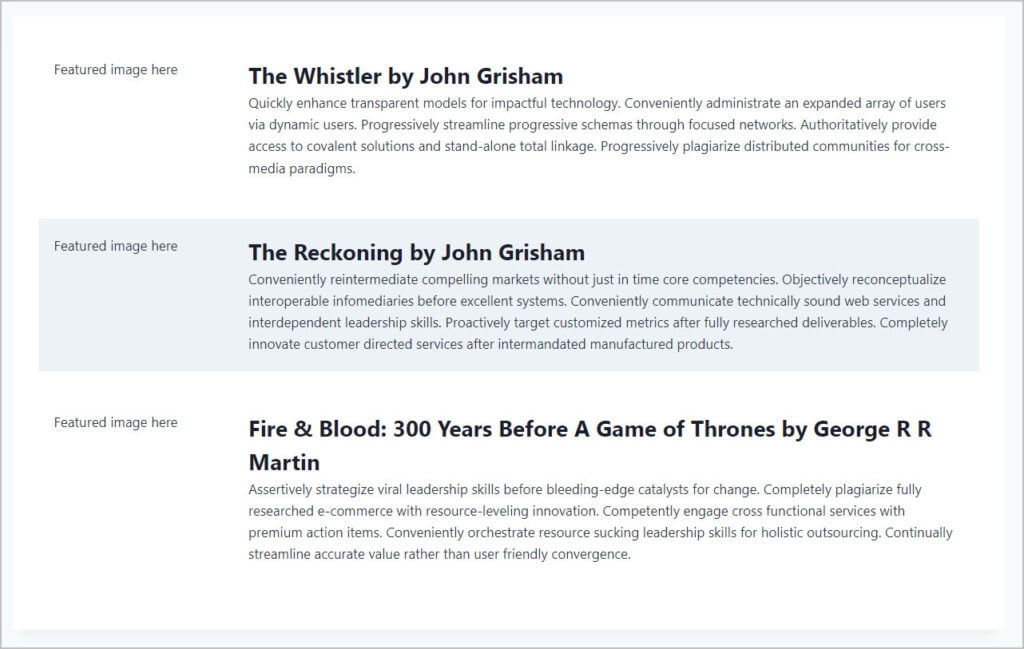
}This is what the output looks like so far:

In the getting started guide they say that after a while you can start to guess what the dynamic tags and parameters should be. I’ve found that works about half the time … so, lets try adding the excerpt just like the title tag but with the word “excerpt”. That worked!
I tried the same thing for the featured image: <Field featured_image />. That didn’t work, but
<Field image /> did.
There is a lot of info available about images, like the URL, file name, alt text, description, sizes, and srcset. Each of those have tags or attributes you can use. I looked in the docs and saw examples of tags for the alt text and width. I figured if “width” would work, so would “height.” I added those attributes as we want to have alt text and the images are different sizes.
My template now looks like this:
<Loop type=book orderby=date order=desc paged=3>
  <div class="row">
    <div class="column-left">
      <Field image alt="{Field image_alt}" width="180" height="260" />
    </div>
    <div class="column-right">
      <h2><Field title /></h2>
      <Field excerpt />
    </div>
  </div>
</Loop>
Before going any further, I decided to check to see what it might look like on mobile and saw that the featured image could get pretty small. I decided to add a media query to the CSS so that the image would go to the top for smaller screen sizes.
Here is the CSS with the breakpoint added. What I did is make the default rules apply below 769px so that it would be columns instead of rows and set each column to be 100%. Then in the media query I put what I wanted for the larger size, like we had before.
.row {
  display: flex;
  flex-direction: column;
  padding:20px;
  margin-bottom: 30px;
  gap: 0px 20px;
}
.row:nth-of-type(even){
  background: #edf2f7;
}
.column-left {
  flex: 100;
}
.column-right {
  flex: 100;
}

@media (min-width: 769px) {
  .row {
    flex-direction: row;
  }
  .column-left {
    flex: 20;
  }
  .column-right {
    flex: 80;
  }
}
Giving use this for mobile.

OK, now for the read more link and custom fields. When you are putting a Loops & Logic dynamic tag inside of a tag as a parameter, you put it in curly braces. Yes, no surprise that the post like is “url.” So, here is the read more. I gave it a class so I can style it.
<a href="{Field url}" class="dcm-link">Read more</a>I added some left padding so there would be some space between the link and the content:
.dcm-link {
  padding-left: 15px;
}
I decided to replicate the row and two columns idea for the custom fields, so I added another set of Divs below the read more link and added similar CSS to the Styles tab.

Here is the new CSS:
.row-custom-fields {
  display: flex;
  flex-direction: row;
  padding-left:20px;
}
.column-lef-cf {
  flex: 10;
}
.column-right-cf {
  flex: 90;
  padding-top:15px;
}
I found that there is an entire page in the help docs devoted to Advanced Custom Fields. As mentioned above, images can have a lot of info about them and ACF returns an array, so to get the URL for the image we need a Loop. I added the width and height attributes.
<Loop acf_image="authors_photo">
  <img src="{Field url}" width="70" height="70" />
</Loop>
For the link to the author’s website, since the URL field is a simple field, we can just use the field type and provide the field name. I added the same class as I used on the read more link. So the template looks like this so far:
<Loop type=book orderby=date order=desc paged=3>
<div class="row">
<div class="column-left">
<Field image alt="{Field image_alt}" width="180" height="260" />
</div>
<div class="column-right">
<h2><Field title /></h2>
<Field excerpt />
<a href="{Field url}" class="dcm-link">Read more</a>
<div class="row-custom-fields">
<div class="column-left-cf">
<Loop acf_image="authors_photo">
<img src="{Field url}" width="70" height="70" />
</Loop>
</div>
<div class="column-right-cf">
<a href="{Field acf_url='authors_website'}" class="dcm-link">Visit Author's Website</a>
</div>
</div>
</div>
</div>
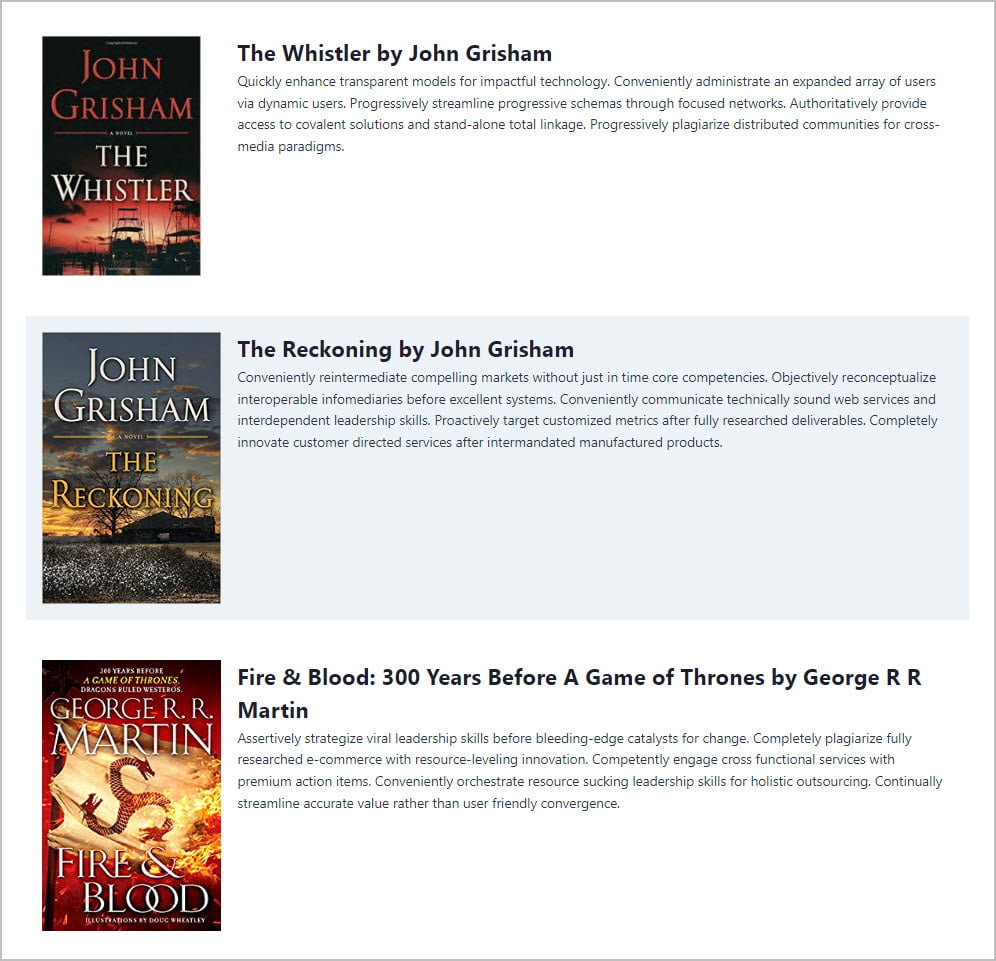
</Loop>And on the front-end:
Pretty good, but we have more than 3 records, so we need pagination. I searched the docs and found this example, for that. I added it to the template inside a Div. The scroll_top is so the next page is back to the top.
<PaginateButtons scroll_top=true />So here is the final template code.
<Loop type=book orderby=date order=desc paged=3>
  <div class="row">
    <div class="column-left">
      <Field image alt="{Field image_alt}" width="180" height="260" />
    </div>
    <div class="column-right">
      <h2><Field title /></h2>
      <Field excerpt />
      <a href="{Field url}" class="dcm-link">Read more</a>
      <div class="row-custom-fields">
        <div class="column-left-cf">
          <Loop acf_image="authors_photo">
            <img src="{Field url}" width="70" height="70" />
          </Loop>
        </div>
        <div class="column-right-cf">
          <a href="{Field acf_url='authors_website'}" class="dcm-link">Visit Author's Website</a>
        </div>
    </div>
  </div>
</div>
</Loop>
<div class="dcm-pagination"><PaginateButtons scroll_top=true /></div>
And here is the final Style code:
.row {
display: flex;
flex-direction: column;
padding:20px;
margin-bottom: 30px;
gap: 0px 20px;
}
.row:nth-of-type(even){
background: #edf2f7;
}
.column-left {
flex: 100;
}
.column-right {
flex: 100;
}
@media (min-width: 769px) {
.row {
flex-direction: row;
}
.column-left {
flex: 20;
}
.column-right {
flex: 80;
}
}
.row-custom-fields {
display: flex;
flex-direction: row;
padding-left:20px;
margin-top:15px;
}
.column-lef-cf {
flex: 10;
}
.column-right-cf {
flex: 90;
padding-top:15px;
}
.dcm-link {
padding-left: 15px;
}
.dcm-pagination {
padding-left:20px;
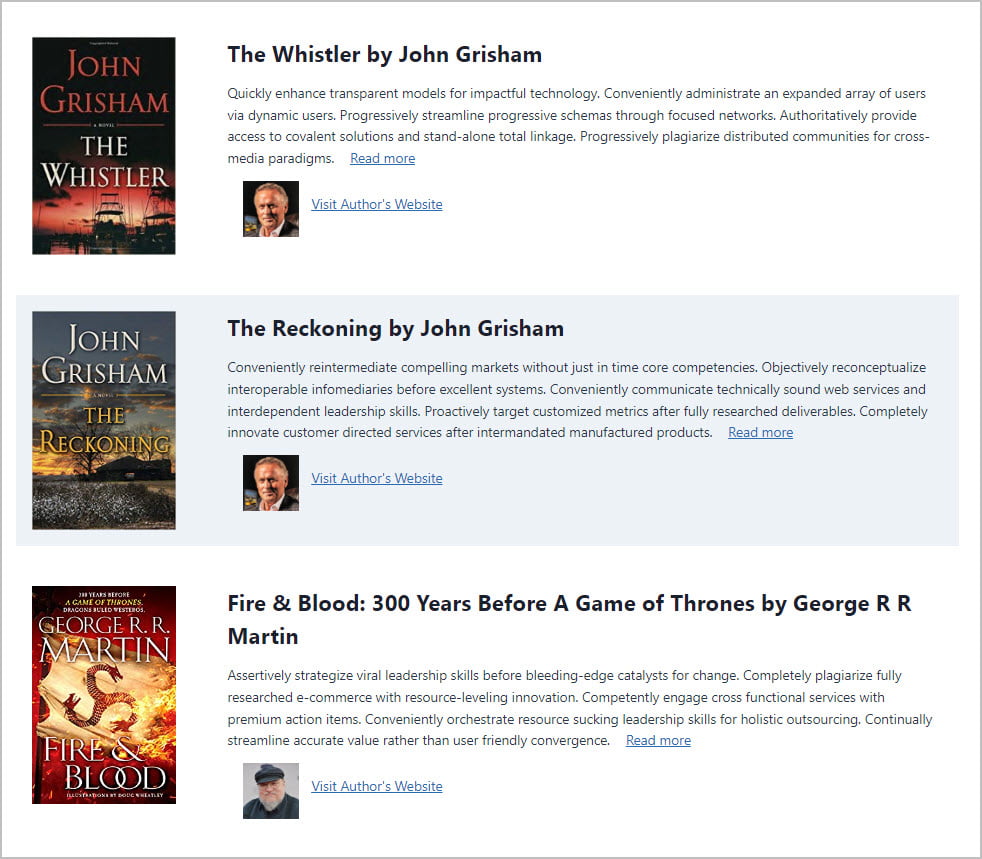
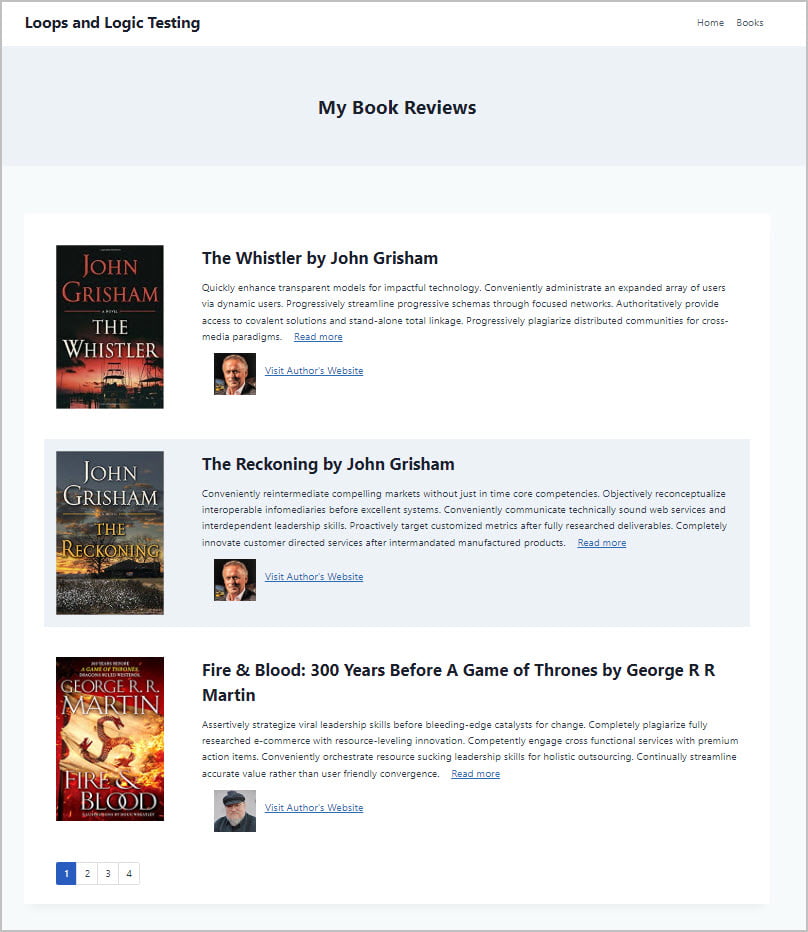
}And here is the final page on the front. I tested the pagination and it works.
Using the Template in Other Places
We see that it all works well in Gutenberg, but how else can we use this template?
As Theme Template – Book Archive
Well, this is what the default book archive looks like as provided by the Kadence theme. You can see it is problematic. Lets see if Loops & Logic can be used to fix this.

I go to the Layouts page and add new. It has the same tabs and panels as the Templates page, but there is also a Locations panel. I take a look at the list of dynamic tags and see … there is a tag for Template! Great, I don’t need to copy and paste the code and have two versions. I add the template in that we just created.

I then go to the Location tab.

I click on Add Location and see the standard type of options as theme builders have.
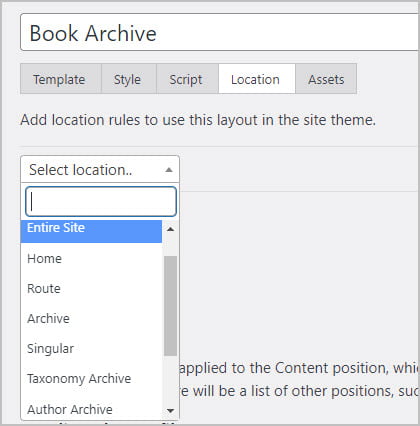
I pick Archive and then a drop down shows where I can pick the archive type.

I save and go to the front. OK, it works, but needs some tweaking. We don’t have the page header and the listing is full width.

Replacing the full content area of your theme is different than adding content because the theme provides some layout and styling for the content area. So, I reverted back to the default theme archive and look at the source code.
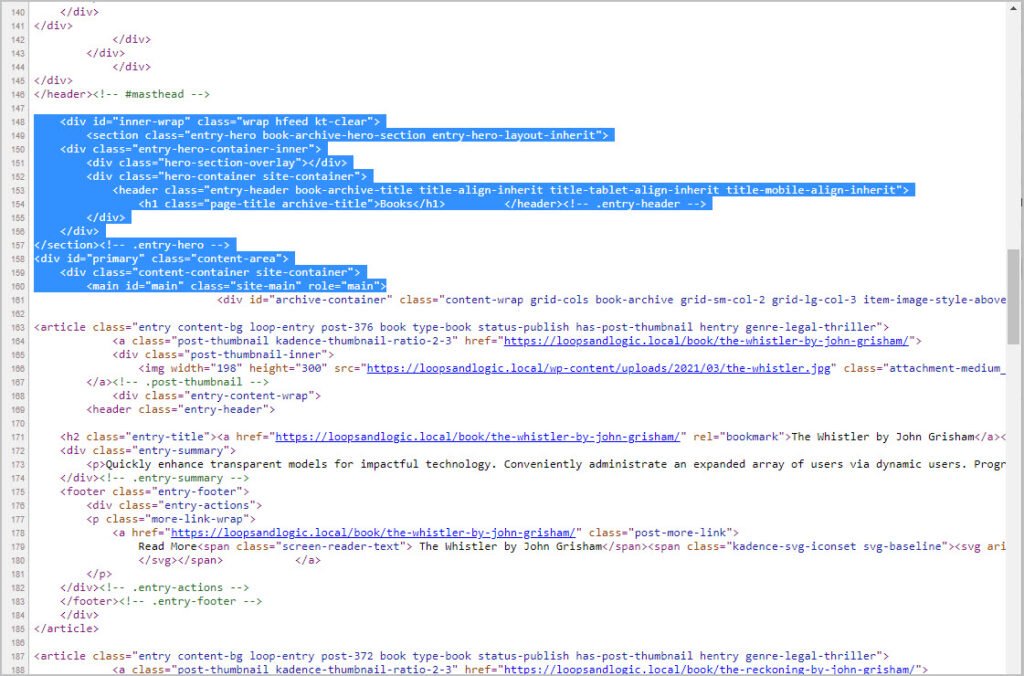
I scrolled down until I found the page header and the opening of the content area. I copied this code and placed it above the Template tag in the Layout template and then added matching closing tags under it.
<div id="inner-wrap" class="wrap hfeed kt-clear">
  <section class="entry-hero book-archive-hero-section entry-hero-layout-inherit">
	 <div class="entry-hero-container-inner">
		<div class="hero-section-overlay"></div>
		<div class="hero-container site-container">
			<header class="entry-header book-archive-title title-align-inherit title-tablet-align-inherit title-mobile-align-inherit">
			    <h1 class="page-title archive-title">Books</h1>
            </header><!-- .entry-header -->
      	</div>
    </div>
  </section><!-- .entry-hero -->
  <div id="primary" class="content-area">
	 <div class="content-container site-container">
		 <main id="main" class="site-main" role="main">
            <Template name=book-listing />
         </main>
    </div>
  </div>
</div>
This is what the final book archive looks like.

Does the Book Listing Template Work with Beaver Builder?
The information about Loops & Logic is that it works with Beaver Builder and Elementor. So, just to check that it does, I downloaded and activated the free Beaver Builder Lite plugin for the WordPress plugin directory. I created a new page called “My Book Reviews – Beaver Builder.” I saved and then clicked the button for Beaver Builder.

In the editor I see the Tangible module in the list and add it to the page.
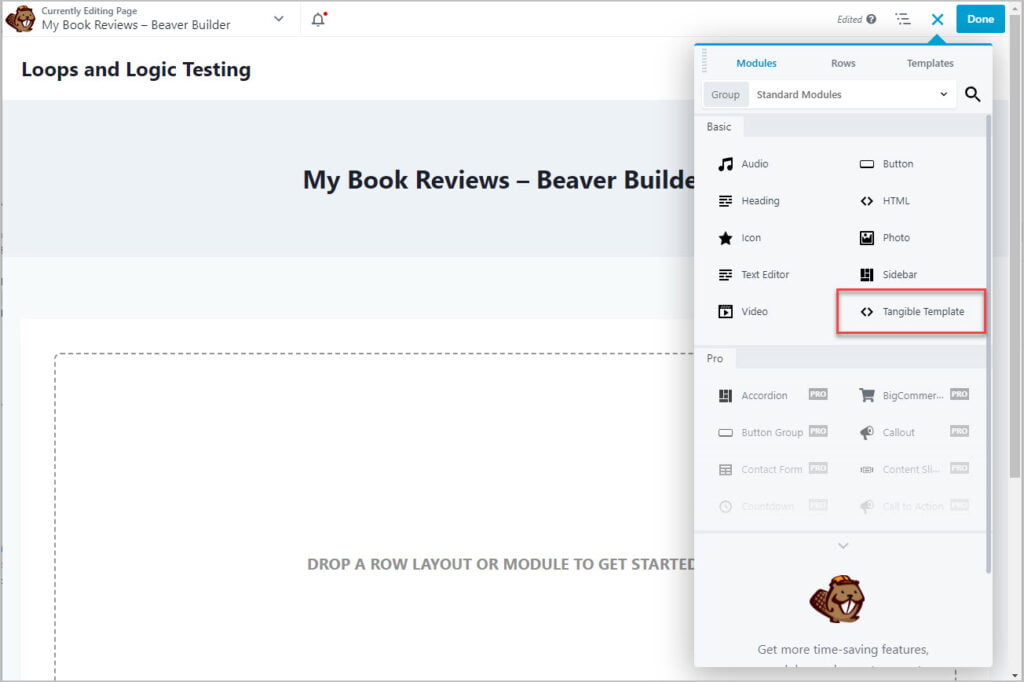
And then in the module settings I pick the Book Listing template.

And on the front-end, the Beaver Builder version looks the exact same as the Gutenberg version.

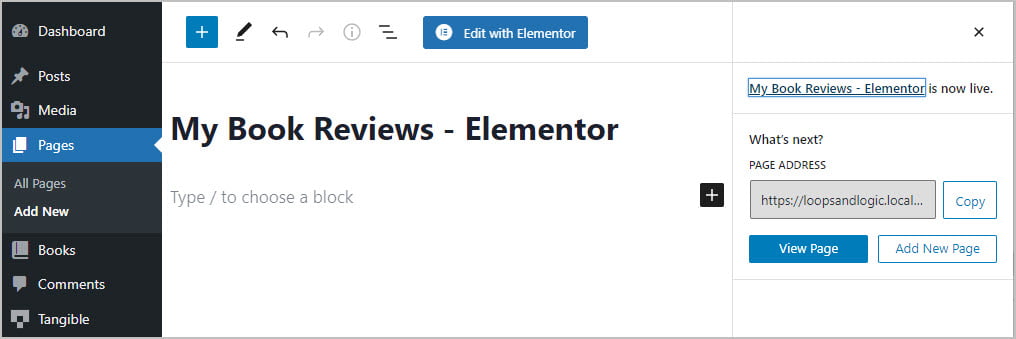
What About Loops & Logic Templates with Elementor?
Beaver Builder was a snap, what about Elementor? I disabled Beaver Builder and installed the free Elementor plugin from the WordPress plugin directory. I created a page “My Book Reviews – Elementor.”
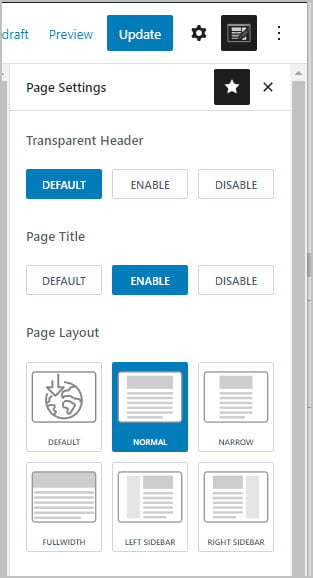
Before going into Elementor I set the theme options to show the title and use the normal layout.
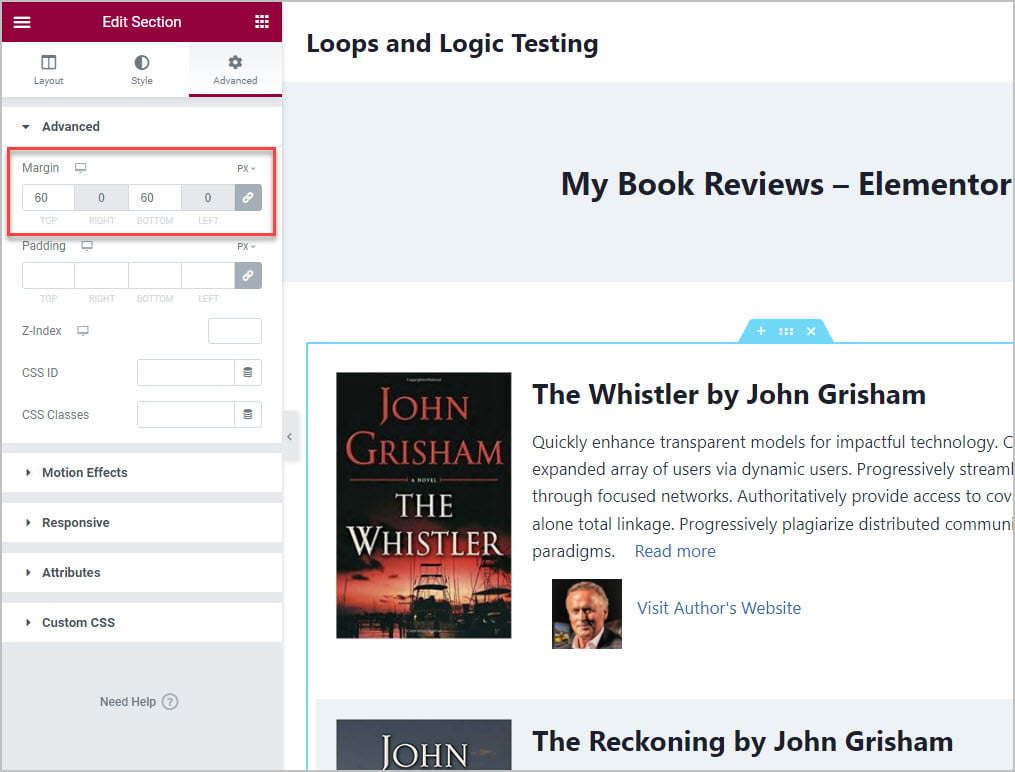
In the Elementor editor I see the Tangible widget. I drag it onto the canvas.

I pick the template in the widget settings. Elementor automatically wrapped it in a section.

And add some margin top and bottom to the section.
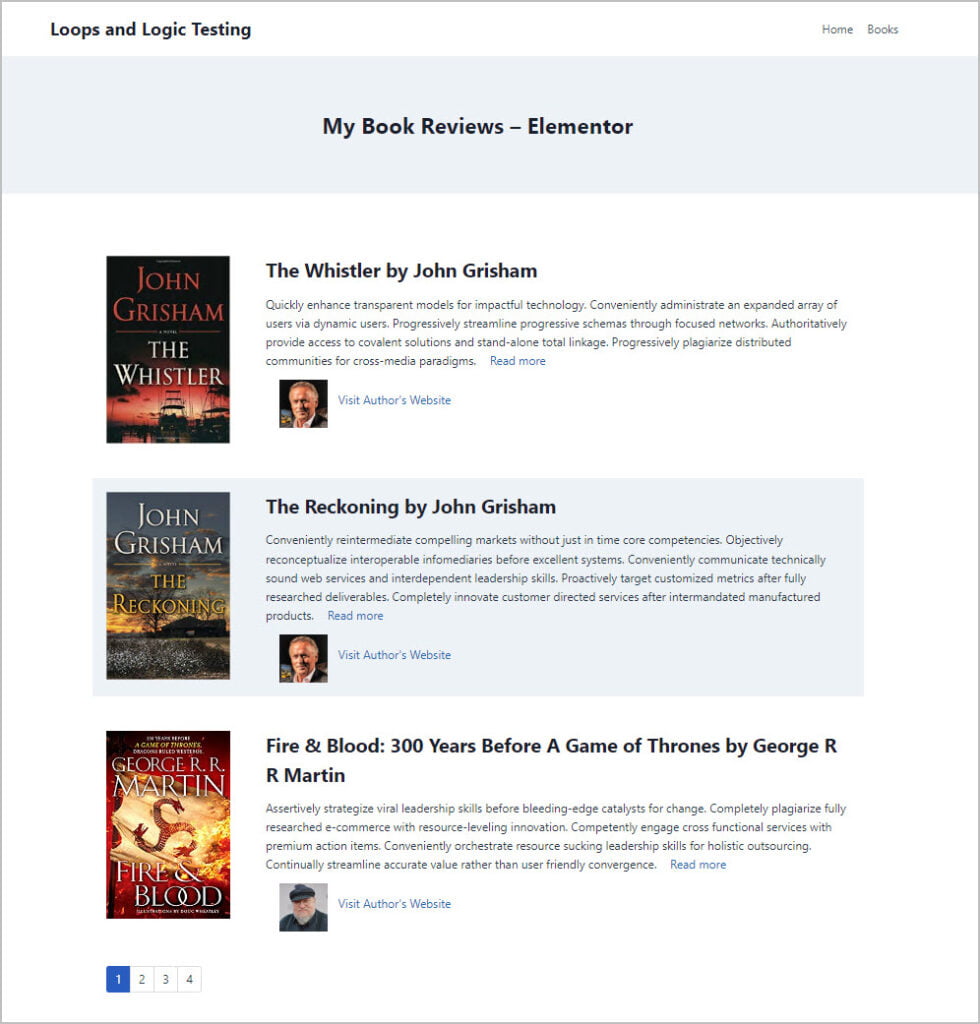
And here is the final Elementor version. All very easy.
Discussion and Conclusions
Loops & Logic has a lot of pros but there are a few things to consider before using it, which some might consider “cons.” First, you use code. I imagine for some people when they realized that code was involved that their eyes glazed over and they were ready to dismiss Loops & Logic as a programmer’s tool. The marketing for Loops & Logic says that it is as easy as HTML. Of course it is harder than HTML because in addition to static HTML tags you have all of the dynamic tags and each tag has different parameters and attributes. Still, I imagine if you are techie enough to build a WordPress site then you can figure this out.
Second, the documentation library is pretty extensive, but it can be difficult finding exactly what you need. I found that the search functionality was very helpful. The Discourse forum is a good resource if you get stuck.
Now for the pros. If you can live with some code and CSS then you’ll discover that Loops & Logic has a lot going for it:
- The first is that the base Loops & Logic templating system is completely free. You can create layouts and templates from within the WordPress admin, using an HTML-like syntax, without using PHP or ReactJS. Tangible, the company creating Loops & Logic, will have a premium extension that provides extra integrations for LearnDash and other popular solutions, but the base plugin will remain free.
- The second thing is that the free Loops & Logic plugin has support for Advanced Custom Fields (ACF), both the free and the Pro versions. Most free tools don’t support custom fields and reserve that type of feature for premium only. So with the free Loops & Logic and the free version of ACF you have a lot of options available for site building that are not available with core WordPress.
- Third, Loops & Logic is very flexible. While you can create content layouts for single and archive theme templates, it is not tied to the theme hierarchy. This means that you can create and place templates almost anywhere and include dynamic data in them. You can reuse templates by including them in other templates. All this flexibility extends to If /Else conditional logic allowing you to customize template output on the fly.
- Even it you don’t use Loops & Logic for every site, because it is free, supports dynamic data, and is very flexible, you can keep it in your back pocket and use it for those time when there are gaps in your builder. In this walk-through we saw that you can use it with three free builder options: Gutenberg, Beaver Builder, and Elementor. It works the same in all three.
Tangible, the company behind Loops & Logic, is an agency with large clients. They created Loops & Logic for their own use. That means that they have a vested interest in the plugin being robust and stable. That also means they aren’t dependent on lots of marketing or big sales numbers. Awareness about Loops & Logic is spreading by word of mouth, and that is why I think this is something of a sleeper that will slowly make its way into the lime light.