

Table of Contents
Introduction
Thrive Themes has recently released its Theme Builder. It has been a long time in the making and I was curious to see how it stacked up against the other solutions that I’ve looked at in this series. Since it is brand new, I expected to find some rough edges, and I did, but overall I was surprised by its polish and sophistication.
In “the old days,” if you wanted a theme template for a Custom Post Type, you used to have to create it using PHP because WordPress does not output the custom fields automatically. Now there are a number of options where you can use your page builder of choice to do the job using drag and drop simplicity. This post is part eight of a series looking at Custom Post Types and the theme building functionality of page builders. In part one of the series I show how to create a Custom Post Type with custom fields using Custom Post Type UI and Advanced Custom Fields. Checkout that post if you are unfamiliar with the process.
The Thrive Themes page builder is called Thrive Architect and like Beaver Builder’s Beaver Themer, the theme builder is separate from the page builder. However, unlike the other solutions in the series, the Thrive Theme Builder installs as a theme, the Shape Shift theme, and not as a plugin. Also, when you install Thrive Theme Builder you get a Lite version of Thrive Architect. This is another difference from many of the other solutions where the theme building functionality is a Pro addon to a base page builder.
Video Version
Setup
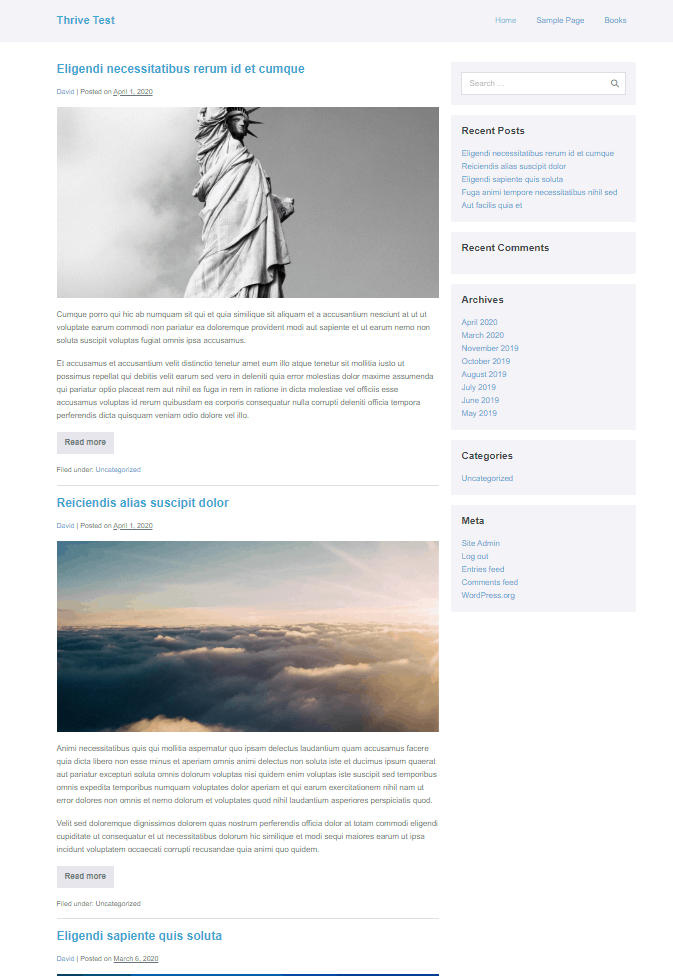
I created a test site and have the free Page Builder Framework theme installed. I used the FakerPress plugin to generate a dozen posts so there would be some content to work with.
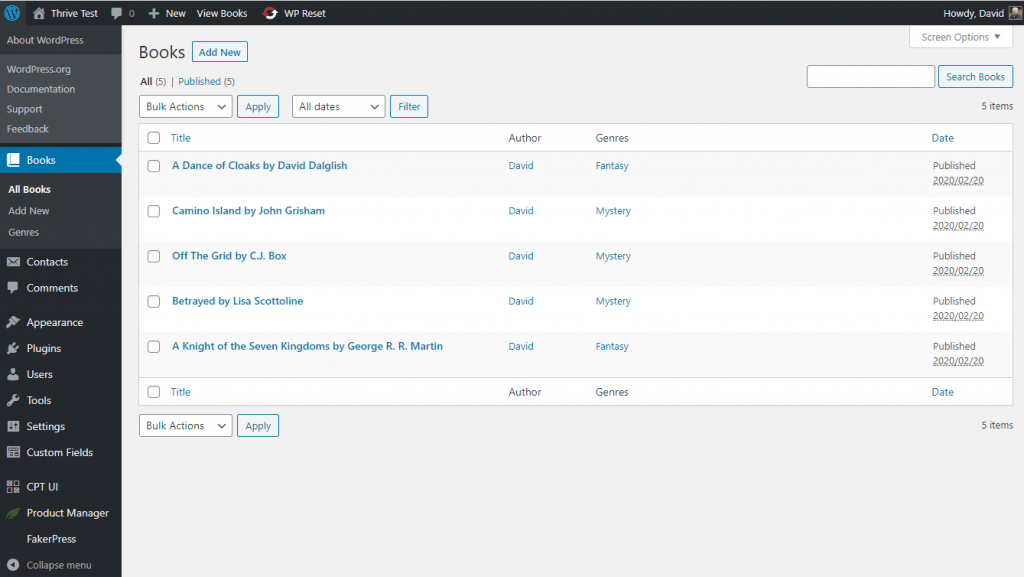
I also have Custom Post Types UI and Advanced Custom Fields installed. I used these to create a Custom Post Type called Books and a custom taxonomy called Genres. I entered some book records.
Here is the custom Genres taxonomy in the editor.

Here are the three custom fields for books: a link to the author’s website, the author’s photo, and the reviewer’s rating of the book.

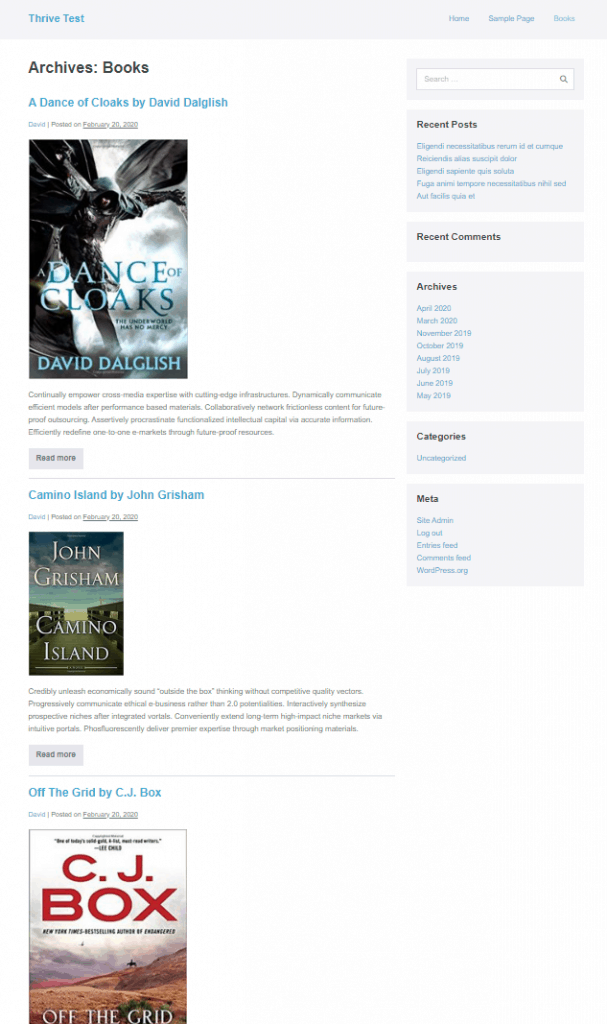
And here is the default Books archive on the front end. You can see that the featured images are different sizes and the layout is not great.
Here is a single book record. Neither the custom taxonomy, nor any of the custom fields are showing. The layout isn’t great.

Let’s do some theme building.
Installing Thrive Theme Builder
To install a Thrive Themes product you need to download the Thrive Product Manager plugin. You enable that and connect with your site. Then you have a list of all of your purchased products and you can install them.

As mentioned earlier, the theme builder is installed with as a theme. To install it you check the box to enable product under the Shapeshift theme. Even though you only click one item, it shows as installing two, because when you install the Shapeshift theme the Thrive Theme Builder is also installed. The Thrive Theme Builder comes bundled with the lite version of Thrive Architect. I already had Thrive Architect installed on this site and didn’t see a way to easily switch it for the lite version. So for this article I’ve used the full version.
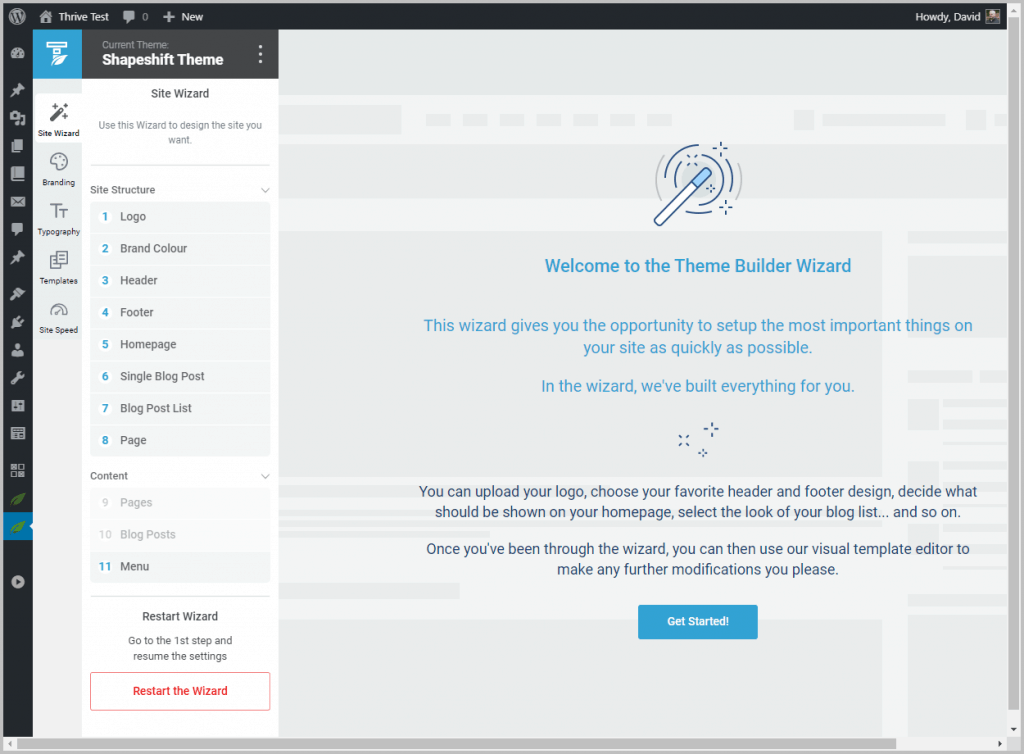
Setup Wizard
Once installed, you are launched into a setup wizard. This gives you the option to select some branding options and to choose from pre-designed templates. You can later create your own templates to replace them if you want.
Let’s look at the steps.
Logo
The first step is to upload a logo. I like that it shows you the suggested dimensions.
I uploaded a logo.
Brand Colors
The next option is to select your brand colors. I kept the default blue with black.

Header
The next option is to choose a default header.

There are 30 different pre-designed header layouts to choose from.

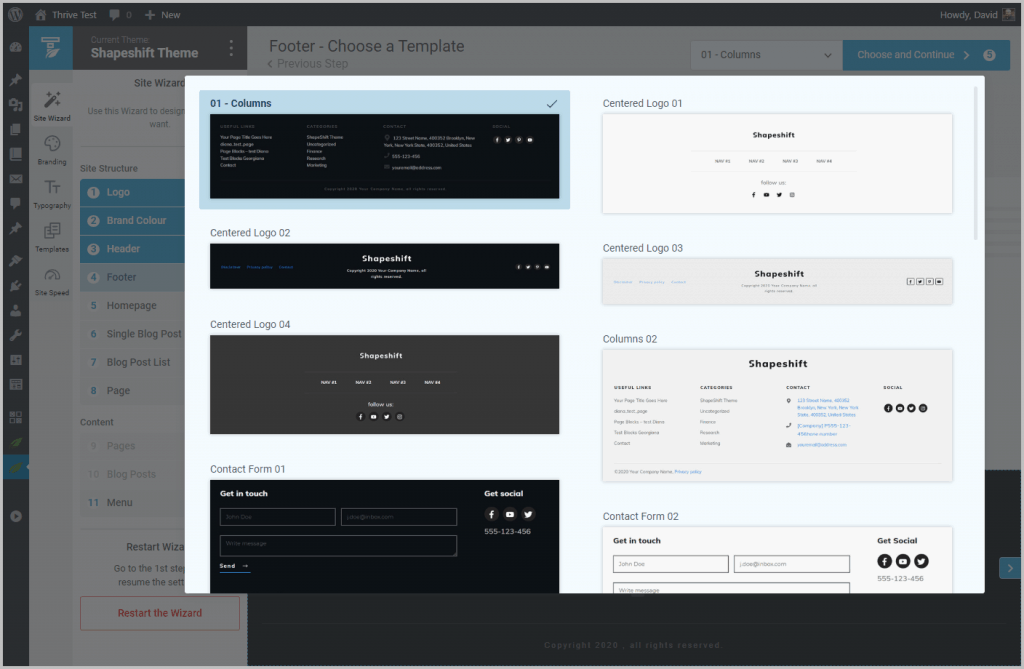
Footer
There are 27 different pre-designed footer options to choose from.
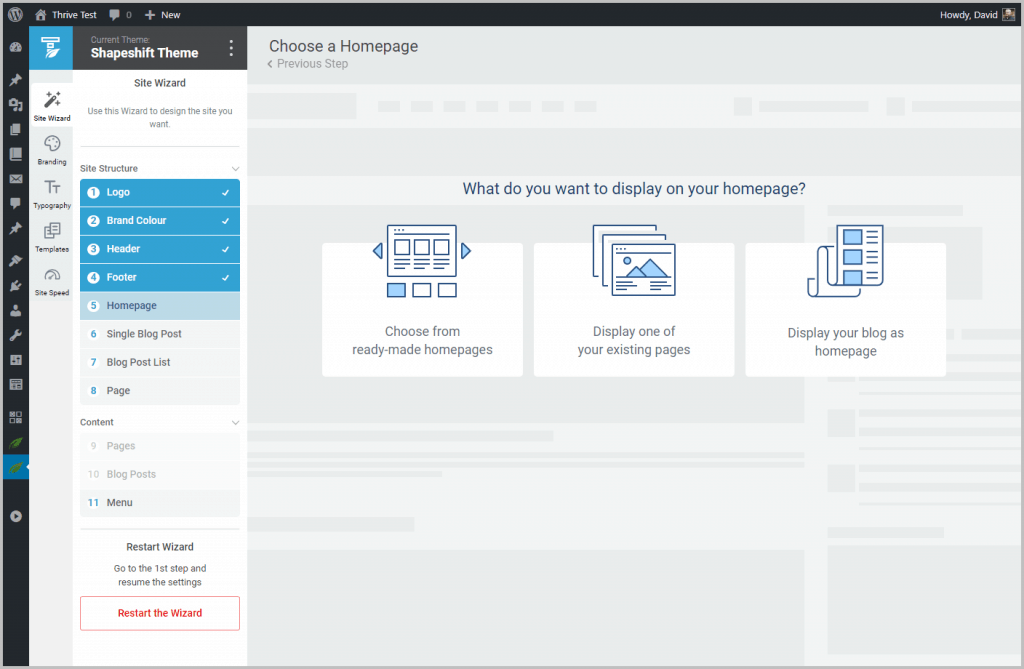
Home Page
You have the option to select a ready made home page, an existing page on the site, or to use your blog posts as the home page. The theme offers 5 different pre-designed home pages. For marketing purposes they don’t recommend using your blog as the home page, but for simplicity sake that is what I selected.
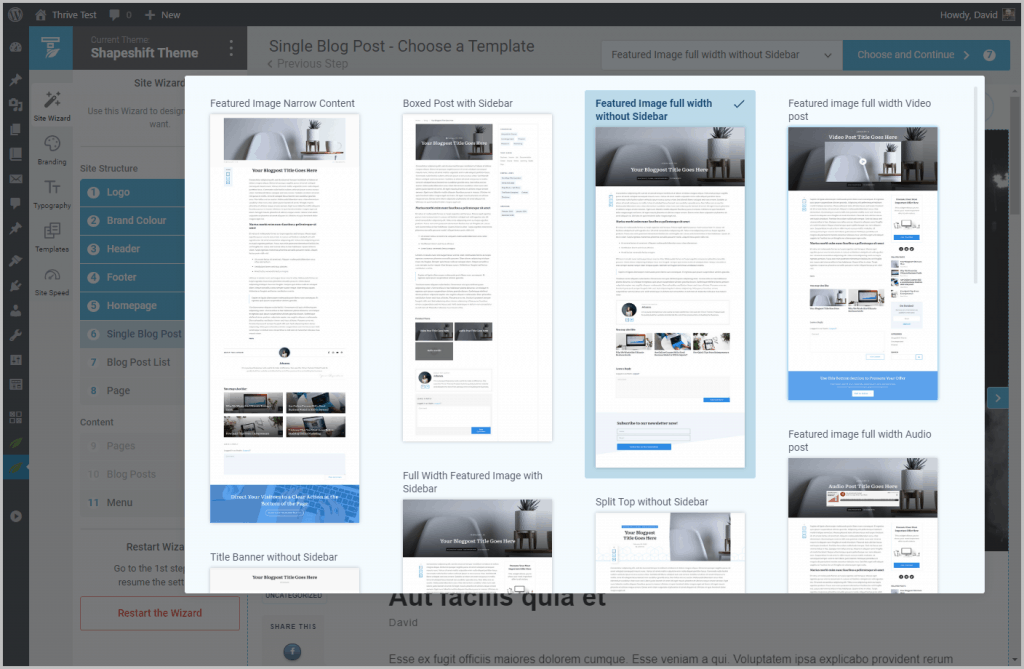
Single Blog Post
There are a dozen pre-designed single post layouts to select from. As with all of the templates, you could later design your own if you prefer.
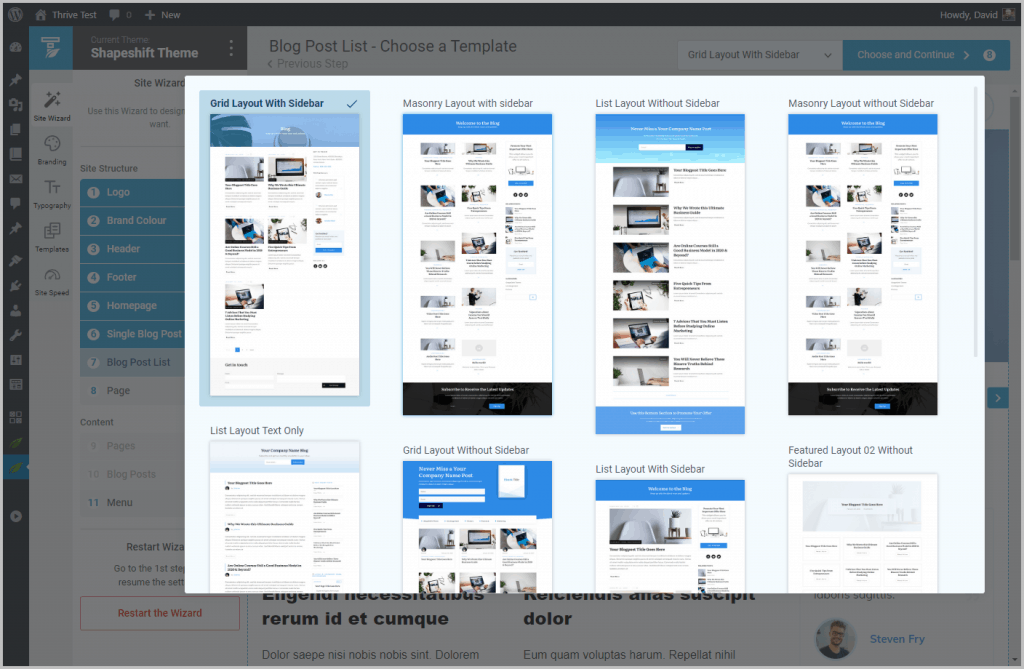
Blog Post List
For the blog post list there are 9 different layout options. These include grid, masonry, and list layouts, with or without a sidebar.
Page
There were 9 page layout options. These would be the starting point when you wanted to create a page for your site.

Menu
Finally, there is the option to choose a menu for the header and footer. I switched to the admin menu area, created a menu, then switched back and assigned it.

You can repeat the wizard any time you wish, or select a step from the menu, to make changes to your previous selections.
Additional Theme Options
There are some additional theme options, which are accessible from the vertical menu to the left of the wizard menu steps.
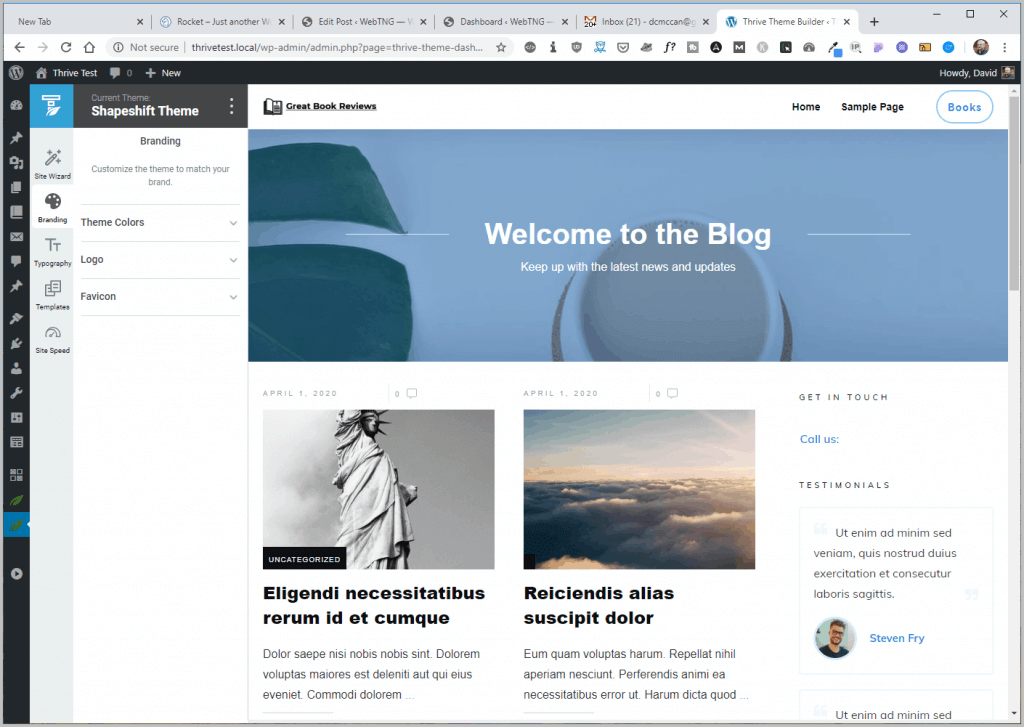
Branding
From the branding menu you can change the theme colors, change the logo, and add a favicon.
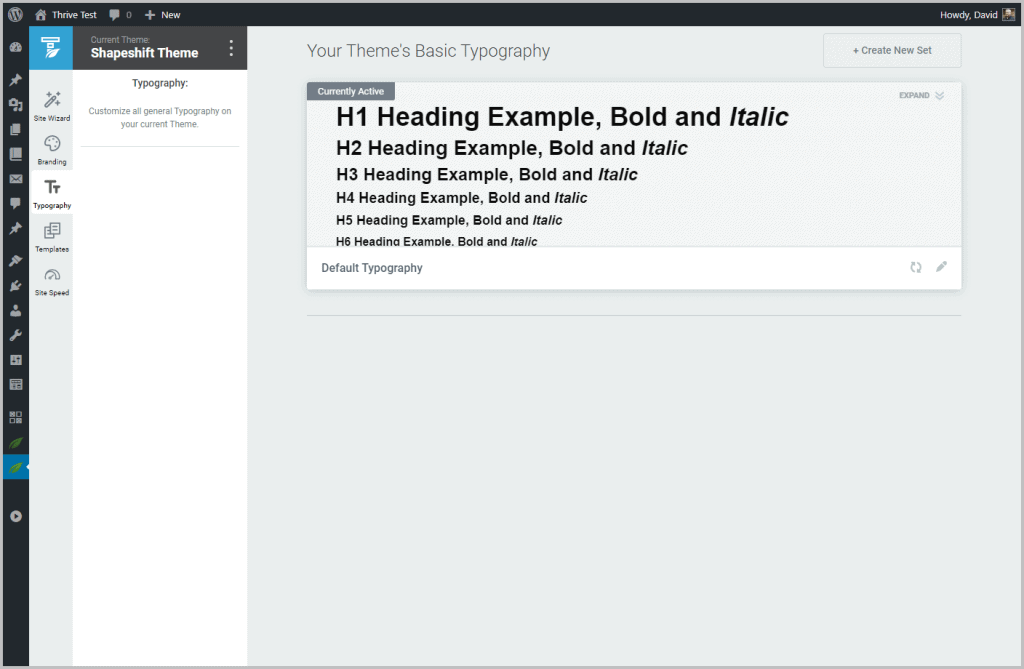
Typography
From the typography menu you can create a new set of font settings where you select the fonts and font sizes.
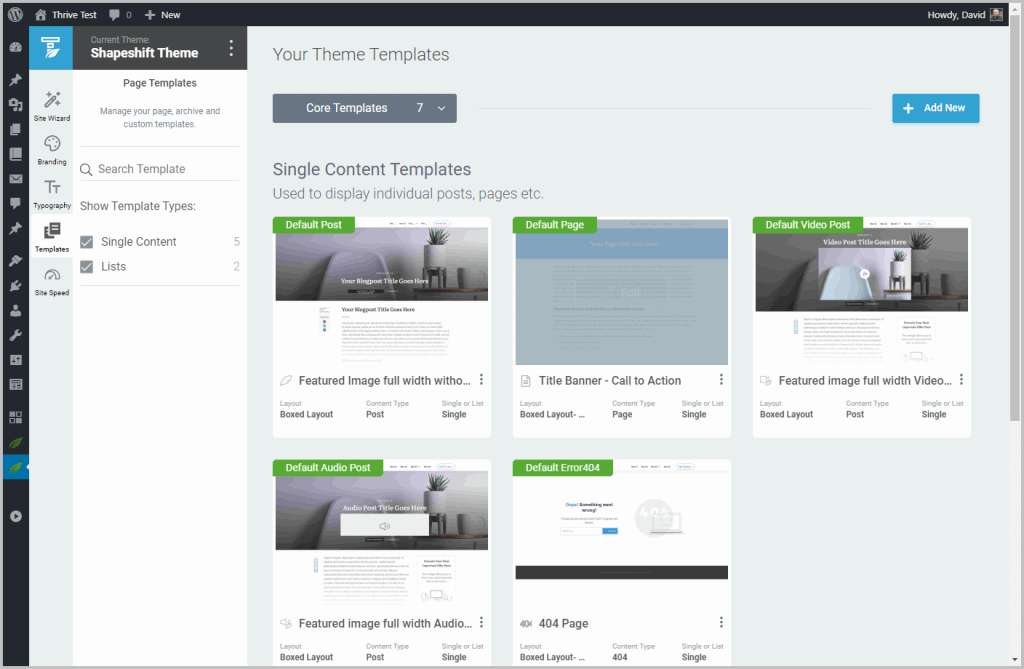
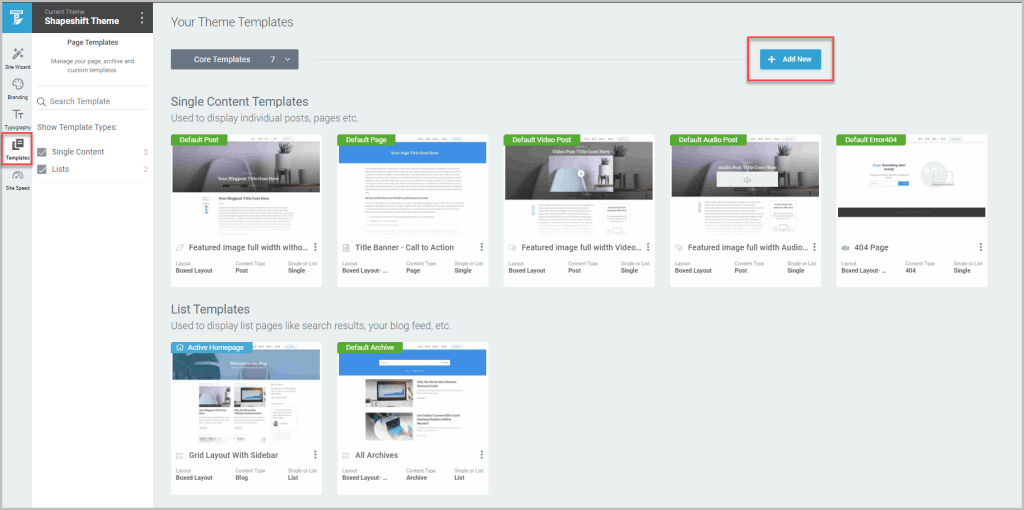
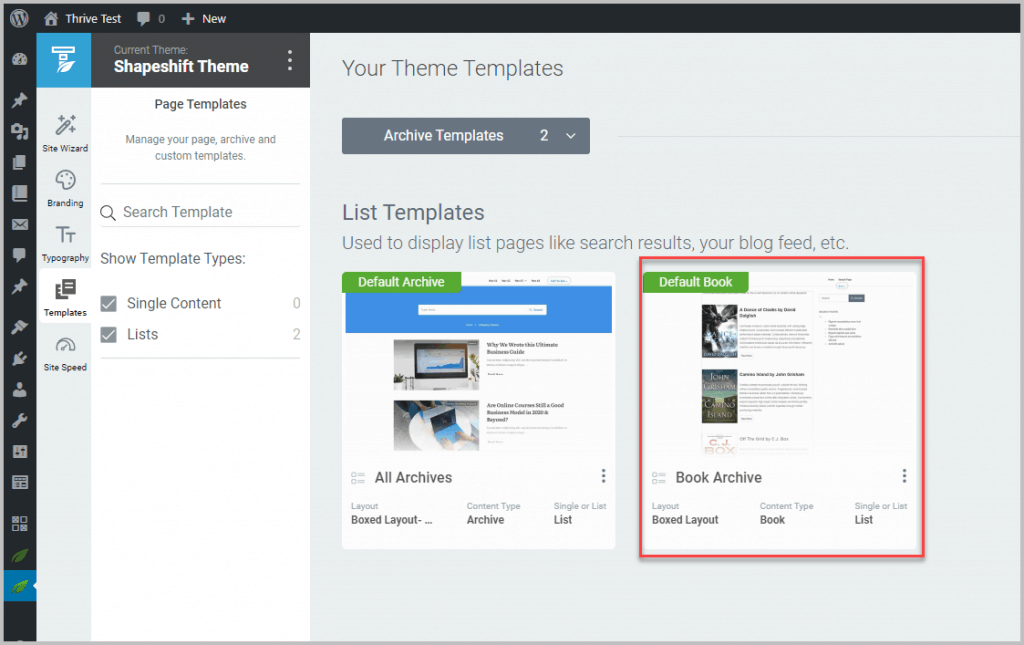
Templates
In the templates area the templates we selected while going through the wizard are shown. Also pre-selected is a video post, audio post, and 404 page templates. You are not limited to selecting from the pre-designed ones. You also have the option to edit them in detail. We will see that process shortly when we create the single and archive templates for the books Custom Post Type.
Site Speed
Thrive Themes has chosen some plugins and services that they think are good and they recommend. You can use your own alternatives, but they have pre-configured these plugins such that if you use one of the recommended ones then the optimal settings are pre-applied automatically. This simplifies the setup of these plugins, which can sometimes be confusing.

Minification and Caching
There are two caching options, WP Fastest Cache and W3 Total Cache. Both have free versions in the WordPress theme directory, as well as premium versions.
Image Optimization and Delivery
For image optimization there is a paid option, Optimole, and a free option, Smush. Again, there are settings that have been pre-configured to apply to either option, if you want to use one of these.
Accelerated Mobile Pages
AMP is an initiative from Google for optimizing browsing on mobile devices. There are plugins available to enable this, but the Thrive Theme Builder has this option available already. What happens is that a cached mobile version of your pages is stored on the Google servers. Using this is also optional.
The Default Single and Archive Book Pages
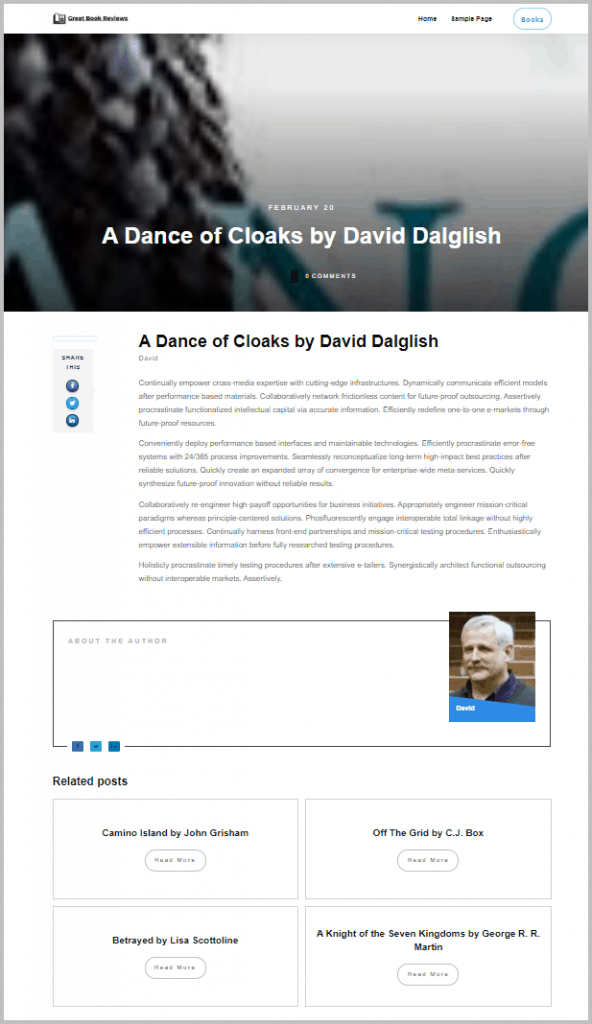
Before starting to create our bespoke templates, lets see what the default looks like. The archive list is OK, except that the book covers are the wrong aspect ratio.
The single book template does not show the custom fields and the page header using the book cover doesn’t work in this instance. A minor point, but the author’s picture is not placed correctly in the author box.
Getting Started With The Template Builder
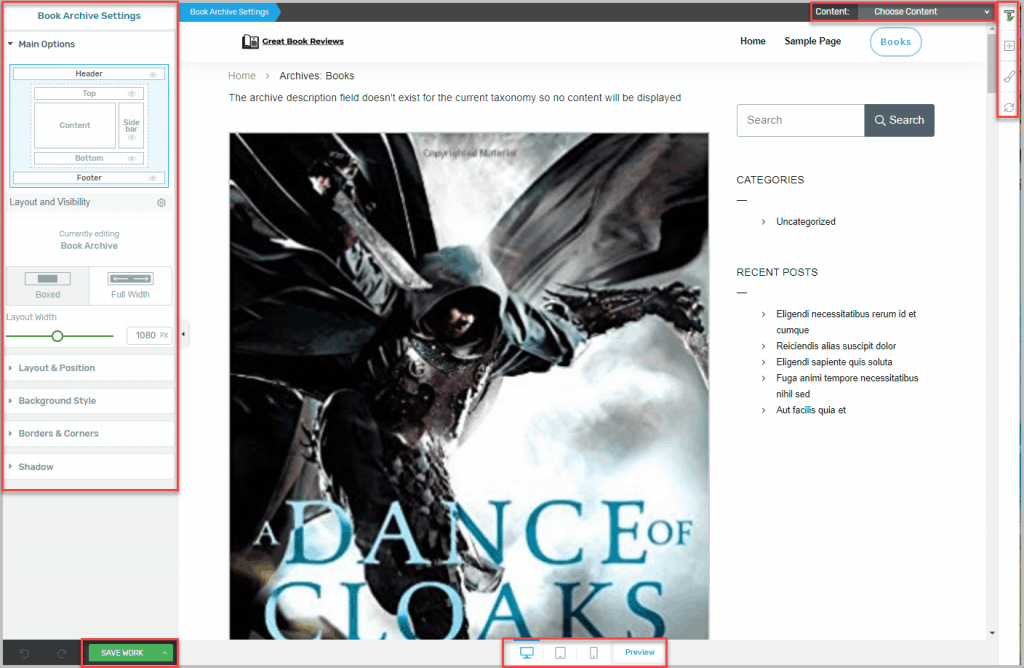
I want to start by creating the Book archive. When you click on the Templates button on the left you see the template area on the right.
Clicking on the Add New button opens a dialog with a place to enter the template name and three drop downs for setting which type of template is being created. I’ve given the template a name and selected that it is to be a List (archive).

I selected that the Archive Type was for Books.

And I also selected that I wanted to “Start From Scratch,” though there are pre-designed options you can select from the drop down if you prefer.

I then clicked the Finish button. This is what the “start from scratch” looks like on the front-end. I expected a blank page, but instead we get a basic list.

If you click on the three dot hot dog menu you see some high level template options.

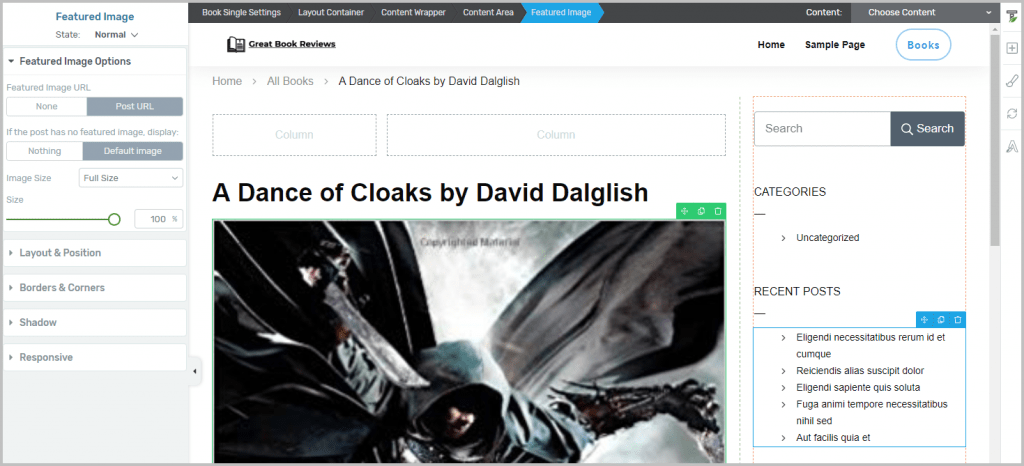
When you hover over a template and click on the Edit button then you go into the template builder. On the left side are the layout and style options. At the bottom left there is a Save button and the up-arrow next to it is how to exit the template builder. At the bottom middle is where you can select the device size for viewing. At the top right-center is a place where you can select particular content for the editor preview. Down the right side there are three options from Thrive Architect: the plus icon where you can add one of the many elements from Thrive Architect, the paint bush which is where you can style individual items, and a revert button.
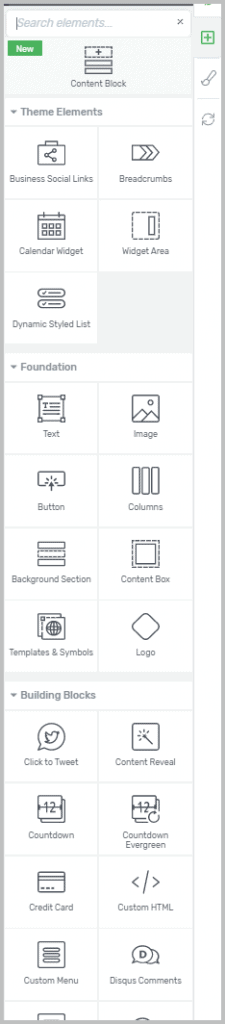
Here are some of the elements available when clicking the plus button.
Creating the Book Archive Template
From the list of elements on the right, I selected the Columns element and dragged it into the template just above the featured image. I then selected a 2 column 1/3 – 2/3 option.
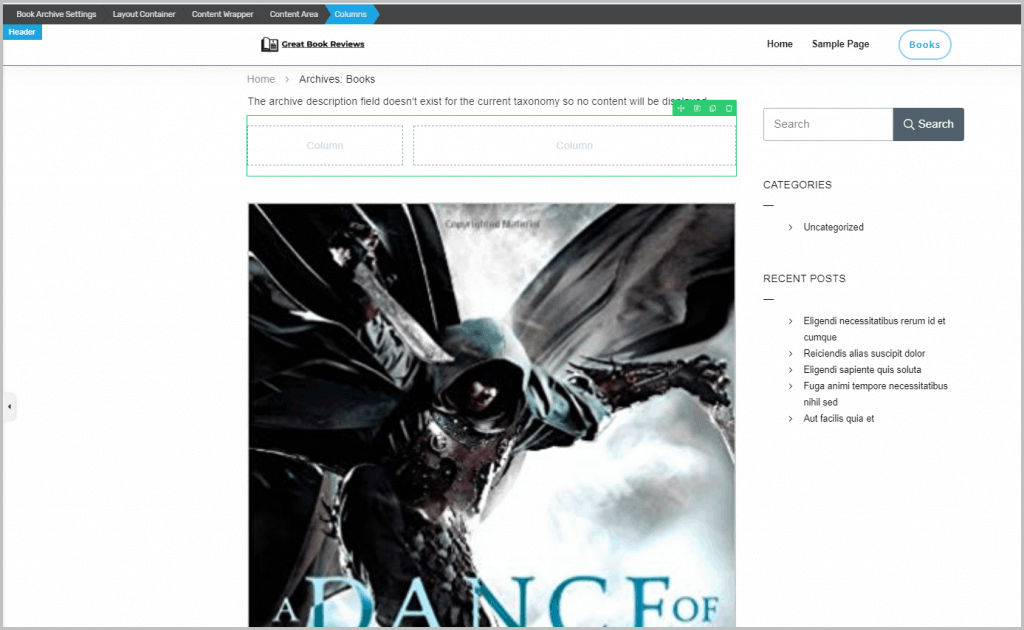
I tried dragging the featured image from below the columns and dropping it into the left side column, but that resulted in the entire layout being put into that column. Instead, I double clicked on the featured image and an option appeared on the left to edit the design.
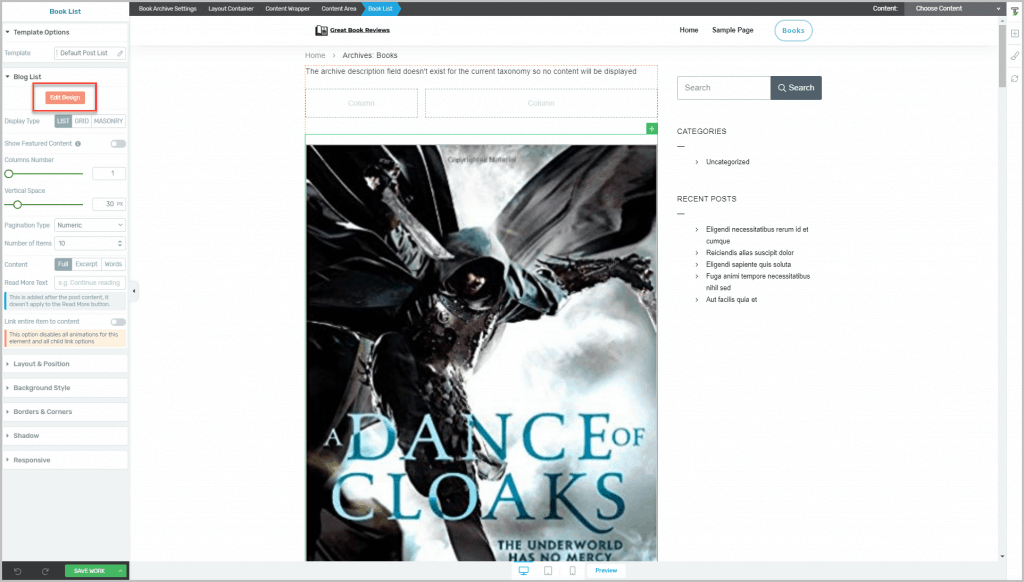
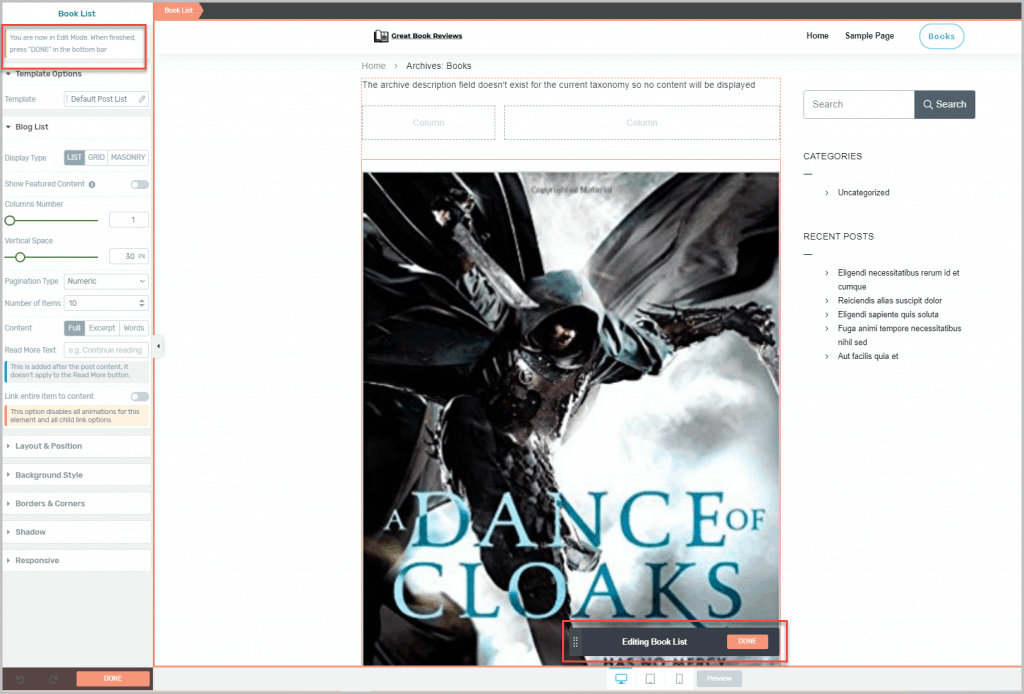
I clicked on the Edit Design button and this changed the design into edit mode. There was a button at the bottom to click when done.
I tried grabbing the 4-way arrows and dragging the featured image into the column above, but that was not possible. I realized that those columns were outside of the content layout, so I deleted them, then added them in again directly above the image within the same container. I was then able to drag the featured image into the left-most column.
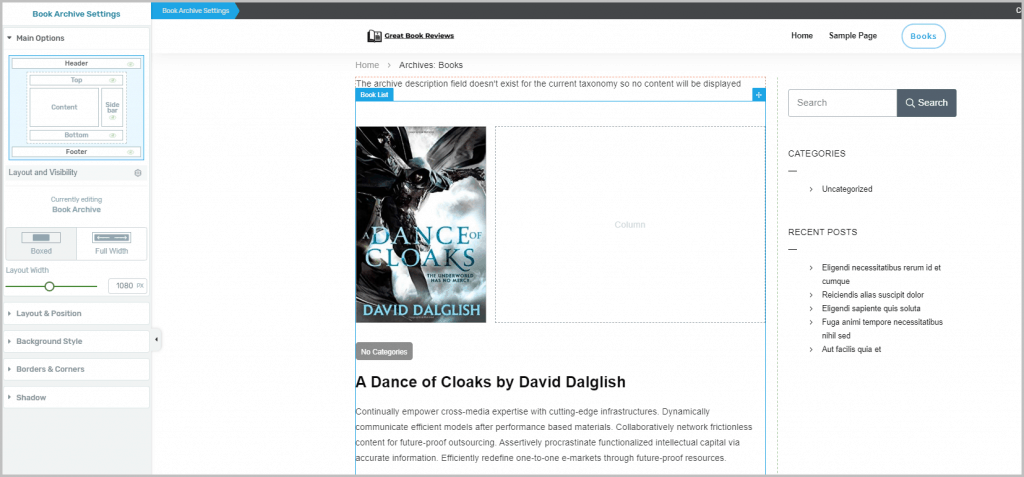
I then dragged the title, content (which I set to excerpt) and read more button into the right column.

The layout was looking pretty good, but there was that text that said “No Categories” which was puzzling. Each book was assigned to a Genre taxonomy. In the sidebar there was also a Categories widget that said Uncategorized. I deleted the “No Categories” element under the book cover image and added in the Post Categories element again under the featured image. This time I saw a dynamic data option.
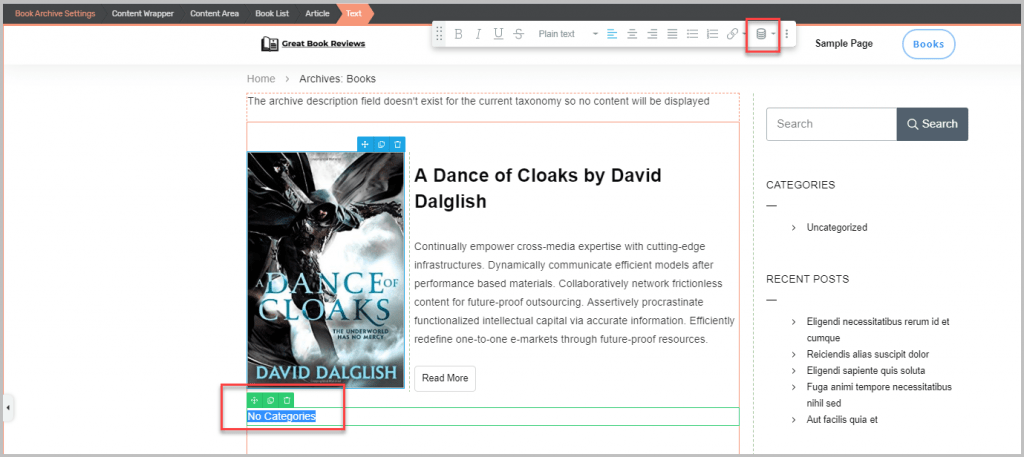
It still showed No Categories, so I clicked on the down arrow next to the database icon to see the dynamic data options.

I then selected the Taxonomies item, but only the default Categories showed as an option, not the custom taxonomy.
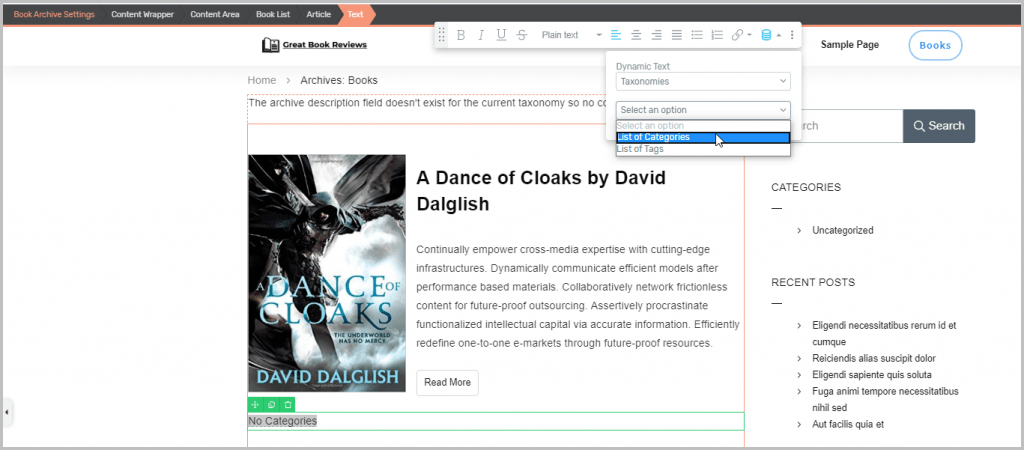
I tried all of the dynamic data options, but was not able to get the Genre to show. So I clicked on the Done button and then double clicked on the Categories element in the sidebar. This time the dynamic data options opened on the left side, but there still wasn’t the option to show the Genre. Since they could not be shown correctly. I removed the categories elements from the template. I then saved.

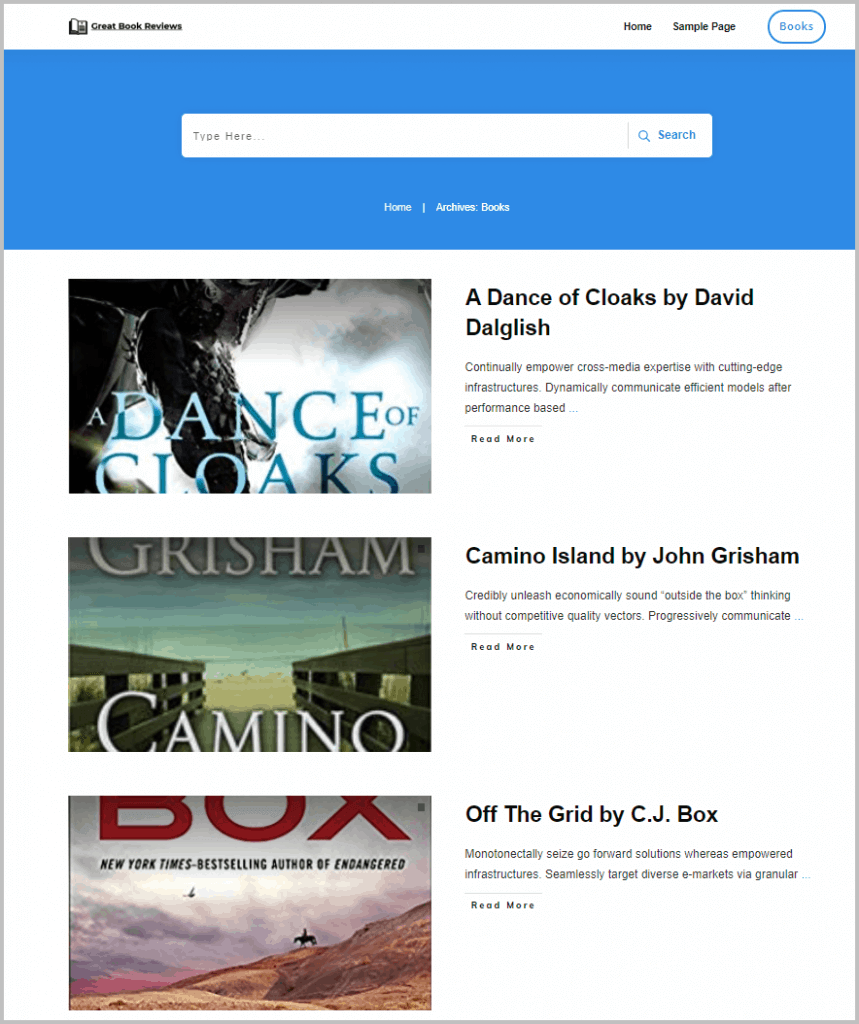
The archive was done, so I clicked the Save Work button at the bottom and went to the front-end to view the archive. The result looked good.

One thing I’ve done to test the flexibility of theme / template builders is to see if I can add a custom field in the archive. So, before starting the single book template, I went back into the templates area. I saw the Book archive just created in the list of archive templates and I noticed it has a screenshot of the layout, which was a nice touch.
I hovered over it to get the Edit button and opened it in the template editor. I then clicked the Edit Design button like before. I dragged a column element into the template, above the Read More button but below the excerpt. I then dragged the Read More button into the left column.

I then selected a button element from the list on the left and dragged that into the right side. Notice the bread crumbs at the top of the screenshot. That is another nice touch.

So I wanted to make that button look like the Read More button, but have a link to the Author’s website, which was one of the Book custom fields. I was able to just click into the button and change the text.
I then went into the button style options and changed the colors.
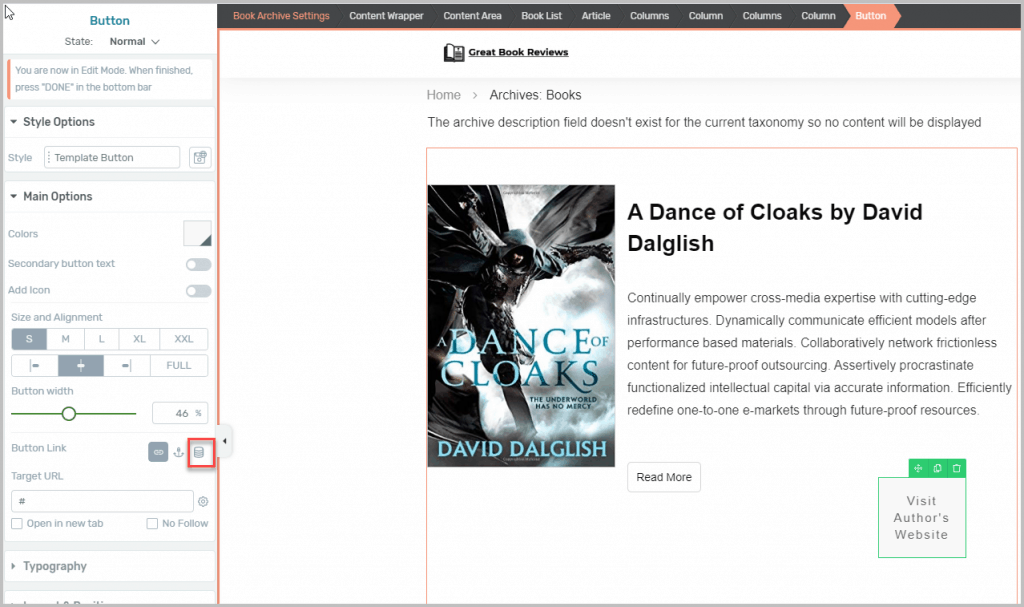
I noticed the database icon, indicating dynamic data, and clicked that and chose the custom field link to the author’s website.

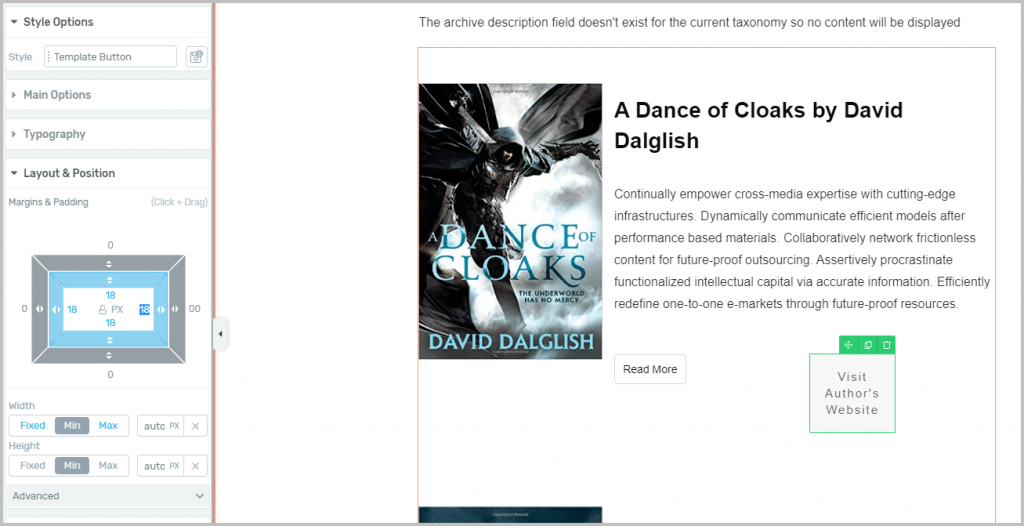
I then adjusted the layout margins and padding.
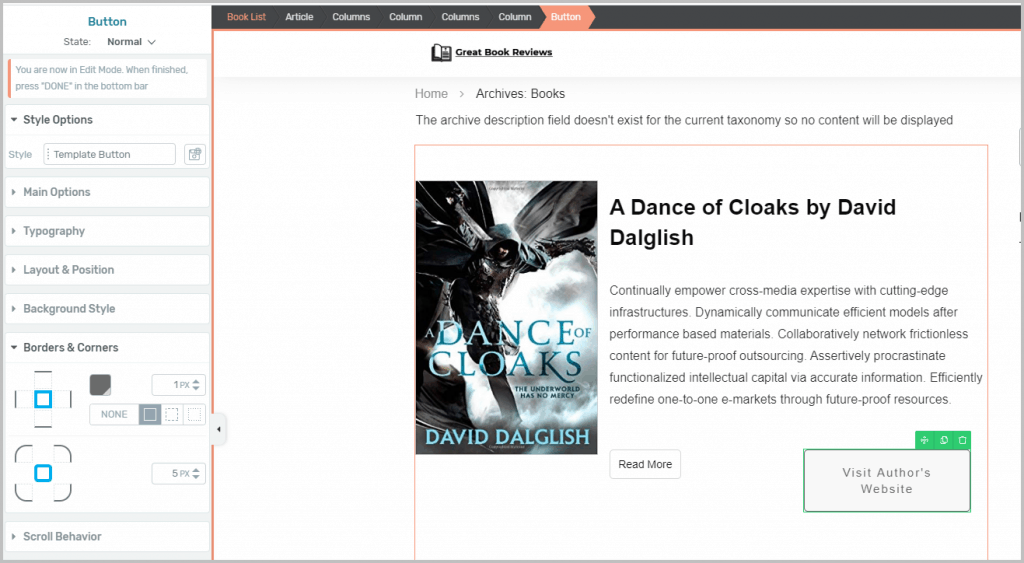
I found the border options and added a border.
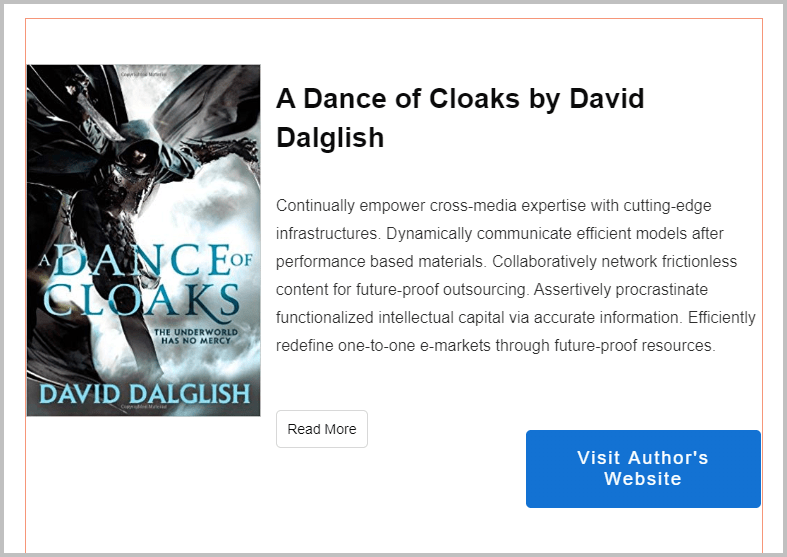
I saved and went back to the front-end to view the result. Here is what the archive looked like.
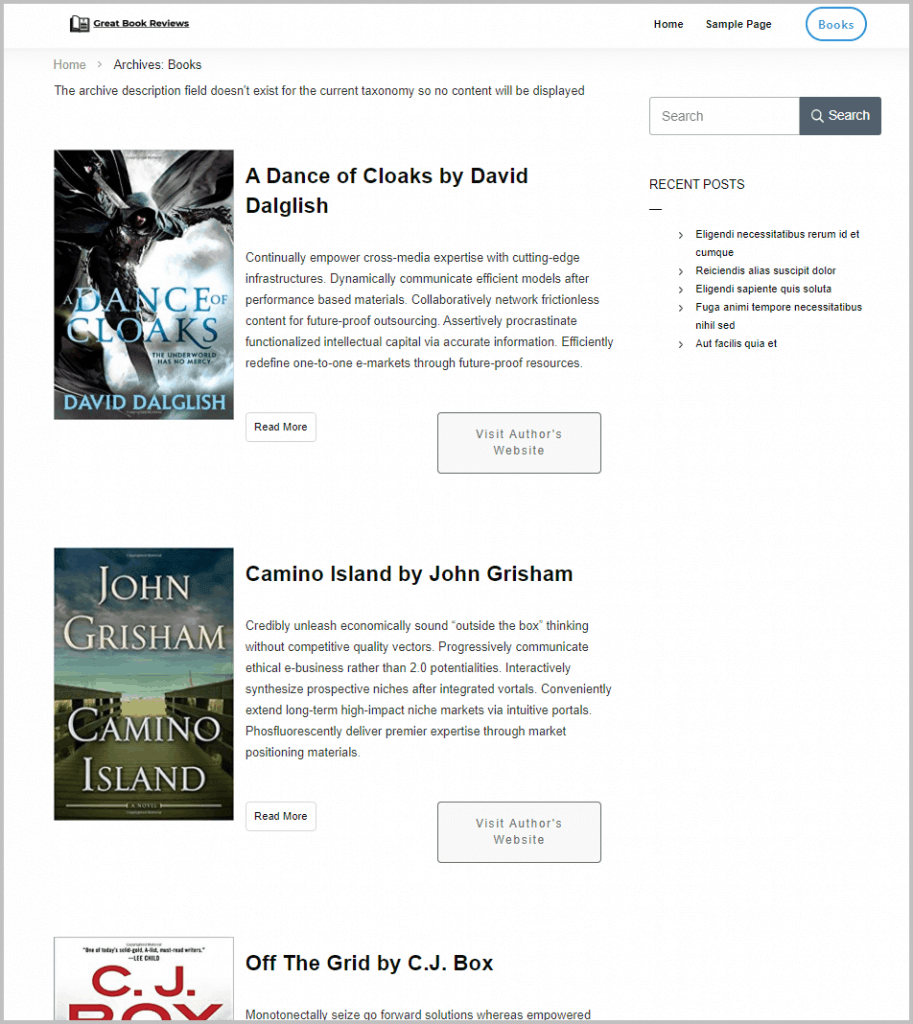
I clicked on the button to go to the Author’s website and that worked.

Creating the Single Book Template
Back at the Templates screen, I clicked the Add New button. I selected single, gave it a name, and selected the post type. I then clicked the Finish button.

The new template was added to the list of templates.

This is what the new book single template looks like on the front before making any changes.
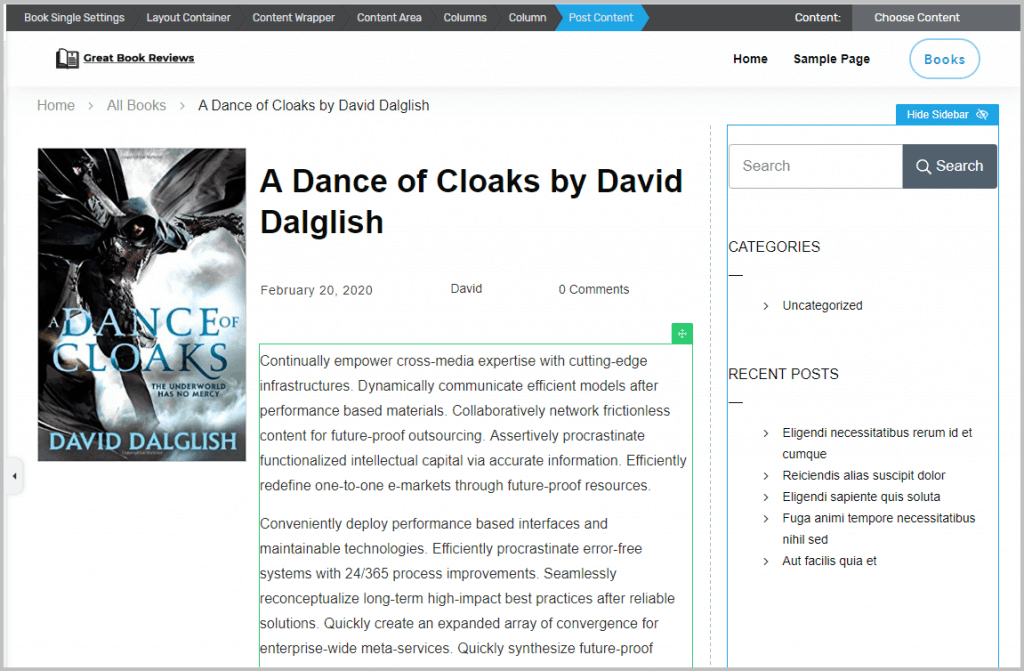
I went into the template editor for the book single. I wanted to create a similar layout as with the archive and have two columns with the book cover on the left and the other default content on the right. It wasn’t necessary, like before, to click the Edit Design button. I added a columns element.
I dragged and placed the content elements into the two columns. The post meta (date, author, comments) were in a row with three columns. When I moved that the spacing between the columns was off.

I adjusted the post meta, made the text the same size, and positioned it.
Since I knew that I wouldn’t be able to pull the genre, I removed the Categories element from the sidebar.
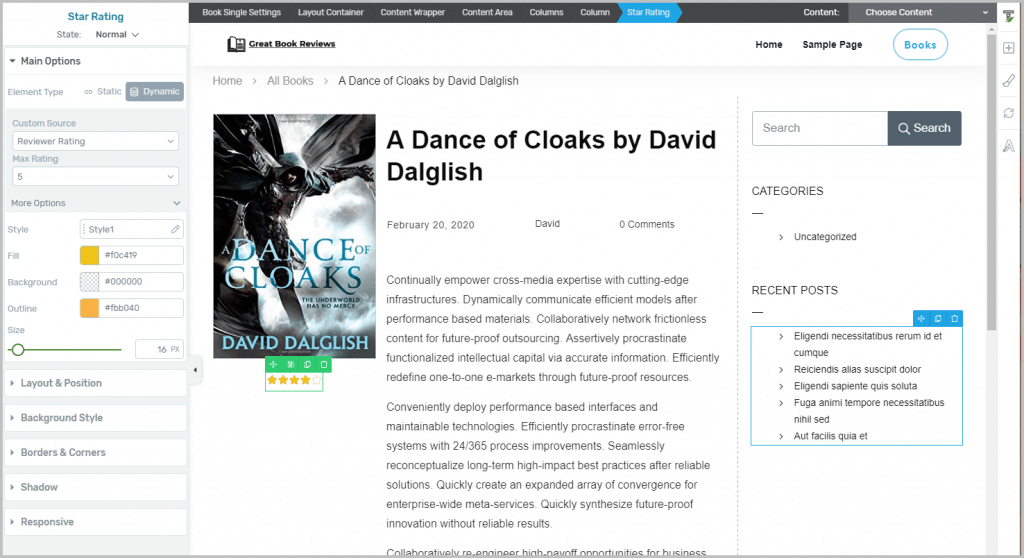
I saw that there was a star rating element, so I dragged that under the book cover image. I centered it, chose the dynamic option, and then clicked the custom field for the reviewer rating.
Next I dragged an image element under the star rating. When I did, it opened the media library for me to pick an image. I noticed the Use Dynamic Source link and clicked it.
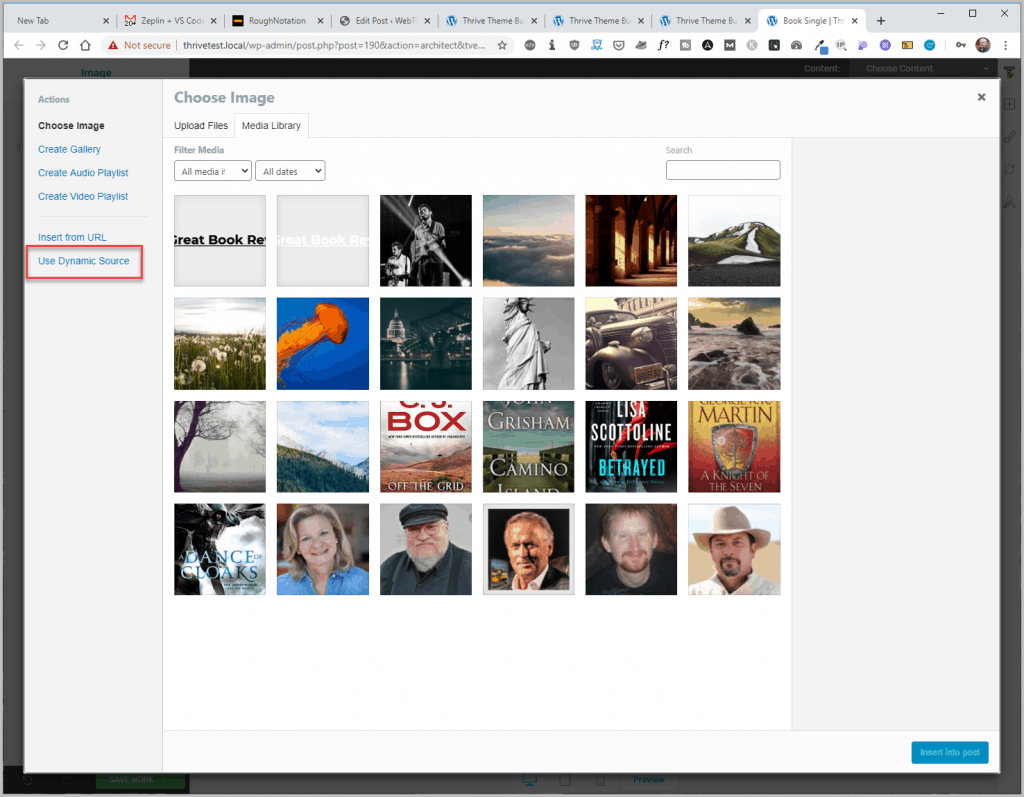
That took me back to the template editor with the Dynamic option selected. I chose the source as a custom fields and selected the author’s photo custom field. I then centered the image and adjusted its size.

I dragged a button element under the author’s photo, double clicked on the text and changed it, adjusted the text size, and selected a dynamic source for the link. I picked the author’s website custom field.
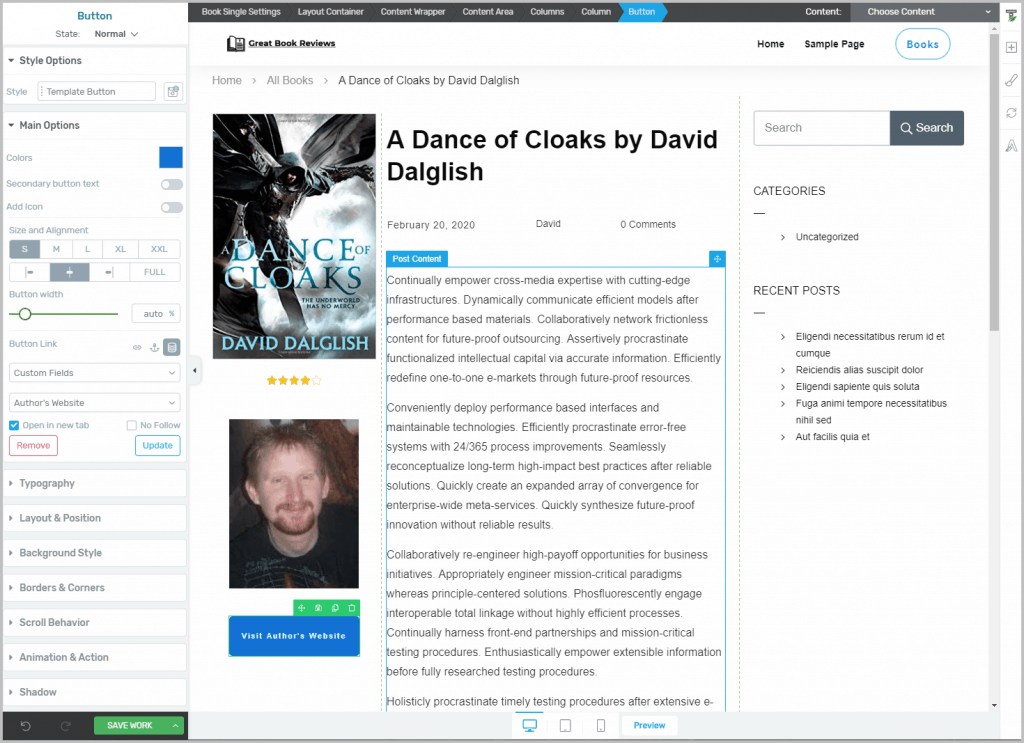
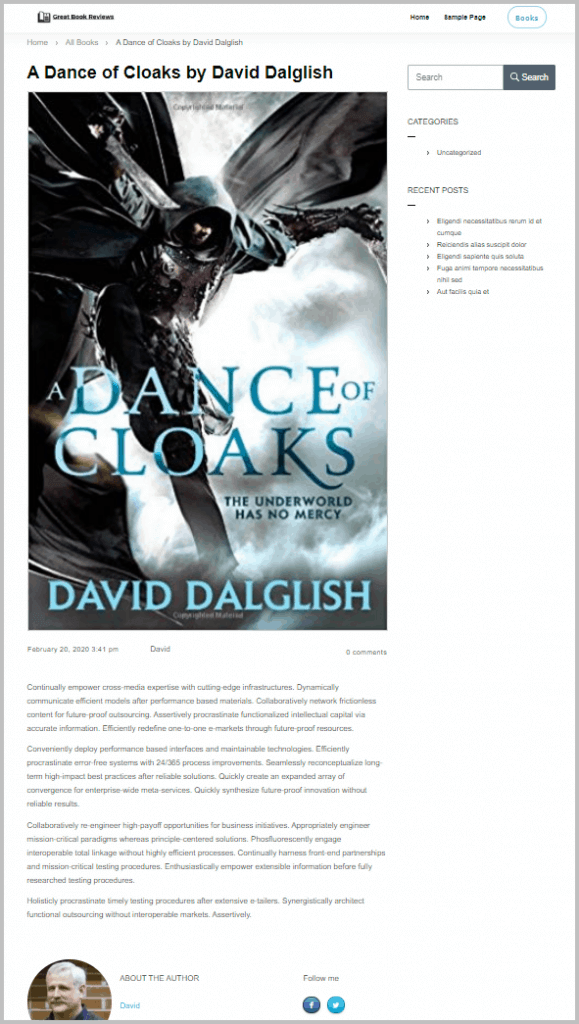
The single template was done, so I clicked the Save Work button and went to view it on the front-end.

It looked good.
Conclusions
The Thrive Theme Builder experience was different than other theme and template builders I’ve worked with. For one thing, the customary practice is to place theme related settings under the Appearance menu. Instead, the Theme Builder menu is found under the Thrive Dashboard. Also, many of the settings from the setup wizard are normally found in the theme Customizer. Being different isn’t necessarily a bad thing, but it means that you can’t rely on previous experience to figure it out.
Overall, the template builder worked fine. It felt a bit clunky at times and the controls worked differently than I was used to with other builder interfaces, but they worked. Thrive Architect doesn’t have a lot of 3rd party addons like Beaver Builder or Elementor, but it has more than enough to get the job done.
The Thrive Theme Builder is new and it had some rough edges. I purchased the Thrive Theme Builder in early May and began this walk-through almost a month ago, but there was a bug and the book archive template would not be applied. Instead the default archive template was shown for books. This was fixed, broke again, and they got it working. I checked regarding the custom Genre taxonomy and was told that Thrive Theme Builder currently doesn’t support custom taxonomies. This was very surprising as it is a standard WordPress feature. Hopefully they will add that soon, but the lack of support for custom taxonomies would limit the product’s use on a number of projects where such would be expected.
With a name like “Shapeshift Theme,” I’d say that the Thrive Theme Builder is meant to be a general purpose theme. It has a lot of small touches geared towards brand promotion and conversion, which I didn’t discuss. It also has a very bold, standout, look that I found attractive. The company explicitly says that they target their themes towards “influencers” and I can see the appeal for that demographic. It is easy for me to accept that it would work well for solopreneurs. I’m not sure if it is flexible enough, however, to “shapeshift” for a broad range of sites. Do you think it is flexible and versatile enough for Twitch streaming stars, music bands, Church websites, etc? Please let me know what you think in the comments below.


Thanks for this post, I am trying to build a resource library for podcasters and this approach of using and then displaying custom posts and fields might work really well. I use Thrive’s Shapeshift theme all the time for client builds, so thanks for writing up the options…
You are welcome. Thrive has a lot going for it, especially all of the small engagement and promotion touches. The only thing I noticed with the Thrive Theme Builder is that custom taxonomies are not supported.