Table of Contents
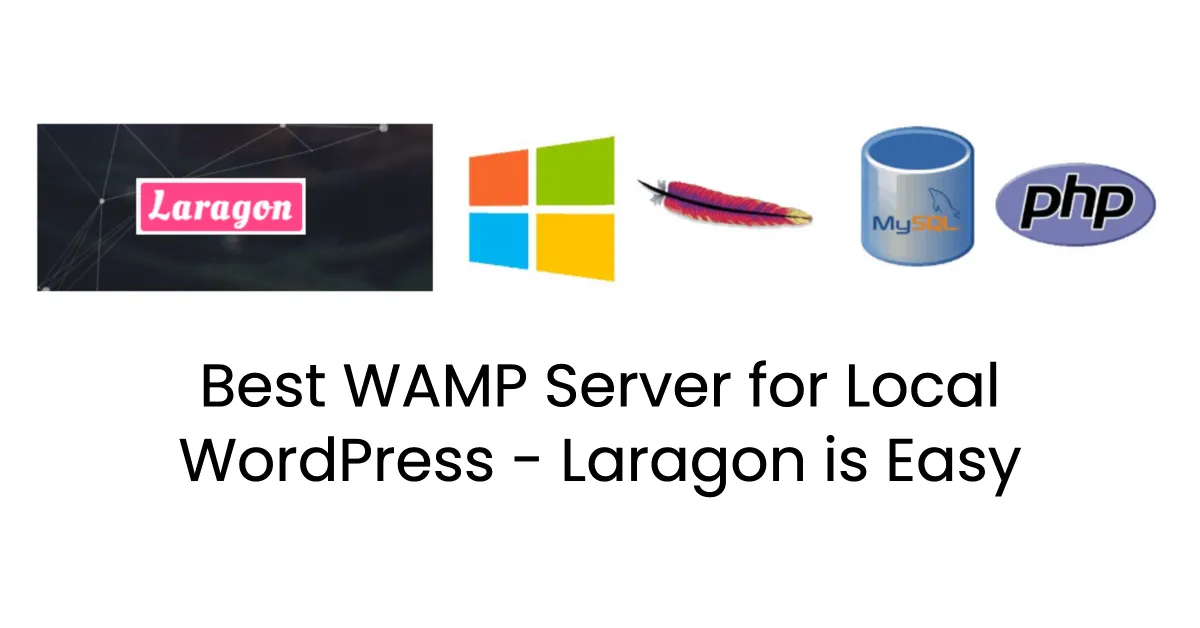
Everyone doing web development or training up in web technologies needs a local test server. You know that testing on a live site is risky. Building websites or evaluating themes and plugins? Yes, you need one too. Are you interested in WordPress, Drupal, Joomla, or PHP? If so, and you are running Windows, then you need a WAMP stack.
WindowsOperating System |
ApacheWeb Server |
MySQLDatabase Server |
PHPServer-side Language |
It may sound complicated, and if you had to install Apache, MySQL, and PHP from scratch individually, it might be. However, there are packages that bundle these programs together to take the pain out of the setup process. They come with an installer and pre-configure all the settings for you. They have a “control panel” that serves as a launcher and provide quick access to options and settings. I’ve evaluated all of them and used many of them. In this article, I’m going to tell you about Laragon WAMP. It is free and it is the easiest to setup and use. Read on to learn about the Laragon WAMP package, how to install it, and how to install WordPress using Laragon’s “quick create” feature.
Laragon Install Video
Laragon is the new kid on the block. The project is about 2 years old and is gaining in popularity. The author comes from the Laravel community and created Laragon because he wanted an easy way to get going with Laravel. Are you interested? The video is about 5 1/2 minutes long. I tried to keep the video short and focused only on the install process for Laragon and WordPress. Those who prefer to read will find step-by-step install instructions, as well as a bit more information on the options available, below the video.
Installing Laragon WAMP
To get started, go to https://laragon.org and click on the “Download Laragon” button. There are several installers for different development stacks. The one of interest to the WordPress crew and those working with PHP is the “Laragon WAMP” installer. The WAMP version includes Apache and Nginx (you can switch to Nginx if desired), MySQL, PHP 7, Node.js, yarn + Ngrok, git, cmder, Composer, HeidiSQL, Memcached, notepadd++, putty, Redis, a send mail utility, telnet, and Winscp. Wow, that’s a lot of programs. Some of them you need for even basic WordPress work. Others are installed to help automate common tasks, while others are options you might want to use some time in the future. Once installed, you can ignore anything you don’t need.
Click on the “Download Laragon – WAMP” link. The installer is 112MB and once installed it takes up about 725MB on disk before you install your development sites. The installed version is a bit large, but the runtime is fast and lightweight. To install it, double-click on the “Laragon-wamp.exe” file that you downloaded. It may take some time to unpack. Once it starts, you can just accept the installer defaults. You can change any option you see during the install later. I accepted all of the defaults, but put Laraon on my “E” drive, because I have more space there.

Once it starts up, you see a “dashboard.” Laragon is a program that you minimize to the Windows tray in the lower right corner of the desktop. You can see those program when you click the “up” chevron next to the volume control. I mention this because you can access the Laragon dashboard from the system tray when it is running.

- The “Start All” button is used to start the Apache and MySQL servers. It changes to a “Stop” button when they are running.
- The “Web” button is just a splash screen, though it has a link to the Laragon.org website.
- The “Database” button launches the Heidi MySQL database management program. If you prefer PhpMyAdmin, it is easy to add and have it picked up as the default tool for managing your databases. There are instructions in the Laragon forum.
- The “Terminal” button opens a command prompt.
- Finally, the “Root” button opens up the Windows File Explorer to the Laragon location on disk, making it easy to navigate there.
In the upper right corner, there is a “gear” icon. You can access the preferences from there.
The General Tab

If you want to run Laragon automatically then you can check those options. I use my computer for activities in addition to programming and site building, so I prefer to start it manually when needed. The file locations are important. If you need to move the Laragon folder to another location on your computer, or if you need to copy it to another computer, you can use those options to set the new location.
The “Auto virtual hosts” option, if checked, means that Laragon will automatically set up a “virtual host” for you and it will update the Windows hosts file with the name of your website. So, say you want to create a local site called “test.com”. Laragon will set it up for you so that you can type that into your web browser address bar and go to your local site.
The bottom box, “Hostname,” is important. Laragon has “quick create” options for WordPress and a number of other types of PHP systems. By default, Laragon uses “dev” as the domain name suffix, but in the screenshot above I’ve changed that to “com,” because that is what I prefer. The value in that box is what Laragon is going to use. I’ll show this below when we create a WordPress site. Note that you might be better off sticking with “dev,” as that is more common.
Services and Ports

You should leave these at their defaults unless you need to change them and understand what might be involved. In the screenshot above, I’ve checked the “Enabled” box next to “SSL” so that I have the option of running a development copy of my production site in SSL. With the “Auto virtual hosts” option checked on the General tab and the Enabled SSL box checked here, Laragon will auto-generate an SSL certificate for your virtual host. It is not perfect, as your web browsers will complain about the SSL certificate since it was not issued by a recognized authority. So, you might have to override their warning. Anyway, it is an option if you need it.
Mail Catcher and Mail Sender Tabs
These tabs are useful if you want to check that your site’s email is working, or if you want to see how the emails look when sent from your site. There is information about this functionality in the feature announcement here.
Installing WordPress
Back on the dashboard, click on the “Start All” button. Now, go to the system tray by right-clicking on the up chevron and then left clicking on the blue Laragon icon.

Click on the “Quick create” link to see the types of sites that Laragon can create for you in an automated fashion. For this tutorial, we are interested in the “WordPress” option. Click the link to get started.

In this case, I’m going to create a test site called “test.com.” Remember from the preferences section, Laragon is going to add the domain suffix automatically, so I only need to type “test” and the site name will be changed to “test.com.” If you wanted to call your local site “dev.test.com,” then you could type in “dev.test.” Be careful though not to create the exact name of your live site on the Internet, or you might have trouble getting to see it. If your live site was “www.test.com” and you typed “www.test” into the box, the virtual host and Windows host file entry would direct your browser to your local test site!
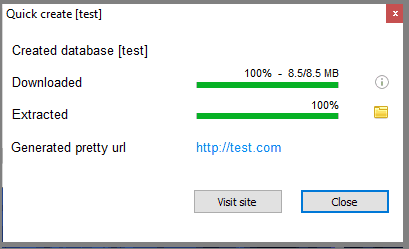
So here you see the progress of the quick create. Laragon downloads the latest version of WordPress and extracts it into a folder named “test” (in this case) under the “c:\laragon\www” folder (or whatever local you used for the Laragon install). If you have the create virtual host option checked then you might get a Windows security confirmation notice on the taskbar. If so, click that to OK the creation of your virtual host. Now, click the “Visit site” button to go to your new WordPress site.
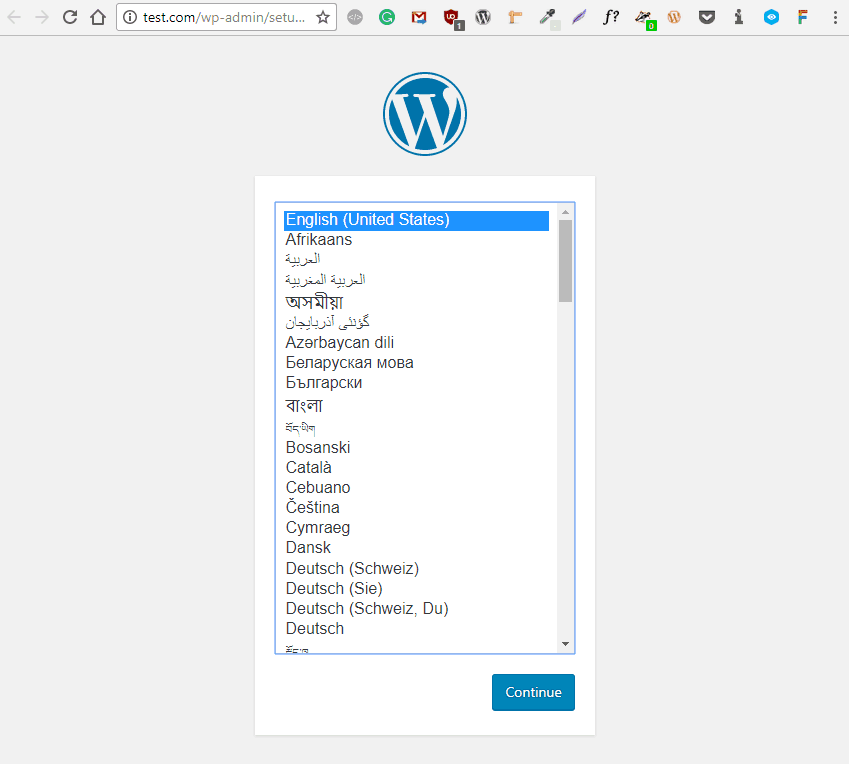
Now we are into the standard WordPress install. Pick your language and click the “Continue” button. On the next screen, click the “Let’s go” button to progress through the WordPress setup wizard.
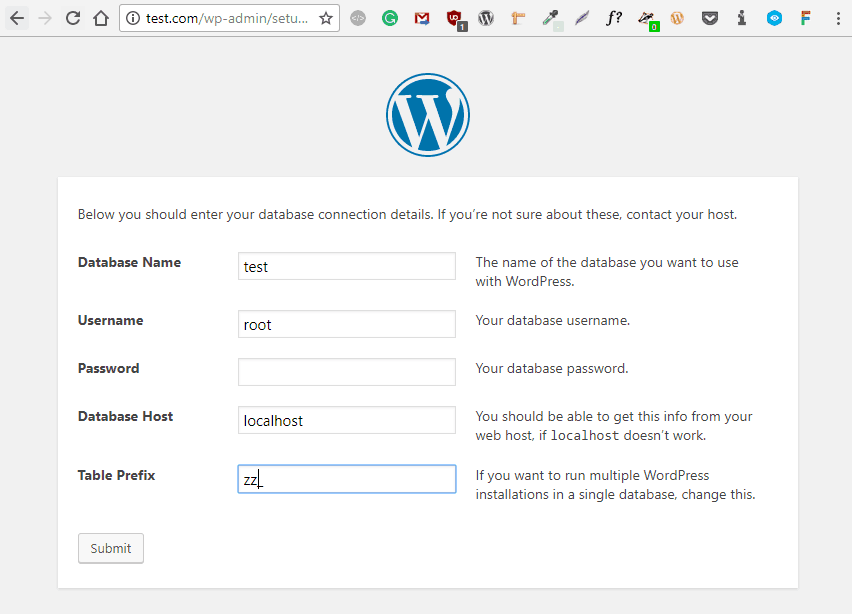
When Laragon performed the quick install, it created a database with the name that you gave for your new site. So, in this case, the “Database Name” is “test.” By default, Laragon setup the MySQL database server with a Username of “root” and a blank password. That’s probably fine for a local machine, but for a site online you would use a unique username and strong passwords. It is usually a good idea to change the database “Table Prefix” from the default since if you take this site live later, your database will be uploaded to your server on the Internet. Click the “Submit” button to continue. Then on the next screen, click the “Run the install” button.
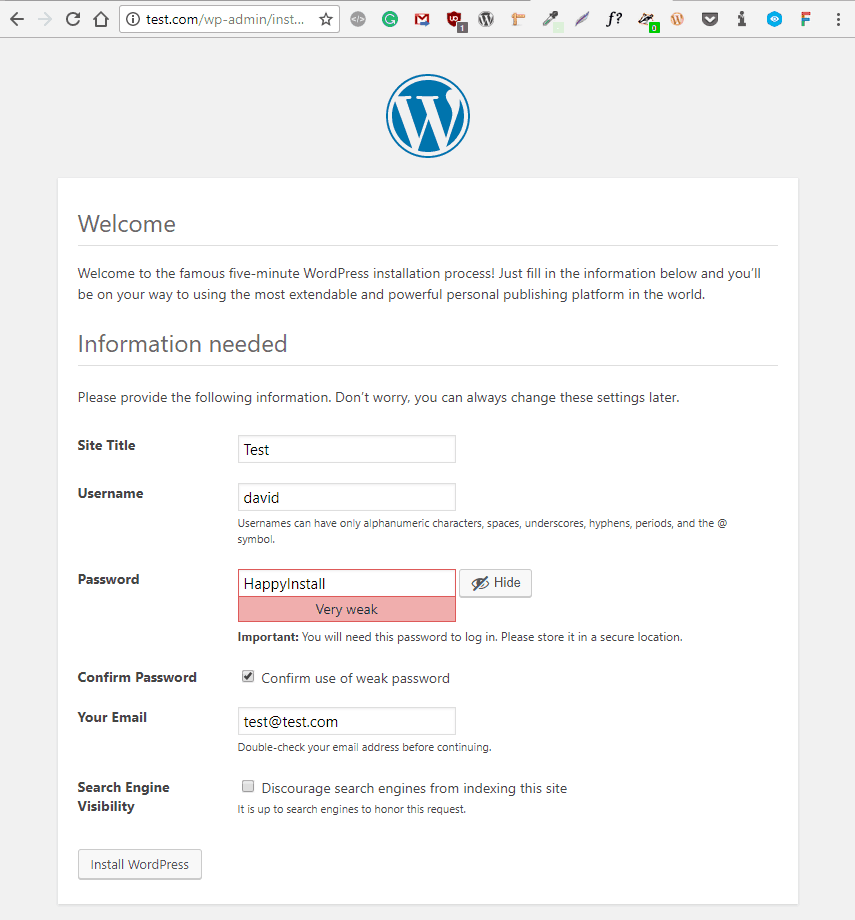
In the screenshot above, I’ve entered a simple username and password for local use. Remember, if you are going to have a site online, then use strong passwords. If this site is going to be taken online later, you might want to use your strong password now when first creating the development version. Otherwise, remember to change it later.
Go ahead and click the “Install WordPress” button. After the install completes, go ahead and log in. You’re done! WordPress is famous for its “5-minute quick install,” but using the Laragon quick create feature you can do it in 3 minutes.
Check Out the Other Laragon Options
Before we finish, I’d like to mention a few of the other options that you can find by right-clicking on the Laragon icon in the system tray.
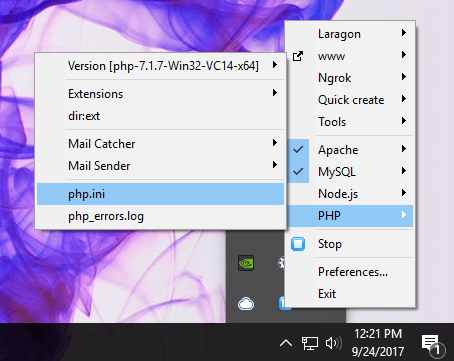
Here are the options on the PHP submenu. You can change PHP settings by clicking on the “php.ini” file, view the PHP error log, and enable or disable PHP Extensions.
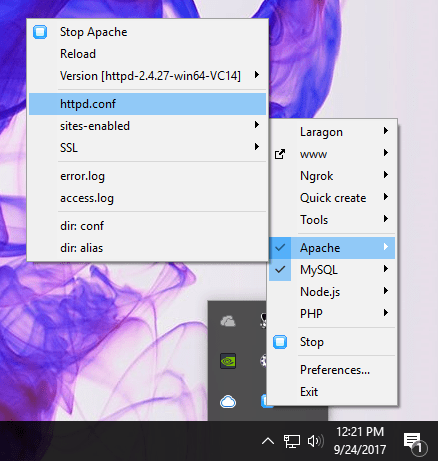
Here is the Apache sub-menu where you can edit the “conf” file and view the error.log.
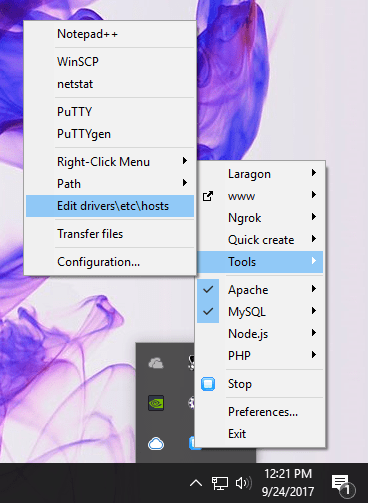
Here is the tools sub-menu where you can run PuTTY or edit the Windows hosts file.
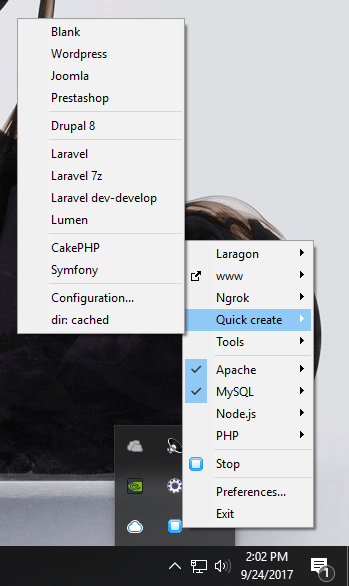
Finally, here are the “Quick create “options. Laragon will go out and get the latest version of these software packages and install them for you.
Wrap Up
I’ve found Laragon WAMP to be a good solution for a local WordPress development and testing environment. I hope this article has given you enough information to evaluate it for your own possible use and helped you with the install if you decide to try it out.
The forum on the Laragon.org website has lots of information and tutorials, and questions seem to be answered in a timely manner.
I know some people don’t want the “Quick create” or some of the other features. There is a tutorial here on setting up the Uniform Server WAMP package if you think that might be better for you. Laragon is my choice. I find it easy to use with a good mix of features. Happy developing.
If you are using WordPress then you may be interested: