Table of Contents
Hi, this is David McCan for WebTNG. In this review I’m looking at the plugin AB Split Test. Website split testing is a method of optimizing your website for a desired result, i.e. a conversion. What you usually do is you split the visitors into two groups, A and B, and you show them different content. That could be a full webpage, it could be a different button or a different headline. There are lots of options, and we’ll look at the options that AB Split Test offers. And you set a goal, which is maybe to click a button to make a purchase, and so on, and we’ll see what goals AB Split Test supports.
So what I’m going to do is first take a quick look at their website to show you what resources are available and the pricing. And then we’ll go to my website WebTNG.com and we’ll walk through the different options that the plugin offers, and we’ll set up a split test on my website.
Video Version
AB Split Test Website
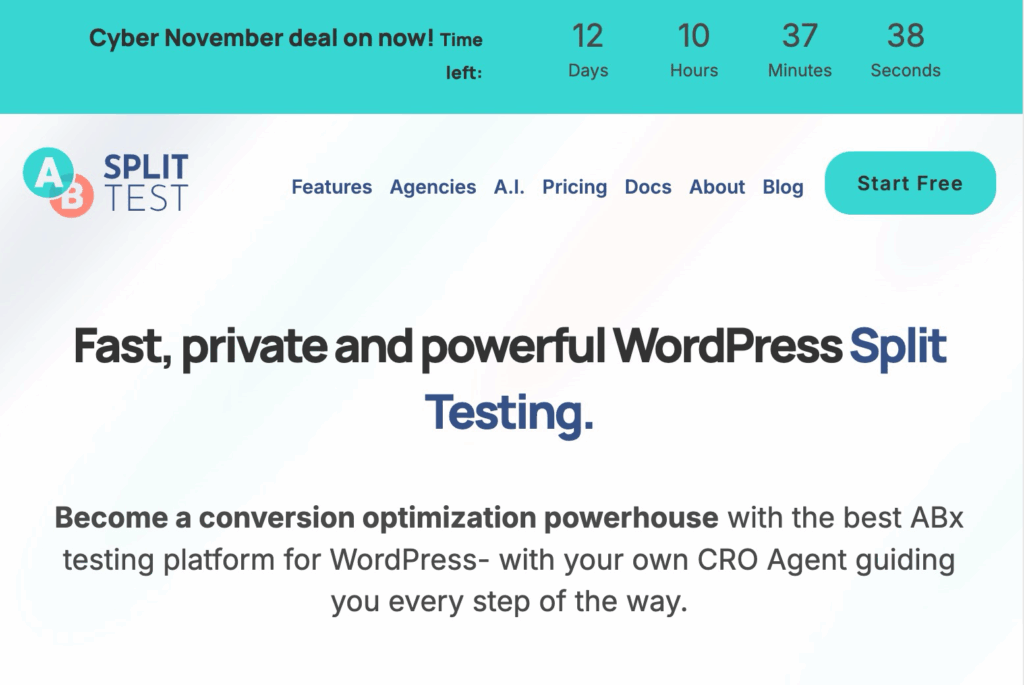
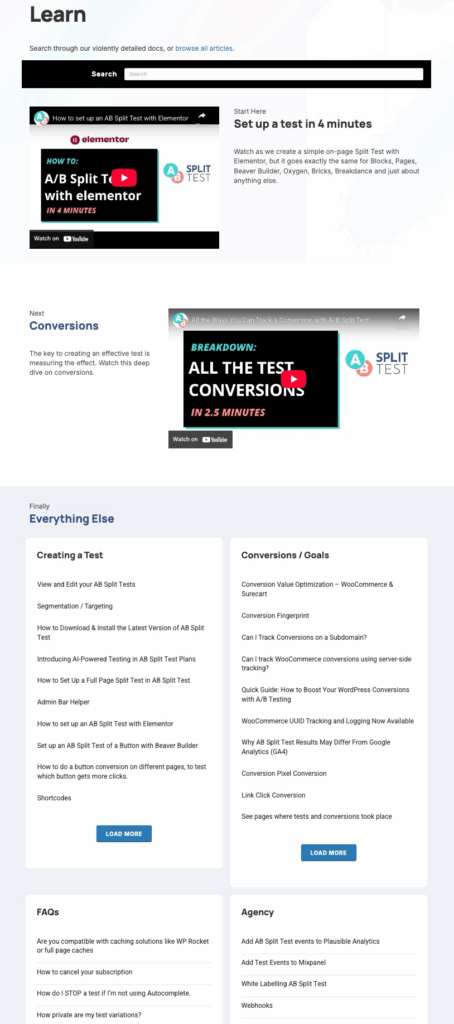
This is the AB Split Test website, and what I wanted to show you here are the docs. AB Split Test has been around for a while now. The documentation is pretty extensive, it’s very good, and a lot of the doc topics have a video. If you just scan real quickly the headlines of the different docs, you’ll see that there are integrations and documentation for different analytics platforms. There are webhooks for e-commerce options and for different page builders. So the documentation is very good.
If we go and look at the pricing, if we look at the packages here, you see that there are annual and lifetime options. There’s a single site and an unlimited sites package. The difference in addition to the number of sites are that the Teams package includes heat maps and dynamic traffic allocation. And there’s also a difference in the number of AI credits. AB Split Test is a mature product, it’s been around for a long time, but the developer is constantly adding new features and new integrations. Two of them we see right here on the pricing page. One is the AI options and the other is the heat maps options. Even though the plugin has been around a long time, it’s still actively developed.
AB Split Test Options and Settings Review
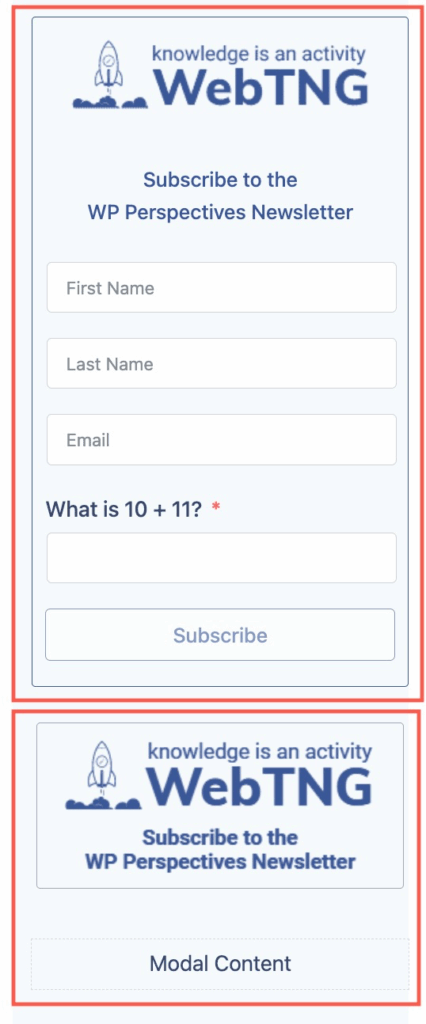
Okay, let’s go ahead and go to the WebTNG website. You can see from the admin bar that in this browser, Brave browser, I’m logged in. And the test that I’m going to do is this is a pop-up for signing up for my newsletter. And it pops up this form. And what I want to test is do I get more signups if I have the button or if I just put the form in line in the sidebar? Okay, so that’s what we’re going to use as our example.
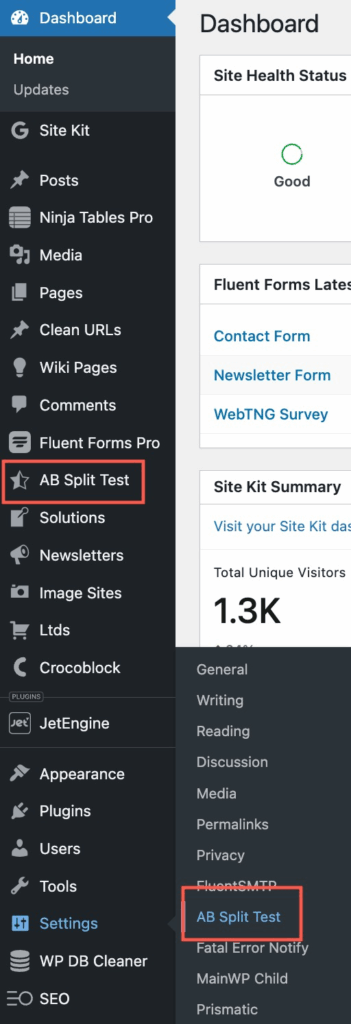
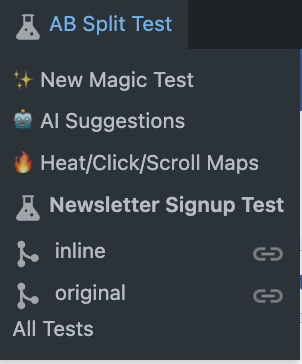
Let’s go to the admin. I’ve installed and activated the plugin, put in my license. There are two menu areas. There’s a main menu area, AB Split Test, where we set up the actual tests. And then there’s a settings page here where you do your overall configuration.
- So you can choose which post types you might want to set up tests for.
- You can set an option to get cookie consent first.
- You can add canonical links to page variations for SEO purposes. You can have debug logging on.
- You can turn on heat maps. That sounds like a nice feature. You can tie a heat map options to a test, but you can also have heat maps on just in general. If you like, you can choose the pages that you’re going to include.
- You can create a unique user ID and store information in the database if you need to do advanced tracking. That’s required for server-side conversions, visitor data exports, WooFunnels, and CartFlows integrations, and for Google Tag Manager conversions.
- Enable fingerprint conversion type. Okay, this is a JavaScript snippet that triggers a test conversion on a remote website.
- You can disable cache clearing, but I noticed that the plugin has identified that I’m using Light Speed cache, so I’m thinking that I wouldn’t need to do that.
- You can enter your own open API keys. So if you want more AI credits than the plan provides, you can bring your own key.
- You can set up web hooks so that when your test is complete, you’ll get an email telling you the result of the test.
- You can use a method called multi-armed bandit to segment your traffic. It’s an advanced option.
- And then you can send weekly reports. Okay, so I’ll save the settings.
And let’s go now to the main menu area where you set up tests. There’s an option for new A/B tests. You can see that the plugin comes with some samples here, so you can see how they’re set up. There is a place for CROAssist AI Insights. CRO stands for conversion rate optimization. So you can put in your AI prompt there. Here’s where you would look at heat maps. And here are logs. Okay, you can see I’ve been doing some testing, a walkthrough first in preparing for the video.
Setting Up the Test in the Admin
All right, let’s go and set up our test. And you give it a name, so I’ll call this Newsletters Sign Up Test. There are several testing options:
- You have an option for a “magic point and click,” i.e. using AI to help you set up the test.
- You can test full page. That’s one full page against another full page.
- You can do on-page elements, which is where you’re testing like a headline or a button or an image or something that’s different between the two test variations.
- And you can test code, CSS styles or JavaScript.
So I’m going to do on-page elements. And when we select that then, we see that it found blocks Gutenberg. I don’t have any other page builder installed here. So it gives you the steps for setting up the test:
- Load the block editor,
- Click the block you want to test,
- Click the Advanced tab, then AB Test.
- Choose your test from the dropdown.
- Give your test variation a name.
- Create your alternative version in the blocks and tag it the same way.
- Then here are instructions for using CSS classes or short codes.
Then here are the different types of goals. Page or post visit, text on a page, element click, that’s the one we’re going to use, link click, time active, scroll depth, URL, conversion block module, external class, JavaScript or conversion pixel.
So we’re going to do element click. Here you put in the CSS selector that is related to the element being clicked. And they give us a class name here that we can use. So I’m going to use that. Put in a period and paste that class name. And it says elements with the class, multiple elements can have the same class will trigger a conversion when clicked. So we’re going to go with that.
Then you can choose who’s going to be included in the test by different user roles or if the user is logged out. You can test the device sizes, so if you only wanted to test, say, you know, mobile phone, you can do that. You can test on traffic with a matching URL. You can decide how much of the traffic you want to test. So you might say, for instance, if you have a real busy site, you only want to test 10%. Then there’s the option to have the test autocomplete when you’ve got enough data for it to be statistically significant. And the plugin will then automatically close the test and pick the winning variant.
There is where you can add webhooks to send the result of a test when the test is complete. And you can restart the test. Say you were doing some experimentation to see that the test was working. Then you want to reset the results so you can start fresh. Okay, so I’m going to go up here and click start test. And it says the test is running.
Creating the Test Variations on the Frontend
Let’s go to the home page. I’m going to edit the page. Okay, and so this is the button here that I want to test. There’s this modal content option here. This is a Kadence pop-up modal block. Okay, so I’m going to click on the image. And the instructions were to go to the advanced tab. I can pick the test. I give the variation a name. So I’ll call this original. And then we’re supposed to add that CSS class. So here’s the class for the modal trigger. And I’m going to put in a space and paste that CSS class name there. And I’m just going to save this.
Now I’m going to add the variation, which I want to just add the signup form inline in the sidebar. So I’m going to go to Fluent Forms, okay, and pick the form. All right, there it is. Let’s go now. Let’s pick the test. And let’s give this a name. We’ll call this inline. Go down to advanced, and I’m going to paste that class name. I think I will do a little bit of styling here. So the form doesn’t blend in quite as much with the sidebar.
Let’s go here, container styles, padding. Okay, so let’s give a little padding top, a padding on the sides, no padding on the bottom, and padding on the right. Okay, and I’m adding the padding because I’m thinking that I want to put a border around it, so I don’t want the form fields to come right to the edge, you know, touch the border. I’ll put a little bit of margin on the bottom, and then I want to enable the border. I’m going to put in the brand color here. All right. And a border width of 1. Good, looks like we’re getting what we want here. And then a border radius. Okay, I’ll save that.
Verifying It All Works
We will go view the page. And we see here we’re seeing the original version, but A/B Split Test, remember one of the options was to have an admin bar menu where we can see, this is the inline option, which is the new option. Okay, so it shows that, or we can see the original. Okay, so this is looking good so far.
Let’s test it out in another browser. So here I have the Perplexity Comet browser. I’ll go to the website. All right, and what do we see? So we’re seeing the original version here. Let’s click on it. I think that should be sufficient to trigger the test, but I want to make sure the form is working, so I’ll sign my dog up for the newsletter. All right, so that looks like the form is working.
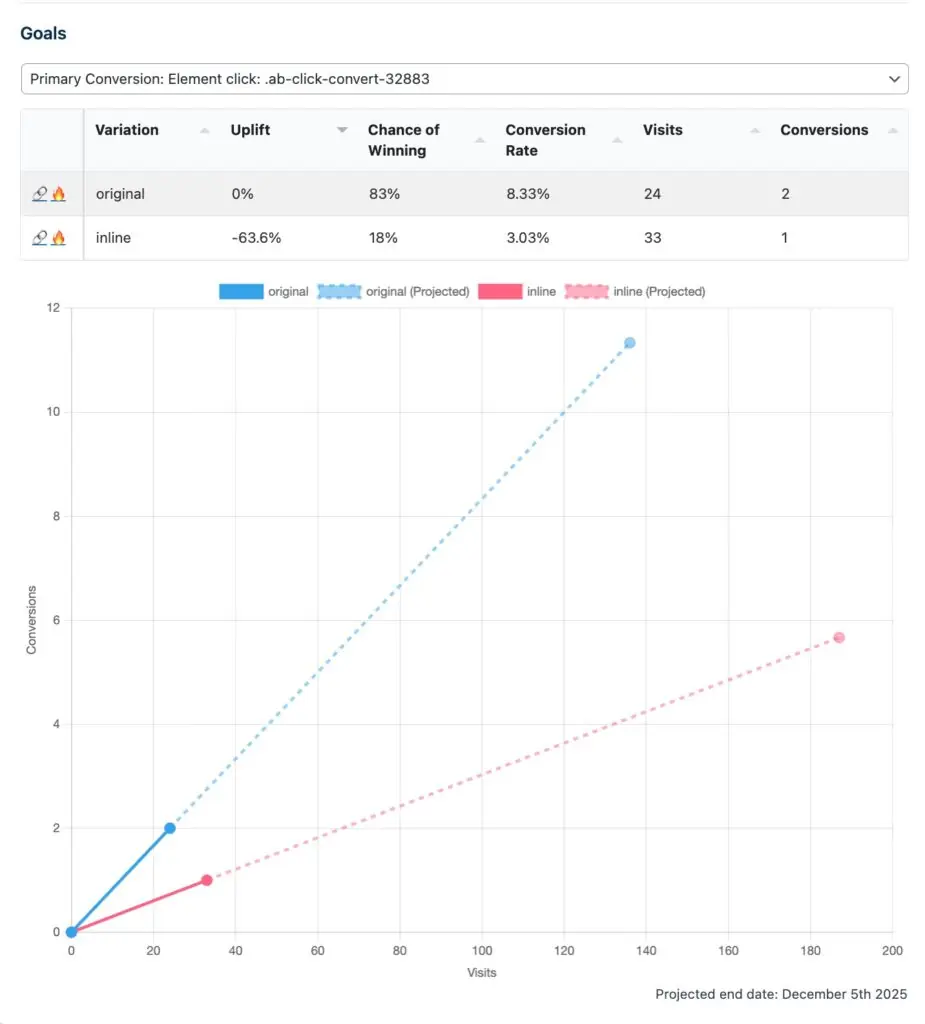
Let’s go now back to Brave. And let’s go to look if that click was saved or recorded. So, ah, it was. Awesome. So it’s been a couple of hours. I wanted to see if any more data has been collected. So let’s go and take a look at the test results. Ah, okay, so we’ve had some visits here now. That’s good to see.
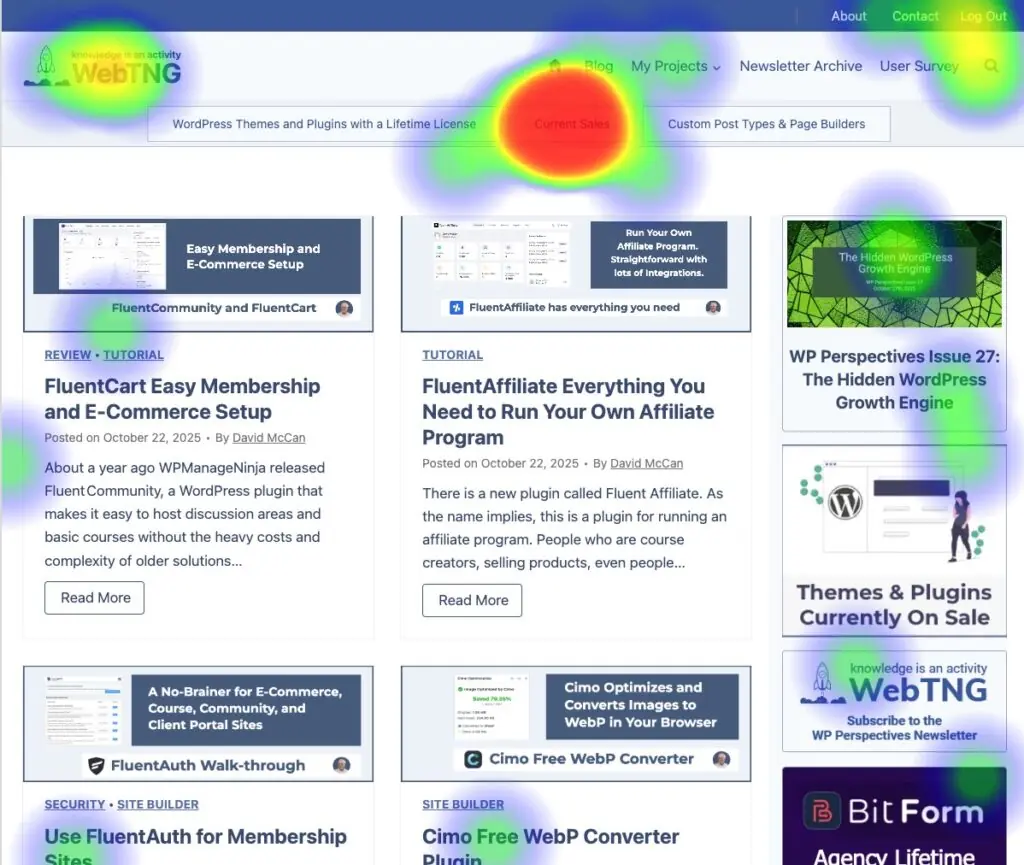
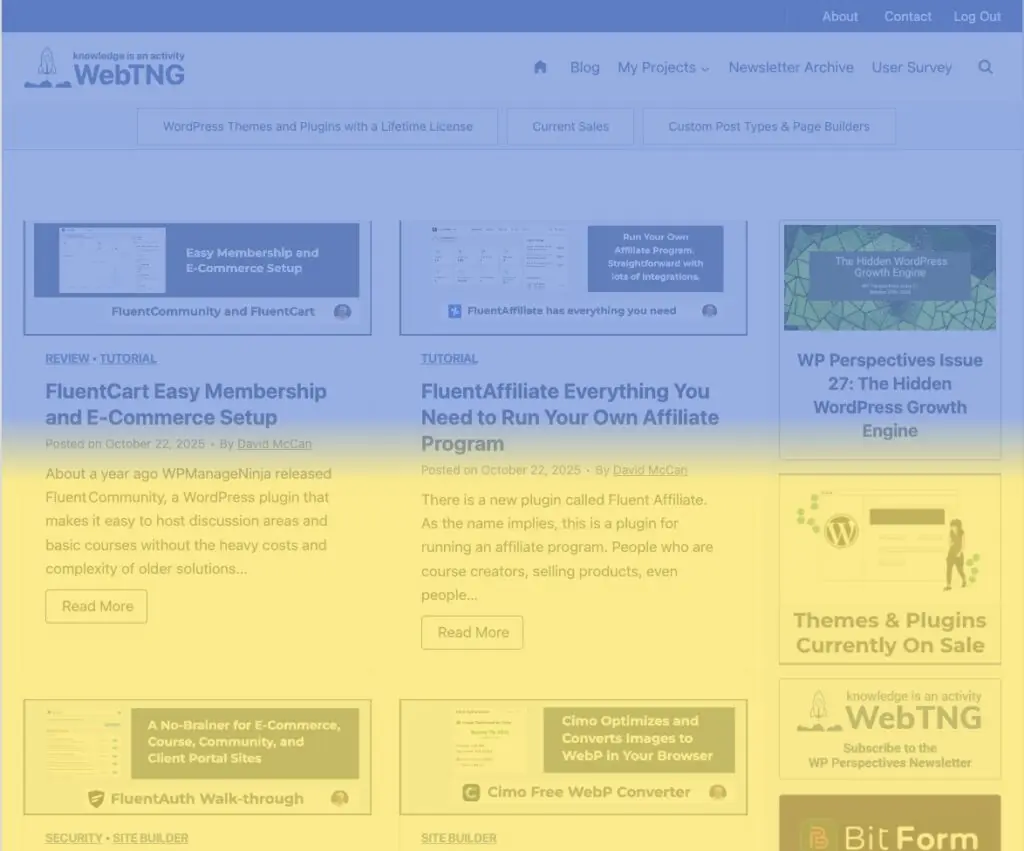
Let’s look at the heat maps. And let’s do it for our newsletter signup. Okay, so here are some people clicking it. Let’s try the inline version of the test. Yeah, okay. So that gives us an idea about that. There’s some other types of interactive data here. A click map. Let’s see, what else is there? A scroll map. Okay. A rage click map. So I guess this is when people are upset and click, click, click, click, click. Nothing. And a dead click map. So that would be when people click on something that doesn’t do anything, I guess.
Discussion and Conclusions
Obviously there are some WordPress websites which are informational only, but the majority of WordPress websites have something they want the visitor to do, i.e. convert, whatever that desired action is. And those websites that want some type of action can benefit from A/B testing. A/B testing gives you a lot of insights into the behavior of your visitors.
When I worked for a large company, we had a marketing team, an IT team that was in charge of the website, and we had executives, and every month we would have a marketing meeting where the marketing folks would present what new packages or new wording or new changes they want to the website, and we would discuss those. It’s easy for those types of discussions to devolve into debates that are opinion-based, but when you’re doing A/B testing, you have an advantage that you have objective data. So that removes a lot of the friction, and you can imagine when you’re working with clients, being able to show concrete results from A/B split tests really highlights your value as a partner.
I found the plugin to be very straightforward to use. I didn’t have to read the manual in order to set up a test. Overall, I think that A/B Split Test is a very good, solid, feature-rich option. It would especially be valuable for people with e-commerce sites, because you would very quickly see a return on the investment.
So that’s my look at the A/B Split Test plugin. I hope you found it interesting and useful. If you did, please give the video a like and subscribe to the channel.