Table of Contents
Why WP Adminify? While the admin is functional, it is an area of WordPress that hasn’t gotten much love. It looks dated. Getting from point A to point B involves more clicks than it should and there are common operations that can be streamlined. There is a lot of information that you have to dig for that it would be nice to shown on a higher level. When there are multiple users on a site you might want to control what they see and the options they have available. There are features for programmers to customize the WordPress admin, but there is no user interface built-in. For these, and a myriad of other reasons, there are a large number of individual utility plugins available for improving the admin.
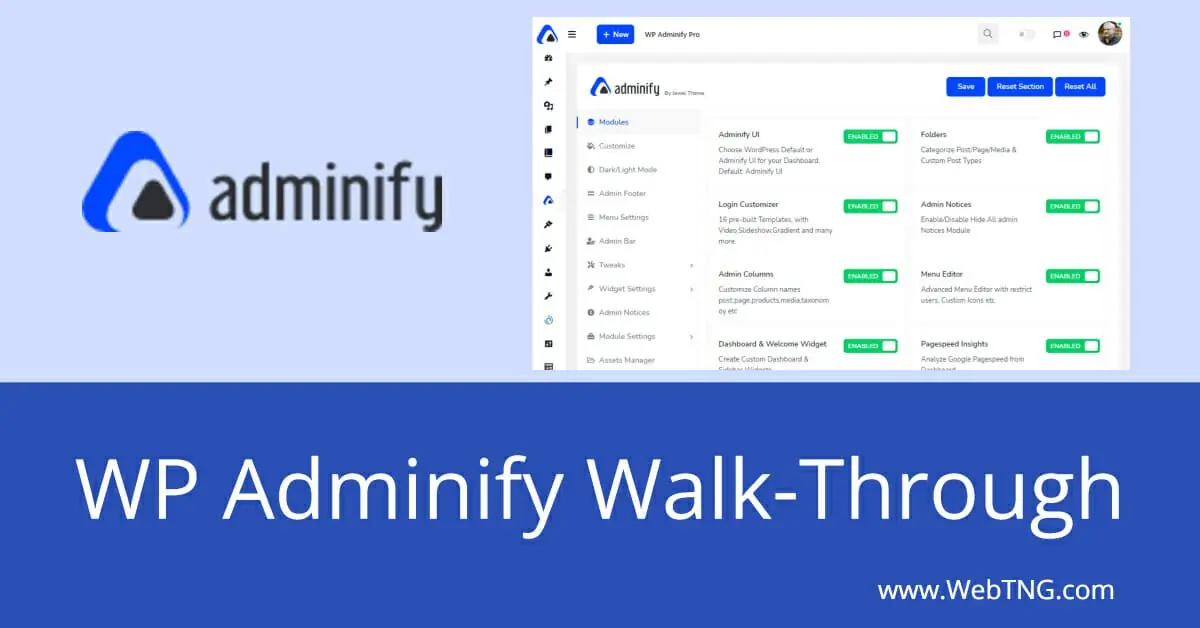
WP Adminify is a plugin that combine the functionality of a lot of these admin utility programs and bundles them into a toolkit. In this walk-through I’ll look at a good number of these features and try to provide enough information so that you can judge if WP Adminify will fit your needs.
Video Version
Testing Environment
For testing WP Adminify I loaded the starter site I use for testing page builders and dynamic data because they have a number of posts, a Custom Post Type, several plugins, and several user accounts. I figured that would provide some variety in the admin. I use the free Kadence theme for this build.
WP Adminify
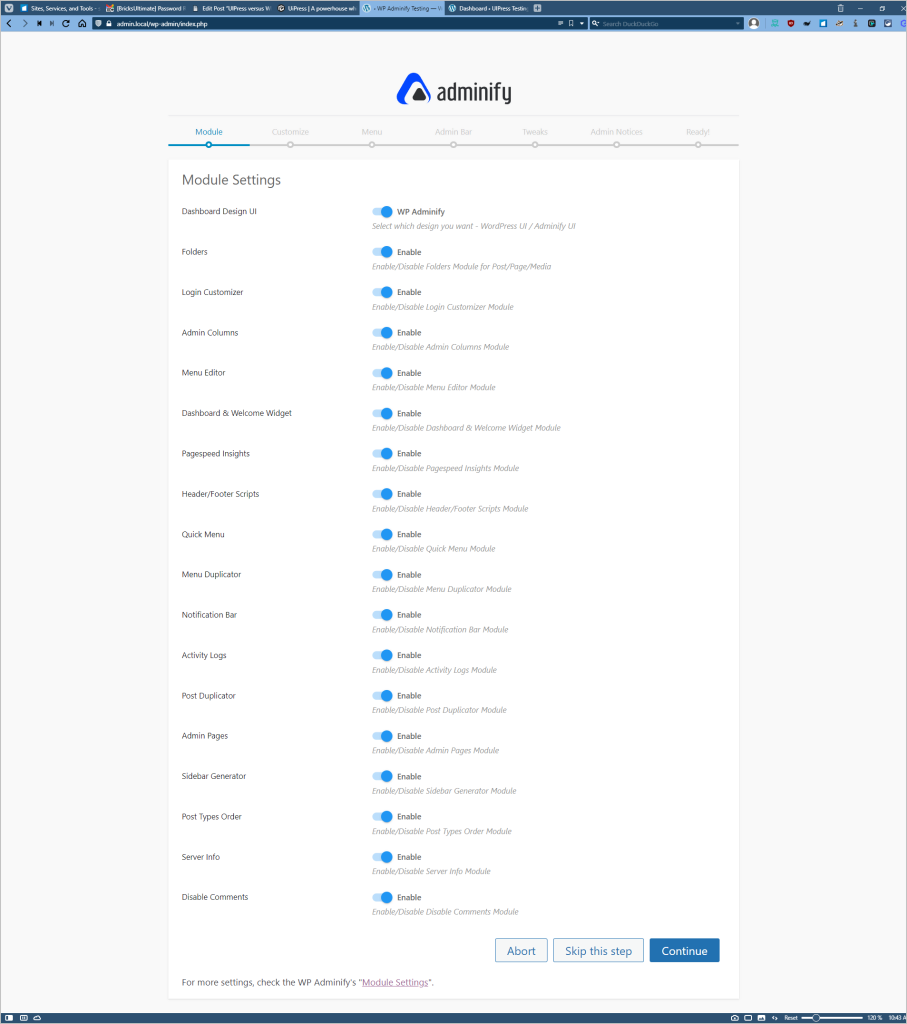
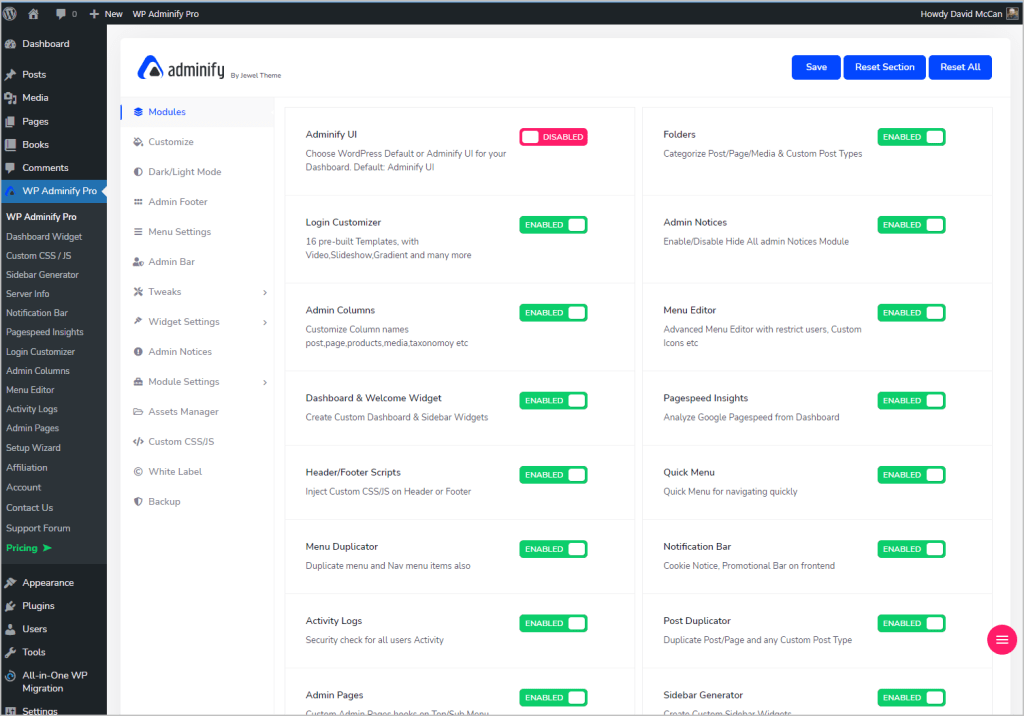
When you install and activate WP Adminify you get a 7 step wizard.
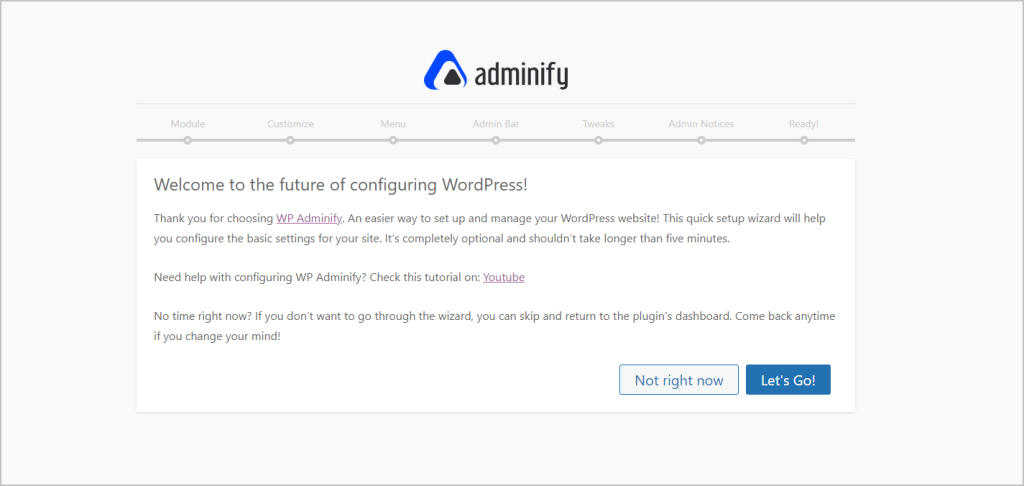
I’m not going to show each screen as I ended up accepting all of the defaults because I didn’t know what the features did so I didn’t feel yet that I could make an informed judgement. For example, here is the first page of the wizard, which shows the list of modules. Perhaps a tooltip with more info would be helpful.
What was apparent from going through the wizard is that this is a feature packed plugin. When you finish the wizard you go to a Freemius license screen. I realized that one of the modules was to go into dark mode. I was willing to give that a try, but I noticed the text in neon blue on the black background was difficult to read. Another thing I noticed right off was that there was this big Adminify logo in the upper right corner. Hmm, I assume that I can change that somewhere, and I’ll go look for that, but it would be nicer if the site name or site logo was there by default.
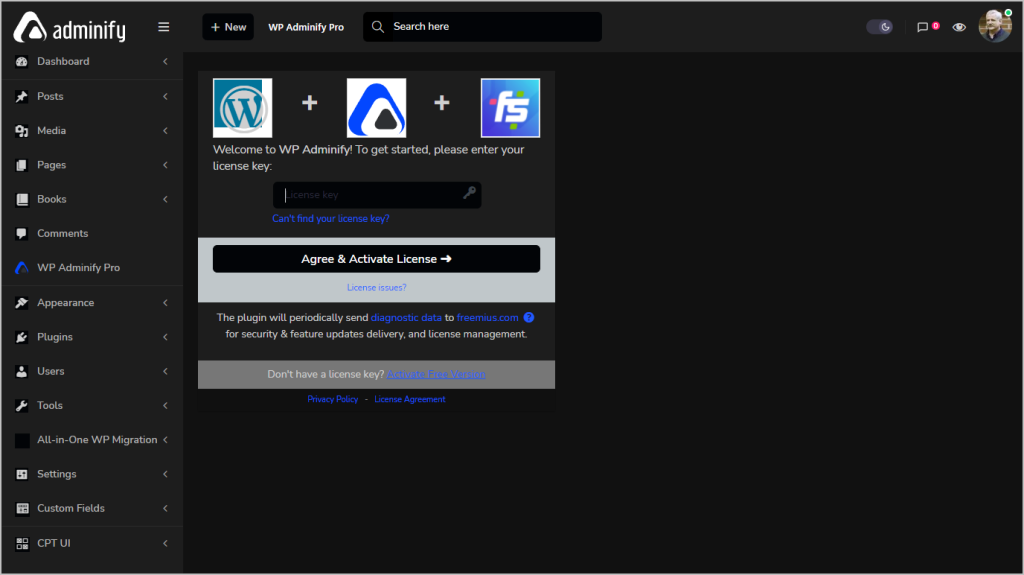
There is a notice on the Freemius license screen that the plugin will send diagnostic data to Freemius for updates and license management. It was difficult for me to read the blue text, but I knew from previous installs of Freemius products that there was a toggle that shows what information is being collected. I clicked the link to expand that section. I was happy to see that the toggle for title, slug, version, and which ones are is active, was off by default.
I entered my license and was taken to the main screen for Adminify. There is a notice at the top about a recent update and I dismissed it and clicked the blue Save button and it was removed.
Testing Custom Color Schemes
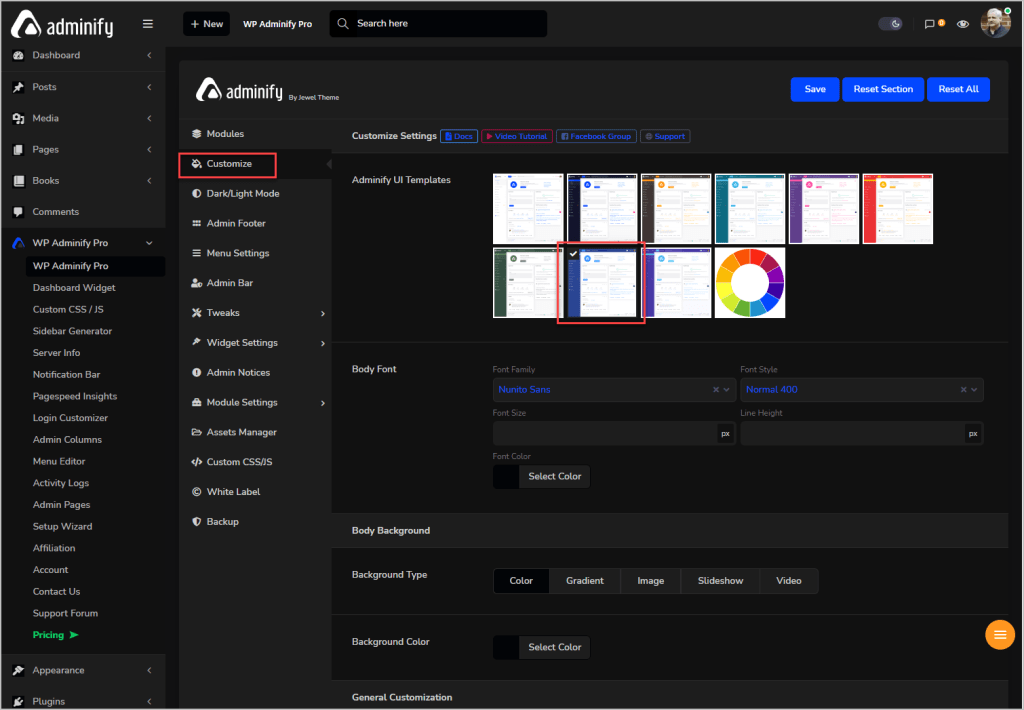
The issue of that dark blue text being hard to read was bothering me and I noticed there is a Customize menu item. This looked like exactly what I needed. There are different color schemes here to pick from. I also noted that there were more fine-grained options below those where you could tweak things further. If this was a passion project I might go to that trouble, but what I was looking for was a quick alternative. I picked one and saved.
To verify that the change was going to do what I needed, I went to the plugins page. The light blue text was indeed easier to read, but I noticed there were still some places with the dark blue text.
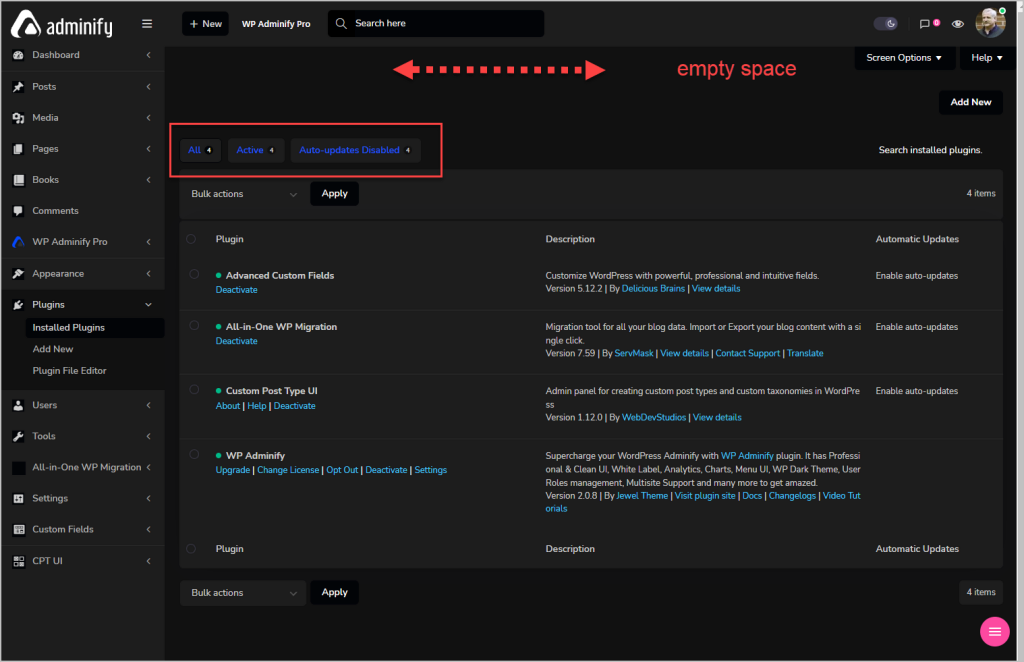
There was also a big empty space above the plugin list. I’ve seen PHP notices appear in that space that is empty and so checked the PHP error log. I found some error notices related to Adminify activity logs:
[15-May-2022 15:21:48 UTC] WordPress database error Incorrect table name ” for query SELECT * FROM ORDER BY `log_id` DESC LIMIT 5 made by wp_dashboard, do_meta_boxes, WPAdminify\Inc\DashboardWidgets\Adminify_Activity_Logs->jltwp_adminify_activity_logs_details [15-May-2022 15:22:12 UTC] WordPress database error Incorrect table name '' for query SELECT * FROM ORDER BY log_id DESC LIMIT 5 made by wp_dashboard, do_meta_boxes, WPAdminify\Inc\DashboardWidgets\Adminify_Activity_Logs->jltwp_adminify_activity_logs_details
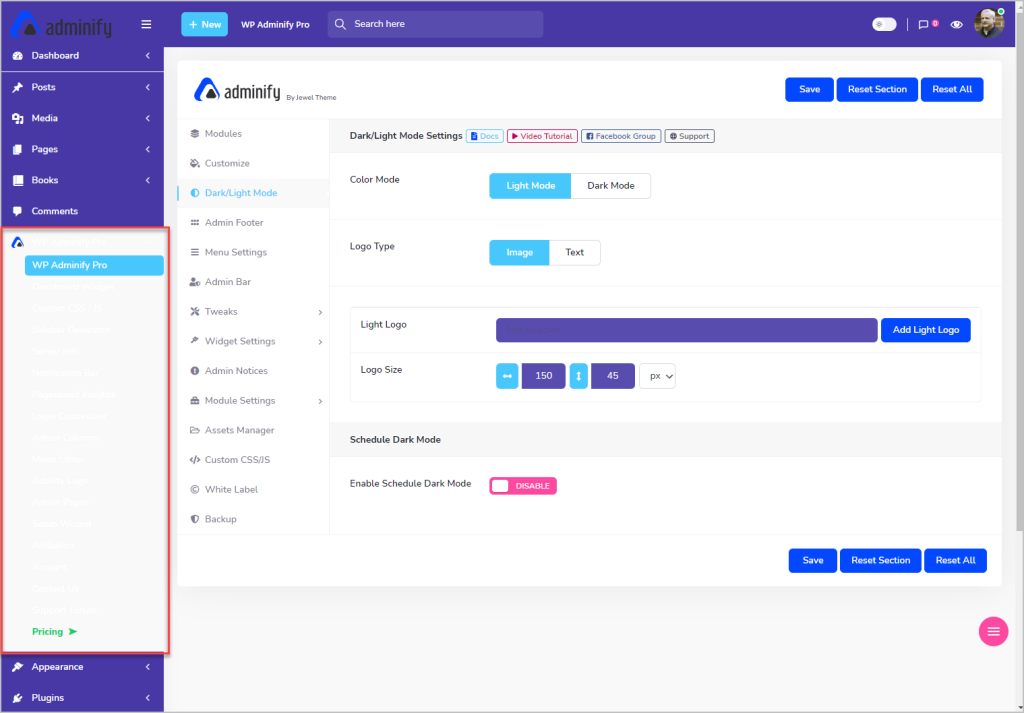
I decide that this has been enough of an experiment with dark mode and go back to the settings and switched to Light mode. I refreshed the page. It seems that the menu items on the left are missing.
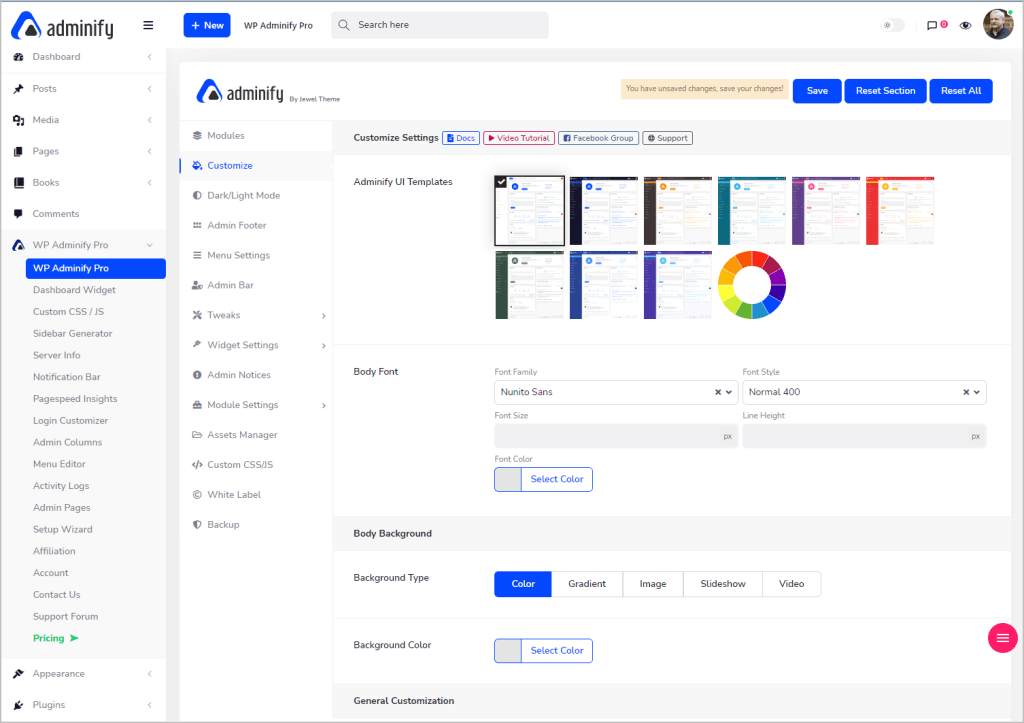
I switch the custom theme to the Adminfy default and things look good.
Testing the Horizontal Menu Option
I had noticed that there was a horizontal menu option and I wanted to try it out. So I enabled it.
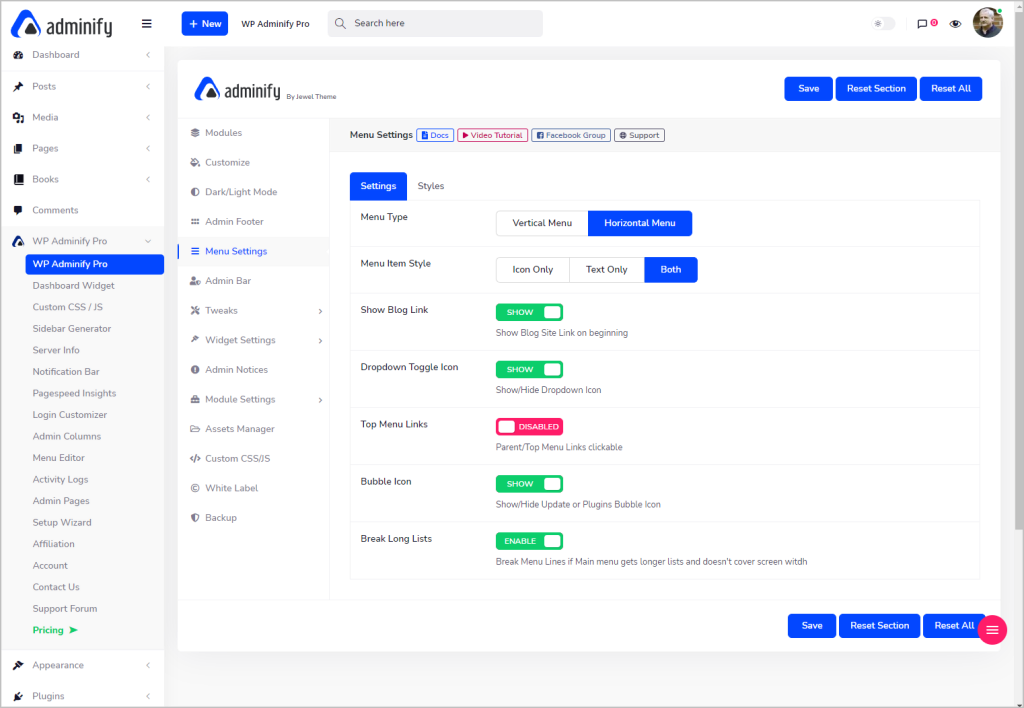
I was noticing lag and it seems like many of the menu items were missing. Just in case, I disable all of the extensions on my web browser. The missing items and lag remain.
I decided I was done experimenting with UI styling options, so I reverted back to the regular menu option and turned off the styling module. That thankfully got rid of the Adminify logo in the upper left corner.
Testing the Adminify Menu Editor
There were some practical features I wanted to test and the first was the menu editor. Taming the admin menus is a common goal. There are three things I wanted to check: reorganizing the menus by putting top level menus of plugins under the settings menu, hiding a menu item from some user roles, and adding items to the top admin bar which makes them easier to get to.
Putting Menus Under Settings
The All In One WP Migration plugin puts itself on the top level and I decided to move it under Settings. AIOWPM has three sub menus. I navigated to the menu editor.

Each of the top level menu items is presented like a card and I noticed they have a drag handle on the left. I tried dragging AIOWPM and nesting it under Settings, but the drag and drop only work on the same level. So I could reorder the top level but not move items to nest them.
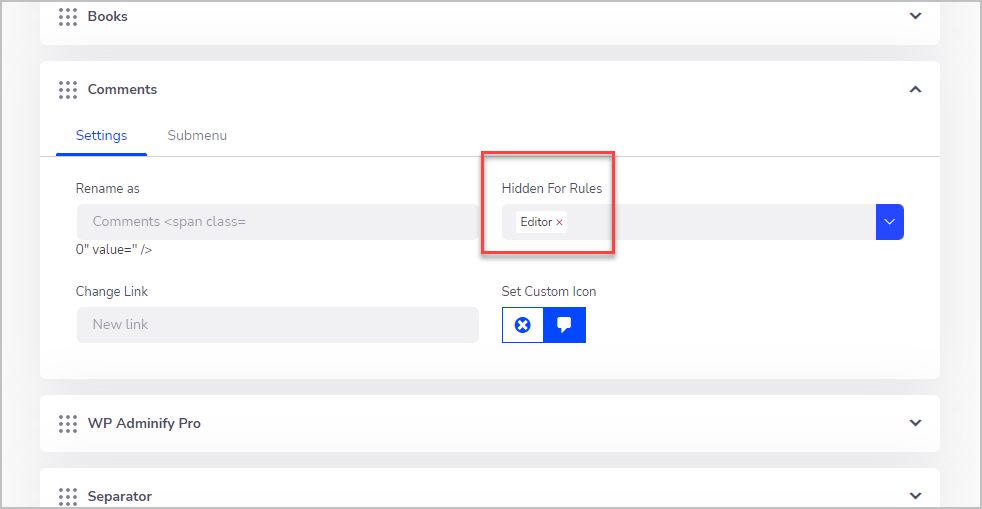
I expanded the card item for AIOWPM to see the options. You can rename the menu item, there are hide rules (which we will come back to), you can change the URL, and set a custom icon. There is also a tab for the submenu which has the same options, but a level down.
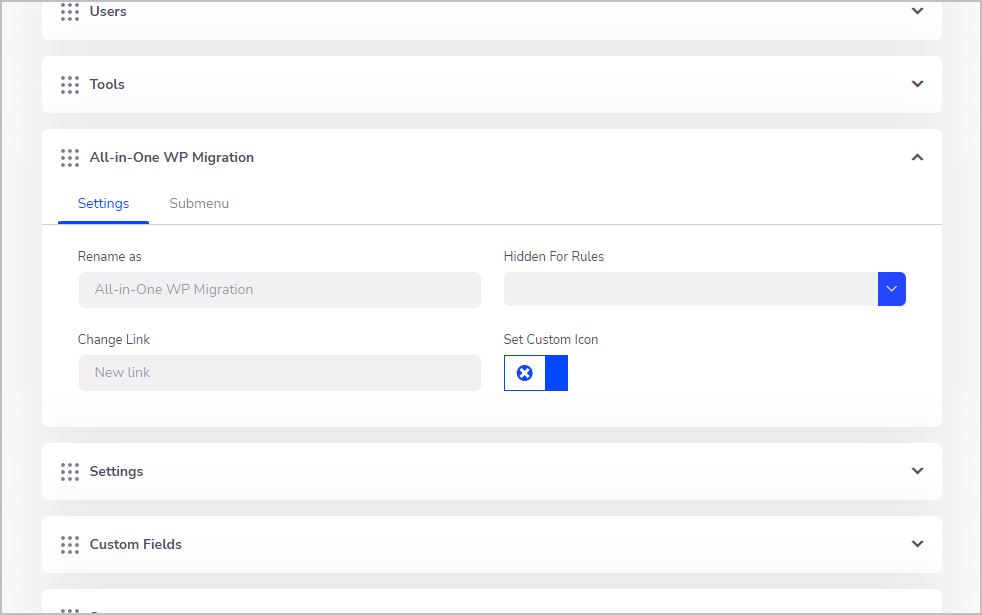
I was surprised that I didn’t seem an option for more control. I checked the docs and the forum but didn’t see anything there.
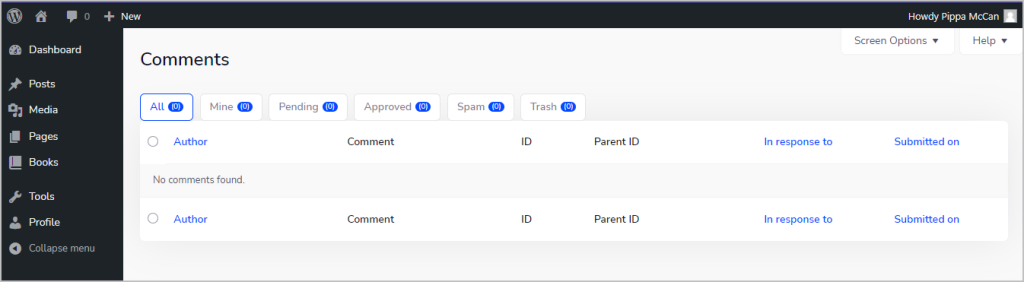
Hiding a Menu Item for a User Role
Another common task is to hide menus from user roles. This can be done for better convenience and for better security. To test this, I created a new user with the editor role.
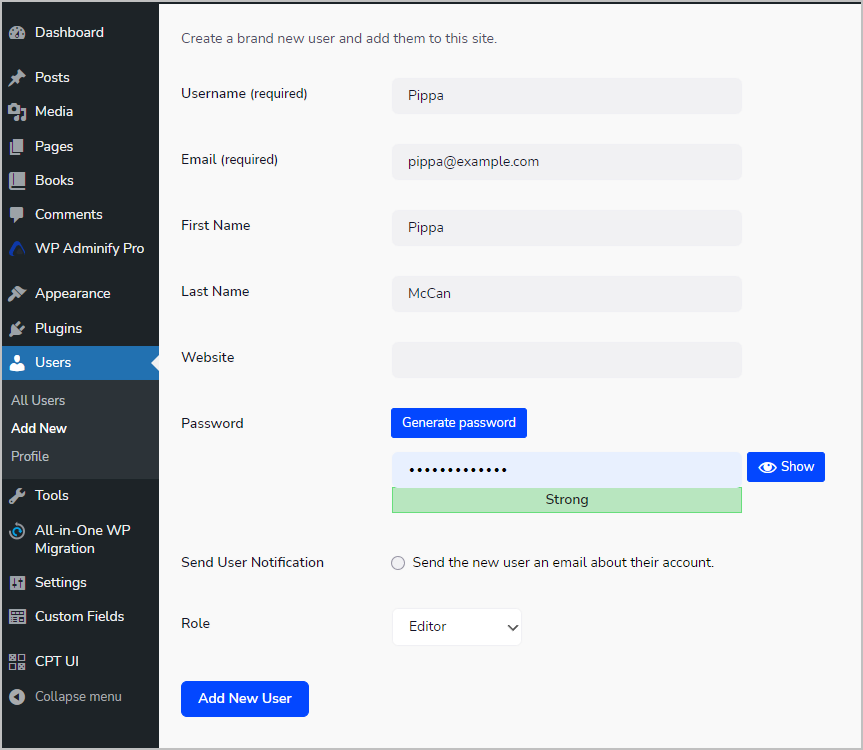
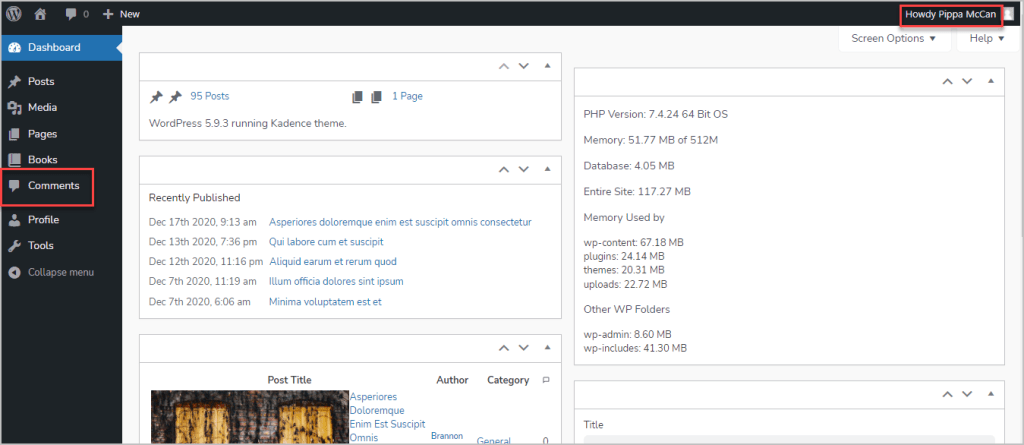
In a private window I logged in as a user with the editor role and see the Comments menu.
Back as an admin user I hide the Comments menu for the Editor role.
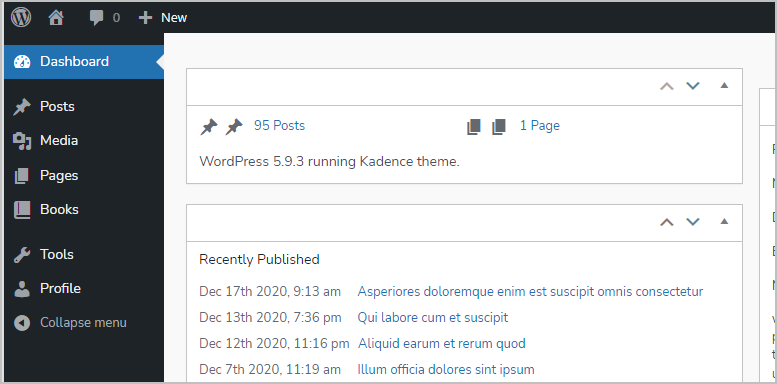
Back in the other window I confirm that the Comments menu is hidden.
However, I try the direct link and get into the comments screen, so Adminify is good for hiding, but isn’t a role editor.
Other Comments About the Menu Editor
It seemed there are some other limitations of the menu editor. It is not possible to create a new separator or to create a new menu item, such as a link to the Plugins menu on the top site menu (under the site name). I did see in the documentation that you can create a new menu item if you add a new Admin page.
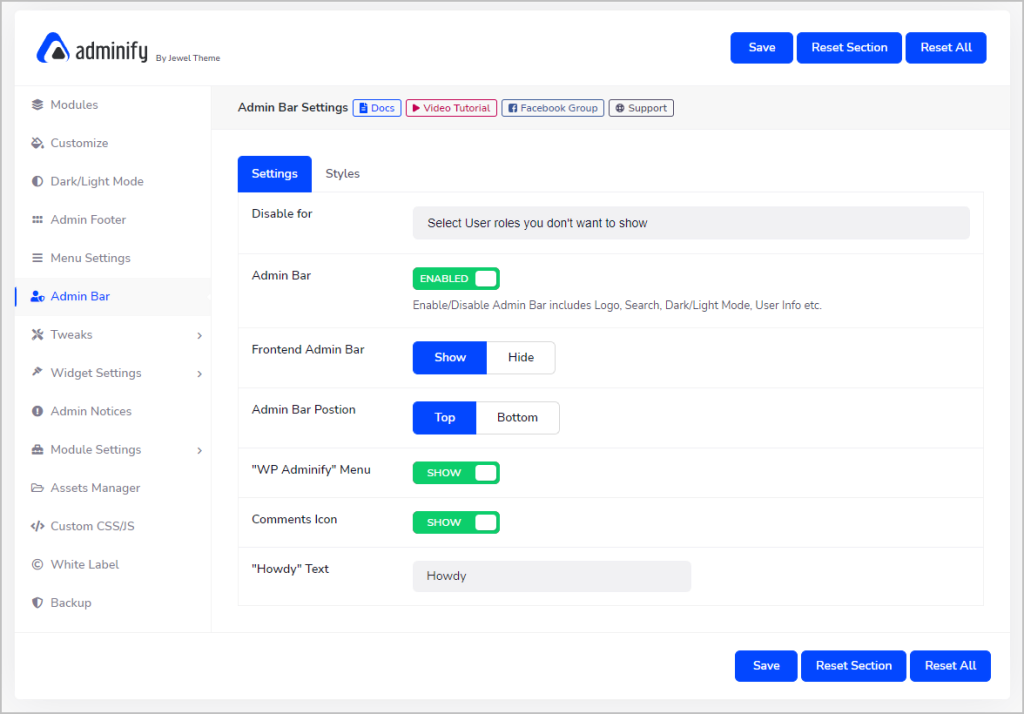
Adding Items to the Top Bar
There is an Admin Bar editor so I went to that screen. Here there were a number of options, but not the option to add a new item.
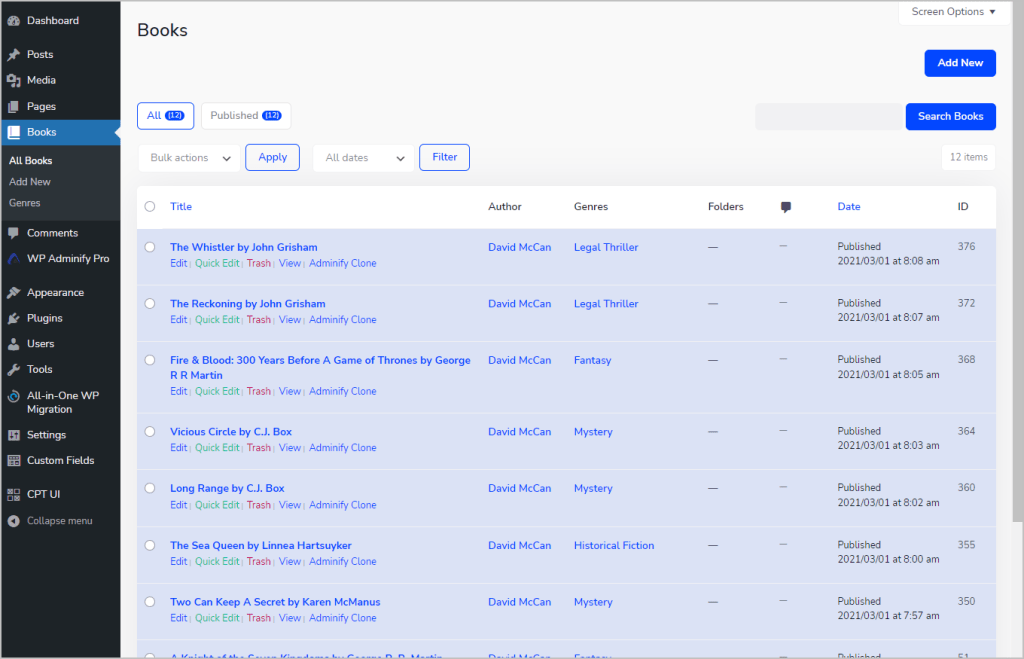
Admin Columns Editor
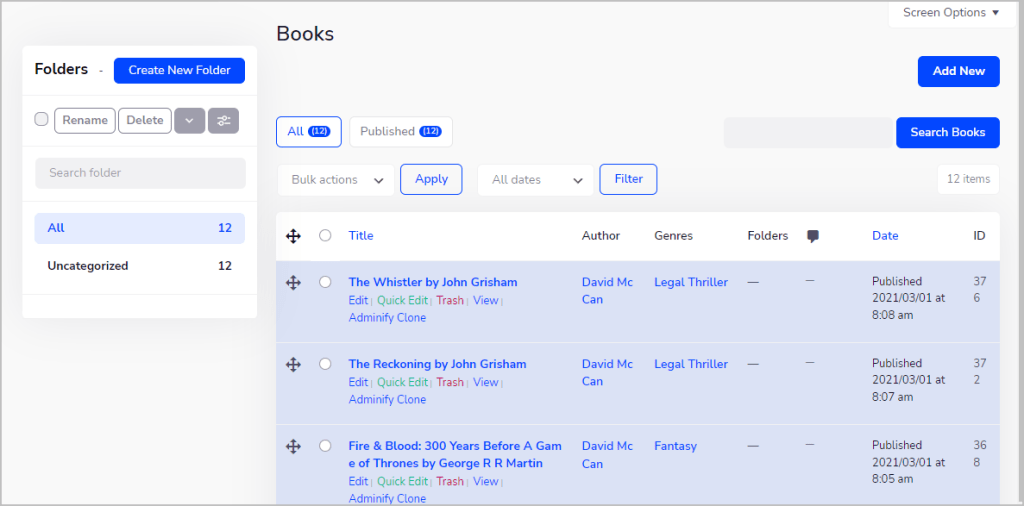
With the Admin Columns module activated, all post types automatically get an admin column added. Here is the list for the Books Custom Post Type and you see that the Post ID column was added.
If we go to the Admin Column Editor we see we can reorder the columns via drag and drop, duplicate a column, delete a column, or go into an editor for a column. There is also a folder option.
In the individual column editor you can change a column label and set the column width.
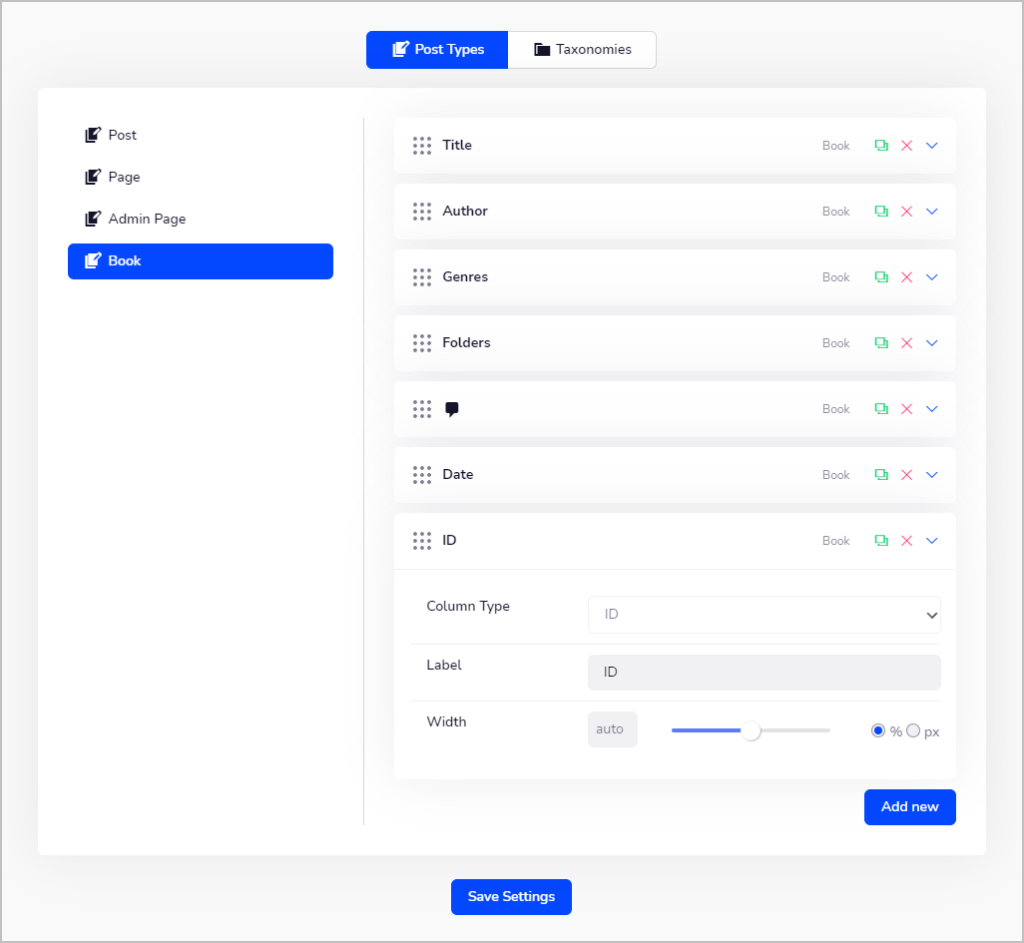
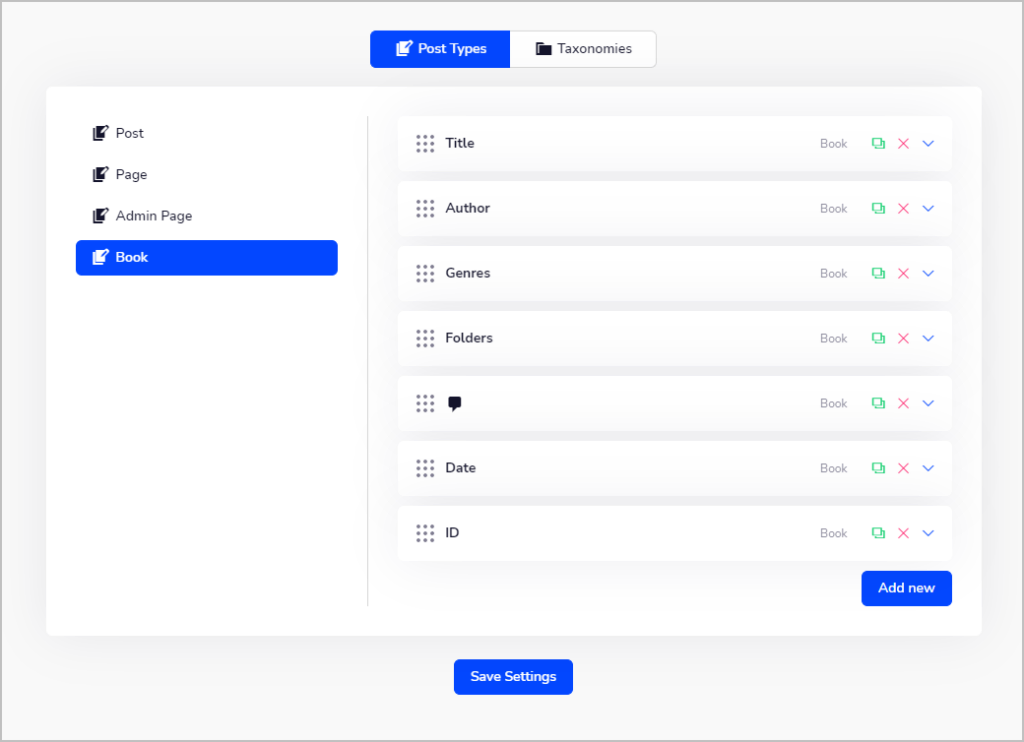
You can add taxonomies as columns, but my Genres custom taxonomy had already been added with CPT-UI. There isn’t an option to use an Advanced Custom Field for a column.
I saw a “Folder” admin column but didn’t see anyway to add a folder. In the Adminify settings area there is a place where you set the post types where you want the columns feature enabled. I enabled it for Books and the books list changed to show the option to add columns.
I’ve usually seen people using folders for the media library, and Adminify has that, so I’m not sure how I would use folders for a post type beyond adding the taxonomy.
Custom Admin Pages
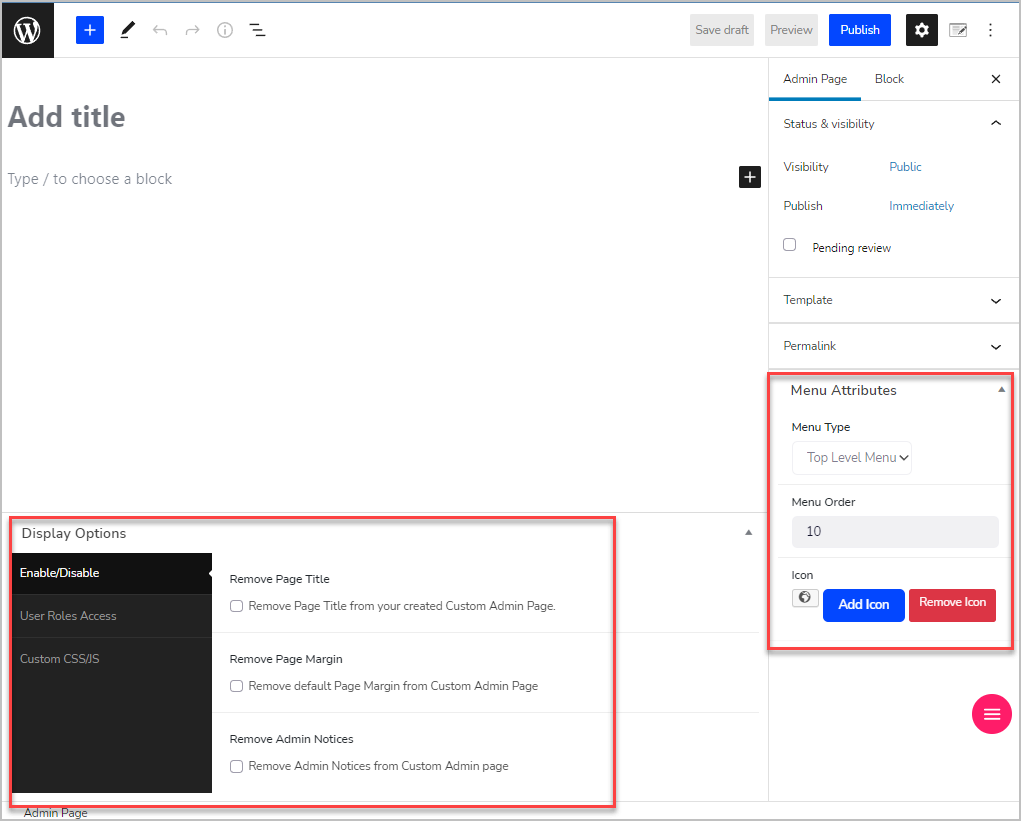
Adding a Custom Admin Page is feature that is commonly needed. When you go to create a new admin page with Adminify you go into a editor screen. The site shown has Gutenberg, but if I had a page builder installed then using that would be an option also.
In the screenshot I highlighted the display options settings and the menu placement settings.
Login Customizer
Another popular admin tweak is to customize the login screen. This allows you to have better branding and experience if you have a lot of site users. When you click in the Adminify menu for the Login Customizer, you go into the theme Customizer.
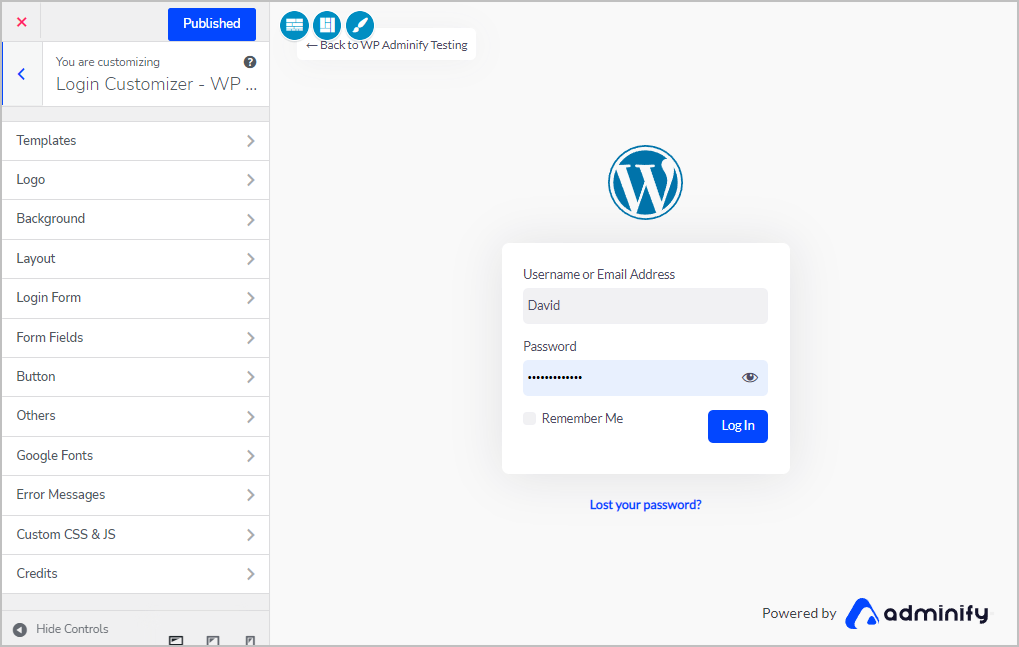
For example, the Login Customizer comes with some pre-designed templates which makes it easy to switch away from the WordPress default. Here is a screenshot with one of the chosen.
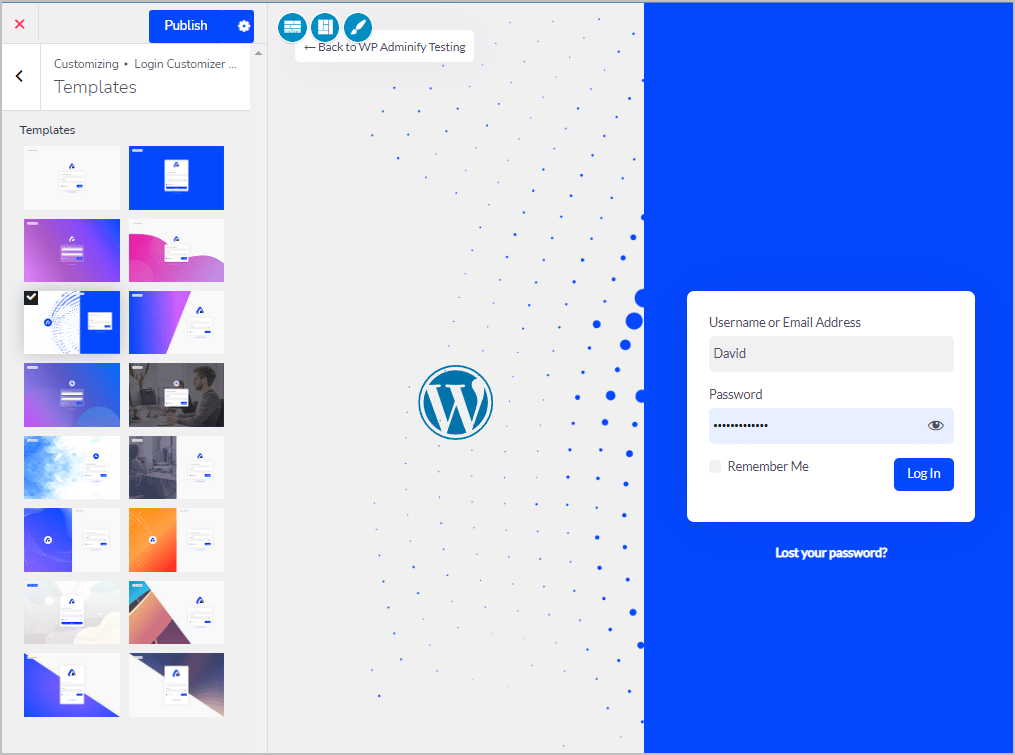
This module is very full featured and gives you full control. Impressive. Note that this feature currently won’t work with the new block themes as they don’t include the Customizer.
Some Other Features
There are too many modules to cover them all, but here are a few of the highlights:
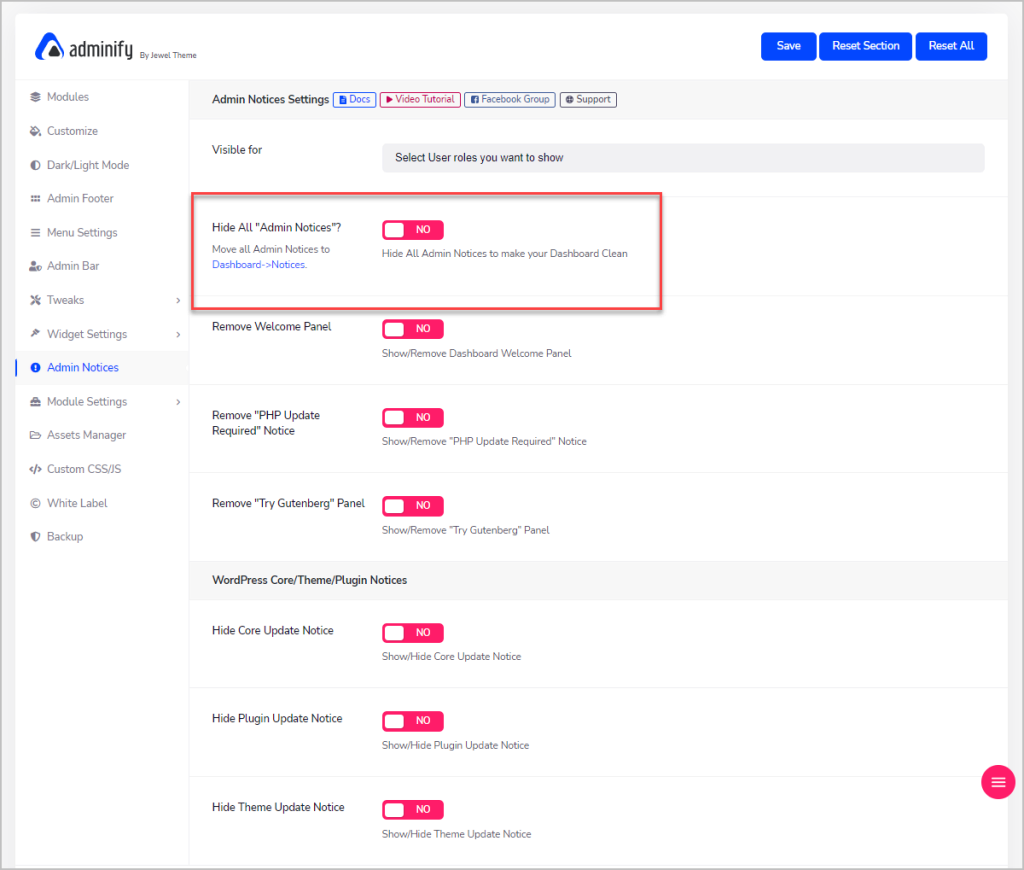
Hide Admin Notices
There is a nice module for hiding admin notices. My favorite part of this is the first item, the option to move all admin notices into a Dashboard / Notices area.
Activity Logs
Adminify includes a module for an activity logs. If you have multiple users on your site then activity logs can help track down problems as you can see a history.

Discussion and Conclusions
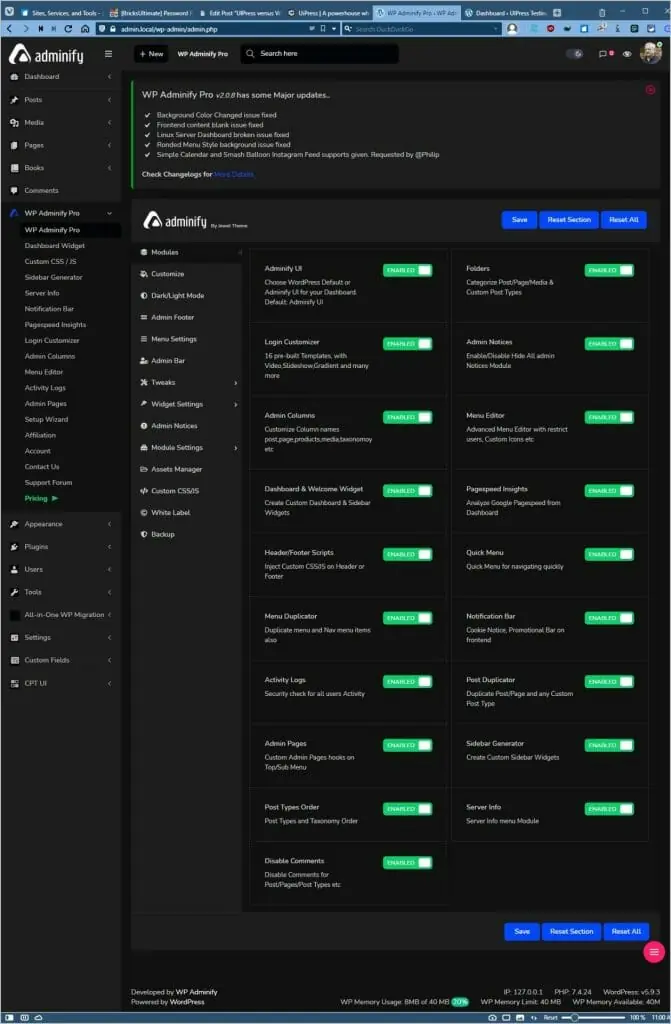
While WP Adminify has a large number of modules, they are not all created equal. I was disappointed with some of the admin theming features. When you first go into the admin after the wizard, the text in the default dark mode was difficult to read and there were icons that didn’t match. I’d put attention on giving a good first impression by making the best looking color scheme the default. That seemed to be the light theme. Also, some of the default color schemes appeared to only work for dark mode, but they weren’t labeled. Menu space in the admin is at a premium and WP Adminifty had lots of submenus related to account information. Perhaps those could be combined into one page with tabs. The horizontal menus didn’t display correctly for me and there was lag when that feature was enabled. The menu editor worked well for hiding menu items as designed, but I expected a more full featured menu editor where I could nest menu items so as to clean up what sometimes becomes a long list.
While testing I noticed a few small display glitches. WP Adminify is not a new plugin so I was surprised to see these. However, the company seems to respond well to feedback and is working to address them. There are a good number of help topics in their documentation library and a number of videos on their YouTube channel.
I was impressed with the login page customizer. You have full control to tweak it as desired. The ability to create admin page was good and I like that you could set the display position and who they showed for all in one place. Folders for the media library, activity logs, and the ability to manage admin notices are features that would benefit most sites. The abilities to create custom sidebars, add header or footer scripts, post duplicator, and disable comments are other features that site administrators might want to use.
Many of the feature of the WP Adminify utility toolbox would probably be used on sites with multiple users, such as membership sites. For that reason, a role editor would be a nice addition. In any event, I was impressed by the sheer number of features. WP Adminify includes the functionality of a dozen or more smaller utility plugins. Installing one plugin, instead of a half a dozen, makes plugin management easier.
I hope this walk-through and look the the many features of WP Adminify will help you in evaluating if it is a good fit for your site.